1. Introduction
This user manual provides detailed instructions for the installation, operation, maintenance, and troubleshooting of your MSI PRO B660M-G DDR4 ProSeries Motherboard. The PRO series is designed to offer stable functionality and high-quality assembly, optimizing professional workflows and ensuring longevity.

Figure 1.1: The MSI PRO B660M-G DDR4 Motherboard alongside its retail packaging. This image provides a general overview of the product as it appears when unboxed.
2. Setup and Installation
2.1 Package Contents
Verify that all items are present in your motherboard package:
- MSI PRO B660M-G DDR4 Motherboard
- I/O Shield
- 2 x SATA Cables
- 2 x M.2 Clips
- User Manual (this document)
- Driver CD/USB (if included)
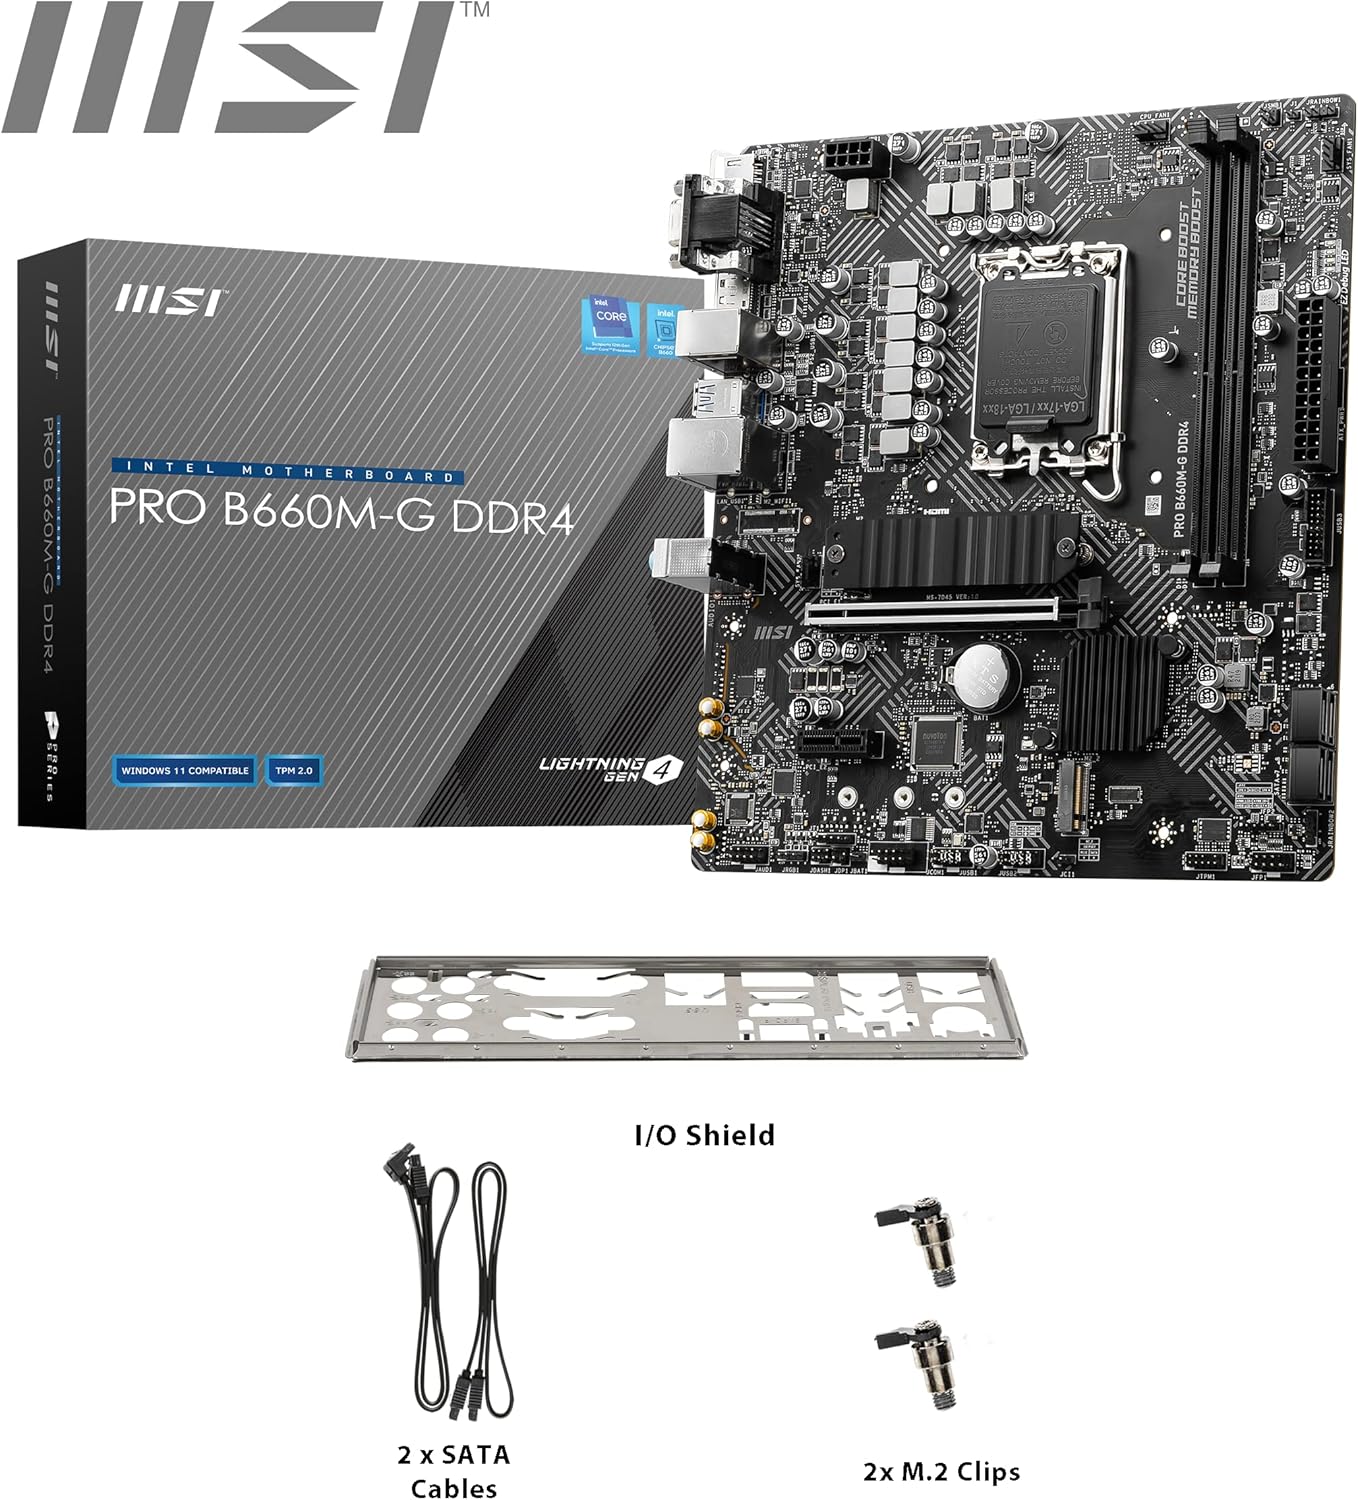
Figure 2.1: The motherboard displayed with its standard accessories, including the I/O shield, SATA cables, and M.2 clips, which are essential for system assembly.
2.2 Safety Information
Always disconnect the power cord from the wall outlet before touching any component. Wear an anti-static wrist strap to prevent electrostatic discharge (ESD) damage to components. Handle components by their edges, avoiding direct contact with pins or circuitry.
2.3 Motherboard Layout
Familiarize yourself with the key components and connectors on the motherboard.

Figure 2.2: An overhead view of the motherboard, clearly showing the LGA 1700 CPU socket and the Intel B660 chipset. This layout is crucial for identifying component placement.
2.4 CPU Installation (LGA 1700)
- Locate the LGA 1700 socket on the motherboard.
- Open the CPU socket lever and lift the load plate.
- Carefully align the triangular mark on the CPU with the mark on the socket.
- Gently place the CPU into the socket without forcing it.
- Close the load plate and secure it with the lever.

Figure 2.3: A detailed view of the LGA 1700 CPU socket, indicating the precise location for CPU placement and alignment during installation.
2.5 Memory (RAM) Installation
This motherboard supports DDR4 memory modules.
- Open the clips at both ends of the DIMM slot.
- Align the notch on the DDR4 memory module with the key in the DIMM slot.
- Insert the module firmly into the slot until the clips snap into place.

Figure 2.4: A close-up of the DDR4 memory slots, highlighting the Memory Boost technology and support for speeds up to 4600 MHz (OC), crucial for optimal system performance.
2.6 Storage (M.2 SSD) Installation
The motherboard features Lightning Gen4 x4 M.2 slots with M.2 Shield Frozr for optimal SSD performance and cooling.
- Locate the M.2 slot(s) on the motherboard.
- If present, remove the M.2 Shield Frozr heatsink.
- Insert the M.2 SSD into the slot at a 30-degree angle.
- Gently push down the SSD and secure it with the provided M.2 clip or screw.
- Reinstall the M.2 Shield Frozr heatsink (if applicable).

Figure 2.5: This image focuses on the M.2 slots, emphasizing their support for Lightning Gen4 x4, which provides high-speed data transfer for compatible SSDs.

Figure 2.6: A detailed view of the M.2 Shield Frozr, a heatsink designed to dissipate heat from M.2 SSDs, ensuring stable performance and preventing thermal throttling.
2.7 Graphics Card (PCIe) Installation
- Open the retention clip on the PCIe x16 slot.
- Align the graphics card with the slot and press down firmly until it clicks into place.
- Secure the card to the PC case with a screw.
2.8 Power Supply Connections
Connect the 24-pin ATX power connector and the 8-pin CPU power connector from your power supply to the corresponding ports on the motherboard.
2.9 Front Panel Connections
Connect the power button, reset button, HDD LED, power LED, and USB/audio headers from your PC case to the appropriate pins on the motherboard's front panel header.
2.10 I/O Panel Connections
Connect your peripherals to the rear I/O panel. This motherboard includes HDMI, DisplayPort, VGA, USB 2.0, USB 3.2 Gen 1, 2.5G LAN, and audio ports.

Figure 2.7: A detailed view of the motherboard's rear I/O panel, showcasing the various connectivity options including HDMI, DisplayPort, VGA, USB ports, 2.5G LAN, and audio jacks.

Figure 2.8: This image highlights the 2.5G LAN port for high-speed network connectivity and the Audio Boost feature, which enhances sound quality for an immersive audio experience.
2.11 Mounting the Motherboard
Carefully place the motherboard into your PC case, aligning the screw holes with the standoffs. Secure the motherboard with screws.
3. Operating Instructions
3.1 First Boot and BIOS/UEFI Access
After assembling your system, connect a monitor, keyboard, and mouse. Power on the system. To enter the BIOS/UEFI setup utility, repeatedly press the Delete key during the Power-On Self-Test (POST) process. The BIOS/UEFI allows you to configure system settings, boot order, and monitor hardware status.
3.2 Driver Installation
After installing your operating system, it is crucial to install the latest drivers for your motherboard components. These drivers can be found on the MSI official website or on the provided driver CD/USB. Installing correct drivers ensures optimal performance and stability for your system, including chipset, LAN, audio, and graphics drivers.
4. Maintenance
4.1 Cleaning
Regularly clean your PC to prevent dust buildup, which can lead to overheating and reduced performance. Use compressed air to remove dust from fans, heatsinks, and vents. Ensure the system is powered off and unplugged before cleaning.
4.2 BIOS/UEFI Updates
MSI periodically releases BIOS/UEFI updates to improve compatibility, stability, and performance. Visit the MSI support website for your motherboard model to download the latest BIOS/UEFI version and follow the provided update instructions carefully. Incorrect BIOS/UEFI updates can damage your motherboard.
4.3 Driver Updates
Keep your system drivers updated to ensure compatibility with new software and hardware, and to benefit from performance improvements and bug fixes. Download drivers only from the official MSI website or component manufacturers' websites.
5. Troubleshooting
5.1 Common Issues and Solutions
- No Power/No POST:
Check all power connections (24-pin ATX, 8-pin CPU). Ensure the power supply is switched on. Reseat RAM modules. Try booting with minimal components (CPU, one RAM stick, graphics card if no integrated graphics). - No Display:
Ensure monitor is connected to the correct graphics output (either integrated graphics on motherboard or dedicated graphics card). Reseat the graphics card. Test with a different monitor or cable. - System Instability/Crashes:
Check CPU and GPU temperatures. Ensure all drivers are installed and up to date. Run memory diagnostic tools to check for faulty RAM. Verify power supply wattage is sufficient for all components. - Boot Device Not Found:
Check SATA/M.2 cable connections to storage drives. Verify boot order in BIOS/UEFI. Ensure the operating system is correctly installed on the drive.
5.2 Diagnostic LEDs (EZ Debug LED)
MSI motherboards often feature EZ Debug LEDs (CPU, DRAM, VGA, BOOT) that light up to indicate the source of a problem during startup. If a specific LED remains lit, it points to an issue with that component. Refer to the motherboard's physical layout to locate these LEDs.
6. Specifications
Below are the key technical specifications for the MSI PRO B660M-G DDR4 Motherboard:
| Feature | Specification |
|---|---|
| Brand | MSI |
| Model Name | PRO B660M G |
| Item Model Number | 7D45-002R |
| CPU Socket | LGA 1700 |
| Compatible Processors | 12th Gen Intel Core, Pentium Gold, Celeron |
| Chipset Type | Intel B660 |
| RAM Memory Technology | DDR4 SDRAM |
| Max RAM | 64 GB |
| Memory Speed | Up to 4600+(OC) MHz |
| PCIe Support | PCIe 4.0 |
| M.2 Slots | Lightning Gen4 x4 with M.2 Shield Frozr |
| LAN | 2.5G LAN |
| USB | USB 3.2 Gen 1, USB 2.0 |
| Dimensions (LxWxH) | 9.6 x 8.7 x 2.5 inches |
| Item Weight | 1.63 pounds |
| Platform | Windows 10, Windows 11 |
7. Warranty and Support
7.1 Warranty Information
MSI products are covered by a limited warranty. The specific terms and duration of your warranty may vary by region and product. Please retain your proof of purchase for warranty claims. For detailed warranty information, visit the official MSI website.
7.2 Technical Support
If you encounter issues that cannot be resolved using this manual or the troubleshooting section, please contact MSI technical support. You can find support resources, including FAQs, driver downloads, and contact information, on the official MSI website:
Please have your motherboard model number (7D45-002R) and serial number ready when contacting support.
8. Official Product Videos
No official product videos from the seller were found for this model at this time.