HATUSOKU Digital Thermometer Hygrometer
Model: LX8112
Introduction
Thank you for purchasing the HATUSOKU Digital Thermometer Hygrometer. This device is designed to accurately measure and display indoor temperature and humidity, helping you maintain a comfortable and healthy living environment. Its compact size, large digital display, and comfort level indicator make it an essential tool for any home.
Important Note: Beware of inferior imitations. When purchasing, please ensure the brand name is ≪HATUSOKU≫.
Package Contents
- HATUSOKU Digital Thermometer Hygrometer Unit
- 1 x AAA Battery
- Instruction Manual (Japanese, for reference)
Product Overview
The HATUSOKU Digital Thermometer Hygrometer features a clear LCD display and intuitive controls. Understanding its components will help you operate it effectively.
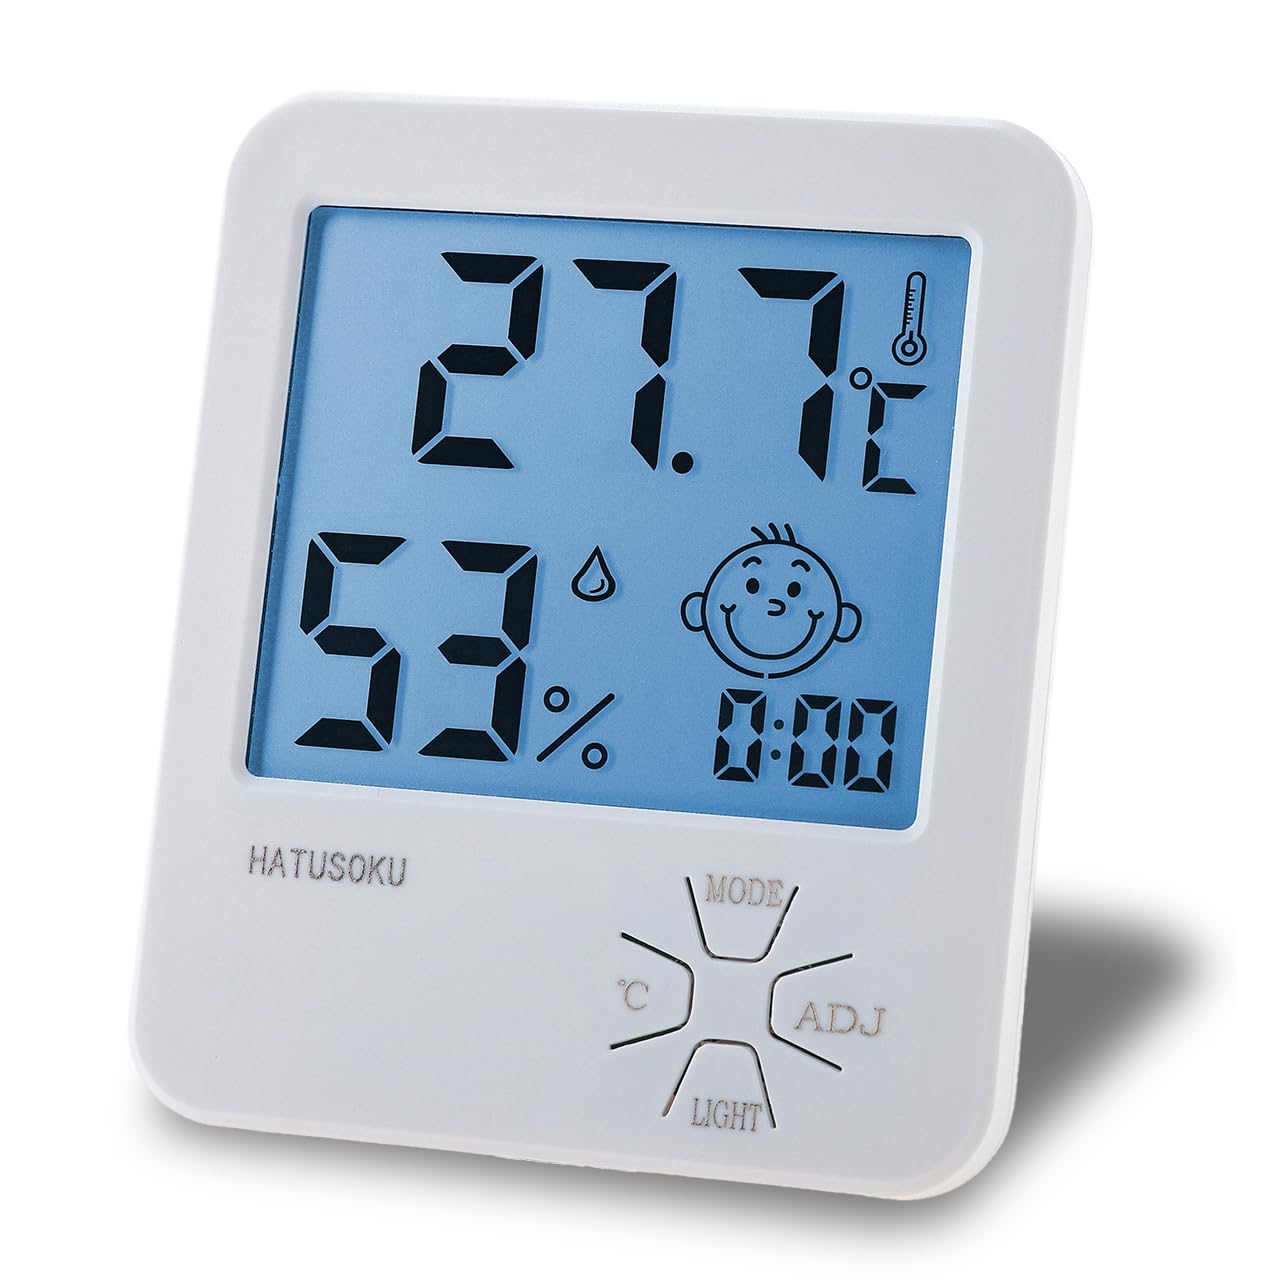
Figure 1: Front view of the HATUSOKU Digital Thermometer Hygrometer.

Figure 2: Front panel features including temperature, humidity, comfort indicator, time, and control buttons.

Figure 3: Back panel features including the kickstand, wall-mount hook, and battery compartment.
Key Features:
- Large Digital Display: Easy-to-read temperature and humidity values.
- Comfort Level Indicator: A face icon changes to indicate comfort levels based on humidity.
- Max/Min Record: Records the highest and lowest temperature and humidity readings.
- Backlight Function: Illuminates the display for easy reading in low light conditions.
- Two-Way Installation: Can be placed on a desktop using the integrated kickstand or mounted on a wall using the hook hole.
Setup
1. Battery Installation
- Locate the battery compartment on the back of the unit (refer to Figure 3).
- Slide open the battery compartment cover.
- Insert the included 1 AAA battery, ensuring the correct polarity (+/-) as indicated inside the compartment.
- Close the battery compartment cover securely.
2. Placement
The device offers two convenient placement options:
- Desktop Placement: Extend the kickstand on the back of the unit to stand it upright on any flat surface.
- Wall Mounting: Use the hook hole on the back of the unit to hang it on a nail or screw on the wall.
Initial Readings: Please allow 2 to 3 hours for the temperature and humidity values to stabilize and accurately reflect the environment of the placement location.
Operating Instructions
Display Information
The main display shows the following information:
- Temperature: Displayed in Celsius (°C).
- Humidity: Displayed as a percentage (%).
- Time: Current time.
- Comfort Level Indicator: A face icon that changes based on humidity levels.

Figure 4: Comfort Level Indicator Explanation.
- Smiling Face: Humidity between 40% and 70% (comfortable).
- Sad Face: Humidity below 40% (dry) or above 70% (humid).
Button Functions
The device has four control buttons on the front panel:
- MODE Button: Used to switch between display modes (e.g., time setting, viewing Max/Min records).
- ADJ Button: Used to adjust values during setting modes (e.g., time adjustment).
- °C Button: (If applicable, though the product description states Celsius only) Used to switch between Celsius and Fahrenheit. Note: This model is designed to display only in Celsius (°C) in accordance with regulations. Fahrenheit (°F) switching is not available.
- LIGHT Button: Activates the backlight for a few seconds.
Viewing Max/Min Temperature and Humidity
The device automatically records the highest and lowest temperature and humidity values since the last reset or battery installation.
- Press the MODE button once to display the maximum recorded temperature and humidity.
- Press the MODE button again to display the minimum recorded temperature and humidity.
- To reset the Max/Min records, press and hold the MODE button while the Max/Min values are displayed.
Setting the Time
- From the normal display mode, press and hold the MODE button until the time display starts flashing.
- Use the ADJ button to adjust the hour.
- Press the MODE button to move to the minute setting.
- Use the ADJ button to adjust the minutes.
- Press the MODE button again to confirm and exit time setting mode.
Maintenance
- Cleaning: Wipe the device with a soft, dry cloth. Do not use abrasive cleaners or immerse the device in water.
- Battery Replacement: When the display becomes dim or stops functioning, replace the AAA battery. Follow the battery installation steps in the Setup section.
- Storage: If storing the device for an extended period, remove the battery to prevent leakage.
Troubleshooting
| Problem | Possible Cause | Solution |
|---|---|---|
| No display or dim display | Battery is dead or incorrectly installed. | Replace the battery with a new AAA battery, ensuring correct polarity. |
| Inaccurate readings | Device has not stabilized to the environment; placed near heat/cold source. | Allow 2-3 hours for stabilization. Relocate the device away from direct sunlight, vents, or extreme temperature sources. |
| Comfort face icon is always sad | Humidity is consistently outside the 40-70% range. | Consider using a humidifier or dehumidifier to adjust room humidity. |
Specifications
| Specification | Detail |
|---|---|
| Manufacturer | HATUSOKU |
| Model Number | LX8112 |
| Item Weight | 78.5 g |
| Product Dimensions | 10 x 8.3 x 2.2 cm |
| Color | White |
| Style | With Backlight |
| Power Source Type | Battery Powered |
| Measurement Accuracy (Temperature) | ±1°C |
| Display Style | LCD |
| Mounting Type | Freestanding, Wall Mount |
| Features | Backlight, Comfort Level Display, Max/Min Record |
| Batteries Included | Yes (1 x AAA) |
| Battery Cell Type | Alkaline |
Warranty and Support
For product support, warranty information, or any inquiries, please contact the seller directly through your Amazon order history. HATUSOKU is committed to providing quality products and customer satisfaction.
You can also visit the official HATUSOKU brand store on Amazon for more information and products: HATUSOKU Brand Store