1. Introduction
Thank you for choosing the DNYSYSJ 16 Channel Audio Mixer, Model C16. This professional-grade mixing console is designed for both beginners and experienced audio engineers, offering versatile connectivity options including USB and Bluetooth. This manual will guide you through the features, setup, and operation to ensure you get the best performance from your device.
2. Safety Information
Please read and understand all safety instructions before operating the mixer. Keep this manual for future reference.
- Power Supply: Use only the provided power adapter. Ensure the voltage matches your local power supply.
- Moisture: Do not expose the unit to rain, moisture, or extreme humidity. Avoid placing liquid containers on the mixer.
- Ventilation: Ensure adequate ventilation. Do not block ventilation openings.
- Placement: Place the mixer on a stable, flat surface. Avoid extreme temperatures or direct sunlight.
- Servicing: Do not attempt to service this unit yourself. Refer all servicing to qualified personnel.
3. Package Contents
Verify that all items are present in your package:
- 1 x DNYSYSJ 16 Channel Audio Mixer (Model C16)
- 1 x Power Cable
- 1 x User Manual (this document)
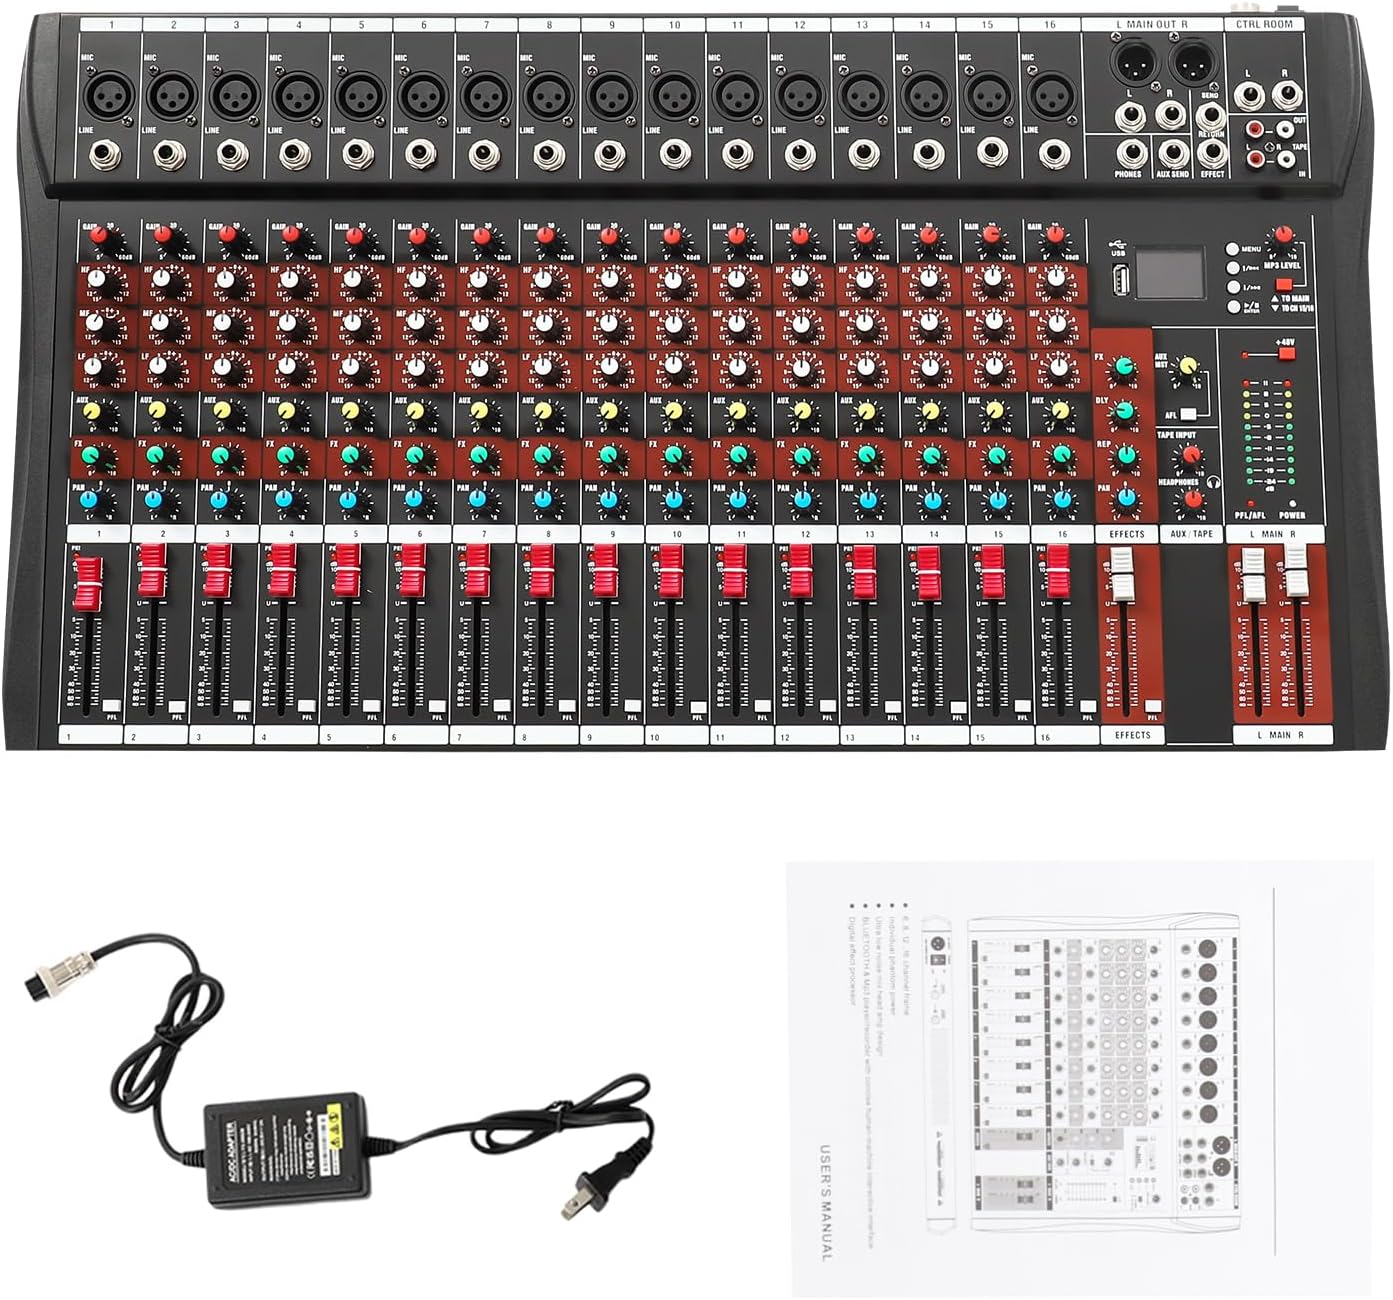
Image: The DNYSYSJ 16 Channel Audio Mixer shown with its power cable and the user manual.
4. Product Overview
The DNYSYSJ 16 Channel Audio Mixer features a robust design with comprehensive controls for various audio applications. Below is an overview of the mixer's layout and key components.

Image: A full view of the 16-channel audio mixer, displaying its numerous input jacks, control knobs, faders, and output ports.
4.1 Control Panel Layout
The mixer's control panel is intuitively designed for ease of use. Refer to the diagram below for a detailed breakdown of each control and connection point.

Image: Detailed diagram labeling the input/output sections and various control knobs and faders on the mixer's surface.
- MIC Input: XLR and 1/4" TRS combo jacks for microphone and line-level inputs.
- Gain Control: Adjusts the input sensitivity for each channel.
- EQ (Equalization): Three-stage equalization (High, Mid, Low) for tone shaping on each channel.
- AUX: Auxiliary send control for external effects or monitor mixes.
- FX (Effects): Control for the built-in digital effects processor.
- PAN: Adjusts the stereo position of the channel's signal.
- PEAK LED: Indicates when the input signal is clipping.
- Channel Volume Faders: Individual volume control for each input channel.
- MP3 Play Control: Dedicated section for USB/Bluetooth playback and recording.
- 48V Phantom Power: Global switch for condenser microphones.
- Main Outputs: Balanced XLR and unbalanced 1/4" TRS outputs for connecting to amplifiers or powered speakers.
- Headphone Jack: 1/4" TRS output for monitoring.
5. Setup
Follow these steps to set up your DNYSYSJ 16 Channel Audio Mixer:
- Unpack: Carefully remove all components from the packaging.
- Placement: Position the mixer on a stable, flat surface, ensuring adequate space for connections and ventilation.
- Power Connection: Connect the provided power cable to the mixer's power input and then to a suitable power outlet. Do not power on yet.
- Connect Inputs:
- Connect microphones to the XLR inputs. If using condenser microphones, ensure 48V phantom power is enabled (see Section 6.1).
- Connect line-level instruments (keyboards, guitars with preamps) or other audio sources to the 1/4" TRS line inputs.
- For USB playback/recording, connect a USB flash drive to the USB port or connect the mixer to a computer via USB.
- Connect Outputs:
- Connect the Main Outputs (XLR or 1/4" TRS) to your amplifier, powered speakers, or recording interface.
- Connect headphones to the Headphone Jack for monitoring.
- Power On: Once all connections are secure, switch on the mixer's power button.

Image: An illustration demonstrating typical connections to the mixer, including an amplifier, computer, smartphone, microphone, and musical instruments.
Video: A demonstration of connecting cables to the mixer and powering it on, followed by adjusting channel faders and knobs.
6. Operating Instructions
This section details how to operate the various functions of your audio mixer.
6.1 Basic Channel Operation
- Gain Adjustment: For each input channel, adjust the Gain Control knob until the PEAK LED flashes only occasionally during the loudest parts of the signal. This ensures optimal signal-to-noise ratio.
- Equalization (EQ): Use the HIGH, MID, and LOW knobs to shape the tone of each channel. Turn clockwise to boost frequencies, counter-clockwise to cut.
- Pan: Adjust the PAN knob to position the channel's sound in the stereo field (left to right).
- Channel Volume: Use the individual Channel Volume Faders to set the relative volume of each input.
- Main Mix: Adjust the Total Volume faders (L MAIN R) to control the overall output level of the mixer.
- 48V Phantom Power: If using condenser microphones, press the 48V PHANTOM POWER button. Ensure all condenser microphones are connected before activating.
6.2 Bluetooth & MP3 Player/Recorder
The mixer includes integrated Bluetooth and MP3 playback/recording capabilities.
- Bluetooth Connection: Activate Bluetooth on your smartphone or tablet. On the mixer's MP3 section, select Bluetooth mode. Pair with the device named 'BT-AUDIO' or similar. You can now stream audio wirelessly to the mixer.
- USB Playback: Insert a USB flash drive containing MP3 files into the USB slot. The mixer will automatically detect and begin playing audio. Use the MP3 Play Control buttons (Play/Pause, Next, Previous) to navigate tracks.
- USB Recording: The mixer can record the main mix directly to a USB flash drive. Select the recording function from the MP3 Play Control section and press record.
6.3 Digital Effects Processor
The mixer features a built-in digital effects processor, primarily offering delay effects. You can adjust the reverb depth and delay effect using the dedicated knobs.
- Applying Effects: Use the FX knob on each channel to send a portion of that channel's signal to the effects processor.
- Effect Level: Adjust the Effects Volume fader to control the overall level of the applied effect in the main mix.
- External Effects: The mixer also provides AUX Send and Return jacks for connecting external effects units.

Image: A close-up of a hand adjusting the faders and knobs on the mixer, highlighting the ergonomic design for precise control.
7. Maintenance
Proper maintenance ensures the longevity and optimal performance of your mixer.
- Cleaning: Use a soft, dry cloth to clean the surface of the mixer. Do not use abrasive cleaners or solvents.
- Dust: Regularly remove dust from the faders and knobs using a soft brush or compressed air.
- Storage: When not in use for extended periods, store the mixer in a cool, dry place, away from direct sunlight and extreme temperatures.
- Cable Management: Ensure cables are not tangled or stressed, which can lead to damage.
8. Troubleshooting
If you encounter issues with your mixer, refer to the following common problems and solutions:
| Problem | Possible Cause | Solution |
|---|---|---|
| No power | Power cable disconnected; power outlet faulty; mixer power switch off. | Check power cable connection; try a different outlet; ensure power switch is ON. |
| No sound output | Main volume faders down; amplifier/speakers off or disconnected; incorrect input/output routing. | Raise main volume faders; check amplifier/speaker power and connections; verify correct cable routing. |
| No sound from a specific channel | Channel volume fader down; gain too low; input device faulty; 48V phantom power off for condenser mic. | Raise channel fader; increase gain; test input device; activate 48V phantom power if needed. |
| Distorted sound | Gain too high (PEAK LED constantly on); faulty cable; impedance mismatch. | Reduce gain until PEAK LED flashes only occasionally; try a different cable; ensure correct impedance. |
| Bluetooth not connecting | Mixer not in Bluetooth mode; device too far; interference. | Ensure mixer is in Bluetooth mode; bring device closer; minimize interference. |
If the problem persists after trying these solutions, please contact customer support.
9. Specifications
Below are the technical specifications for the DNYSYSJ 16 Channel Audio Mixer (Model C16):
- Model: C16
- Brand: DNYSYSJ
- Number of Channels: 16
- Connectivity Technology: Bluetooth, USB
- Frequency Response: 30000 Hz (as per product data)
- Material Type: Metal+plastic
- Power Source: Corded Electric
- Item Weight: 15 pounds
- Dimensions: Approximately 63.5 cm (25 inches) x 34 cm (13.39 inches) x 3.7 cm (1.46 inches)
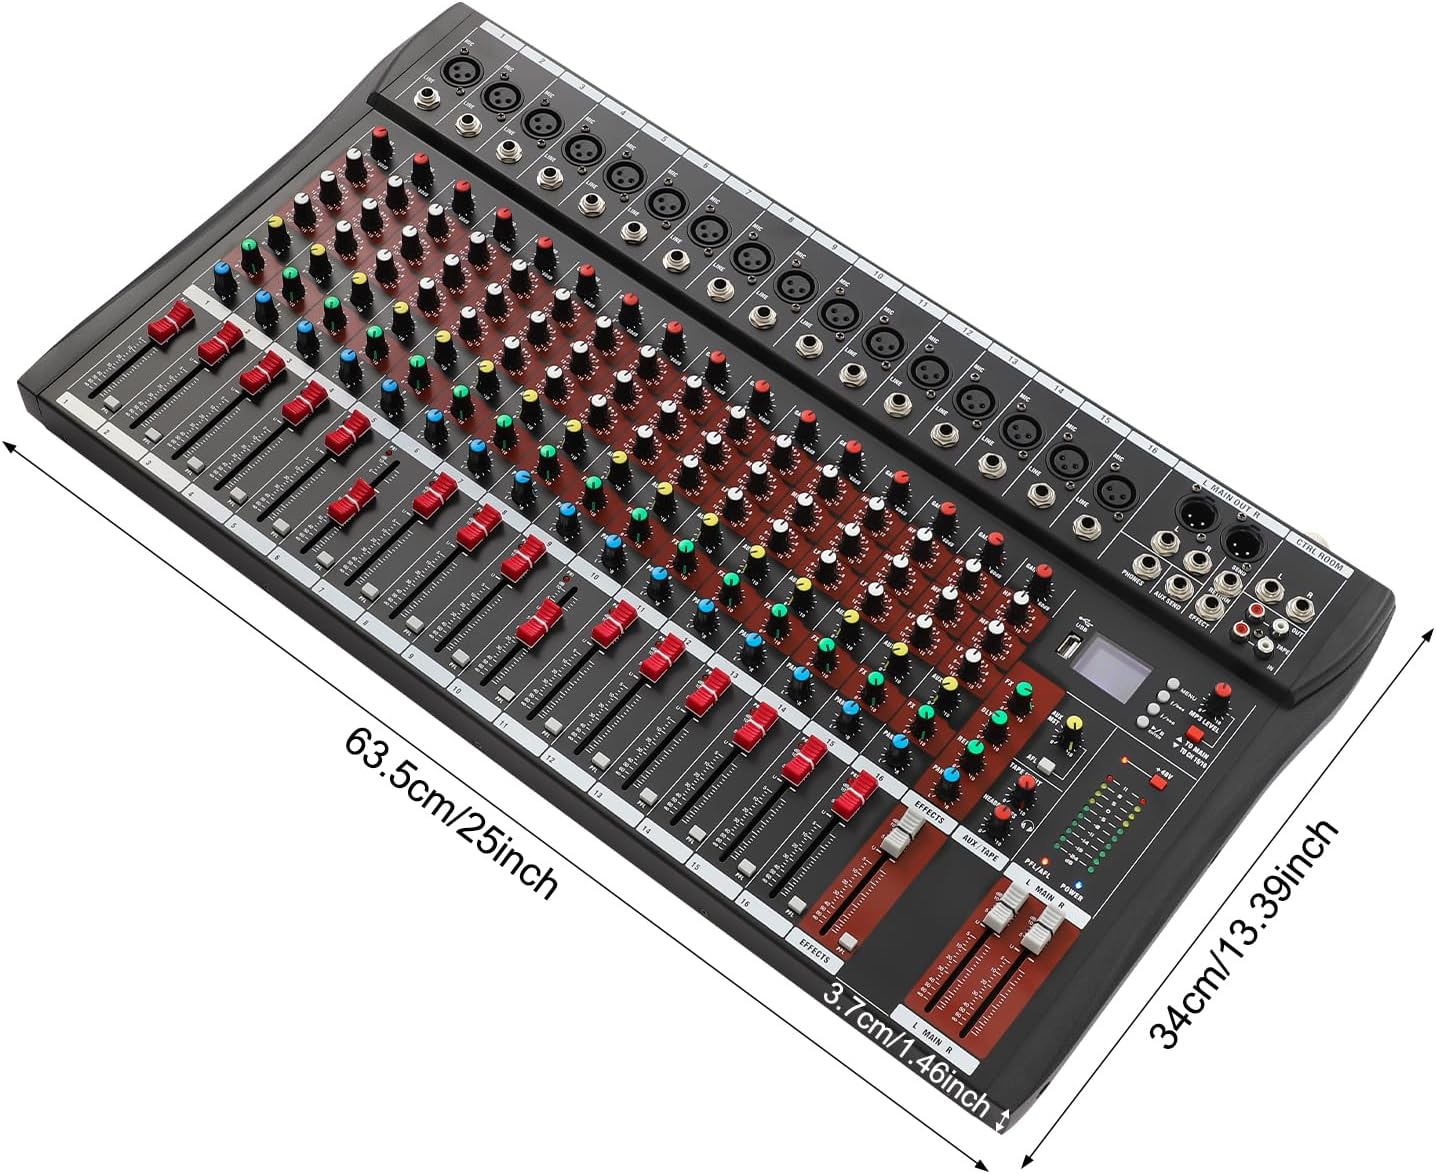
Image: The mixer shown with its physical dimensions indicated.
10. Warranty and Support
For warranty information and customer support, please refer to the documentation included with your purchase or visit the official DNYSYSJ website. If you have any questions or require assistance, our customer service team is available to help.