1. Introduction
Thank you for choosing the Ravemen LS-CT03 CR800/TR30M USB Lightset. This lightset is designed to provide reliable and powerful illumination for your cycling needs, featuring an 800-lumen front light and a 30-lumen rear light. This manual provides detailed instructions for the proper installation, operation, and maintenance of your new lightset to ensure optimal performance and longevity.
2. Package Contents
Please verify that all items listed below are included in your package:
- Ravemen CR800 Front Light
- Ravemen TR30M Rear Light
- USB Charging Cable
- Handlebar Mount (for CR800)
- Seat Post Mount (for TR30M)
- Wired Remote Button
3. Product Overview
Familiarize yourself with the components of your Ravemen lightset:
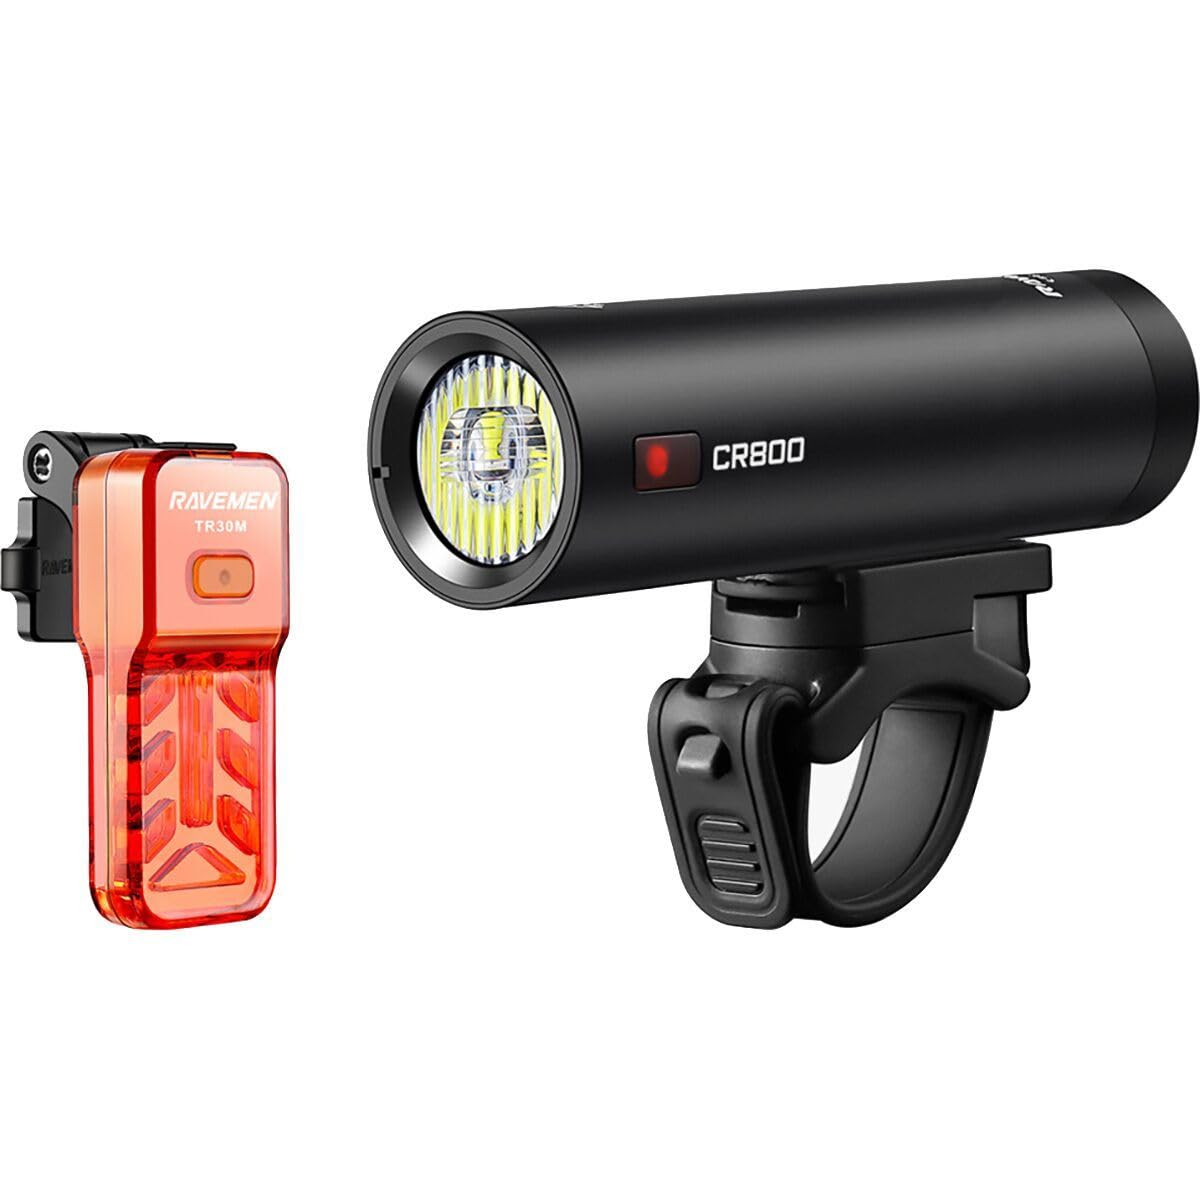
Image 3.1: The Ravemen LS-CT03 CR800/TR30M USB Lightset, including the CR800 front light, TR30M rear light, and associated mounting accessories.
3.1 CR800 Front Light
- Lens: Optical lens for efficient light distribution, including an optical low beam design.
- Power Button: Controls power and mode selection.
- Charging Port: Micro USB port for recharging.
- Remote Port: Connects the wired remote button.
- Mounting Bracket: Integrated for handlebar attachment.
3.2 TR30M Rear Light
- Lens: Provides wide visibility.
- Power Button: Controls power and mode selection.
- Charging Port: Micro USB port for recharging.
- Mounting Bracket: Integrated for seat post attachment.
3.3 Wired Remote Button
- Button: Allows for safe brightness adjustment without removing hands from the handlebar.
- Cable: Connects to the CR800 front light.
4. Setup and Installation
4.1 Mounting the CR800 Front Light
- Select a suitable position on your handlebar (22.2mm to 35mm diameter) that does not obstruct your view or controls.
- Open the clamp of the handlebar mount.
- Place the mount around the handlebar and securely tighten the screw until the mount is firm.
- Slide the CR800 front light onto the mount until it clicks into place. Ensure it is securely fastened.
- Adjust the light angle to illuminate the path ahead without blinding oncoming traffic.
4.2 Mounting the TR30M Rear Light
- Attach the TR30M rear light to your seat post using the provided strap or integrated mount.
- Ensure the light is facing directly backward and is visible to following traffic.
4.3 Connecting the Wired Remote Button
- Locate the remote port on the CR800 front light.
- Plug the wired remote button's cable into this port.
- Position the remote button on your handlebar in an easily accessible location, typically near your grip.
5. Operating Instructions
5.1 Charging the Lights
Both the CR800 and TR30M lights are rechargeable via Micro USB.
- Connect the provided USB cable to the charging port on each light.
- Plug the other end of the USB cable into a USB power source (e.g., computer, USB wall adapter).
- The indicator light on the device will show charging status (e.g., red for charging, green for fully charged).
- Charging time may vary. Ensure lights are fully charged before first use.
5.2 Power On/Off and Mode Selection (CR800 Front Light)
- Power On: Press and hold the power button for approximately 1 second.
- Mode Cycle: Short press the power button to cycle through brightness modes (e.g., High, Medium, Low, Flash). The CR800 features an optical low beam for commuting and a daylight visible flash mode.
- Power Off: Press and hold the power button for approximately 1 second.
- Intelligent Memory Circuit: The light will power on in the last used brightness mode.
5.3 Power On/Off and Mode Selection (TR30M Rear Light)
- Power On: Press and hold the power button for approximately 1 second.
- Mode Cycle: Short press the power button to cycle through various flash and steady modes.
- Power Off: Press and hold the power button for approximately 1 second.
5.4 Using the Wired Remote Button
The wired remote button allows for convenient brightness adjustment of the CR800 front light while riding.
- Brightness Adjustment: Short press the remote button to cycle through brightness modes.
- Instant Max Output: Press and hold the remote button for instant maximum brightness (if applicable to the current mode).
6. Maintenance
6.1 Cleaning
Wipe the light body and lens with a soft, damp cloth. Do not use abrasive cleaners or solvents, as they may damage the finish or lens.
6.2 Battery Care
- Charge the lights regularly, especially if not used for extended periods, to maintain battery health.
- Avoid fully discharging the battery frequently.
- Store the lights in a cool, dry place when not in use.
6.3 Water Resistance
The lightset has an IPX6 waterproof rating, meaning it is protected against high-pressure water jets from any direction. It is suitable for use in heavy rain but should not be submerged in water.
7. Troubleshooting
- Light not turning on: Ensure the battery is charged. Press and hold the power button for the specified duration (approx. 1 second).
- Light not charging: Check the USB cable connection and the power source. Ensure the charging port is clean and free of debris.
- Light flickering or dim: The battery may be low. Recharge the light.
- Wired remote not working: Ensure the remote cable is securely plugged into the CR800 front light's remote port.
- Mounting issues: Ensure the mount is securely tightened to the handlebar/seat post and the light is properly clicked into the mount.
8. Specifications
| Feature | Specification |
|---|---|
| Front Light Brightness | 800 Lumens (CR800) |
| Rear Light Brightness | 30 Lumens (TR30M) |
| Waterproof Rating | IPX6 |
| Power Source | Battery Powered |
| Charging Port | Micro USB |
| Material | Durable Anodized Aluminum Construction |
| Mounting Type | Handlebar Mount (CR800), Seat Post Mount (TR30M) |
| Weight | 0.22 Kilograms (approximate total) |
| Special Features | Optical Low Beam, Daylight Visible Flash, Side Visibility, Wired Remote, Intelligent Memory Circuit |
9. Warranty and Support
For warranty information and customer support, please refer to the official Ravemen website or contact your local dealer. Keep your purchase receipt as proof of purchase.
You can find more information about Ravemen products at the official Ravemen Store.
10. Official Product Videos
No official seller videos are available for embedding at this time.