
1. Product Overview
This document provides instructions for the MAKO AIRTEK Atlas Copco Controller Control Panel, Model 1900071052. This control panel is designed as a direct replacement for compatible Atlas Copco systems, ensuring full product compatibility. It is constructed from high-quality materials to meet original manufacturing standards, contributing to durability and cost-effectiveness.
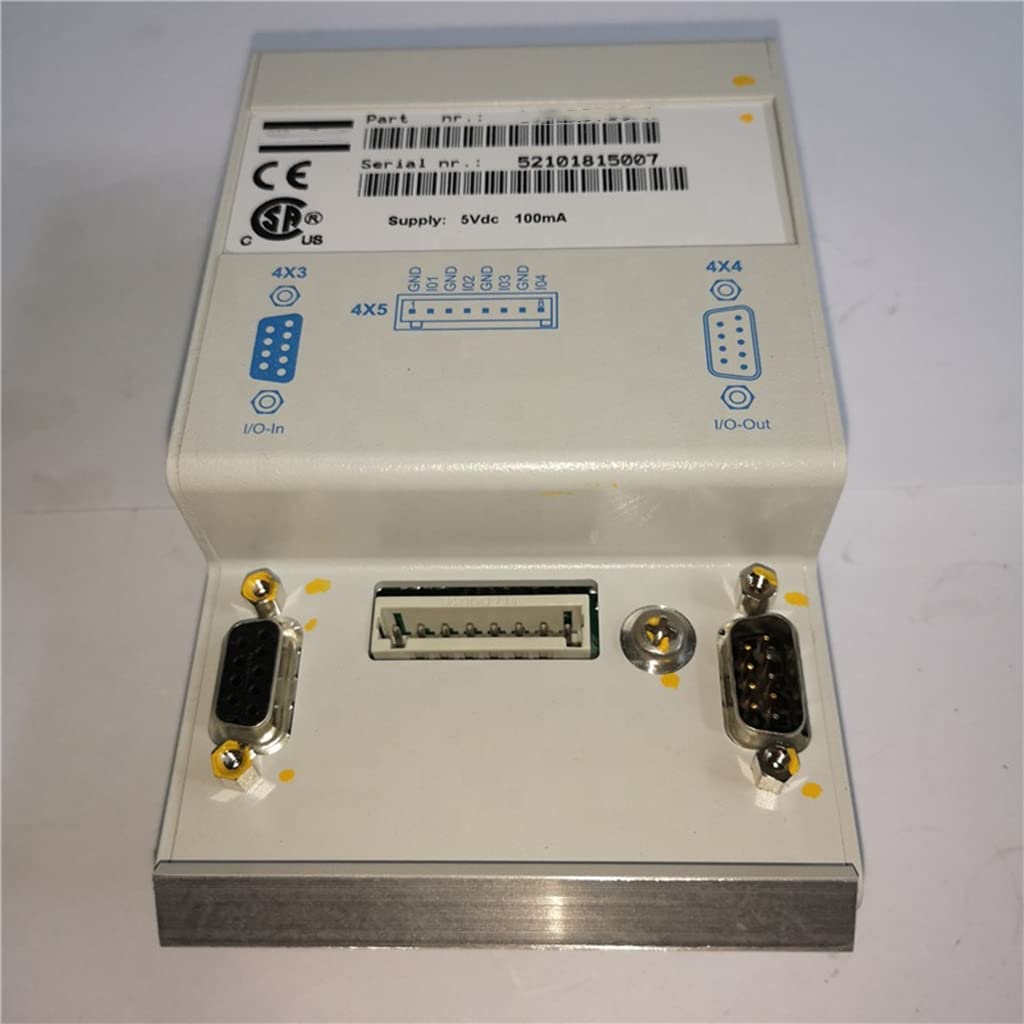
Figure 1.1: MAKO AIRTEK Atlas Copco Controller Control Panel, Model 1900071052.
2. Important Safety Information
Read all safety warnings and instructions carefully before installing or operating the control panel. Failure to follow these instructions may result in electric shock, fire, or serious injury.
- Always disconnect power to the equipment before installation, maintenance, or troubleshooting.
- Ensure installation is performed by qualified personnel familiar with electrical systems and air compressor controls.
- Verify all connections are secure and correctly wired according to the compressor's wiring diagram.
- Do not operate the control panel if it appears damaged.
- Keep the control panel clean and free from moisture and debris.
3. Package Contents
Verify that all items are present and undamaged upon unpacking:
- MAKO AIRTEK Atlas Copco Controller Control Panel (Model 1900071052)
- Instruction Manual (this document)
- Mounting hardware (if applicable, check packaging)
4. Setup and Installation
Proper installation is crucial for the functionality and safety of the control panel. It is recommended to have this procedure performed by a certified technician.
4.1 Pre-Installation Steps
- Power Disconnection: Ensure the main power supply to the air compressor system is completely disconnected and locked out.
- Machine Nameplate Information: Before installation, it is essential to provide the NAMEPLATE information of your machine for proper programming of the control panel. This ensures the panel is configured correctly for your specific Atlas Copco compressor model.
- Old Panel Removal: Carefully disconnect all wiring from the existing control panel, noting the position and function of each wire. Take photographs for reference if necessary. Remove the old control panel from its mounting location.
4.2 Mounting the New Control Panel
- Position the new MAKO AIRTEK control panel in the designated mounting location.
- Secure the panel using the appropriate mounting hardware. Ensure it is firmly attached and stable.

Figure 4.1: Example of a control panel for installation reference.
4.3 Wiring Connections
- Refer to the wiring diagram of your Atlas Copco compressor and the labels on the new control panel.
- Connect each wire to its corresponding terminal on the new control panel. Double-check all connections for accuracy and tightness.
- Ensure proper grounding of the control panel.

Figure 4.2: Example of control panel wiring terminals.
4.4 Initial Power-Up
- After all connections are verified, restore power to the air compressor system.
- Observe the control panel display for initial boot-up sequences and any error messages.
- Perform a functional test according to your compressor's operational guidelines to ensure the panel is communicating correctly with the system.
5. Operating Instructions
This section outlines the basic operation of the control panel. Specific functions and menu navigation may vary slightly based on the programming for your Atlas Copco compressor model.
5.1 Basic Operation
- Power On/Off: Use the designated power button or switch to turn the compressor system on or off.
- Display: The LCD screen displays real-time operational data such as pressure, temperature, running hours, and status messages.
- Navigation Buttons: Use the arrow keys (Up, Down, Left, Right) to navigate through menus and adjust settings. The 'Enter' or 'OK' button confirms selections.
- Emergency Stop: Familiarize yourself with the emergency stop button location and function for immediate system shutdown in critical situations.

Figure 5.1: Control panel display and navigation buttons.
5.2 Programming and Settings
The control panel comes pre-programmed. For advanced settings or specific operational adjustments, consult your compressor's original operating manual or contact a qualified service technician. Accessing programming menus typically involves a specific key sequence or password.
- Parameter Adjustment: Navigate to the desired parameter (e.g., pressure setpoints, timer settings) and use the navigation buttons to modify values.
- Alarm/Warning Reset: If an alarm or warning is displayed, address the underlying issue first, then use the designated button (often labeled 'Reset' or 'Alarm') to clear the message.

Figure 5.2: Control panel with various function buttons for programming and settings.
6. Maintenance
Regular maintenance ensures the longevity and reliable operation of your control panel. Always disconnect power before performing any maintenance.
6.1 Cleaning
- Wipe the exterior of the control panel with a soft, dry, or slightly damp cloth.
- Do not use abrasive cleaners, solvents, or excessive moisture, as these can damage the display or electronic components.
- Ensure no liquids enter the panel's openings.

Figure 6.1: Example of a clean control panel.
6.2 Inspection
- Periodically inspect the control panel for any signs of physical damage, loose connections, or corrosion.
- Check that all buttons are functioning correctly and the display is clear and readable.
- If any issues are found, address them promptly or contact support.

Figure 6.2: Control panel showing connections for inspection.
7. Troubleshooting
This section provides solutions to common issues you might encounter with the control panel. For problems not listed here, contact technical support.
| Problem | Possible Cause | Solution |
|---|---|---|
| Panel does not power on | No power supply; Loose wiring; Faulty panel | Check main power supply; Verify all wiring connections; Contact support if power is present but panel remains off. |
| Display is blank or unreadable | Power issue; Display fault; Environmental factors | Check power supply; Ensure operating within specified temperature range; Contact support for display issues. |
| Incorrect readings or erratic behavior | Sensor issue; Wiring interference; Programming error | Inspect sensor connections; Check for electromagnetic interference; Verify programming with machine nameplate data; Contact support. |
| Buttons are unresponsive | Stuck buttons; Internal fault | Gently press buttons to ensure they are not stuck; If unresponsive, contact support. |
Figure 7.1: Example of a control panel displaying a potential issue.

Figure 7.2: Control panel indicators for troubleshooting.
8. Specifications
Key specifications for the MAKO AIRTEK Atlas Copco Controller Control Panel, Model 1900071052:
| Attribute | Detail |
|---|---|
| Manufacturer | MAKO AIRTEK |
| Part Number | 1900071052 |
| Style | 1900071052 |
| ASIN | B09NGXZ6BP |
| First Available | December 11, 2021 |
9. Warranty and Support
For any issues, questions, or technical support regarding your MAKO AIRTEK Atlas Copco Controller Control Panel, please contact us. We aim to respond to inquiries within 1 business day (excluding public holidays). Our work hours are Monday to Friday.
Please refer to your purchase documentation for specific warranty terms and conditions.
Contact Information:
- Contact via the platform where the product was purchased (e.g., eBay message).