1. Introduction
Thank you for choosing the HomeMount Dot 4 Wall Mount. This product is designed to securely hold your Dot (4th Gen) device, optimize space, and manage cables for a clean setup. Please read this manual carefully before installation and use to ensure proper functionality and safety.
2. Compatibility
Important Note: This HomeMount wall mount is ONLY compatible with the Dot 4th generation device (2020 Release). It is NOT compatible with the larger Echo 4th generation device, Dot 3rd Generation, Dot 5th Generation, or Dot 4th Generation with a clock display.

3. Key Features
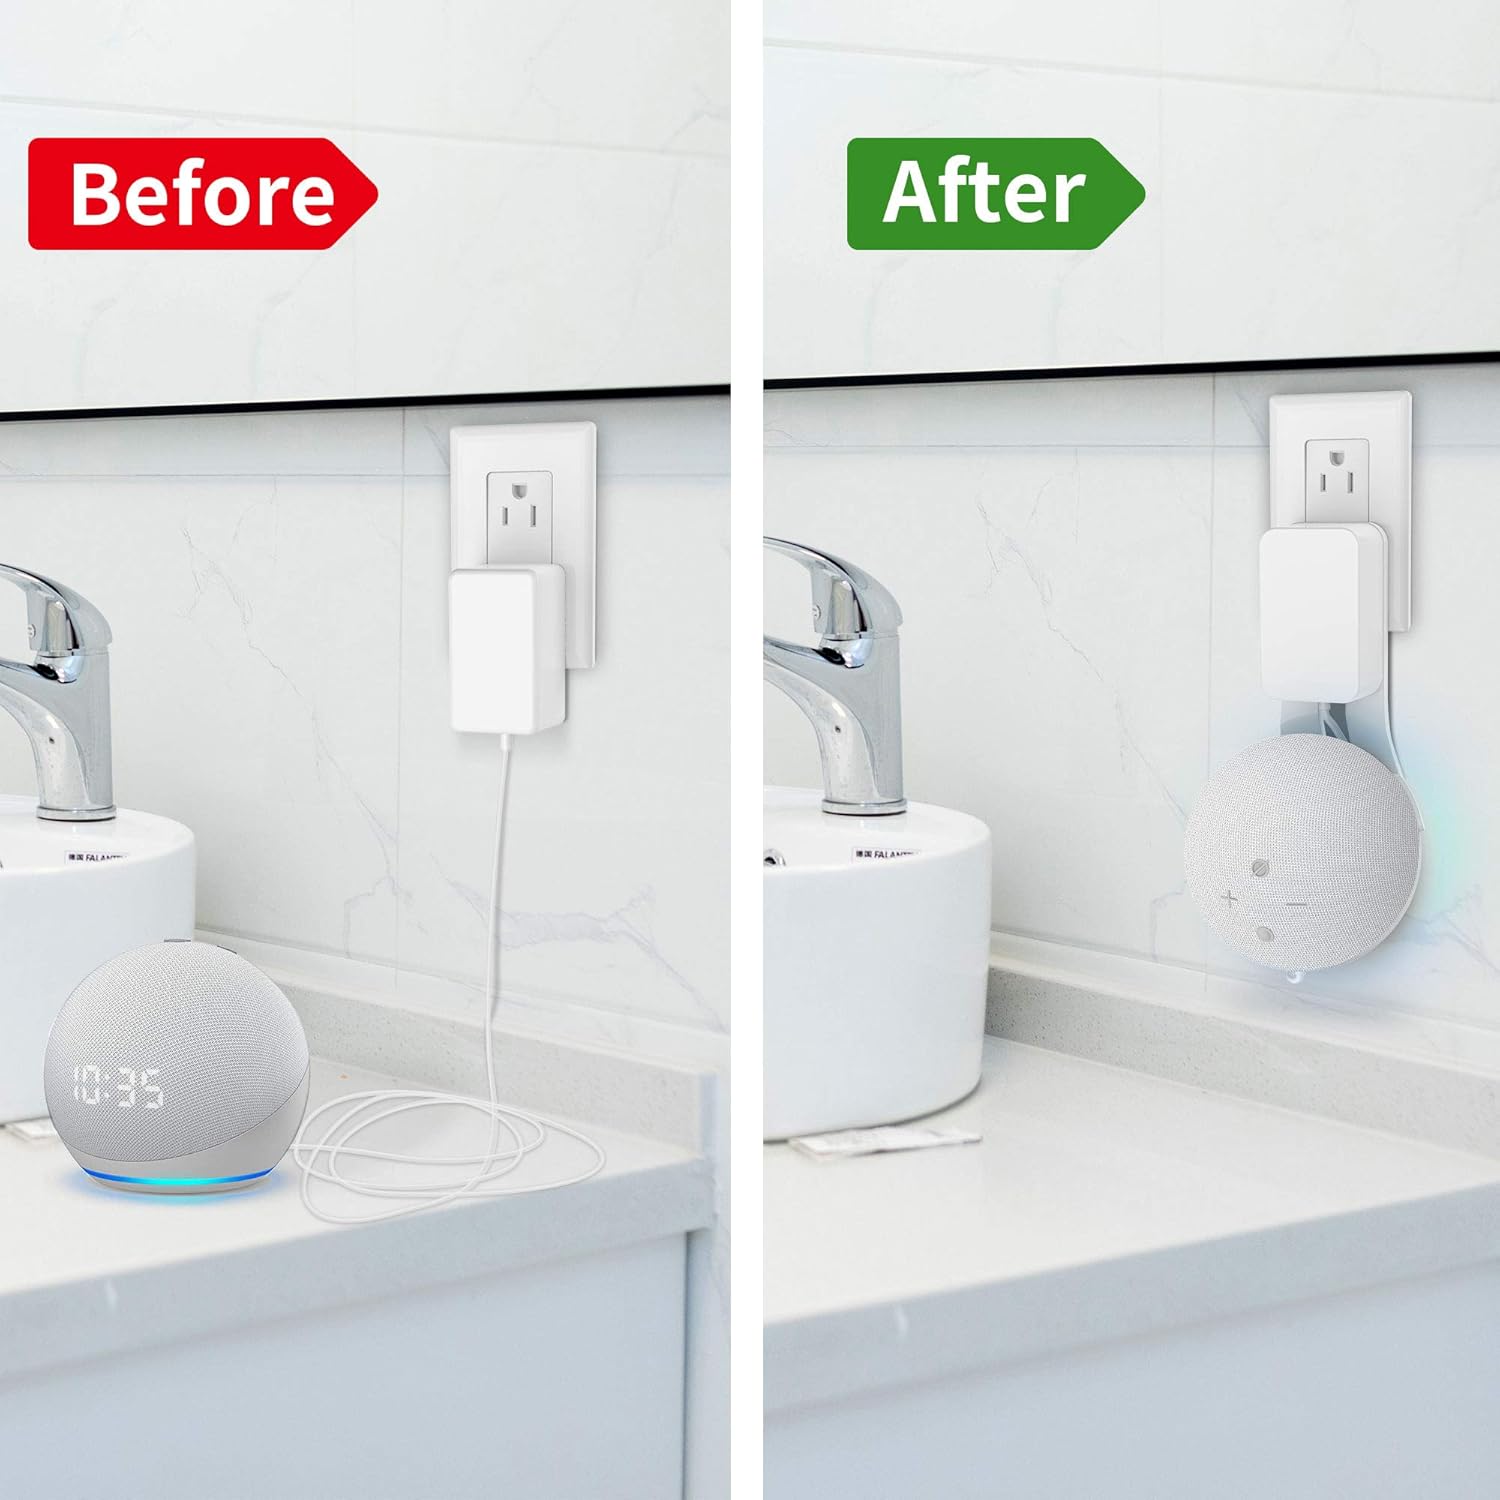
- Integrated Cable Management: Designed to neatly conceal the power cable, eliminating messy wires and providing a clean aesthetic.
- Enhanced Stability: Constructed from durable ABS plastic, ensuring your Dot 4th Gen device is held securely without risk of falling.
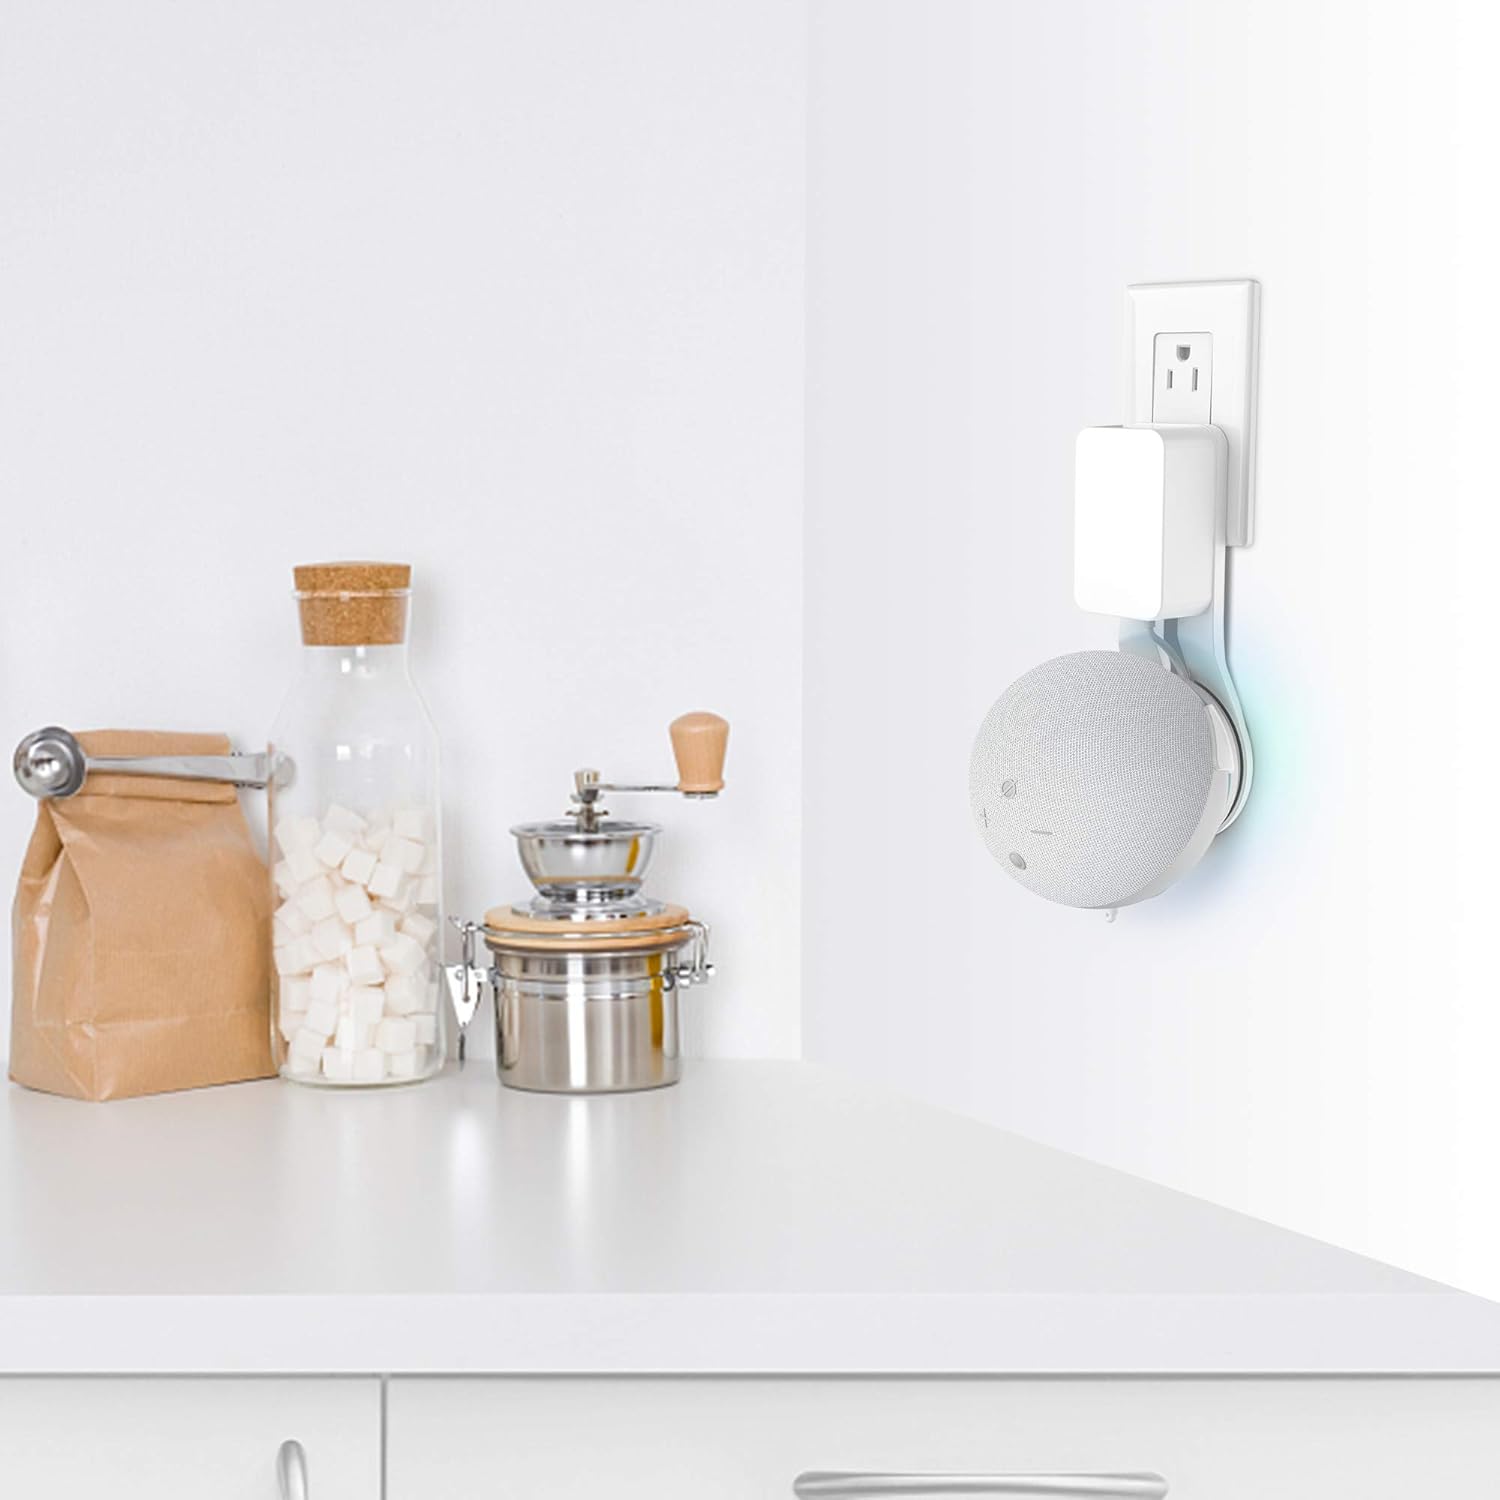
- Versatile Placement: Allows for convenient placement of your device in various rooms such as kitchens, bedrooms, and bathrooms, optimizing sound projection and accessibility.
- Unaltered Sound Quality: The design ensures that the device's original sound quality is maintained without degradation.
- Easy Installation: Installs in minutes into horizontal outlets without the need for drilling or screws.
4. Setup and Installation
Follow these steps to install your HomeMount Dot 4 Wall Mount:
- Unpack Components: Remove the wall mount from its packaging. Ensure you have the mount and your Dot 4th Gen device with its power adapter.
- Install Power Adapter: Insert the Dot 4th Gen power adapter into the designated slot on the wall mount.
- Manage Cables: Wrap the excess power cable neatly around the integrated cable management channels within the mount. Connect the short cable from the mount to your Dot 4th Gen device.
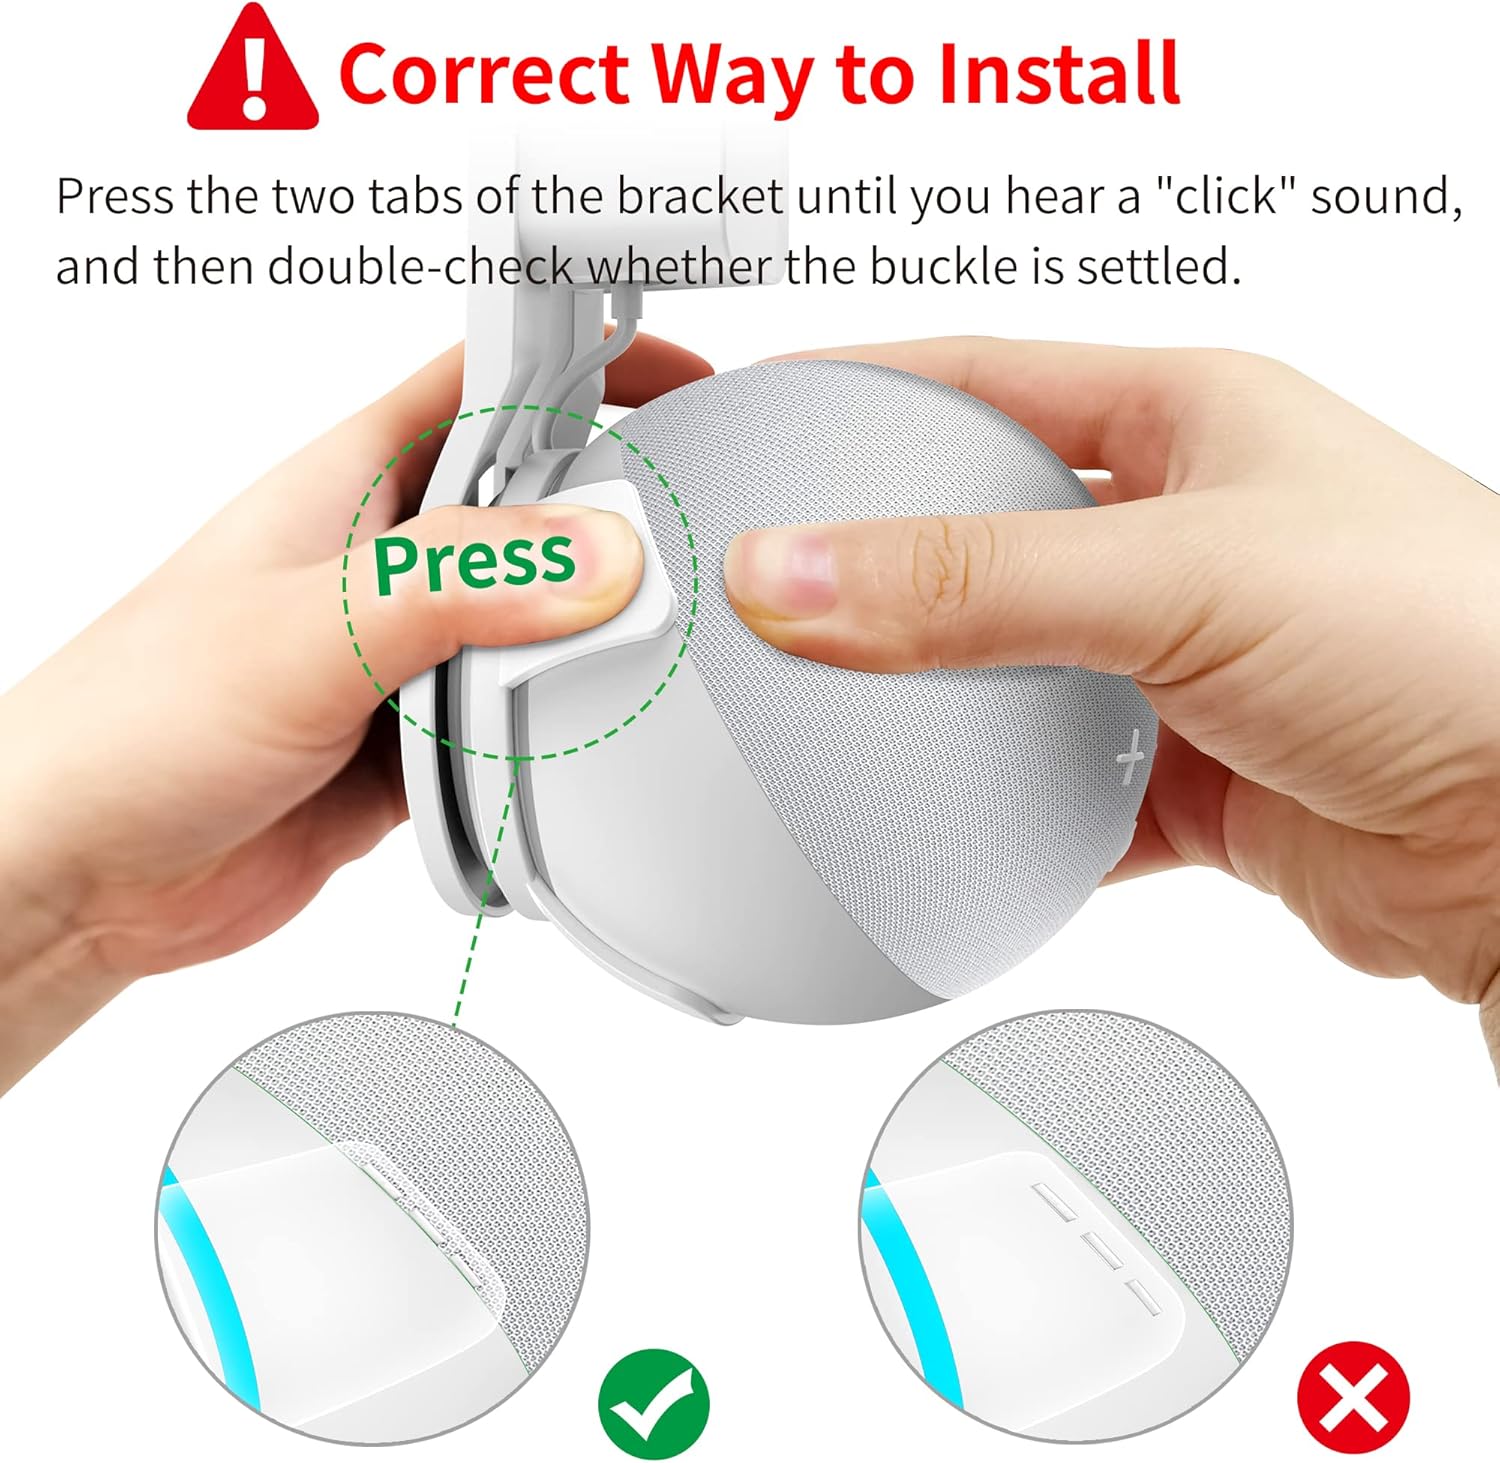
- Secure Dot Device: Carefully place your Dot 4th Gen device into the mount. Press the two tabs of the bracket until you hear a distinct "click" sound. Double-check that the buckle is securely settled to ensure the device is firmly held.
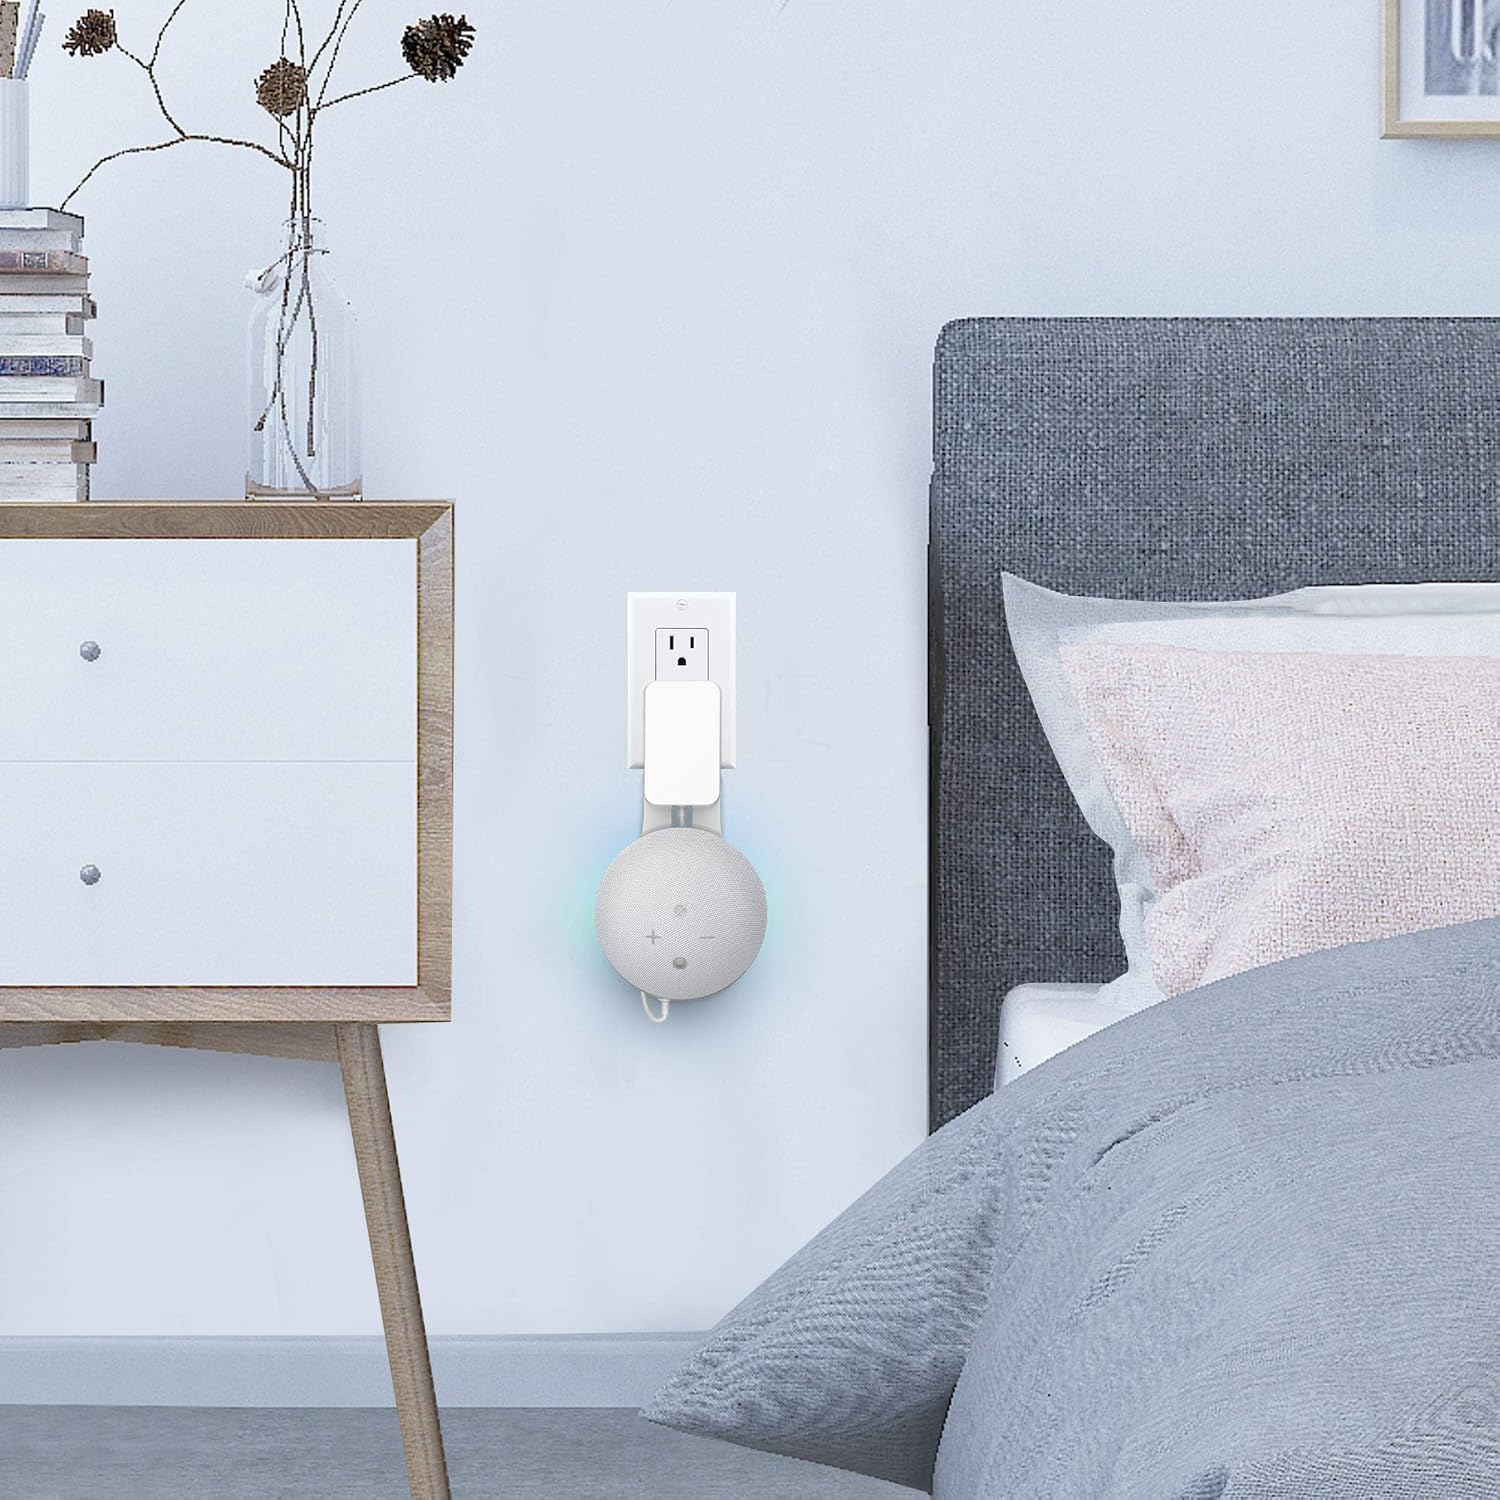
- Plug into Outlet: Insert the assembled mount with your Dot 4th Gen device into a horizontal electrical outlet. No drilling or additional tools are required.

For a visual guide, please watch the official installation video:
5. Operation
Once installed, your Dot 4th Gen device operates as usual. The HomeMount wall mount provides a stable and aesthetically pleasing placement for your device. The open design ensures full access to all buttons and ports, and does not interfere with sound output or microphone input.
Enjoy your device in various locations:
- Kitchen: Keep your countertops clear while enjoying music or recipes.
- Bedroom: Convenient access to smart assistant features without clutter.
- Bathroom: Enjoy audio while maintaining a tidy space.
6. Maintenance
The HomeMount Dot 4 Wall Mount requires minimal maintenance:
- Cleaning: Wipe the mount with a soft, dry cloth to remove dust. Avoid using abrasive cleaners or solvents.
- Inspection: Periodically check that the mount is securely plugged into the outlet and that the Dot 4th Gen device is firmly seated within the mount.
7. Troubleshooting
If you encounter any issues, please refer to the following common solutions:
- Device does not fit: Ensure your device is a Dot 4th Generation (2020 Release) and not a larger Echo 4th Gen, Dot 3rd Gen, Dot 5th Gen, or Dot 4th Gen with clock. Refer to the compatibility section.
- Device feels loose in the mount: Make sure the two tabs of the bracket have clicked into place, securing the device. Gently press the device into the mount until you hear the click.
- Mount is loose in the outlet: Ensure the mount is fully inserted into a horizontal outlet. If the outlet itself is loose, consult a qualified electrician.
- Cables are not neatly managed: Re-route the power cable through the internal channels as shown in the installation steps.
8. Specifications
| Brand | HomeMount |
| Model | Dot 4 Wall Mount |
| Color | White |
| Mounting Type | Wall Mount |
| Special Feature | Hand Free, Cable Management |
| Material | Acrylonitrile Butadiene Styrene (ABS) |
| Item Dimensions (L x W x H) | 0.75 x 4.09 x 1.81 inches |
9. Warranty and Support
For warranty information or technical support, please contact HomeMount customer service through the retailer where the product was purchased or visit the official HomeMount website. Please retain your proof of purchase for warranty claims.