Introduction
This manual provides detailed instructions for the safe and efficient use of your UNITEC Daily Mechanical Timer Switch, Model 30977. This device is designed to automatically switch electrical appliances on and off at pre-set times daily, helping to optimize energy consumption and extend appliance life. Please read these instructions carefully before operating the timer switch.
1. Setup
Follow these steps to set up your UNITEC Daily Mechanical Timer Switch:
- Unpack the Timer: Carefully remove the timer switch from its packaging. Inspect it for any visible damage.
- Plug into a Wall Socket: Insert the timer switch into a standard indoor wall socket. Ensure it is securely seated. The timer is rated IP20 for indoor use only.
- Connect Your Appliance: Plug the appliance you wish to control into the socket on the front of the timer switch. Ensure the appliance is switched on at its own power switch, if applicable, so the timer can control its power supply.

Image: The UNITEC Daily Mechanical Timer Switch plugged into a wall socket, ready for use.

Image: The timer switch integrated into a home environment, demonstrating its compact design.
2. Operating Instructions
The UNITEC Daily Mechanical Timer Switch features a mechanical adjustment ring for setting your desired schedule.
2.1 Setting the Current Time
Rotate the outer dial clockwise until the current time aligns with the arrow marker on the timer's face. The dial is marked with hours from 1 to 24.
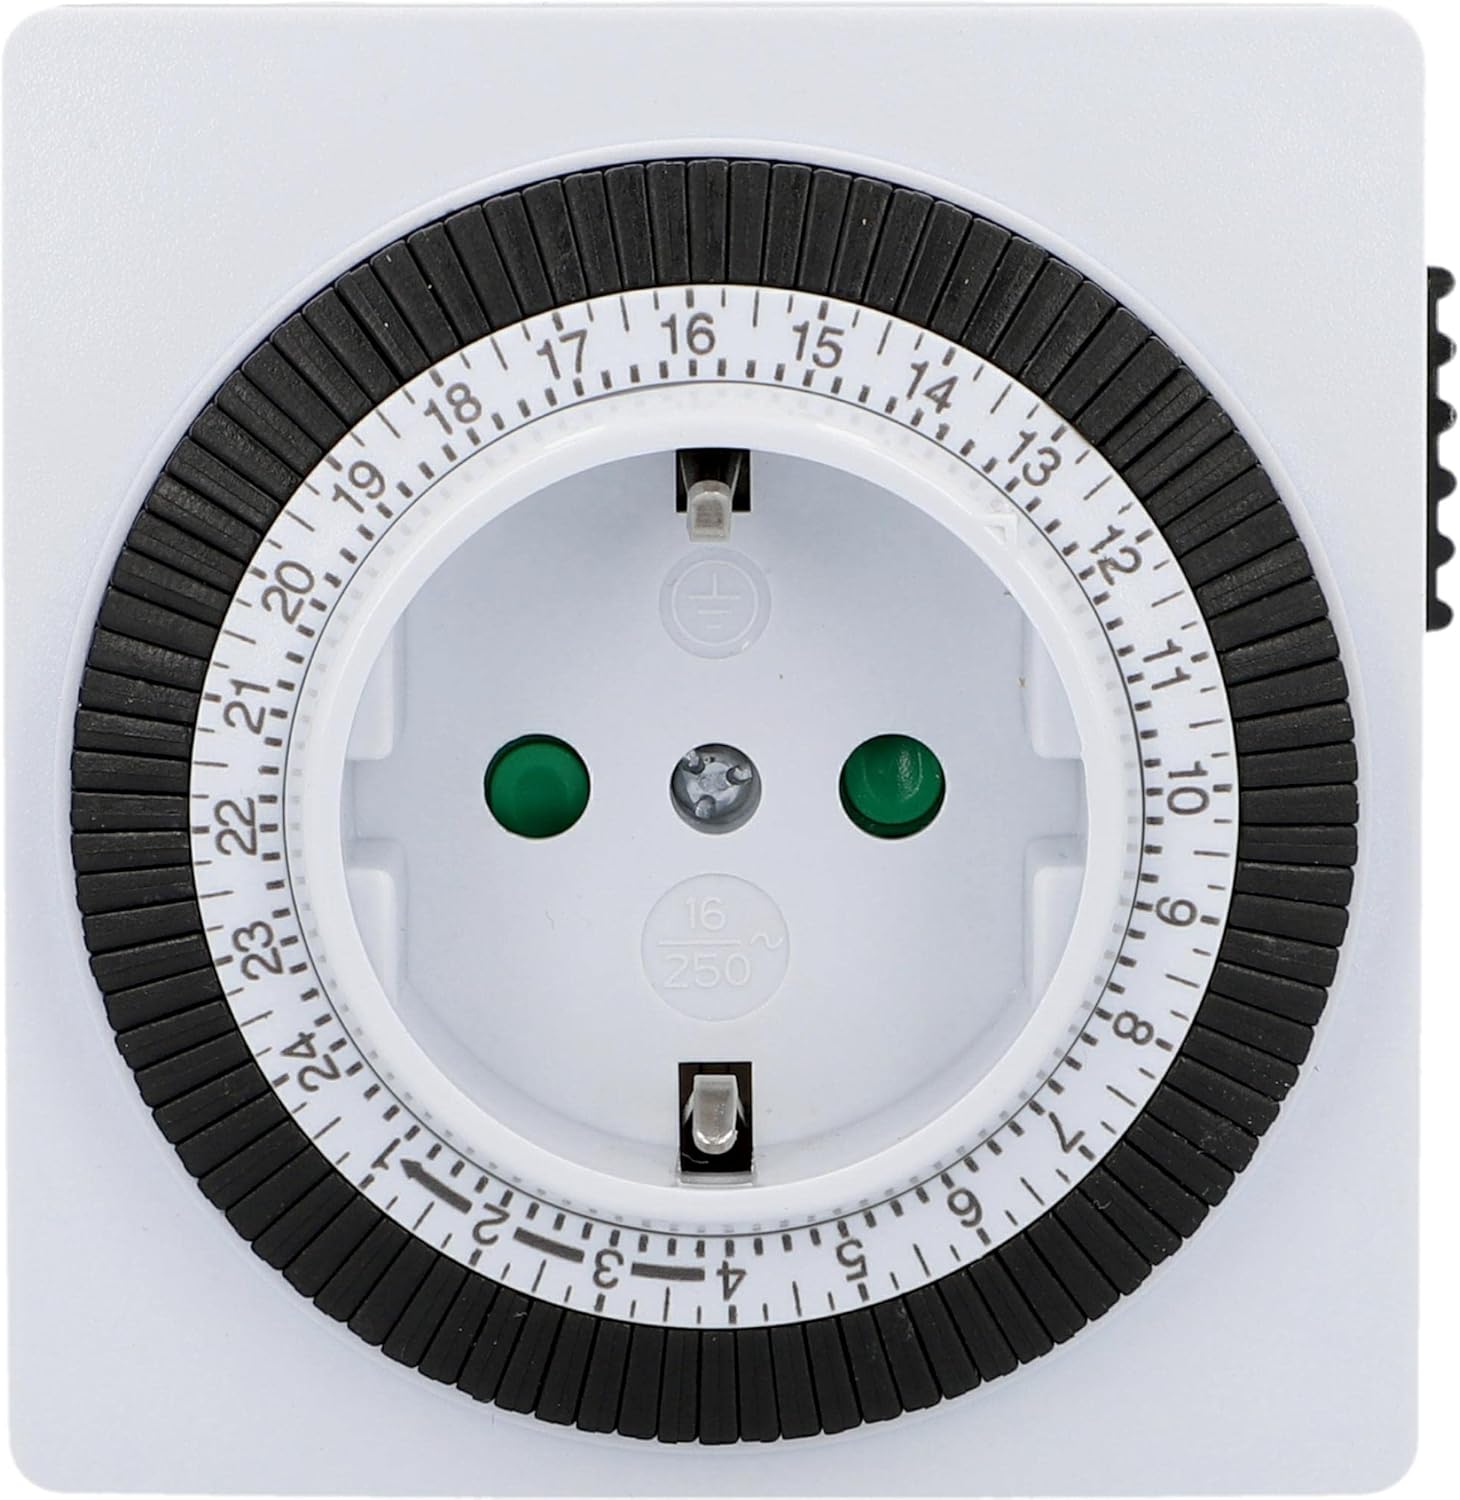
Image: A detailed view of the timer's dial, showing the 24-hour markings and the individual switching segments.
2.2 Programming On/Off Times
The outer ring of the dial consists of multiple segments, each representing 15 minutes. To program an "ON" period:
- Identify Segments: Each segment corresponds to a 15-minute interval. There are 96 segments for a full 24-hour cycle (24 hours * 4 segments/hour = 96 segments).
- Set "ON" Periods: Push down the segments corresponding to the times you want the connected appliance to be switched "ON". When a segment is pushed down, the timer will supply power to the appliance during that 15-minute interval.
- Set "OFF" Periods: Leave the segments up for the times you want the connected appliance to be switched "OFF". During these intervals, no power will be supplied.
The smallest switching time is 15 minutes. You can set multiple switching times throughout the day.
2.3 Manual Override Switch
On the side of the timer, there is a manual override switch (often marked with an 'I' for ON and a clock symbol for TIMER). This switch allows you to bypass the programmed schedule:
- 'I' Position (ON): When the switch is in the 'I' position, the appliance will remain continuously "ON", regardless of the programmed settings.
- Clock Symbol Position (TIMER): When the switch is in the clock symbol position, the timer will operate according to your programmed schedule.

Image: The side of the timer switch, showing the manual override switch with 'I' (ON) and clock (TIMER) symbols.
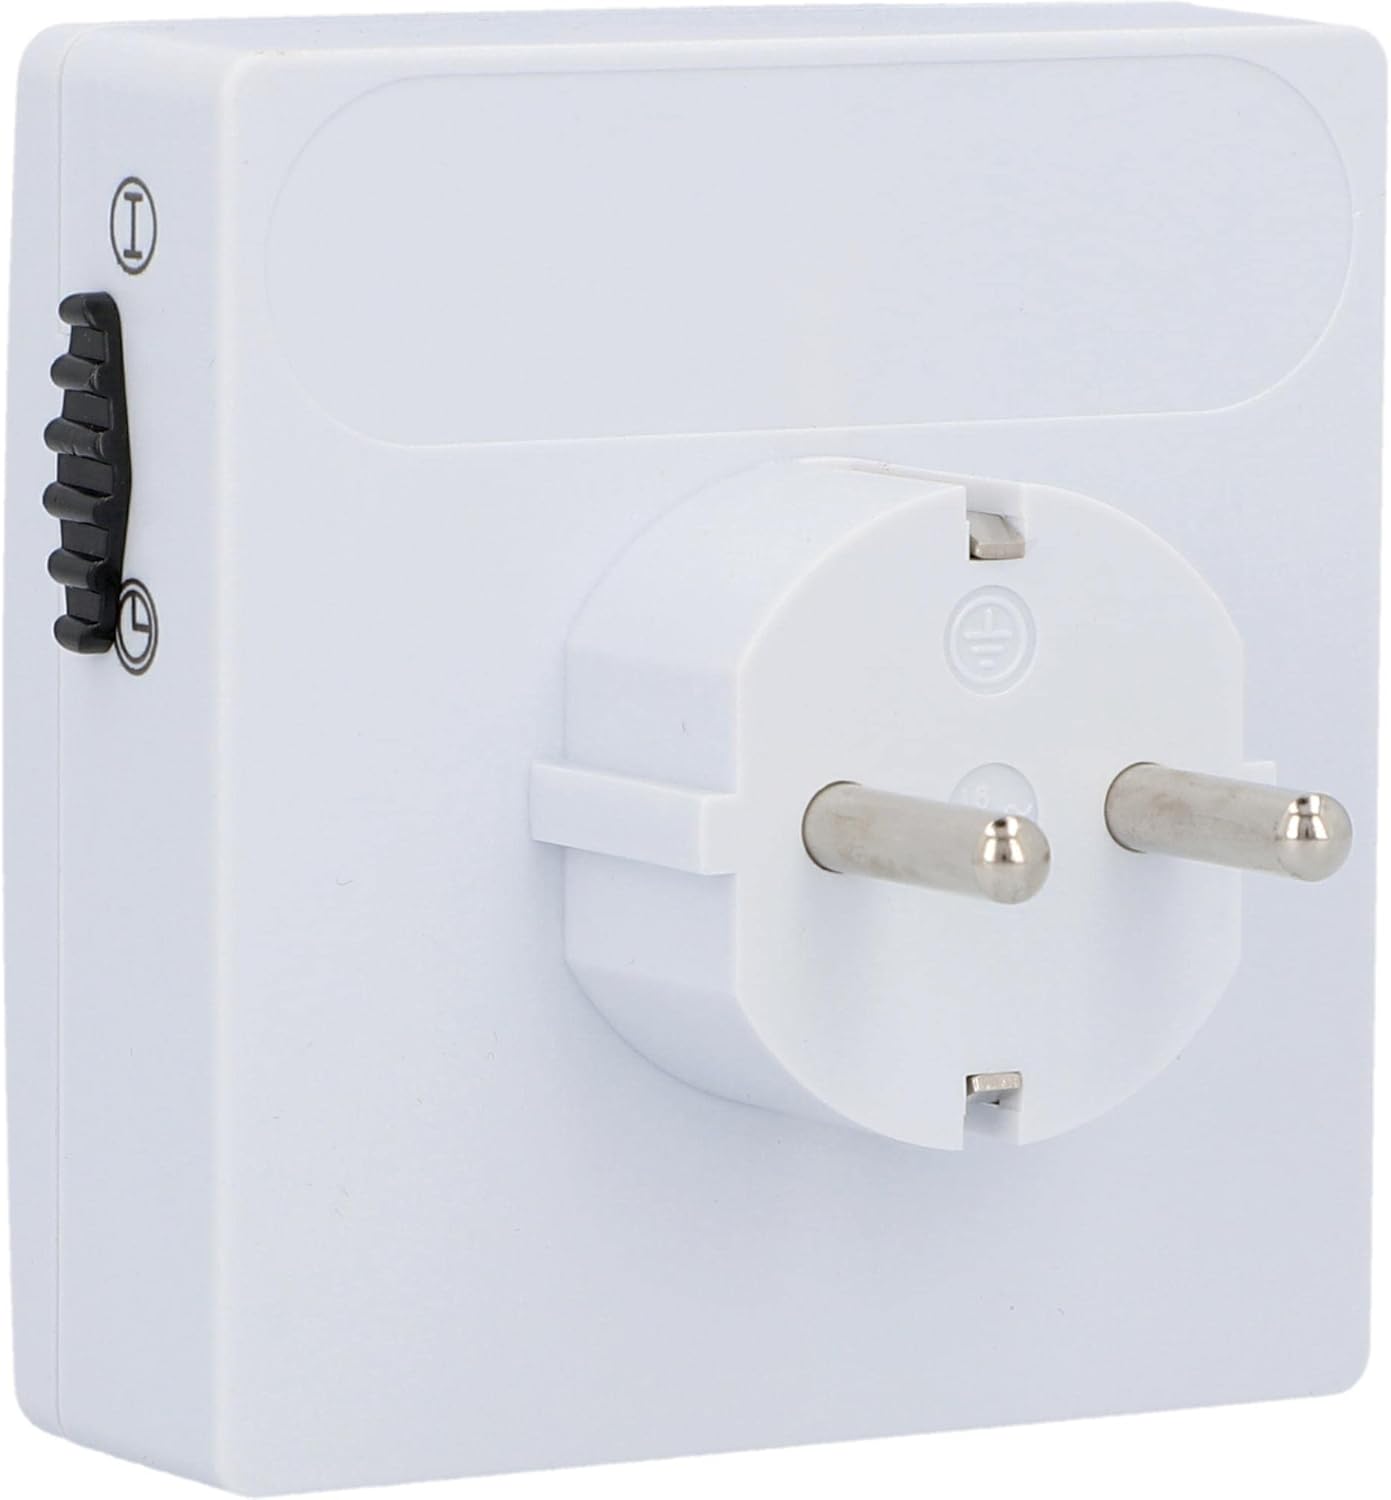
Image: The rear view of the timer switch, illustrating the plug prongs and the position of the manual override switch.
3. Maintenance
The UNITEC Daily Mechanical Timer Switch requires minimal maintenance to ensure long-lasting performance.
- Cleaning: Disconnect the timer from the power outlet before cleaning. Wipe the exterior with a soft, dry cloth. Do not use liquid cleaners, abrasive cleaners, or solvents, as these can damage the device.
- Storage: If not in use for an extended period, store the timer in a cool, dry place away from direct sunlight and moisture.
- Safety: This timer is designed for indoor use (IP20 rating). Do not expose it to water, high humidity, or extreme temperatures. The built-in increased touch protection helps guard against foreign objects.
4. Troubleshooting
If you encounter issues with your timer switch, please refer to the following common problems and solutions:
| Problem | Possible Cause / Solution |
|---|---|
| Appliance does not switch ON/OFF at programmed times. |
|
| Timer dial is not rotating. |
|
5. Specifications
| Feature | Detail |
|---|---|
| Model Number | 30977 |
| Brand | Unitec |
| Type | Daily Mechanical Timer Switch |
| Color | White / Black |
| Material | Plastic |
| Protection Rating | IP20 (Indoor Use Only) |
| Minimum Switching Time | 15 minutes |
| Maximum Switching Times per Day | 96 (15-minute intervals) |
| Product Dimensions | 4.57 x 3.54 x 3.54 inches (approx.) |
| Item Weight | 5.7 ounces / 0.16 Kilograms (approx.) |
6. Warranty and Support
For warranty information or technical support, please refer to the documentation included with your purchase or contact the retailer where the product was acquired. You may also visit the official Unitec website for further assistance.
Please retain your proof of purchase for any warranty claims.