1. Introduction
This manual provides detailed instructions for the installation, operation, and maintenance of your CP PLUS Full HD 8 Channel DVR Security System. This system includes an 8-channel Digital Video Recorder (DVR), 2.4 MP dome cameras, 2.4 MP bullet cameras, a 2 TB Hard Disk Drive (HDD), an 8-channel power supply, and a Pluscam 2U NVR/DVR rack. Please read this manual thoroughly before installation and operation to ensure proper use and optimal performance.
2. Package Contents
Verify that all items listed below are included in your package. If any items are missing or damaged, please contact your vendor.
- 1 x CP PLUS 8 Channel Full HD DVR
- 4 x CP PLUS 2.4 MP Dome Cameras
- 4 x CP PLUS 2.4 MP Bullet Cameras
- 1 x 2 TB Hard Disk Drive (HDD)
- 1 x 8 Channel Power Supply
- 1 x Pluscam 2U NVR/DVR Rack
- 1 x USB Mouse
- 1 x DVR Power Adapter
- Necessary cables and connectors (e.g., SATA cables for HDD)
3. System Overview
3.1 Digital Video Recorder (DVR)
The DVR is the central unit for recording, storing, and managing video footage from your cameras. It supports up to 8 channels for simultaneous recording.
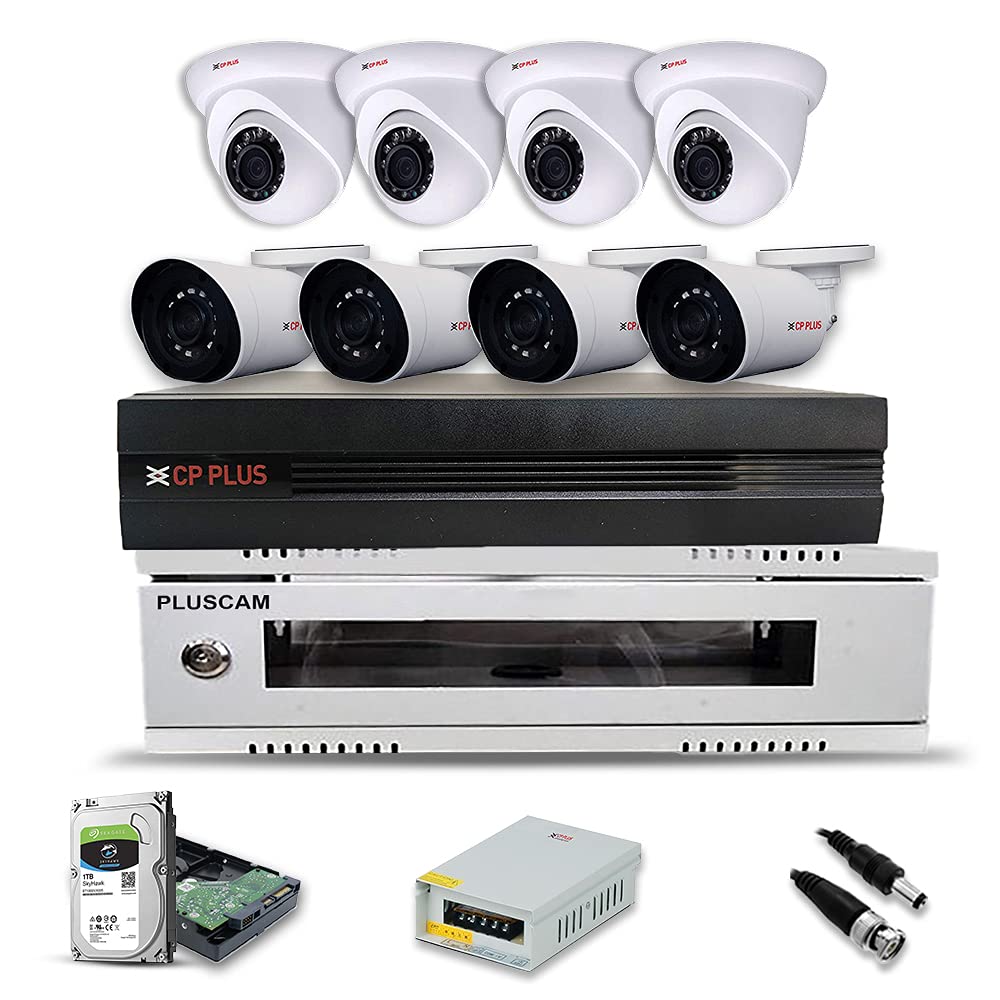
Image: CP PLUS 8 Channel DVR with power adapter, mouse, and cables.
DVR Rear Panel Connections
Familiarize yourself with the ports on the rear panel of the DVR for proper connection of cameras, display, and network.
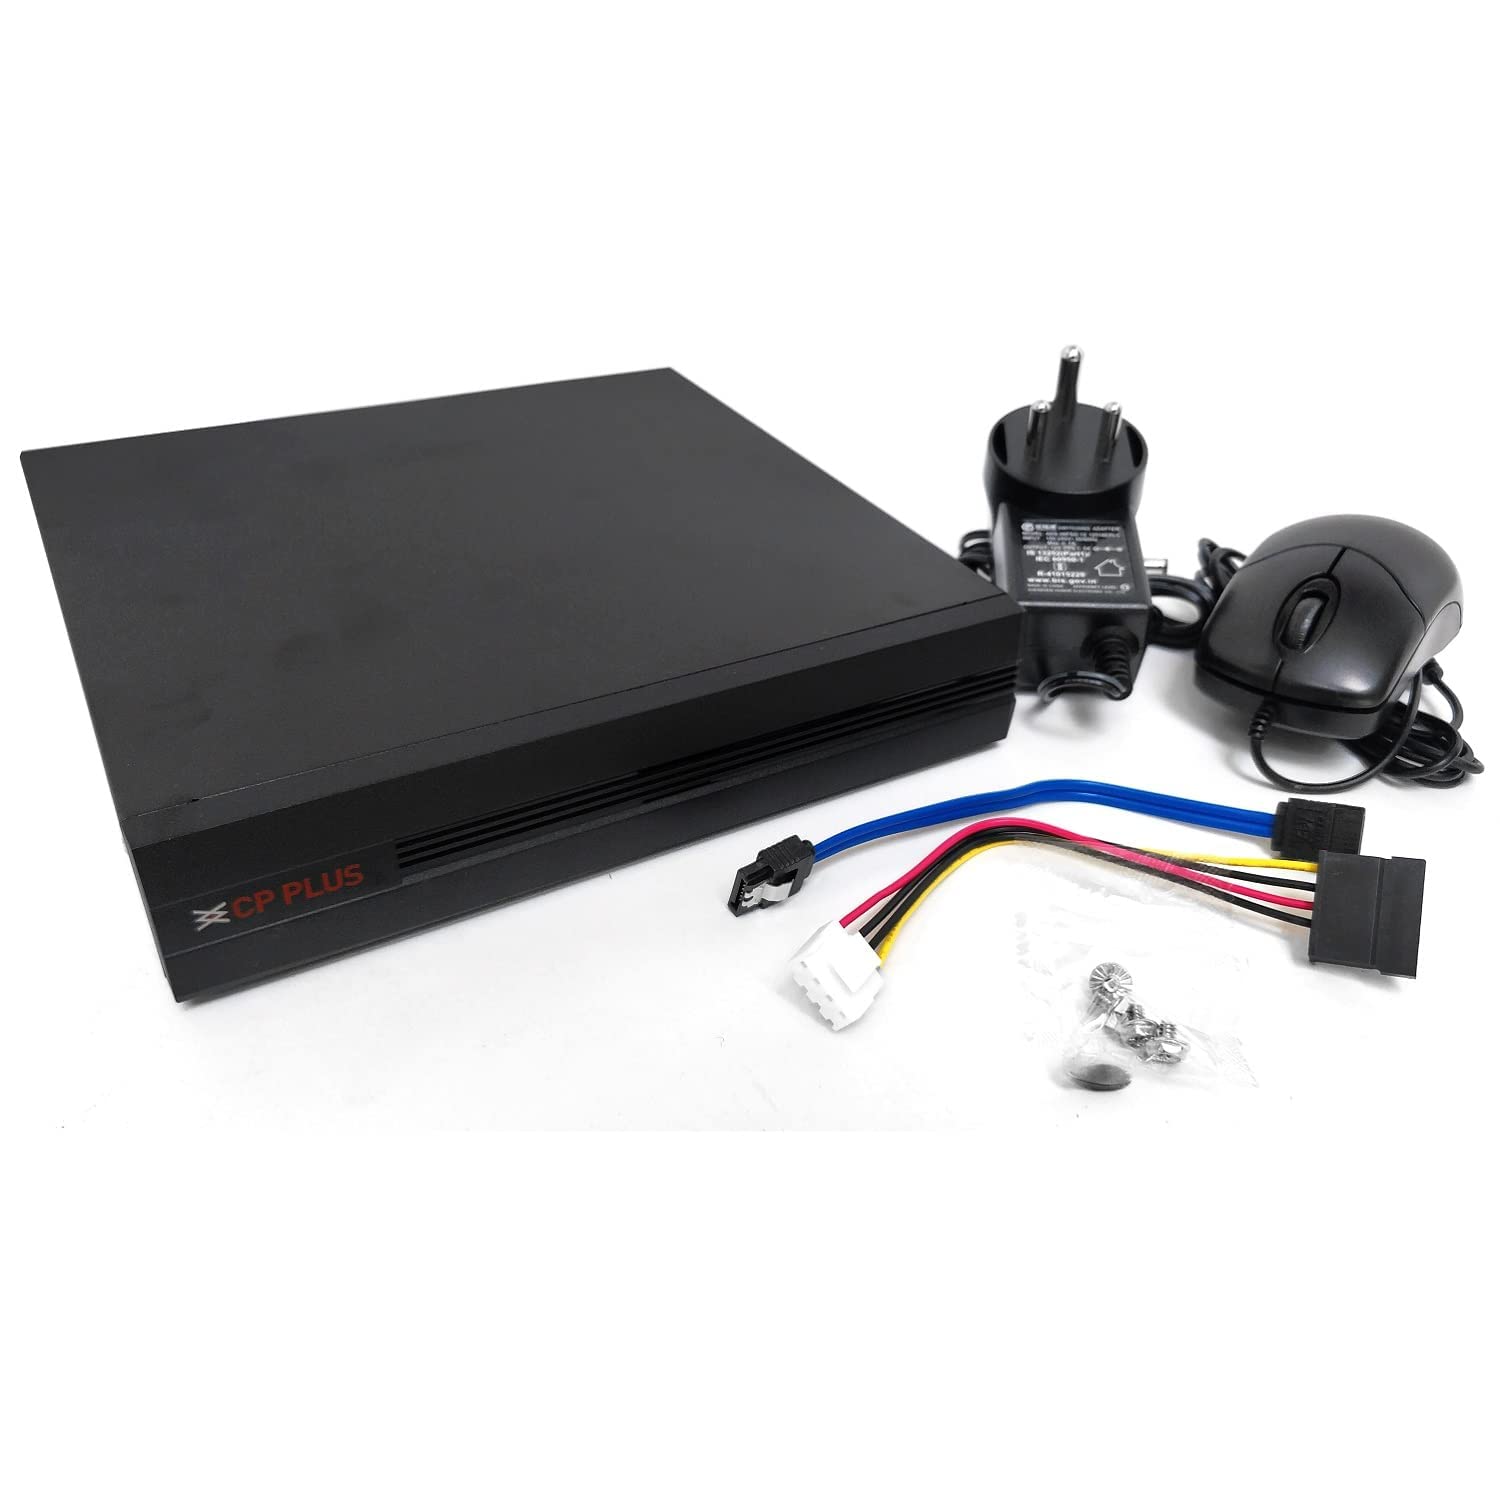
Image: Rear view of the CP PLUS 8 Channel DVR showing Video In (CH1-CH8), Audio In/Out, VGA, HDMI, USB, LAN, and Power ports.
- Video In (CH1-CH8): BNC connectors for connecting cameras.
- Audio In/Out: RCA connectors for audio input and output.
- VGA Port: For connecting to a monitor or display.
- HDMI Port: For connecting to an HD monitor or TV.
- USB Ports: For connecting a mouse, USB flash drive for backup, or external HDD.
- LAN Connection: RJ45 port for network connection and remote viewing.
- Power Input: For connecting the DVR power adapter.
3.2 2.4 MP Dome Cameras
These cameras are designed for indoor or outdoor use, offering a wide field of view and discreet appearance. They provide 2.4 Megapixel Full HD resolution.

Image: A CP PLUS 2.4 MP dome camera, typically used for ceiling or wall mounting.
3.3 2.4 MP Bullet Cameras
Bullet cameras are robust and typically used for outdoor surveillance, providing a clear, focused view. They also offer 2.4 Megapixel Full HD resolution.

Image: A CP PLUS 2.4 MP bullet camera, suitable for wall or pole mounting.
3.4 2 TB Hard Disk Drive (HDD)
The included 2 TB HDD is pre-installed or provided for installation into the DVR, enabling storage of recorded video footage.

Image: A 2 TB internal hard disk drive for video storage.
3.5 Pluscam 2U NVR/DVR Rack
This rack provides a secure and organized enclosure for your DVR, protecting it from dust and unauthorized access.

Image: A Pluscam 2U rack designed to house a DVR or NVR unit.
4. Setup and Installation
4.1 Hard Disk Drive (HDD) Installation (If not pre-installed)
Note: Ensure the DVR is powered off and unplugged before installing the HDD.
- Remove the top cover of the DVR by unscrewing the screws on the rear and sides.
- Connect the SATA data cable and SATA power cable from the DVR to the HDD.
- Secure the HDD to the bottom of the DVR chassis using the provided screws.
- Replace the top cover and secure it with screws.
4.2 Camera Placement and Mounting
Plan the locations for your cameras carefully to maximize coverage and minimize blind spots. Consider factors like lighting, potential obstructions, and power source proximity.
- Mark drilling points on the wall or ceiling using the camera's mounting base as a template.
- Drill pilot holes and insert wall anchors if necessary.
- Secure the camera base to the mounting surface with screws.
- Adjust the camera angle for optimal viewing.
4.3 Wiring Connections
- Camera Video Connection: Connect the BNC cable from each camera to the corresponding Video In port (CH1-CH8) on the DVR rear panel.
- Camera Power Connection: Connect each camera to the 8-channel power supply using appropriate DC power cables. Ensure the power supply is connected to a power outlet.
- Monitor Connection: Connect a monitor to the DVR using either the VGA or HDMI port.
- USB Mouse: Plug the included USB mouse into one of the DVR's USB ports.
- Network Connection (Optional): For remote viewing, connect an Ethernet cable from the DVR's LAN port to your router or network switch.
4.4 Initial Power-Up and Configuration
- Connect the DVR power adapter to the DVR and then to a power outlet. The DVR will power on automatically.
- Follow the on-screen prompts for initial setup, which typically includes setting the language, date/time, network settings, and creating an administrator password.
- If the HDD was newly installed, the system may prompt you to format it. Follow the instructions to format the HDD for recording.
5. Operating Instructions
5.1 DVR Interface Navigation
Use the USB mouse to navigate the DVR's graphical user interface (GUI). Right-click to access the main menu, and left-click to select options.
5.2 Live View
Upon startup, the DVR typically displays the live view of all connected cameras. You can switch between single-camera view, multi-camera view, and sequence display.
5.3 Recording Settings
Access the main menu, then navigate to Record > Record Schedule to configure recording modes for each channel.
- Continuous Recording: Records continuously based on a set schedule.
- Motion Detection Recording: Records only when motion is detected in the camera's view.
- Alarm Recording: Records when an external alarm input is triggered.
5.4 Video Playback
To review recorded footage:
- From the main menu, select Playback.
- Choose the desired date, time, and camera channel.
- Use the playback controls (play, pause, fast forward, rewind) to navigate through the footage.
5.5 Remote Viewing
To access your security system remotely via a smartphone or computer:
- Ensure the DVR is connected to your network and has internet access.
- Download the official CP PLUS mobile application (e.g., CP Plus gCMOB) from your device's app store or the PC client software from the CP PLUS website.
- Register an account and add your DVR device using its serial number or QR code.
- You can now view live feeds, play back recordings, and manage settings remotely.

Image: A person viewing a live surveillance feed on a tablet, demonstrating remote access capabilities.
6. Maintenance
- Regular Cleaning: Periodically clean camera lenses and DVR vents to ensure clear images and proper cooling. Use a soft, dry cloth.
- Firmware Updates: Check the CP PLUS official website for firmware updates for your DVR. Keeping firmware updated can improve performance and security.
- Data Backup: Regularly back up important video footage to an external USB drive or network storage to prevent data loss.
- HDD Health Check: Monitor the health of your HDD through the DVR's system settings to anticipate potential failures.
7. Troubleshooting
7.1 No Video Display
- Check if the DVR is powered on and the power adapter is securely connected.
- Verify that the monitor is correctly connected to the DVR via VGA or HDMI and is set to the correct input source.
- Ensure all camera video cables are securely connected to both the cameras and the DVR.
- Confirm that cameras are receiving power from the 8-channel power supply.
7.2 No Recording
- Check if the HDD is properly installed and formatted. Access Main Menu > Storage > HDD Manage to verify.
- Ensure recording schedules are correctly configured for the desired channels (Main Menu > Record > Record Schedule).
- Verify that the HDD is not full. If full, configure overwrite settings or replace the HDD.
7.3 Remote Viewing Issues
- Confirm the DVR is connected to the internet (check network status in DVR settings).
- Ensure your router's internet connection is active.
- Verify that the correct device ID or QR code is entered in the mobile application/PC client.
- Check firewall settings on your router; port forwarding may be required for some configurations (consult your network administrator or ISP).
8. Specifications
| Feature | Specification |
|---|---|
| Brand | CP PLUS |
| Model | 4DOME4BULLET (Kit) |
| DVR Channels | 8 Channels |
| Camera Resolution | 2.4 MP Full HD |
| Camera Type | 4 Dome, 4 Bullet |
| HDD Capacity | 2 TB |
| Connectivity Technology | Wired, Wireless (for remote access) |
| Special Feature | Night Vision |
| Recording Mode | Continuous, Event (Motion Detection) |
| Video Output | VGA, HDMI |
| Network Interface | RJ45 Ethernet Port |
| USB Interface | Multiple USB ports for mouse/backup |
9. Warranty and Support
For warranty information and technical support, please refer to the warranty card included with your product or visit the official CP PLUS website. Keep your purchase receipt as proof of purchase for warranty claims.
CP PLUS Official Website: www.cpplusworld.com