Introduction
This instruction manual provides detailed guidance for the proper setup, operation, and maintenance of your Works by Cellet 360 Multi Mount Car Holder. Please read this manual thoroughly before use to ensure optimal performance and longevity of the product. This mount is designed to securely hold devices up to 3.5 inches wide, including the Vivitar Vivicam 5385, in a vehicle environment.
Product Overview
Features
- Designed for secure device holding while driving, navigating, or for passenger entertainment.
- Compatible with devices up to 3.5 inches wide, including various smartphones and gaming devices.
- Adjustable design supports both vertical and horizontal viewing with a 360-degree rotation option.
- Constructed with a high-strength aircraft-grade stainless steel core, capable of holding devices up to 8 pounds.
- Features Grade A rubber padding and feet to protect your device from scratches and prevent sliding.
- Includes multiple adapters for compatibility with various vehicle types.
Components

Figure 1: Labeled components of the 360 Multi Mount Car Holder.
The mount consists of several key components designed for secure and adjustable device holding. These include anti-slip rubber pads for grip, a 360-degree adjustable ball joint for flexible positioning, a stable support shelf for the device's base, a one-touch release mechanism for easy device removal, and an innovative silicone pad cushioned clip for secure attachment to your vehicle's air vent.
Setup Instructions
Assembly
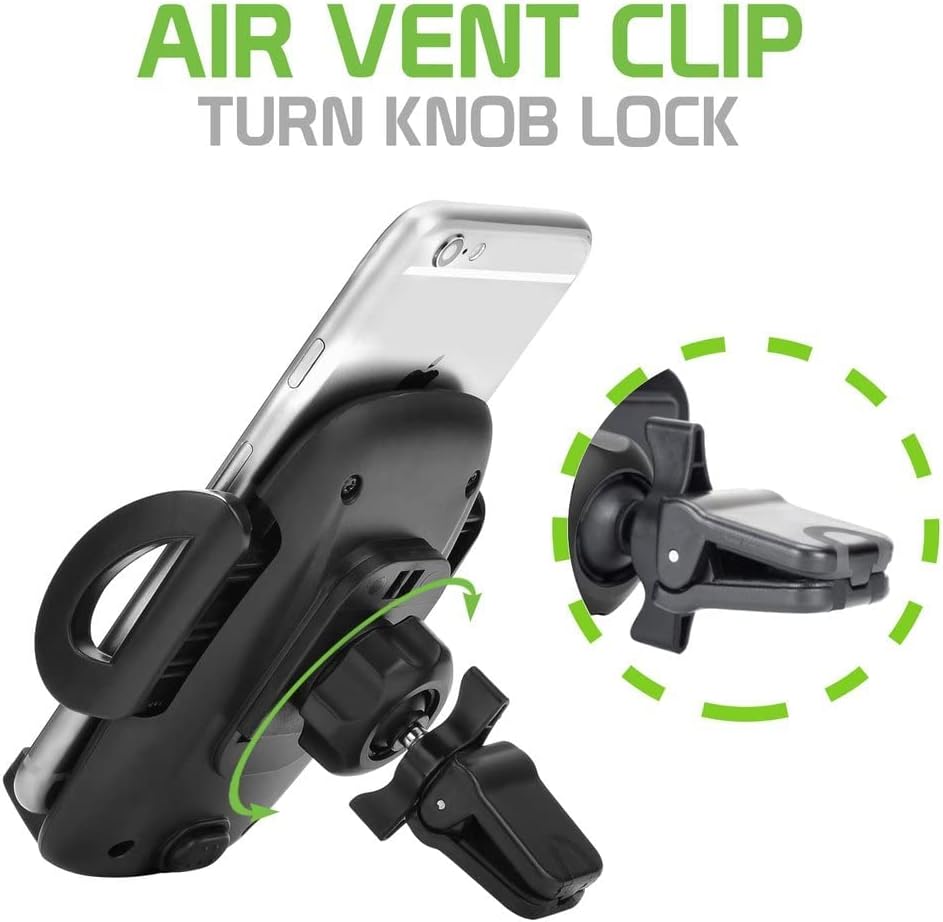
Figure 2: Assembly diagram for the car mount.
- Locate the main device holder and the air vent clip with the ball joint.
- Unscrew the tightening nut from the air vent clip's ball joint.
- Place the tightening nut over the ball joint.
- Insert the ball joint into the circular socket on the back of the device holder.
- Tighten the nut securely onto the device holder to fix the ball joint in place, allowing for rotation but preventing detachment.
Installation in Vehicle

Figure 3: Air vent clip with turn knob lock.
- Identify a suitable air vent in your vehicle that provides a clear view and does not obstruct driving.
- Open the air vent clip by pressing the release button or spreading the jaws.
- Carefully insert the clip onto one of the air vent blades.
- Once positioned, turn the knob on the air vent clip to tighten and secure it firmly to the vent. Ensure it is stable and does not wobble.
Using the Mount Stabilizer (Optional)

Figure 4: Car mount installed with the stabilizer arm.
For enhanced stability, especially on bumpy roads or with heavier devices, utilize the mount stabilizer arm. Extend the arm from the bottom of the mount until it rests firmly against your vehicle's dashboard. This provides additional support and reduces vibration.
Operating Instructions
Attaching Your Device

Figure 5: Smartphone secured in the car mount.
- Press the one-touch release button located on the bottom or side of the mount to expand the side arms.
- Place your device onto the stable support shelf at the bottom of the mount.
- Gently push the side arms inward until they securely grip your device. Ensure the device is centered and stable.
- Verify that the device is firmly held and will not fall during vehicle movement.
Adjusting the Viewing Angle
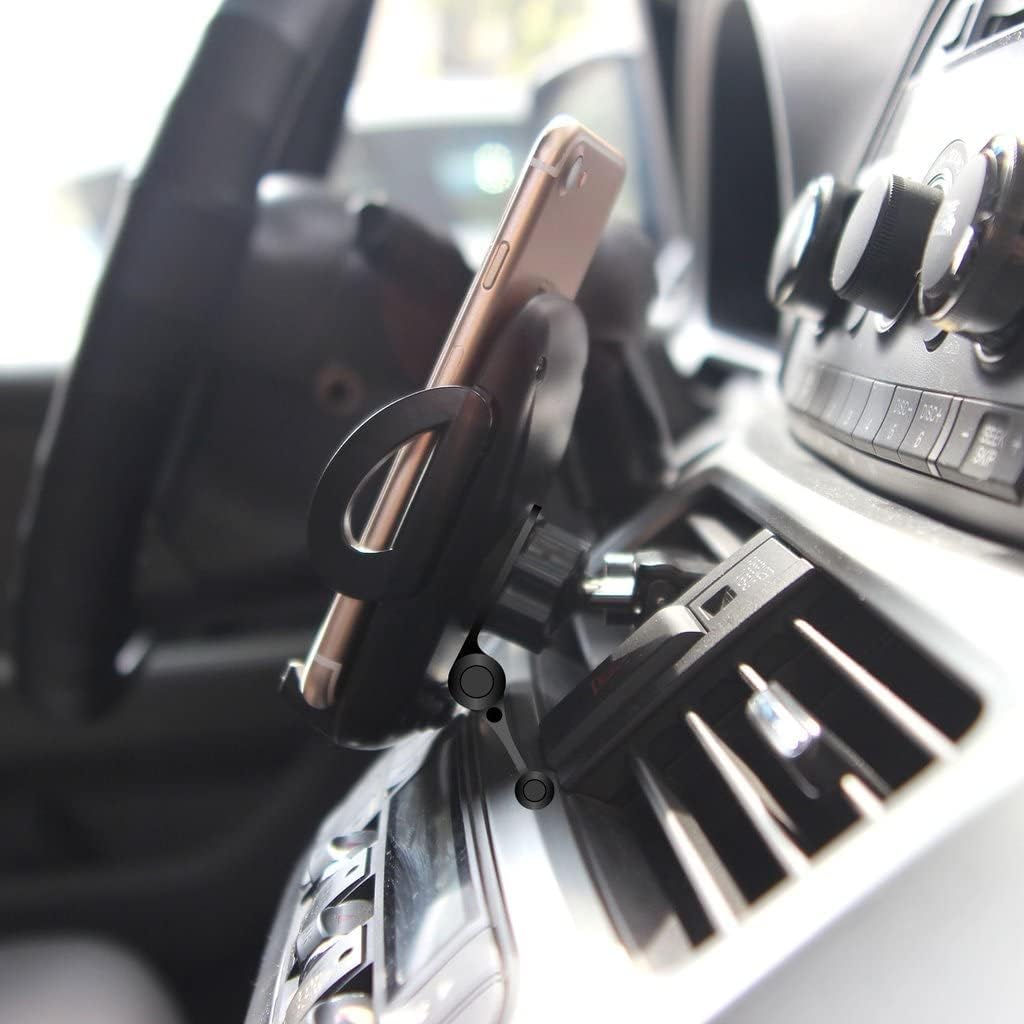
Figure 6: Car mount with device displaying navigation.
The mount features a 360-degree adjustable ball joint, allowing you to rotate your device to any desired orientation (portrait or landscape) and tilt it for optimal viewing. Loosen the tightening nut slightly if needed to adjust the angle, then re-tighten to secure the position.
Maintenance
- Cleaning: Use a soft, damp cloth to wipe down the mount. Avoid abrasive cleaners or solvents that could damage the plastic or rubber components.
- Inspection: Periodically check all connections and moving parts to ensure they are secure and functioning correctly.
- Storage: If not in use for an extended period, store the mount in a cool, dry place away from direct sunlight.
Troubleshooting
| Problem | Possible Cause | Solution |
|---|---|---|
| Mount is loose on air vent | Air vent clip not tightened sufficiently. | Ensure the turn knob on the air vent clip is fully tightened. Adjust the clip's position on the vent blade for a better grip. |
| Device is not held securely | Side arms not fully closed or device is too wide/narrow. | Press the side arms firmly inward until they grip the device. Ensure your device's width is within the 3.5-inch limit. |
| Mount wobbles excessively | Mount not stable or stabilizer not used. | Ensure the air vent clip is tight. Utilize the mount stabilizer arm by extending it to rest against the dashboard. |
| Cannot adjust viewing angle | Ball joint tightening nut is too tight. | Slightly loosen the tightening nut behind the device holder, adjust the angle, then re-tighten. |
Specifications
| Feature | Detail |
|---|---|
| Item Weight | 4 ounces |
| ASIN | B09NC5L2MW |
| Manufacturer | Works by Cellet |
| Brand | Works by Cellet |
| Color | Black |
| Form Factor | Vehicle Mount |
| Compatible Device Models | Vivitar Vivicam 5385, and other devices up to 3.5 inches wide |
| Material | Plastic, Stainless Steel |
| Maximum Device Width | 3.5 inches |
| Maximum Device Weight | 8 pounds |
Warranty and Support
For warranty information or technical support, please refer to the product packaging or contact Works by Cellet customer service directly. Contact details are typically provided with your purchase or can be found on the manufacturer's official website.