
Introduction
The TempPro A52 Indoor Thermometer and Hygrometer is designed to provide accurate and real-time measurements of indoor temperature and humidity. Featuring a large backlit LCD screen and a comfort level indicator, this device helps you monitor your indoor environment for optimal comfort and health. It also records maximum and minimum temperature and humidity over the past 24 hours, allowing you to track environmental changes easily.
Key Features
- High Accuracy: Equipped with advanced sensors for precise temperature (±2°F) and humidity (±2-3% RH) readings.
- Air Comfort Indicator: A colored arrow indicates dry, comfort, or wet conditions at a glance.
- Large Backlit Display: A 3.3-inch LCD screen with large digits and an orange backlight for easy reading in any lighting.
- Max/Min Records: Displays the highest and lowest temperature and humidity recorded over the last 24 hours.
- Multiple Placement Options: Can be wall-mounted, placed on a tabletop, or attached to metal surfaces with its built-in magnet.
- Selectable Units: Easily switch between Fahrenheit (°F) and Celsius (°C).

Image: Overview of the TempPro A52's main features, including temperature and humidity measurement, magnetic backing, unit switching, comfort indicator, and backlight.
Setup
1. Battery Installation
The TempPro A52 requires one AAA battery (included). To install:
- Locate the battery compartment on the back of the device.
- Open the battery cover.
- Insert one AAA battery, ensuring the correct polarity (+/-).
- Close the battery cover securely.
2. Placement Options
The device offers versatile placement options:
- Tabletop: Use the integrated stand to place the device on any flat surface.
- Wall Mount: Hang the device using the keyhole slot on the back.
- Magnetic Attachment: The built-in magnet allows attachment to metal surfaces like refrigerators.
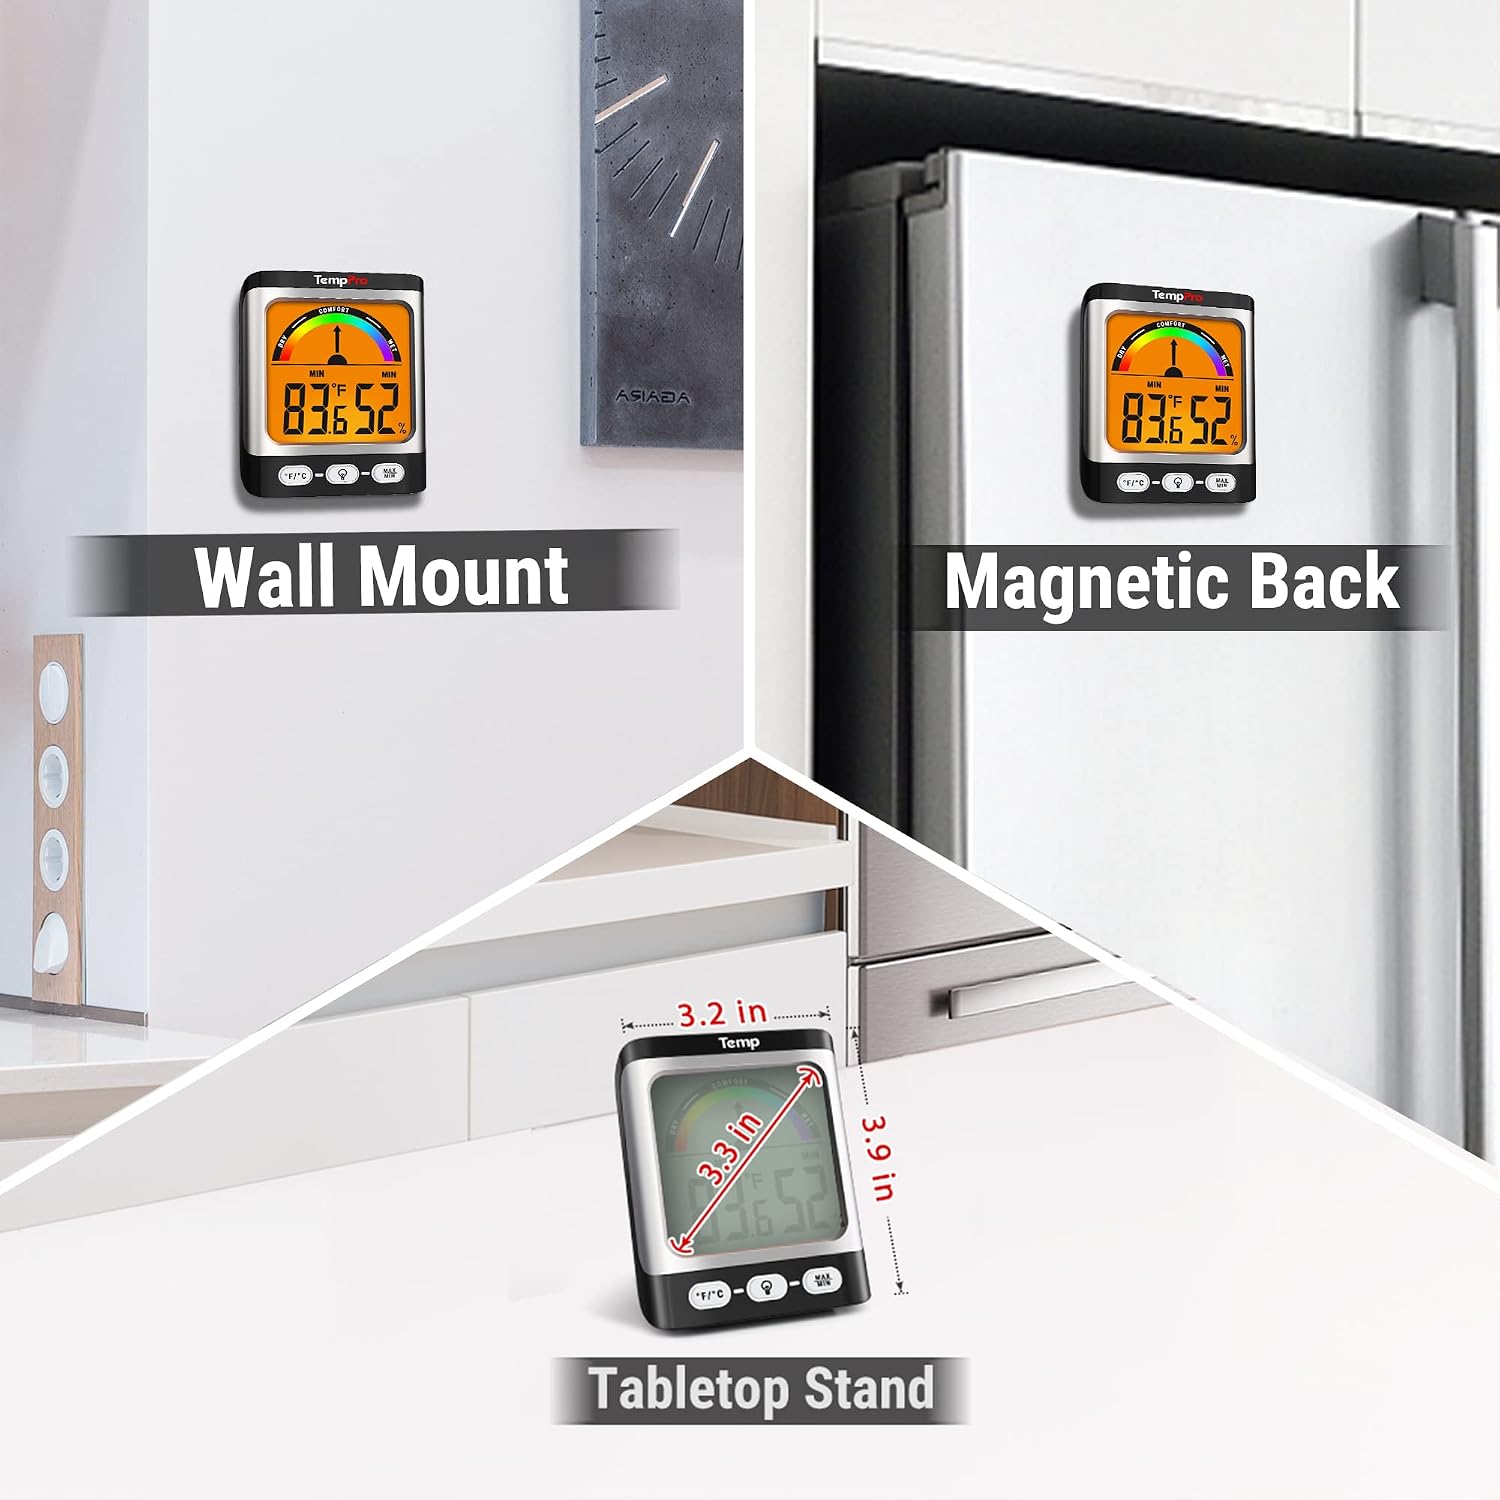
Image: Demonstrates the various ways to place the TempPro A52, including wall mounting, magnetic attachment, and using the tabletop stand.
Operating Instructions
1. Display and Controls
The large LCD screen displays current temperature and humidity. The device features three front-facing buttons:
- °F/°C Button: Press to switch between Fahrenheit and Celsius temperature units.
- Light Button: Press to activate the orange backlight for approximately 10 seconds.
- MAX/MIN Button: Press to view the maximum and minimum temperature and humidity records.

Image: Detailed view of the TempPro A52's 3.3-inch backlit LCD display and its control buttons for unit switching, backlight, and max/min records.
2. Air Comfort Indicator
The device includes a colored comfort level indicator with an arrow, providing a quick visual reference for indoor conditions:
- DRY: Humidity below 30%
- COMFORT: Humidity between 30% and 60%
- WET: Humidity above 60%

Image: Explanation of the colored comfort levels (Dry, Comfort, Wet) and their corresponding humidity ranges displayed on the TempPro A52.
3. Max/Min Records
To view the maximum and minimum temperature and humidity recorded over the past 24 hours, press the MAX/MIN button. Pressing it again will cycle through the maximum, minimum, and current readings. These records reset automatically every 24 hours.

Image: Visual representation of how the TempPro A52 tracks and displays maximum and minimum temperature and humidity records over 24 hours.
Maintenance
1. Battery Replacement
When the display dims or the device stops functioning, it is time to replace the AAA battery. Follow the battery installation steps outlined in the Setup section.
2. Cleaning
Wipe the device with a soft, dry cloth. Do not use abrasive cleaners or immerse the device in water.
Troubleshooting
- No Display or Dim Display: Check battery polarity. Replace the AAA battery if necessary.
- Inaccurate Readings: Ensure the device is placed in a stable environment, away from direct sunlight, heat sources, or strong drafts. Allow 15-30 minutes for readings to stabilize after initial setup or relocation.
- Backlight Not Working: Replace the battery. If the issue persists, contact customer support.
Specifications
| Feature | Detail |
|---|---|
| Model Number | A52 |
| Indoor Temperature Range | -5°F ~ 154°F (-20°C ~ 70°C) |
| Humidity Range | 10% to 99% RH |
| Temperature Tolerance | ±2°F (±1.1°C) |
| Humidity Tolerance | ±2-3% RH |
| Temperature Unit | °F / °C (Selectable) |
| Backlight Function | Orange backlight (approx. 10 seconds) |
| Comfort Level Indicator | 7 levels (Dry, Comfort, Wet) |
| Power Source | 1 x AAA Battery (Included) |
| Product Dimensions | 8.13 x 1.85 x 9.88 cm; 118 grams |
| Mounting Type | Tabletop, Wall Mount, Magnetic |
| Color | Black |

Image: Multiple TempPro A52 units displaying similar readings, indicating the device's accuracy and consistency.
Warranty and Support
For warranty information or technical support, please refer to the contact details provided with your purchase or visit the official TempPro website. Keep your purchase receipt for warranty claims.


