1. Introduction
Thank you for purchasing the MAXDONE A4 Laminator. This device is designed to protect your documents and photos from wear, tear, and moisture using both hot and cold lamination processes. Please read this manual carefully before operating the laminator to ensure safe and efficient use. Keep this manual for future reference.
2. Safety Instructions
- Always connect the laminator to a grounded power outlet.
- Do not operate the laminator with wet hands or near water.
- Keep children and pets away from the laminator during operation.
- Do not insert objects other than laminating pouches into the machine.
- Unplug the laminator when not in use or before cleaning.
- Ensure proper ventilation around the machine during use.
- Do not attempt to open or repair the laminator yourself. Contact qualified service personnel.
- Avoid laminating heat-sensitive materials in hot lamination mode.
3. Package Contents
Please check the package for the following items:
- MAXDONE A4 Laminator (Model FN333)
- Power Cord
- 10 Laminating Pouches (various sizes: A4, A5, A6)
- Paper Cutter
- Corner Rounder
- User Manual
4. Product Overview
Familiarize yourself with the components of your laminator:
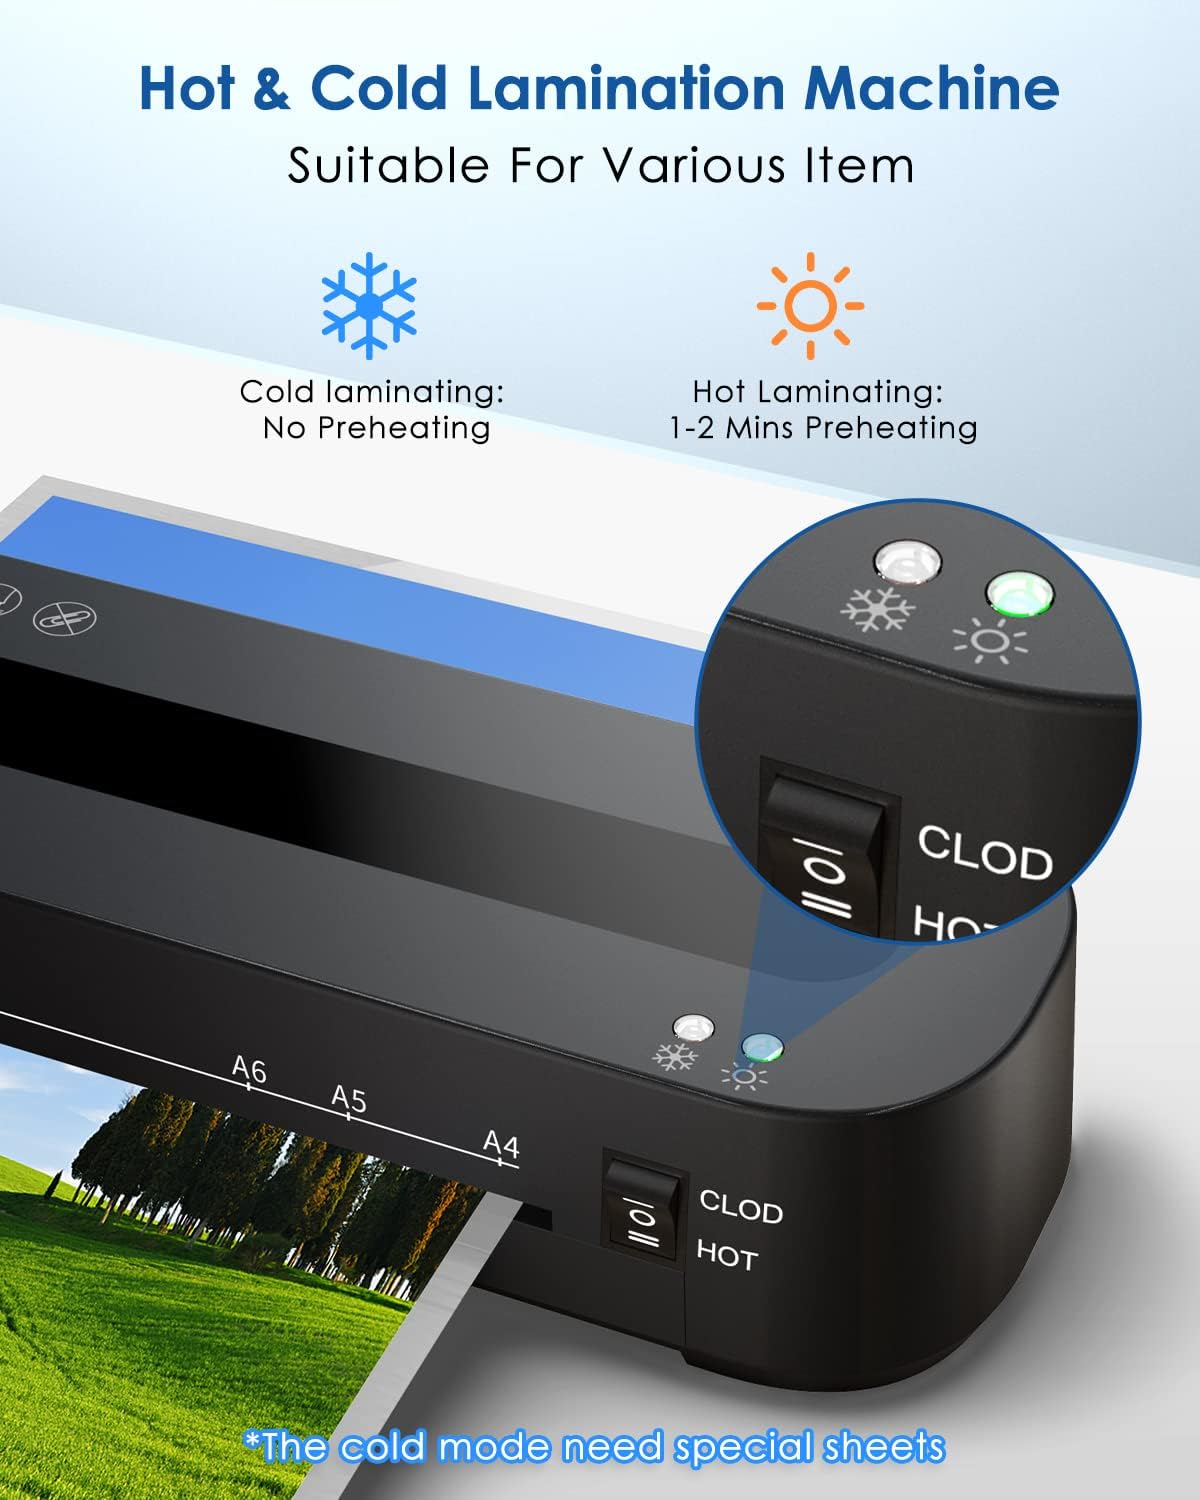
Image: Control panel showing the 'CLOD' (Cold) and 'HOT' mode switch, and indicator lights for power and readiness.

Image: Side view of the laminator highlighting the 'ABS' button for jam release.
- Power Switch: Turns the laminator on and off.
- Mode Switch (CLOD/HOT): Selects between cold lamination and hot lamination modes.
- Indicator Lights: Show power status and readiness for lamination (green for ready).
- Entry Slot: Where laminating pouches are inserted.
- Exit Slot: Where laminated documents emerge.
- ABS Button: Used to release jammed documents.
5. Setup
- Unpack the laminator and all accessories.
- Place the laminator on a stable, flat surface with adequate space for document entry and exit.
- Ensure the power switch is in the 'OFF' position.
- Plug the power cord into the laminator and then into a suitable electrical outlet.
6. Operating Instructions
6.1 Hot Lamination

Image: Visual guide for hot lamination steps, including turning on, waiting for green light, inserting pouch, and switching off.
- Turn on the laminator using the power switch.
- Switch the mode selector to 'HOT'. The red indicator light will illuminate.
- Wait approximately 1-2 minutes for the laminator to preheat. The green 'Ready' indicator light will turn on when the machine is ready for use.
- Place your document inside a laminating pouch, ensuring it is centered and there is an even border around the document.
- Insert the sealed edge of the laminating pouch squarely into the entry slot. The laminator will automatically feed the pouch through.
- Once the laminated document exits the machine, place it on a flat surface to cool.
- After completing lamination, switch the mode selector to 'OFF' and unplug the device.
Note: This laminator supports pouch thicknesses between 80 and 125 microns.
6.2 Cold Lamination
Cold lamination does not require preheating. It uses pressure-sensitive pouches.
- Turn on the laminator using the power switch.
- Switch the mode selector to 'CLOD' (Cold).
- Place your document inside a special cold laminating pouch.
- Insert the sealed edge of the cold laminating pouch squarely into the entry slot.
- Once the laminated document exits the machine, it is ready for use.
- After completing lamination, switch the mode selector to 'OFF' and unplug the device.
6.3 Jam Release
In case of a paper jam:
- Immediately switch off the laminator.
- Press and hold the 'ABS' (Anti-Blocking System) button located on the side of the machine.
- Gently pull the jammed pouch out of the entry or exit slot.
- Release the 'ABS' button.
- Check the pouch for damage. If damaged, discard it.
7. Maintenance
- Cleaning: Ensure the laminator is unplugged and cool before cleaning. Wipe the exterior with a soft, dry cloth. Do not use abrasive cleaners or solvents.
- Roller Cleaning: Periodically run a folded sheet of paper through the laminator to clean the rollers of any adhesive residue.
- Storage: Store the laminator in a dry, dust-free environment when not in use.
8. Troubleshooting
| Problem | Possible Cause | Solution |
|---|---|---|
| Laminator does not turn on. | No power supply. | Check power cord connection and wall outlet. |
| Laminator not heating up (Hot mode). | Incorrect mode selected or insufficient warm-up time. | Ensure 'HOT' mode is selected and wait for the green 'Ready' light. |
| Document jams. | Pouch inserted incorrectly or too quickly; pouch too thick. | Press the 'ABS' button to release the jam. Ensure pouches are inserted straight and within recommended thickness (80-125 microns). |
| Poor lamination quality (bubbles, cloudy). | Insufficient heat or incorrect pouch thickness. | Ensure laminator is fully preheated. Use appropriate pouch thickness for hot lamination. |
| Laminated document is wavy. | Pouch too thin for temperature or document not flat. | Use a slightly thicker pouch or ensure the document is completely flat before lamination. |
9. Specifications
| Feature | Specification |
|---|---|
| Brand | MAXDONE |
| Model Number | FN333 |
| Lamination Type | Hot & Cold |
| Max. Laminating Width | 210 mm (A4) |
| Supported Pouch Thickness | 80-125 Microns |
| Warm-up Time | 1-2 Minutes |
| Laminating Speed | 1.05 feet per minute (approx. 32 cm/min) |
| Number of Rollers | 2 |
| Product Dimensions (L x W x H) | 32 x 10 x 6.2 cm |
| Product Weight | 900 g |
| Color | Black |
10. Warranty and Support
This product comes with a standard manufacturer's warranty. For specific warranty details, please refer to the documentation included with your purchase or contact the seller directly. If you encounter any issues or require technical assistance, please reach out to MAXDONE customer support or your retailer.