NewAir NAC10KWH01
Newair Portable Air Conditioner User Manual
Model: NAC10KWH01
1. Introduction
Thank you for choosing the Newair Portable Air Conditioner. This manual provides important information regarding the safe operation, installation, maintenance, and troubleshooting of your appliance. Please read this manual thoroughly before use and keep it for future reference.
Product Overview
The Newair Compact Portable Air Conditioner (Model NAC10KWH01) is designed to provide quick and easy cooling for your space. Its compact and lightweight design makes it suitable for various rooms, and the self-evaporative system enhances efficiency by reducing the need for frequent water tank emptying.
Key features include:
- Compact, lightweight design for easy storage and portability.
- Self-evaporative system for improved efficiency and reduced water drainage.
- Fast and temporary installation with an included window venting kit.
- Energy-efficient modes including fan-only and dehumidifying.
- Programmable timer, adjustable thermostat, and multiple fan speeds for customized comfort.
2. Safety Information
IMPORTANT SAFETY INSTRUCTIONS: Always follow basic safety precautions when using electrical appliances to reduce the risk of fire, electric shock, and injury to persons.
- Read all instructions before using this appliance.
- This appliance operates on 110 Volts. Ensure the power source matches the appliance's requirements.
- Do not operate the unit with a damaged cord or plug. If the cord or plug is damaged, contact customer support.
- Do not block air outlets or inlets. Maintain adequate clearance around the unit for proper airflow.
- Do not insert fingers or foreign objects into the air inlet/outlet.
- Always unplug the unit before cleaning or servicing.
- Do not use the appliance near water or in excessively humid environments.
- Keep the appliance away from heat sources and direct sunlight.
- This appliance is for indoor use only.
- Supervise children and pets when the appliance is in use.
3. Product Components and Controls
Unit Diagram

Figure 3.1: Front view of the Newair Portable Air Conditioner.
This image shows the front of the Newair portable air conditioner, highlighting its compact, white design with the Newair logo and the adjustable air vents. The unit is on wheels for easy mobility.

Figure 3.2: Back view of the Newair Portable Air Conditioner.
This image displays the rear of the portable air conditioner, showing the exhaust hose connection point, power cord, and air intake grilles. It also indicates the location of the drain holes for excess humidity.
Control Panel and Remote Control

Figure 3.3: Top control panel of the unit.
This image illustrates the top control panel of the Newair portable air conditioner, featuring buttons for power, mode selection (Cool, Fan, Dehumidify), fan speed adjustment, timer settings, and temperature control (Up/Down arrows). A digital display shows the current temperature or timer setting.
The unit can be operated using the control panel on top of the unit or the included remote control. The remote allows for convenient adjustment of settings from a distance.
- Power Button: Turns the unit on or off.
- Mode Button: Cycles through cooling, fan, and dehumidifying modes.
- Speed Button: Adjusts fan speed (e.g., Low, Medium, High).
- Timer Button: Sets the auto-on or auto-off timer.
- Up/Down Arrows: Adjusts temperature settings or timer duration.
- Sleep Mode: Activates a quiet, energy-saving mode for nighttime operation.
4. Setup and Installation
The Newair Portable Air Conditioner is designed for fast and temporary installation. It comes with a window venting kit for easy setup.
Unpacking
- Carefully remove the unit from its packaging.
- Check for any shipping damage. If damaged, do not operate and contact customer support.
- Keep all packaging materials for future storage or if the unit needs to be returned.
Window Venting Kit Installation

Figure 4.1: Components of the window venting kit.
This image displays the window venting kit components, including the adjustable window plate and the exhaust hose, which are essential for directing hot air outside.
- Attach the Exhaust Hose: Connect one end of the exhaust hose to the air outlet on the back of the portable air conditioner. Ensure it is securely fastened.
- Prepare the Window Kit: Adjust the window plate to fit your window opening. The kit is designed for sliding windows.
- Install Window Kit: Place the adjusted window plate into the window opening and secure it. Ensure there are no gaps for air leakage.
- Connect Hose to Window Kit: Attach the other end of the exhaust hose to the opening in the window plate.
- Position the Unit: Place the portable air conditioner on a flat, stable surface, ensuring it is close enough to the window for the exhaust hose to reach without kinks or excessive bends. Maintain at least 12 inches of clearance from walls and furniture for optimal airflow.
- Plug In: Plug the power cord into a grounded 110V electrical outlet.
The installation process is quick and does not require drilling or permanent modifications to your window casing.
5. Operating Instructions
Your Newair Portable Air Conditioner offers several operating modes to suit your comfort needs.
Turning On/Off
- Press the Power button on the control panel or remote control to turn the unit on or off.
Mode Selection
Press the Mode button repeatedly to cycle through the available modes:
- Cool Mode: Provides cooling by expelling hot air through the exhaust hose. Use the Up/Down arrows to set your desired temperature. The recommended temperature range is 61-89°F.
- Fan Mode: Circulates air without cooling. This mode is energy-efficient for cooler days.
- Dehumidifying Mode: Removes excess moisture from the air. The self-evaporative system minimizes the need for manual draining, but in very humid conditions, you may need to drain the unit (refer to Maintenance section).
Fan Speed Adjustment
In Cool or Fan mode, press the Speed button to select your desired fan speed (e.g., Low, Medium, High).
Timer Function
The 24-hour timer allows you to program the unit to turn on or off automatically.
- Press the Timer button.
- Use the Up/Down arrows to set the desired time in hours.
- The timer will activate after a few seconds of inactivity.
Sleep Mode
Activate Sleep Mode for quieter operation and energy saving during nighttime. The unit will adjust temperature and fan speed automatically to maintain comfort while minimizing noise.
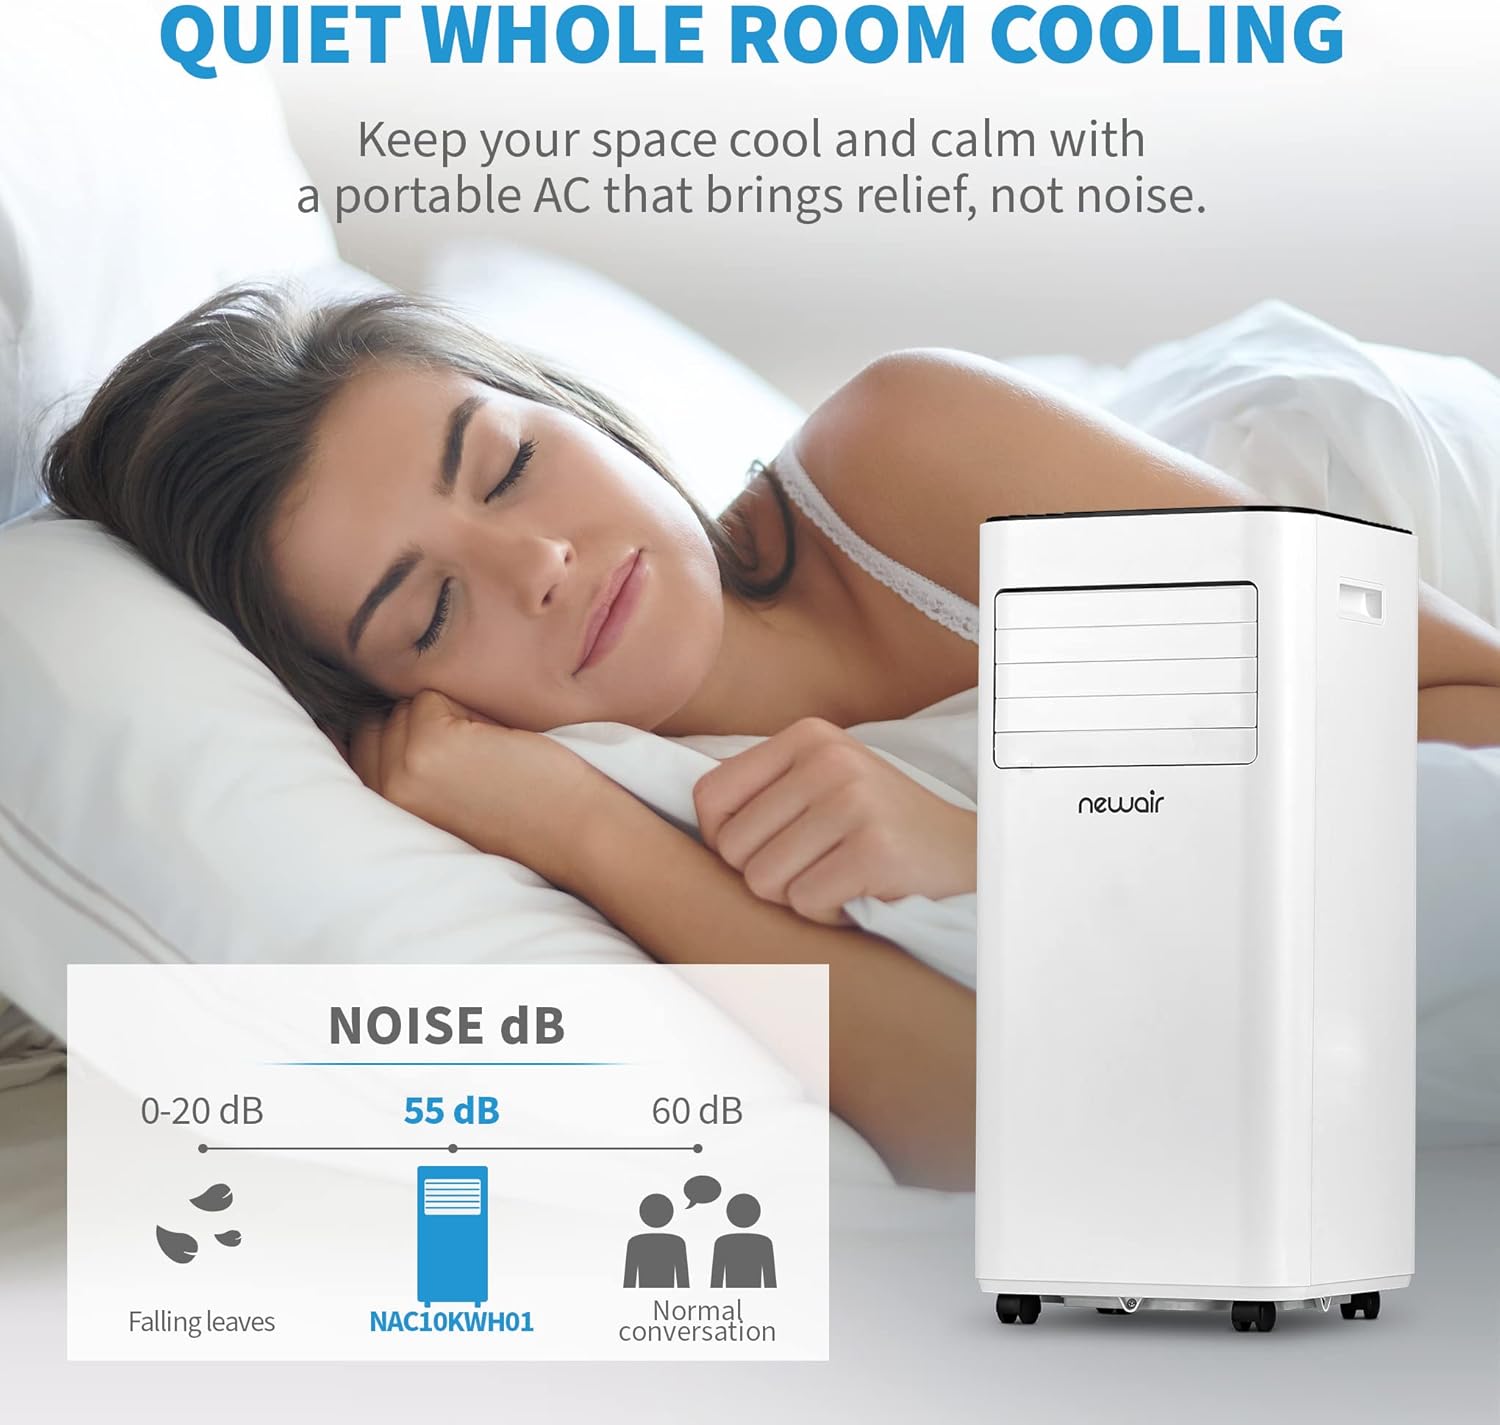
Figure 5.1: Quiet operation of the unit.
This image illustrates the quiet operation of the Newair portable air conditioner, indicating a noise level of 55 dB, comparable to a normal conversation, making it suitable for use in bedrooms or quiet environments.
6. Maintenance
Regular maintenance ensures optimal performance and extends the lifespan of your portable air conditioner.
Cleaning the Air Filter
The air filter should be cleaned every two weeks or more frequently depending on usage and air quality.
- Unplug the unit from the power outlet.
- Locate and remove the air filter (usually at the back or side of the unit).
- Clean the filter with a vacuum cleaner or wash it with warm, soapy water. Rinse thoroughly.
- Allow the filter to air dry completely before reinserting it into the unit. Do not use the unit without a filter.
Draining Water
The self-evaporative system significantly reduces the need for manual draining. However, in highly humid environments, the internal water tank may fill up. The unit will typically stop operating and display an error code when the tank is full.

Figure 6.1: Location of drain holes.
This image highlights the two drain holes located at the bottom rear of the unit, which are used for manual water drainage in highly humid conditions.
- Unplug the unit.
- Place a shallow pan or tray under the drain outlet(s) at the bottom rear of the unit.
- Remove the drain plug(s) to allow water to flow out.
- Once drained, replace the drain plug(s) securely.
Storage
When storing the unit for an extended period:
- Ensure the unit is completely drained of water.
- Clean the air filter.
- Unplug the power cord and coil it neatly.
- Store the unit in a cool, dry place, preferably in its original packaging, to protect it from dust and damage.
7. Troubleshooting
Before contacting customer support, please refer to the following troubleshooting guide for common issues.
| Problem | Possible Cause | Solution |
|---|---|---|
| Unit does not turn on. | No power; Power cord not plugged in; Circuit breaker tripped; Full water tank. | Ensure unit is plugged into a working outlet; Check circuit breaker; Drain water tank if full. |
| Unit does not cool effectively. | Air filter dirty; Room too large; Doors/windows open; Exhaust hose not properly installed or kinked; Temperature setting too high. | Clean air filter; Ensure room size is within 270 sq ft; Close all doors/windows; Check exhaust hose for proper installation and kinks; Lower temperature setting. |
| Unit is noisy. | Unit not on a level surface; Obstruction in fan. | Place unit on a flat, stable surface; Check for and remove any obstructions. |
| Water leaks from unit. | Drain plug not securely closed; Unit tilted; Water tank full. | Ensure drain plug is secure; Place unit on a level surface; Drain water tank. |
8. Specifications
| Feature | Detail |
|---|---|
| Model Number | NAC10KWH01 |
| Cooling Capacity | 10,000 BTU (ASHRAE) |
| Coverage Area | Up to 270 sq. ft. |
| Power Input | 110 Volts, 950 Watts |
| Item Weight | 51.8 pounds |
| Product Dimensions (D x W x H) | 12.2 x 12.4 x 27.5 inches |
| Sound Level | 55 dB |
| Color | White |
| Special Features | Self-Evaporative System, Remote Control, Timer, Dehumidifying Mode, Fan Mode, Sleep Mode |

Figure 8.1: Dimensions of the unit.
This diagram provides the precise dimensions of the Newair portable air conditioner: 12.20 inches deep, 12.40 inches wide, and 27.50 inches high, shown relative to a human figure for scale.
9. Warranty and Customer Support
Warranty Information
This Newair Portable Air Conditioner comes with a 1 Year Warranty from the date of purchase. This warranty covers defects in materials and workmanship under normal use.
For full warranty terms and conditions, please refer to the warranty card included with your product or visit the official Newair website.
Customer Support
If you have any questions, require assistance, or need to claim warranty service, please contact Newair customer support. Have your model number (NAC10KWH01) and purchase date ready when contacting support.
For more information and support, you can visit the official Newair store on Amazon: NewAir Store
Related Documents - NAC10KWH01
 |
Newair NAC08KWH01 Portable Air Conditioner Owner's Manual This owner's manual provides instructions for the Newair NAC08KWH01 Portable Air Conditioner, covering setup, operation, maintenance, and safety information. It includes details on features, specifications, and troubleshooting. |
 |
Newair NEC1K6WH00 Air Cooler Owner's Manual Comprehensive owner's manual for the Newair NEC1K6WH00 Air Cooler, detailing specifications, safety instructions, operation, features, and maintenance. |
 |
NewAir NEC500SI00 Evaporative Air Cooler Owner's Manual This owner's manual provides instructions for operating, maintaining, and troubleshooting the NewAir NEC500SI00 Evaporative Air Cooler, a portable cooling solution for rooms up to 250 sq. ft. |
 |
NewAir AF-1000 Series Evaporative Cooler Owner's Manual Official owner's manual for the NewAir AF-1000 Series Evaporative Cooler. Find detailed instructions on setup, operation, maintenance, troubleshooting, and warranty information for your NewAir appliance. |
 |
NewAir NEC500WH00 Evaporative Air Cooler Owner's Manual This owner's manual provides detailed instructions for the NewAir NEC500WH00 Evaporative Air Cooler, covering setup, operation, maintenance, troubleshooting, and warranty information to ensure optimal performance and longevity. |
 |
Newair NGH1K6WH00 10,000W Hardwired Garage Heater Owner's Manual Detailed owner's manual for the Newair NGH1K6WH00 10,000-Watt Hardwired Garage Heater, covering installation, safety, operation, and maintenance for efficient garage heating. |
Ask a question about this manual
Ask about setup, troubleshooting, compatibility, parts, safety, or missing instructions. Manuals+ will review the question and use this page’s manual context to help answer it.