vidaXL 316388
vidaXL Garden Arch with Planters User Manual
Model: 316388
1. Product Overview
The vidaXL Garden Arch with Planters is a versatile and sturdy wooden structure designed to enhance your garden or outdoor space. It features an arched trellis for climbing plants and integrated planters at the base, making it ideal for creating a beautiful focal point, supporting plant growth, or serving as a decorative entrance.

Figure 1: The vidaXL Garden Arch with Planters, showcasing its full structure and integrated planter boxes.
2. Safety Information
Please read and understand all safety warnings before assembly and use.
- Always assemble the garden arch strictly according to the provided instructions to ensure structural integrity.
- Be aware of the weight of climbing plants, especially when wet, and ensure the structure is stable and securely anchored to prevent tipping.
- Keep children and pets away from the assembly area during installation.
- Do not expose the product to extreme weather conditions (e.g., strong winds, heavy snow) without proper reinforcement, as this may compromise its stability and lead to damage.
- Proposition 65 Warning: This product contains chemicals known to the state of California to cause cancer and reproductive harm. For more information, please visit www.P65Warnings.ca.gov.
3. Components and Parts List
Before beginning assembly, ensure all parts are present and undamaged. If any parts are missing or damaged, contact customer support immediately.
While a detailed parts list is typically included in the packaging, the main components of the vidaXL Garden Arch include:
- Arched top section (trellis)
- Vertical side trellis panels (2)
- Integrated planter boxes (2)
- Connecting hardware (screws, bolts, etc.)
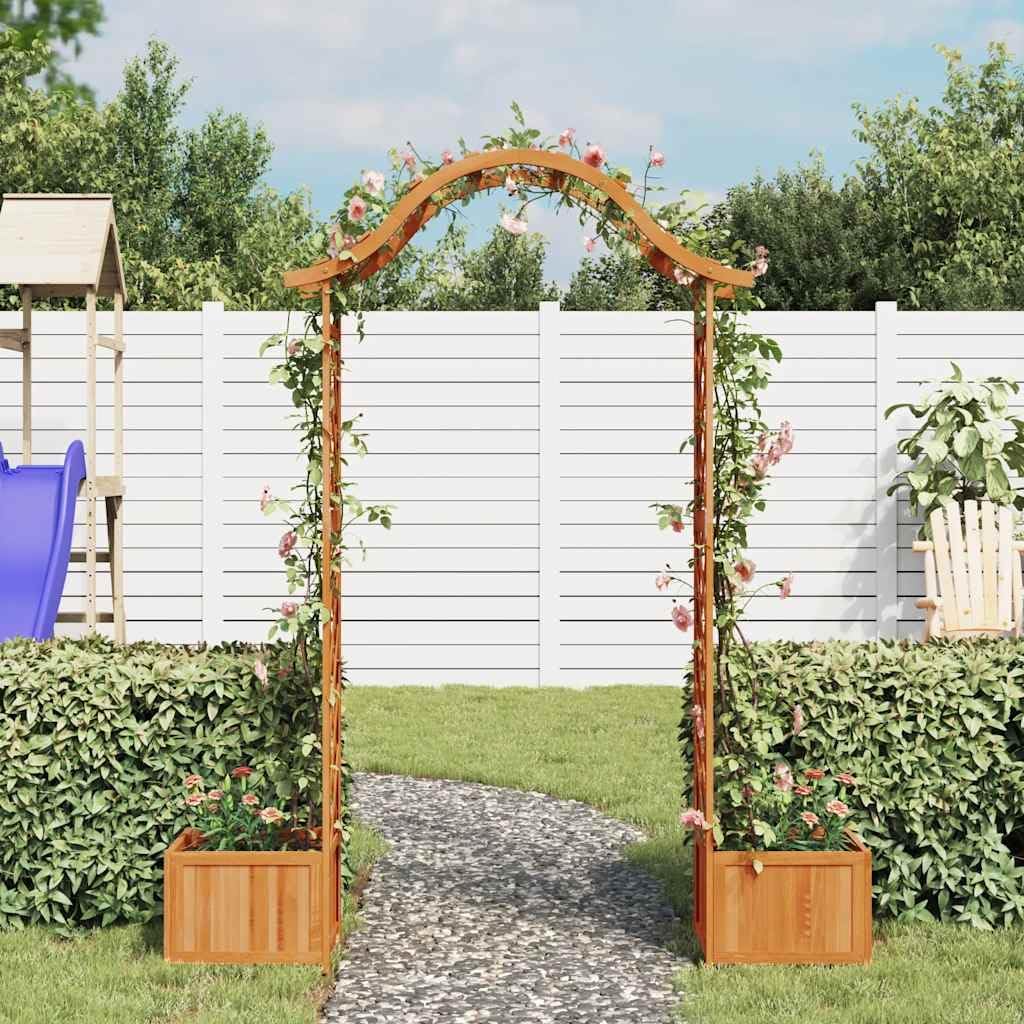
Figure 2: Close-up view of the side trellis panel and the top arch section, highlighting the wooden construction.

Figure 3: Interior view of one of the integrated planter boxes, showing the slatted base for drainage.
4. Setup and Assembly
Assembly of the vidaXL Garden Arch is designed to be straightforward. Follow the step-by-step instructions provided in your product packaging. The general steps are outlined below:
- Unpack and Identify Parts: Carefully unpack all components and lay them out. Refer to the included parts list to ensure everything is present.
- Assemble Planter Boxes: Begin by assembling the two integrated planter boxes. Ensure all panels are securely fastened.
- Attach Side Trellis Panels: Connect the vertical side trellis panels to the assembled planter boxes. Pay attention to the orientation of the panels.
- Install Arched Top Section: Carefully lift and attach the arched top section to the top of the vertical trellis panels. This step may require two people for ease and safety.
- Secure All Connections: Double-check all screws, bolts, and fasteners to ensure they are tightened securely. Do not overtighten to avoid damaging the wood.
- Positioning: Choose a level and stable location for your garden arch. Consider anchoring it to the ground, especially in areas prone to strong winds, to enhance stability.
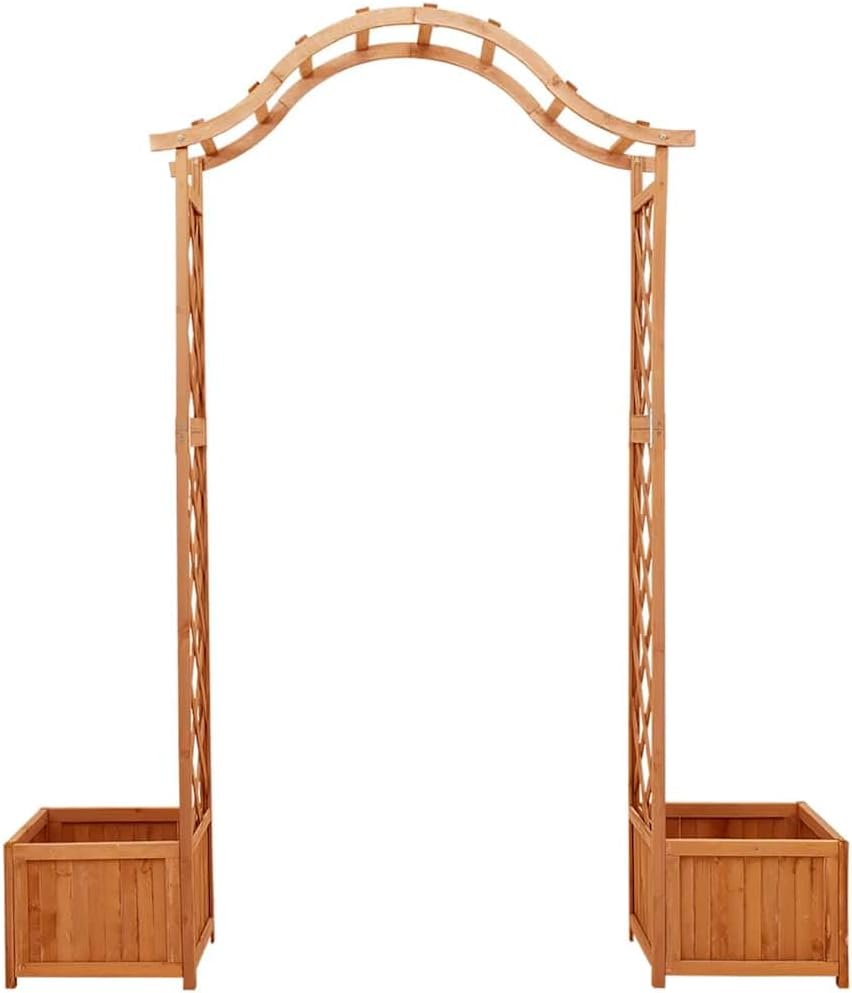
Figure 4: Dimensional diagram of the garden arch, providing measurements for width, height, and planter box size, which can aid in planning placement.
5. Operating and Usage
The vidaXL Garden Arch is designed for various decorative and functional uses in your garden:
- Climbing Plant Support: Utilize the trellis structure to support climbing plants such as roses, clematis, ivy, or grapevines. Guide young shoots through the lattice as they grow.
- Integrated Planters: The two side planters are perfect for planting flowers, herbs, or small shrubs. Ensure adequate drainage by adding a layer of gravel or broken pottery at the bottom before filling with soil.
- Decorative Feature: The arch can serve as a beautiful entrance to a garden path, a focal point in a flower bed, or a backdrop for outdoor events.
- Customization: Decorate the arch with string lights, fabric, or additional floral arrangements for special occasions like weddings or parties.

Figure 5: The garden arch in use, adorned with climbing roses and flowers in the integrated planters, demonstrating its aesthetic appeal.
6. Maintenance
Proper maintenance will extend the life and appearance of your wooden garden arch:
- Regular Cleaning: Clean the wood periodically with a soft cloth and mild soap solution to remove dirt and grime. Rinse thoroughly and allow to air dry.
- Wood Treatment: As the arch is made of wood, it is susceptible to weathering. Consider applying a wood sealant, stain, or varnish annually to protect it from moisture, UV rays, and rot. The product has a lacquered finish, but additional treatment can enhance longevity.
- Check Fasteners: Periodically inspect all screws and connections to ensure they remain tight. Retighten as necessary.
- Drainage: Ensure the planter boxes have clear drainage to prevent water accumulation, which can lead to wood rot.
- Winter Storage/Protection: In regions with harsh winters, consider covering the arch or storing it indoors to protect it from extreme cold, snow, and ice.
7. Troubleshooting
Here are some common issues and their potential solutions:
| Problem | Possible Cause | Solution |
|---|---|---|
| Arch feels unstable or wobbly. | Loose fasteners; uneven ground; insufficient anchoring; strong winds. | Check and tighten all screws and bolts. Ensure the arch is placed on a level surface. Consider using ground anchors or weighting the planter boxes (e.g., with heavy pots or rocks) for added stability, especially in windy conditions. |
| Wood appears discolored or weathered. | Exposure to sun, rain, and humidity without adequate protection. | Clean the wood and apply a suitable outdoor wood sealant, stain, or varnish. Regular application is recommended. |
| Difficulty during assembly. | Incorrect part orientation; missing pre-drilled holes; stripped screws. | Refer to the assembly manual's diagrams. If holes are missing, carefully pre-drill small pilot holes. Use appropriate tools and avoid overtightening to prevent stripping screws. Contact customer support if parts are defective. |
8. Specifications
| Attribute | Detail |
|---|---|
| Brand | vidaXL |
| Model Number | 316388 |
| Color | Brown |
| Material | Wood (Fir Wood) |
| Product Dimensions (W x H) | 68.9" W x 80.3" H (175 cm W x 204 cm H) |
| Item Weight | 17.75 pounds (8.05 kg) |
| Style | Rustic |
| Finish Type | Lacquered |
| Shape | Elliptical Arch |
| Assembly Required | Yes |
9. Warranty and Support
For information regarding product warranty, returns, or technical support, please refer to the documentation included with your purchase or contact the retailer or manufacturer directly. You can visit the official vidaXL website or the retailer's customer service portal for assistance.
Manufacturer: Home Life Boutique
Brand Website: www.vidaxl.com (Note: This is a general placeholder, actual website may vary by region)
Ask a question about this manual
Ask about setup, troubleshooting, compatibility, parts, safety, or missing instructions. Manuals+ will review the question and use this page’s manual context to help answer it.