Introduction
This manual provides comprehensive instructions for the Philips Lighting Bliss LED Ceiling Fan Light, designed to combine customizable lighting with a gentle breeze. It features retractable transparent blades and three SceneSwitch light settings, all controllable via a remote. Please read this manual carefully before installation and use to ensure safe and optimal performance.
Safety Information
- Professional Installation: The fan must be installed by a qualified professional.
- Ceiling Compatibility: Not recommended for plaster ceilings.
- Blade Clearance: Blades must be installed at a minimum height of 2.3 meters (7.5 feet) from the floor.
- Wall Clearance: The outer edge of the fan blades must be at least 0.5 meters (1.6 feet) from any wall when deployed.
- Light Source: This product contains a light source classified E. Do not attempt to replace the LED light source yourself. Contact a qualified technician for service.
- Power Supply: Ensure the main power supply is disconnected before installation, maintenance, or cleaning.
Product Overview
The Philips Bliss LED Ceiling Fan Light integrates a powerful LED light with a quiet ceiling fan. Its unique design features blades that retract when the fan function is not in use, providing a sleek appearance.

Image: Packaging box of the Philips Bliss LED Ceiling Fan Light, showing the product and its key features.
Setup and Installation
Installation should be performed by a professional electrician. Follow these general guidelines:
- Unpack: Carefully remove all components from the packaging. Verify all parts are present according to the packing list.
- Mounting Bracket: Securely attach the mounting bracket to a suitable ceiling joist or support structure. Ensure the ceiling can support the fan's weight (7.2 kg).
- Wiring: Connect the electrical wiring according to local electrical codes and the provided wiring diagram. Ensure the power supply is OFF during this step.
- Assemble Fan Body: Attach the fan motor assembly to the mounting bracket.
- Blade Installation: The fan features retractable blades. Ensure they are correctly aligned and secured.
- Canopy Installation: Secure the canopy to cover the wiring and mounting bracket.
- Remote Control Setup: Insert the included Lithium metal battery into the remote control.
Important Dimensions for Installation:
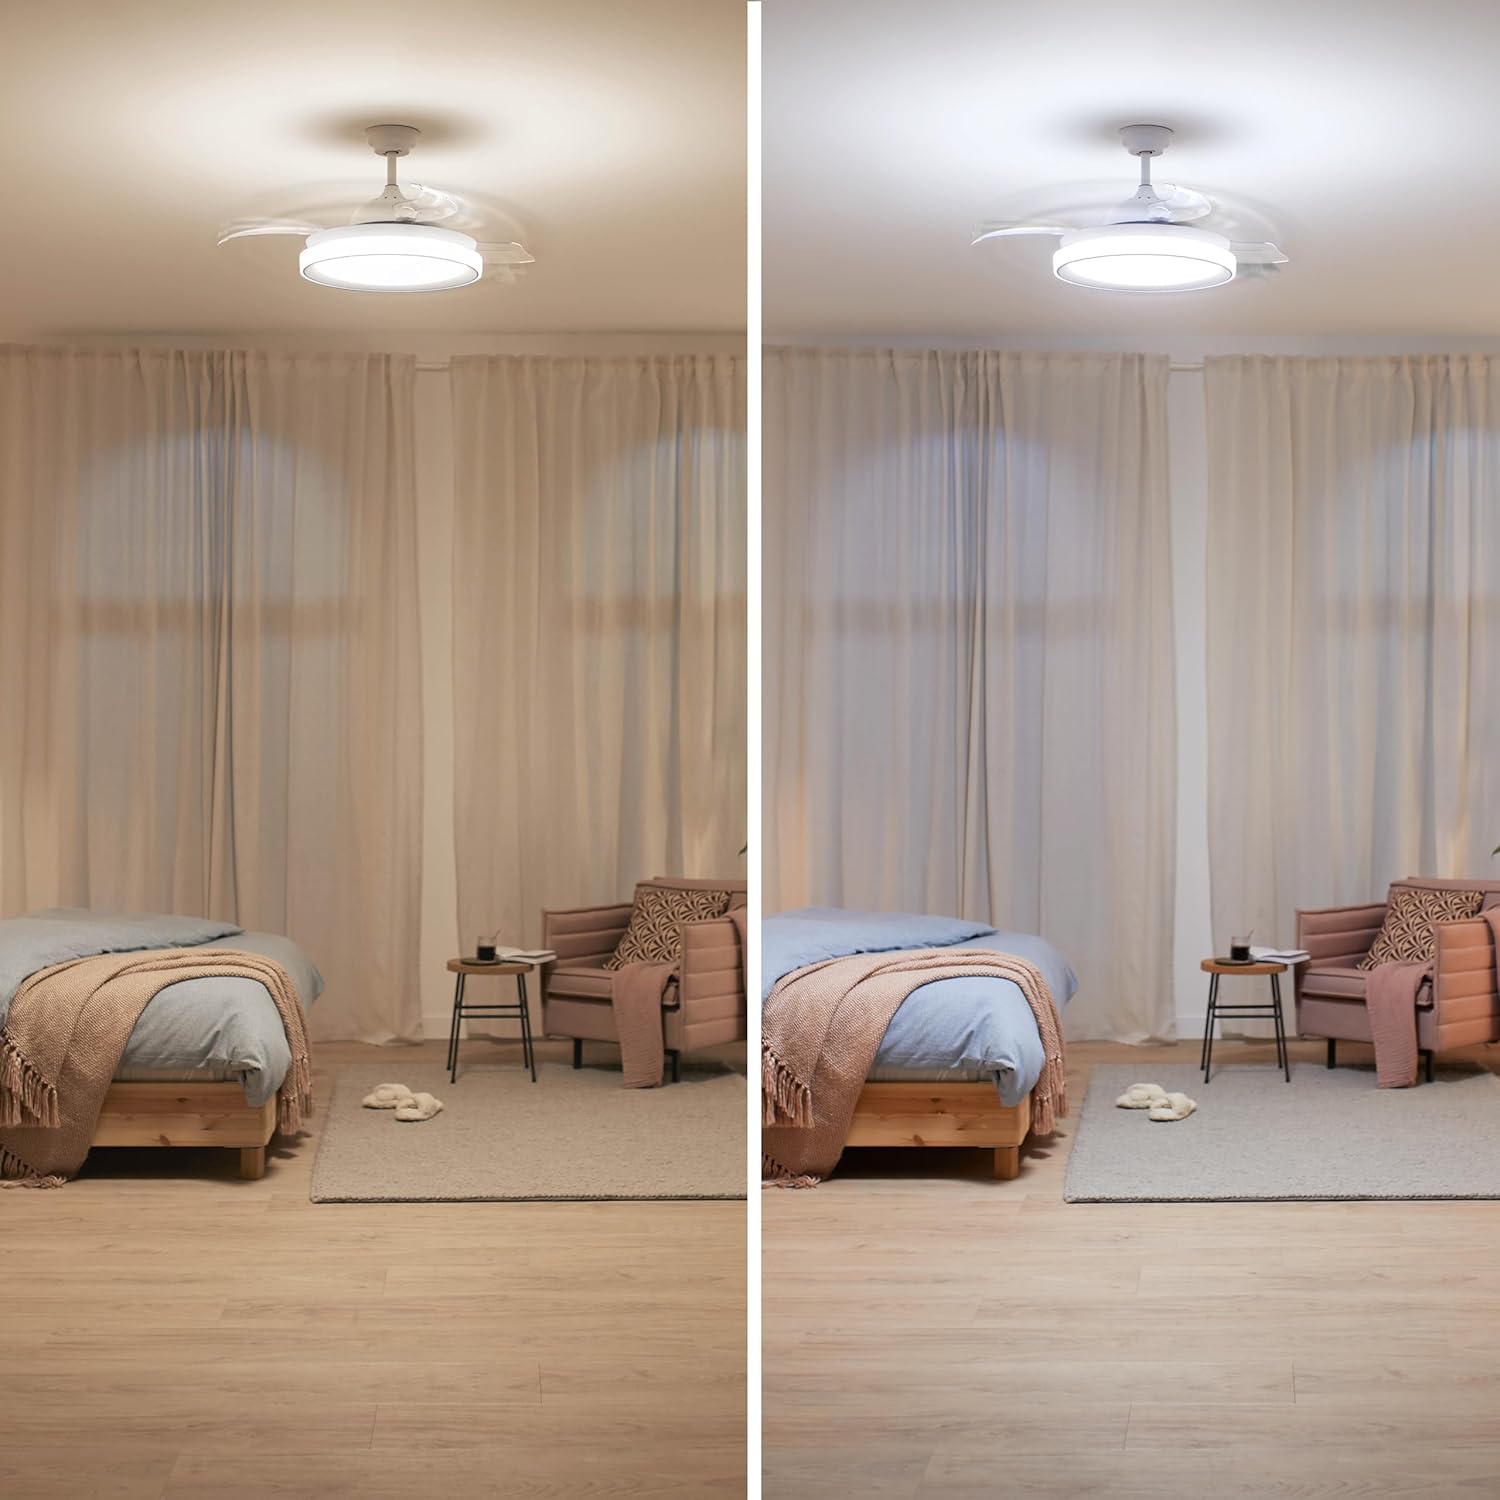
Image: Technical drawing illustrating the dimensions of the ceiling fan light. Overall diameter with blades deployed is approximately 1060mm, light fixture diameter is 483mm, and total height is 418mm.
Operating Instructions
The Philips Bliss LED Ceiling Fan Light is operated using the included remote control.

Image: A person using the remote control to operate the Philips Bliss LED Ceiling Fan Light, which is installed on the ceiling.
Light Functions (SceneSwitch Technology)
- The light offers three color temperatures: 2700K (Warm White), 5500K (Cool Daylight), and 4000K (Neutral White).
- Use the dedicated button on the remote to cycle through these settings.
- The Auto Memory feature allows the light to recall the last used color temperature when turned on again.
Fan Functions
- Power On/Off: Use the fan power button on the remote to activate or deactivate the fan. The blades will extend when the fan is on and retract when off.
- Speed Control: Adjust the fan speed using the speed control buttons on the remote. The silent DC motor operates between 36-42 dB.
- Summer/Winter Mode: This feature allows the blades to rotate in reverse, optimizing air distribution for both cooling in summer and circulating warm air in winter. Refer to the remote control diagram for the specific button.

Image: A living room setting demonstrating the Philips Bliss LED Ceiling Fan Light with two different light color temperatures: warm white on the left and cool daylight on the right.

Image: A bedroom setting demonstrating the Philips Bliss LED Ceiling Fan Light with two different light color temperatures: warm white on the left and cool daylight on the right.
Maintenance
Regular maintenance ensures the longevity and optimal performance of your ceiling fan light.
- Cleaning: Disconnect power before cleaning. Use a soft, damp cloth to wipe the fan body and blades. Do not use abrasive cleaners or solvents.
- Blade Care: The transparent blades are designed to retract. Avoid obstructing their movement.
- Light Source: The LED light source is integrated and not user-replaceable. If the light fails, contact a qualified service technician.
- Motor: The DC motor is designed for long-term, maintenance-free operation. No lubrication is required.
Troubleshooting
| Problem | Possible Cause | Solution |
|---|---|---|
| Fan does not turn on. | No power supply; Remote control battery depleted; Incorrect wiring. | Check circuit breaker. Replace remote battery. Verify wiring connections (professional assistance recommended). |
| Light does not turn on. | No power supply; Remote control battery depleted; LED failure. | Check circuit breaker. Replace remote battery. Contact service technician for LED failure. |
| Fan makes unusual noise. | Loose screws; Obstruction; Motor issue. | Ensure all mounting screws are tight. Check for any obstructions around blades. If noise persists, contact service. |
| Remote control not working. | Battery depleted; Remote out of range; Interference. | Replace remote battery. Ensure you are within range. Remove any potential sources of interference. |
Specifications
| Feature | Detail |
|---|---|
| Brand | PHILIPS |
| Model Number | 929003184401 |
| Manufacturer | SIGNIFY |
| Dimensions (L x W x H) | 51.51 x 51.51 x 41.8 cm (20.28 x 20.28 x 16.46 inches) |
| Weight | 7.2 Kilograms (15.87 lbs) |
| Light Power | 28 Watts |
| Fan Power | 35 Watts |
| Luminous Flux | 4500 lm |
| Voltage | 120 Volts |
| Light Type | Integrated LED |
| Color Temperature | 2700K, 4000K, 5500K (SceneSwitch) |
| Material | Stainless Steel, Aluminum, Glass |
| Color | White |
| Remote Battery | 1 Lithium metal (included) |
| Installation Type | Ceiling Mount |
| Special Features | Energy Efficient, Retractable Blades, Silent DC Motor, SceneSwitch Technology, Summer/Winter Mode |
Warranty and Support
For warranty information and technical support, please refer to the official Philips Lighting website or contact their customer service. Keep your purchase receipt as proof of purchase.
Spare Parts: Information regarding spare parts availability is not provided.
Software Updates: Information regarding guaranteed software updates is not provided.
Official Product Videos
No official product videos from the seller are available for this product at this time.


