
Introduction
This manual provides instructions for the assembly, operation, and maintenance of your LOYALHEARTDY Black 2-Tier Adjustable Floor-to-Ceiling Clothing Rack. Please read these instructions carefully before use to ensure proper installation and safe operation. This rack is designed to provide adjustable and heavy-duty storage for garments in various spaces.
Safety Information
- Ensure all components are securely fastened before loading clothes onto the rack.
- Do not exceed the maximum total load capacity of 260 lbs (120 kg). Each individual clothing bar has a maximum load capacity of 130 lbs (59 kg).
- Install the rack on stable, flat surfaces. Avoid uneven floors or ceilings to prevent instability.
- Keep children away from the assembly area during installation to prevent accidents.
- Verify that the ceiling and floor surfaces are suitable for pressure-mounted installation.
Package Contents
Please check that all the following components are present before beginning assembly:
- Adjustable Vertical Poles (Steel)
- Adjustable Horizontal Hanging Rods (Steel)
- Fixed Clamps (PP Material)
- Pole Bases with Non-Slip Rubber Caps (PP Material)
- Hanging Hooks (PP Material)
- 2 Clothes Hangers (Accessories)
Setup and Assembly
No tools are required for the assembly of this clothing rack.
- Unpack Components: Carefully unpack all parts and verify them against the package contents list.
- Assemble Vertical Poles: Connect the sections of the vertical poles. Ensure that the adjustable pipe section is positioned at the top, with its smaller end facing towards the ceiling. The built-in spring mechanism within the pole assists with secure ceiling contact.
- Position Vertical Poles: Place the non-slip rubber caps of the pole bases firmly on the floor. Extend the top section of each vertical pole until it makes secure, firm contact with the ceiling. The spring will provide tension to hold the pole in place.
- Install Horizontal Bars: Attach the fixed clamps to the vertical poles at your desired heights for the horizontal hanging rods. When installing the horizontal bars, ensure each bar uses the correct pair of holders/brackets: one larger bracket for the wider end of the bar and one smaller bracket for the narrower end.
- Adjust Length and Height: The horizontal bars can be adjusted in length from 27.5 to 43.3 inches. The vertical poles can be adjusted in height from 43.3 to 120 inches. Make these adjustments as needed to fit your space.
- Secure All Connections: Double-check that all clamps, pole sections, and horizontal bar connections are tightened and secure before hanging any garments.

Image: Fully assembled clothing rack in a room setting.

Image: Dimensions diagram illustrating the adjustable height and length ranges.
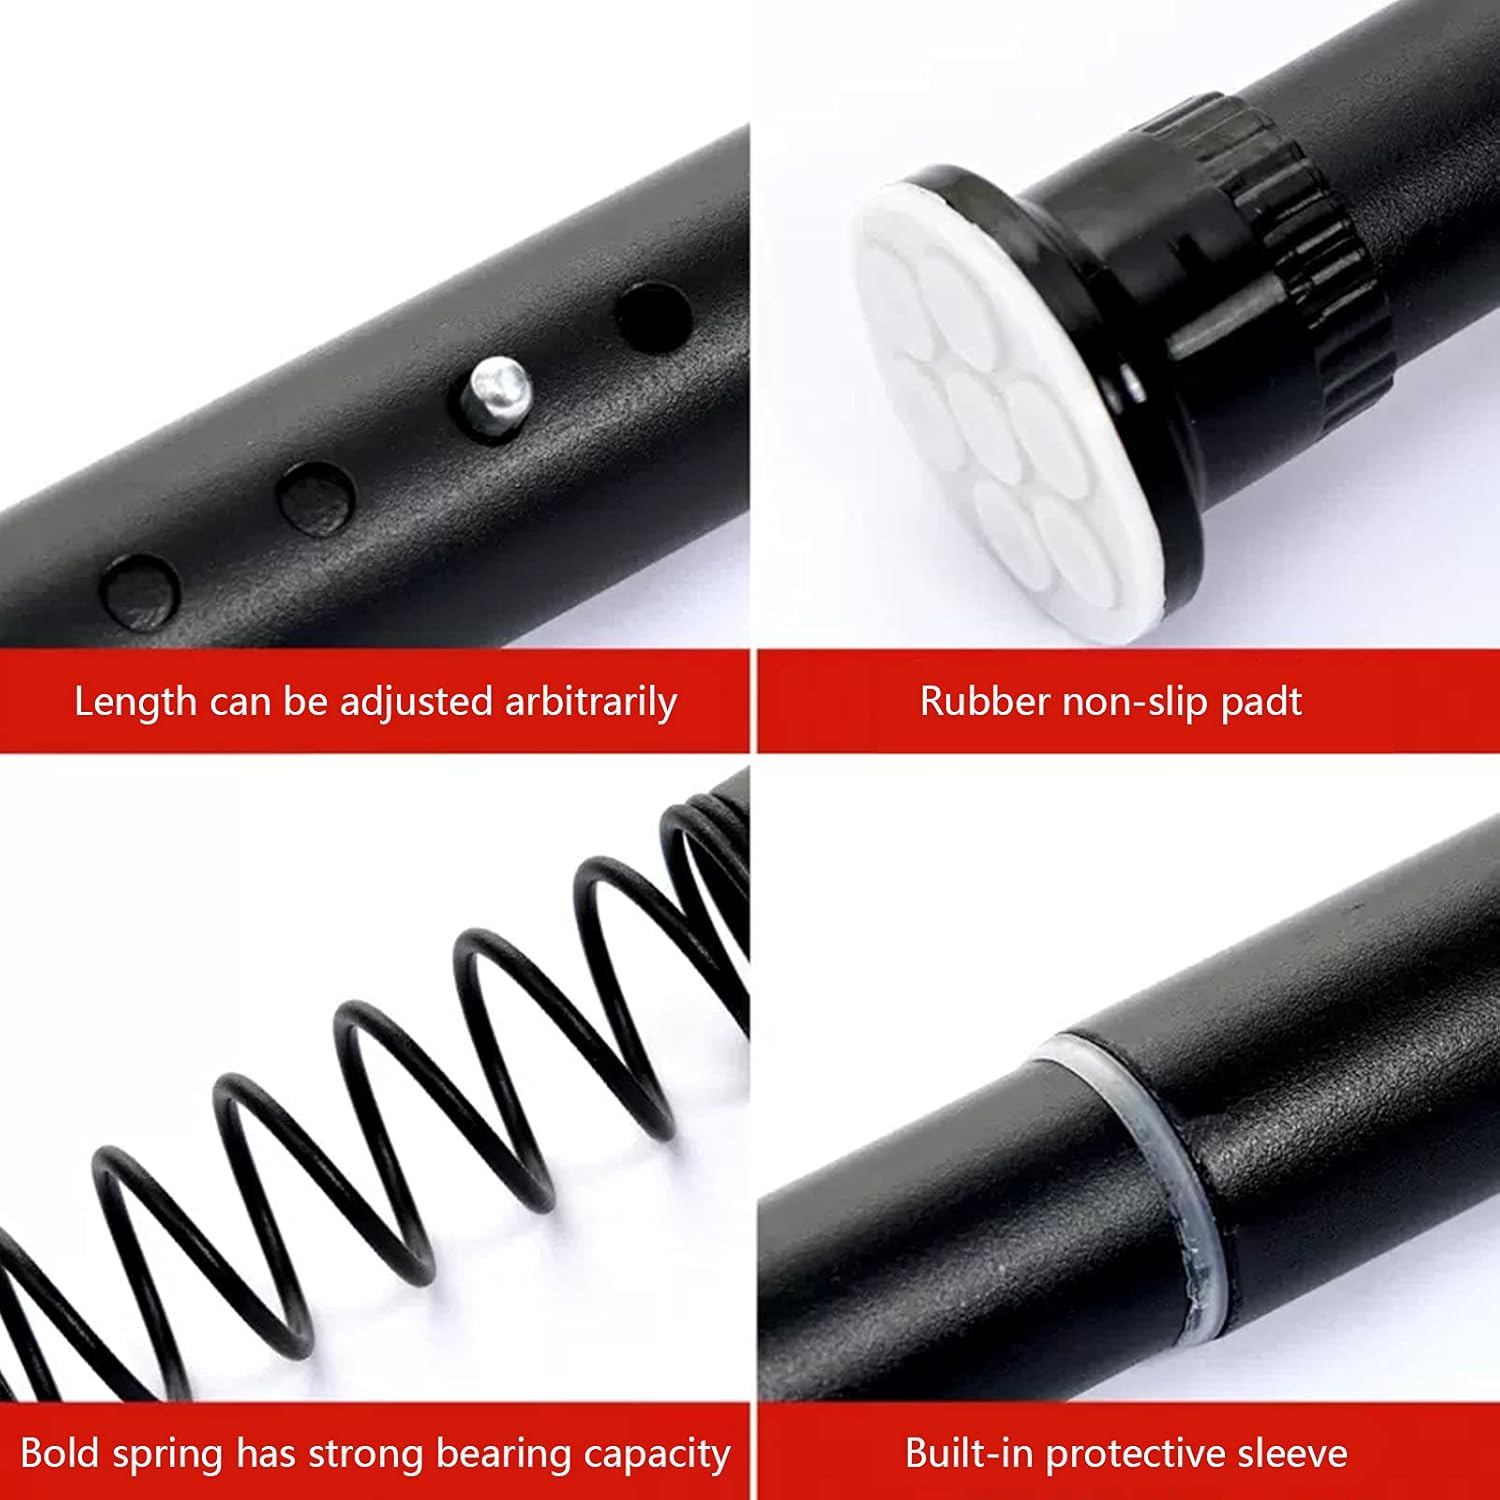
Image: Detailed view of key features: adjustable length, non-slip rubber pad, strong spring, and protective sleeve.

Image: Close-up of the clamp mechanism for attaching horizontal bars.
Operating Instructions (Adjustments)
- Adjusting Height: The vertical poles can be adjusted from 43.3 inches to 120 inches (1.1m to 3.05m) to accommodate various ceiling heights. To adjust, gently twist or release the locking mechanism on the pole, extend or retract the pole to the desired height, and then firmly secure the mechanism.
- Adjusting Length: The horizontal hanging rods are adjustable in length from 27.5 inches to 43.3 inches (0.7m to 1.1m). To adjust, slide the rod to the desired length and ensure it is securely seated within its brackets.
- Repositioning Bars: The vertical position of the horizontal bars on the main poles can be changed by loosening the fixed clamps, sliding them to a new height, and then re-tightening them securely.
Maintenance
- Cleaning: Wipe down the steel poles and rods with a soft, damp cloth as needed to remove dust or dirt. Avoid using abrasive cleaners or harsh chemicals, which may damage the finish.
- Inspection: Periodically check all connections, clamps, and fasteners to ensure they remain tight and secure. Re-tighten any loose parts immediately.
- Rubber Caps: Inspect the non-slip rubber caps on the pole bases for any signs of wear or damage to ensure continued protection for your floor and ceiling.
Troubleshooting
- Rack is unstable or wobbly:
- Ensure the vertical poles are fully extended and securely pressed against the ceiling using the internal spring mechanism.
- Verify that the non-slip rubber caps are clean and firmly positioned on a flat, stable floor surface.
- Check that all clamps and horizontal bar connections are tightened.
- Horizontal bars slide down:
- Ensure the fixed clamps holding the horizontal bars are securely tightened to the vertical poles.
- Verify that the correct brackets are used for each end of the horizontal bar (larger for the wider end, smaller for the narrower end).
- Confirm that the weight on the bar does not exceed the 130 lbs (59 kg) limit.
- Difficulty adjusting height or length:
- Ensure any locking mechanisms on the poles or bars are fully disengaged before attempting to adjust.
- Clean any debris or dust from the adjustable sections that might be impeding movement.
Specifications
| Brand | LOYALHEARTDY |
| Model Number | HG-LYFLST-5911 |
| Material | Stainless Steel (Poles/Rods), ABS/PP (Clamps, Bases, Hooks) |
| Color | Black |
| Adjustable Height | 43.3 - 120 inches (1.1 - 3.05 meters) |
| Adjustable Length | 27.5 - 43.3 inches (0.7 - 1.1 meters) |
| Max. Load Capacity (Total) | 260 lbs (120 kg) |
| Max. Load Capacity (Per Bar) | 130 lbs (59 kg) |
| Installation Type | Free Standing, Floor-to-Ceiling |
| Number of Tiers | 2 |
| Item Weight | 4.43 kg |
Warranty and Support
For warranty information, product support, or to inquire about replacement parts, please contact LOYALHEARTDY customer service. You can typically find contact details through your original retailer or by visiting the official LOYALHEARTDY brand website.
You may also visit the LOYALHEARTDY Store on Amazon for more information.