
1. Introduction
Thank you for choosing the ROMECH Dual Power Hot Glue Gun. This manual provides essential information for the safe and effective operation, maintenance, and troubleshooting of your new tool. Please read these instructions carefully before use and retain them for future reference.
2. Safety Instructions
WARNING: Failure to follow these safety instructions may result in electric shock, fire, or serious injury.
- Always wear appropriate personal protective equipment, such as heat-resistant gloves and safety glasses, when operating the glue gun.
- Do not touch the hot nozzle or the freshly released hot glue. The nozzle and melted glue can reach high temperatures and cause severe burns.
- Never pull out a melting or partially melted glue stick from the back of the gun. This can damage the heating element and feed mechanism. Allow the glue stick to cool and harden before attempting to remove it, or push it through with a new stick.
- Ensure the glue gun is placed on its metal safety stand when not in use to prevent the hot nozzle from touching surfaces.
- Do not leave the glue gun unattended while it is plugged in or heating.
- Keep the glue gun out of reach of children and pets.
- Use the glue gun in a well-ventilated area.
- Do not use the glue gun near flammable materials or in explosive atmospheres.
- If the power cord is damaged, it must be replaced by the manufacturer, its service agent, or similarly qualified persons to avoid a hazard.
- Only use glue sticks of the specified diameter (7/16 inch or 11mm) with this glue gun.

Image: Safety warnings for the hot glue gun, illustrating not to pull out melting glue sticks and not to touch the hot nozzle.
3. Package Contents
Verify that all items are present in your package:
- 1 x Hot Glue Gun
- 21 x Hot Glue Sticks (7/16 inch / 11mm diameter)
- 1 x User Manual (this document)
- 1 x Tool Carry Bag

Image: The complete package contents, showing the hot glue gun, 21 glue sticks, user manual, and a tool carry bag.
4. Product Features
- Ergonomic Design: Comfortable grip for extended use.
- Fast Heating Up: Quickly reaches operating temperature.
- Copper Gun Nozzle: Durable and efficient heat transfer.
- Dual Power 60W/100W: Selectable power for different applications.
- Metal Safety Stand: Provides stable support and keeps the hot nozzle elevated.
- Heat Emission Holes: Designed for efficient heat dissipation.

Image: An exploded view highlighting key features of the glue gun, including its ergonomic design, fast heating, copper nozzle, dual power switch, metal safety stand, and heat emission holes.
Dual Power Settings
- 60W Setting: Heats to approximately 300°F (149°C). Ideal for crafting projects and delicate materials, providing a glue output of approximately 0.35 oz/min.
- 100W Setting: Heats to approximately 410°F (210°C). Suitable for faster heating and heavier materials like wood, providing a glue output of approximately 0.53 oz/min.
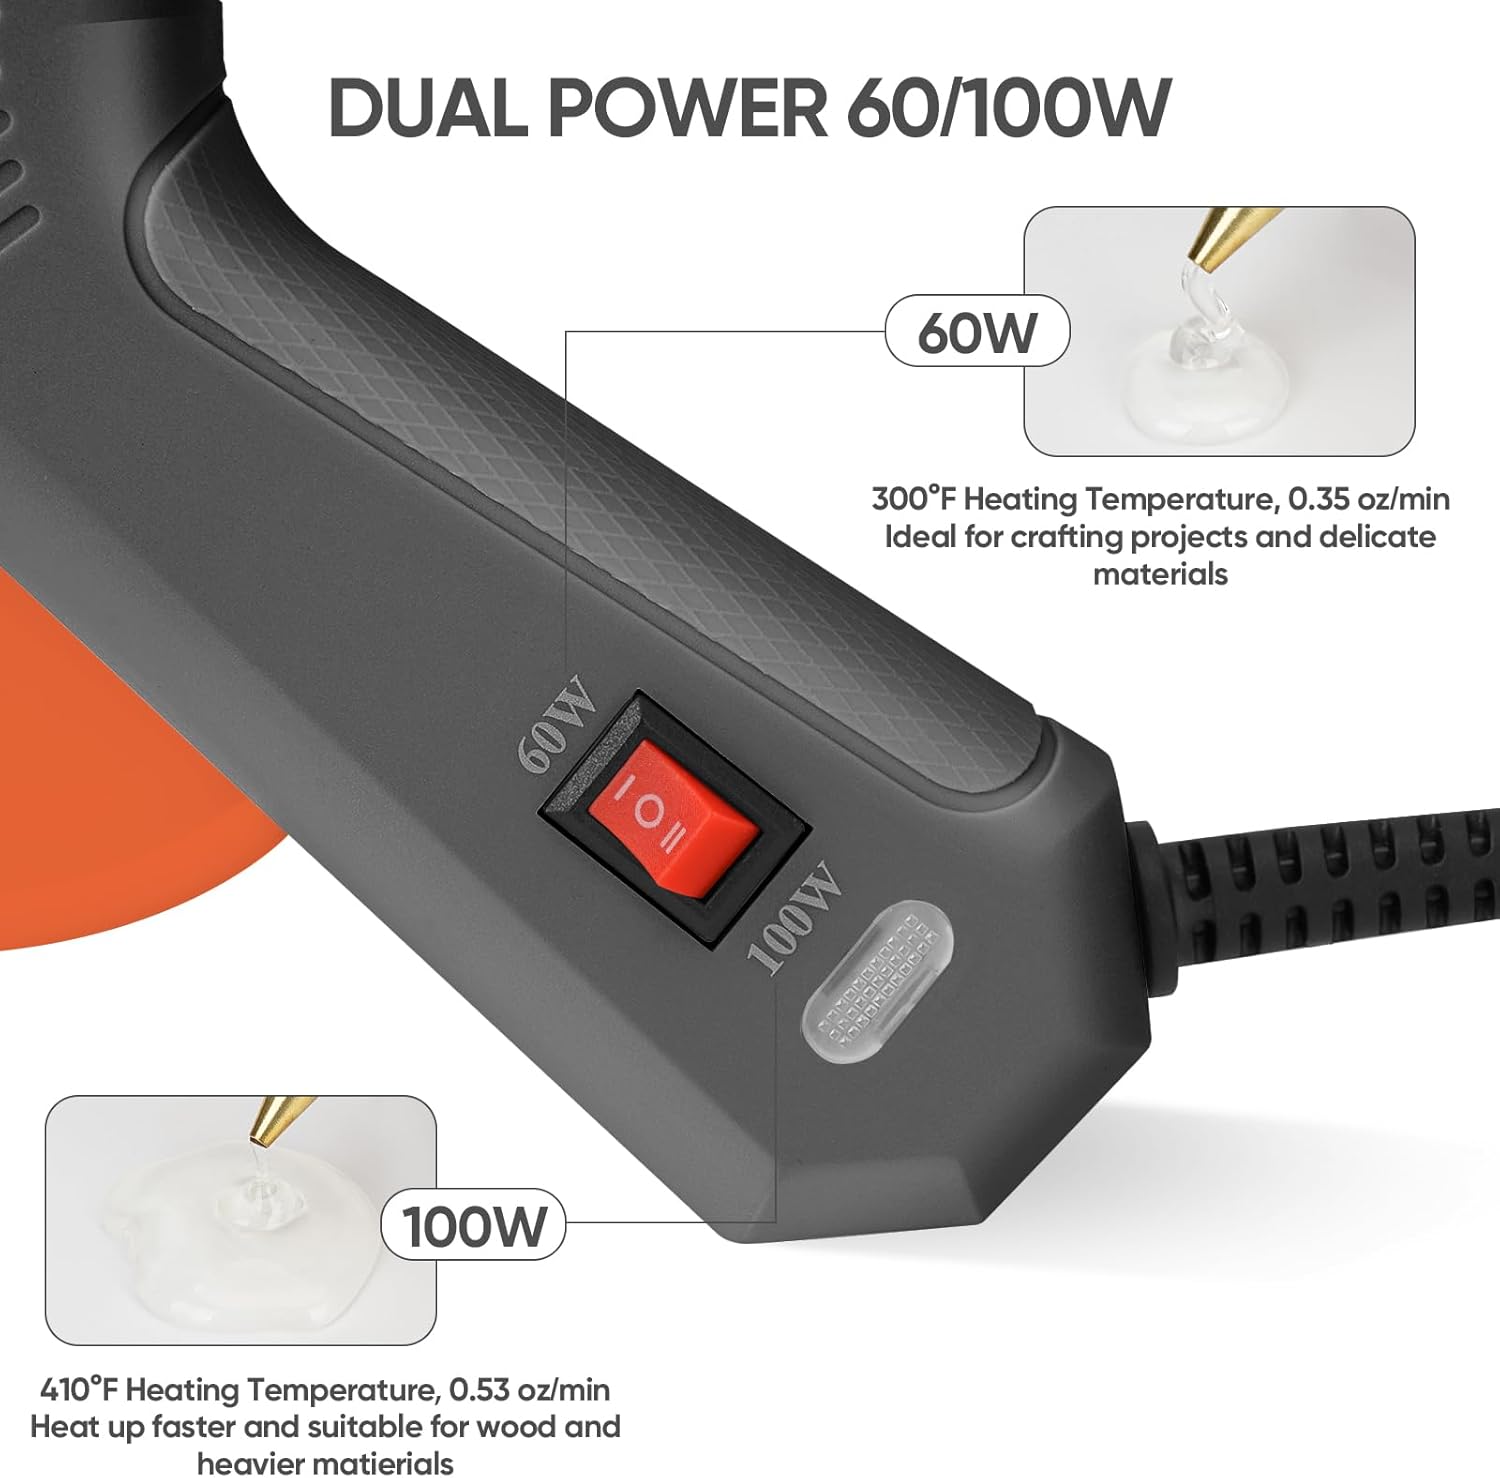
Image: A close-up of the glue gun's dual power switch, detailing the 60W setting for 300°F and 0.35 oz/min output, and the 100W setting for 410°F and 0.53 oz/min output.
Included Glue Sticks
The package includes 21 transparent glue sticks with the following characteristics:
- Excellent Clarity
- No Impurities
- High Viscosity
- Odor Free
- Dimensions: 0.43 inch (11mm) diameter, 5.9 inch (150mm) length

Image: A bundle of 21 transparent glue sticks, highlighting their quality features and dimensions.
5. Setup
- Insert Glue Stick: Ensure the glue gun is unplugged and cool. Insert a 7/16 inch (11mm) diameter glue stick into the hole at the back of the gun until it stops.
- Position the Stand: Extend the metal safety stand to support the glue gun securely on a flat, heat-resistant surface.
- Connect Power: Plug the power cable into a standard 110V electrical outlet.
- Select Wattage: Use the switch on the side of the glue gun to select either 60W or 100W, depending on your project requirements. The indicator light will illuminate.
Image: Visual instructions for inserting a glue stick, connecting the power, and selecting the desired wattage (60W or 100W).
6. Operating Instructions
- Pre-heating: Allow the glue gun to pre-heat for 3-5 minutes. The exact time may vary based on the selected wattage and ambient temperature. The glue gun is ready when the glue stick starts to melt at the nozzle.
- Apply Glue: Gently press the trigger to dispense melted glue. Apply glue to one surface, then immediately press the two surfaces together. Hold firmly for a few seconds until the glue sets.
- Continuous Use: As the glue stick shortens, insert a new glue stick into the back of the gun to push the existing one forward.
- Finishing: When finished, switch the power off and unplug the glue gun from the electrical outlet. Allow the glue gun to cool completely on its stand before storing.
Image: Visual instructions demonstrating the pre-heating process and how to gently press the trigger to apply glue.
7. Maintenance
- Cleaning: Ensure the glue gun is unplugged and completely cool before cleaning. Wipe the exterior with a clean, damp cloth. Do not use abrasive cleaners or solvents.
- Nozzle Care: Do not attempt to clean the nozzle while it is hot. Any hardened glue around the nozzle can be carefully removed once the gun is cool.
- Storage: Store the glue gun in its carry bag in a dry, cool place, away from direct sunlight and moisture. Ensure no glue sticks are left partially melted in the gun during storage.
- Cord Inspection: Regularly inspect the power cord for any signs of damage. If damaged, do not use the glue gun and contact customer support.
8. Troubleshooting
| Problem | Possible Cause | Solution |
|---|---|---|
| Glue gun does not heat up. | Not plugged in; power switch off; faulty outlet; internal fault. | Check power connection; ensure switch is ON; test outlet with another device; contact customer support if internal fault suspected. |
| Glue does not dispense. | Not enough pre-heating time; glue stick not fully inserted; wrong size glue stick; clogged nozzle. | Allow more pre-heating time (3-5 mins); push glue stick further; ensure correct 7/16 inch (11mm) glue sticks are used; clean nozzle carefully when cool. |
| Glue drips excessively. | Overheating (less common with dual power); low-quality glue sticks. | Ensure correct wattage is selected for the task; use high-quality glue sticks. A small amount of dripping is normal for hot glue guns. |
| Glue gun smokes. | Dust or debris on heating element; internal fault. | Unplug immediately. Allow to cool. If smoke persists after cleaning exterior, discontinue use and contact customer support. |
9. Specifications
- Model: ROMECH-116
- Manufacturer: ZASTION
- Power Type: Corded Electric
- Voltage: 110 Volts
- Power: 60W / 100W (Dual Power)
- Pre-heating Time: 3-5 minutes
- Glue Stick Diameter: 7/16 inch (11mm)
- Product Dimensions: Approximately 8.18 inches (length) x 6.85 inches (height) x 1.5 inches (width)
- Weight: Approximately 848 grams (including packaging)
- UPC: 785939953909
Image: The hot glue gun with its main dimensions indicated, showing a length of 8.18 inches and a height of 6.85 inches.
10. Warranty and Support
ROMECH products are manufactured to high-quality standards. For any questions, technical support, or warranty claims, please refer to the contact information provided with your purchase or visit the official ROMECH website. Please have your model number (ROMECH-116) and purchase details ready when contacting support.