Introduction
This manual provides detailed instructions for the safe and efficient use of your Onumii LED Puck Lights. Please read this manual thoroughly before installation and operation, and retain it for future reference.
Package Contents
Verify that all items listed below are included in your package:
- Puck Lights x6
- Remote Control x2
- Remote Holder x1 (with adhesive & screws)
- Removable & Traceless Adhesive x6
- Screws x12
- User Manual x1

Figure 1: Package Contents
Setup and Installation
1. Battery Installation
- Gently rotate and unscrew the back cover of the puck light to open it.
- Insert three (3) AA batteries (not included) into the battery compartment, ensuring correct polarity (+/-).
- Replace the back cover by aligning and rotating it until securely closed.
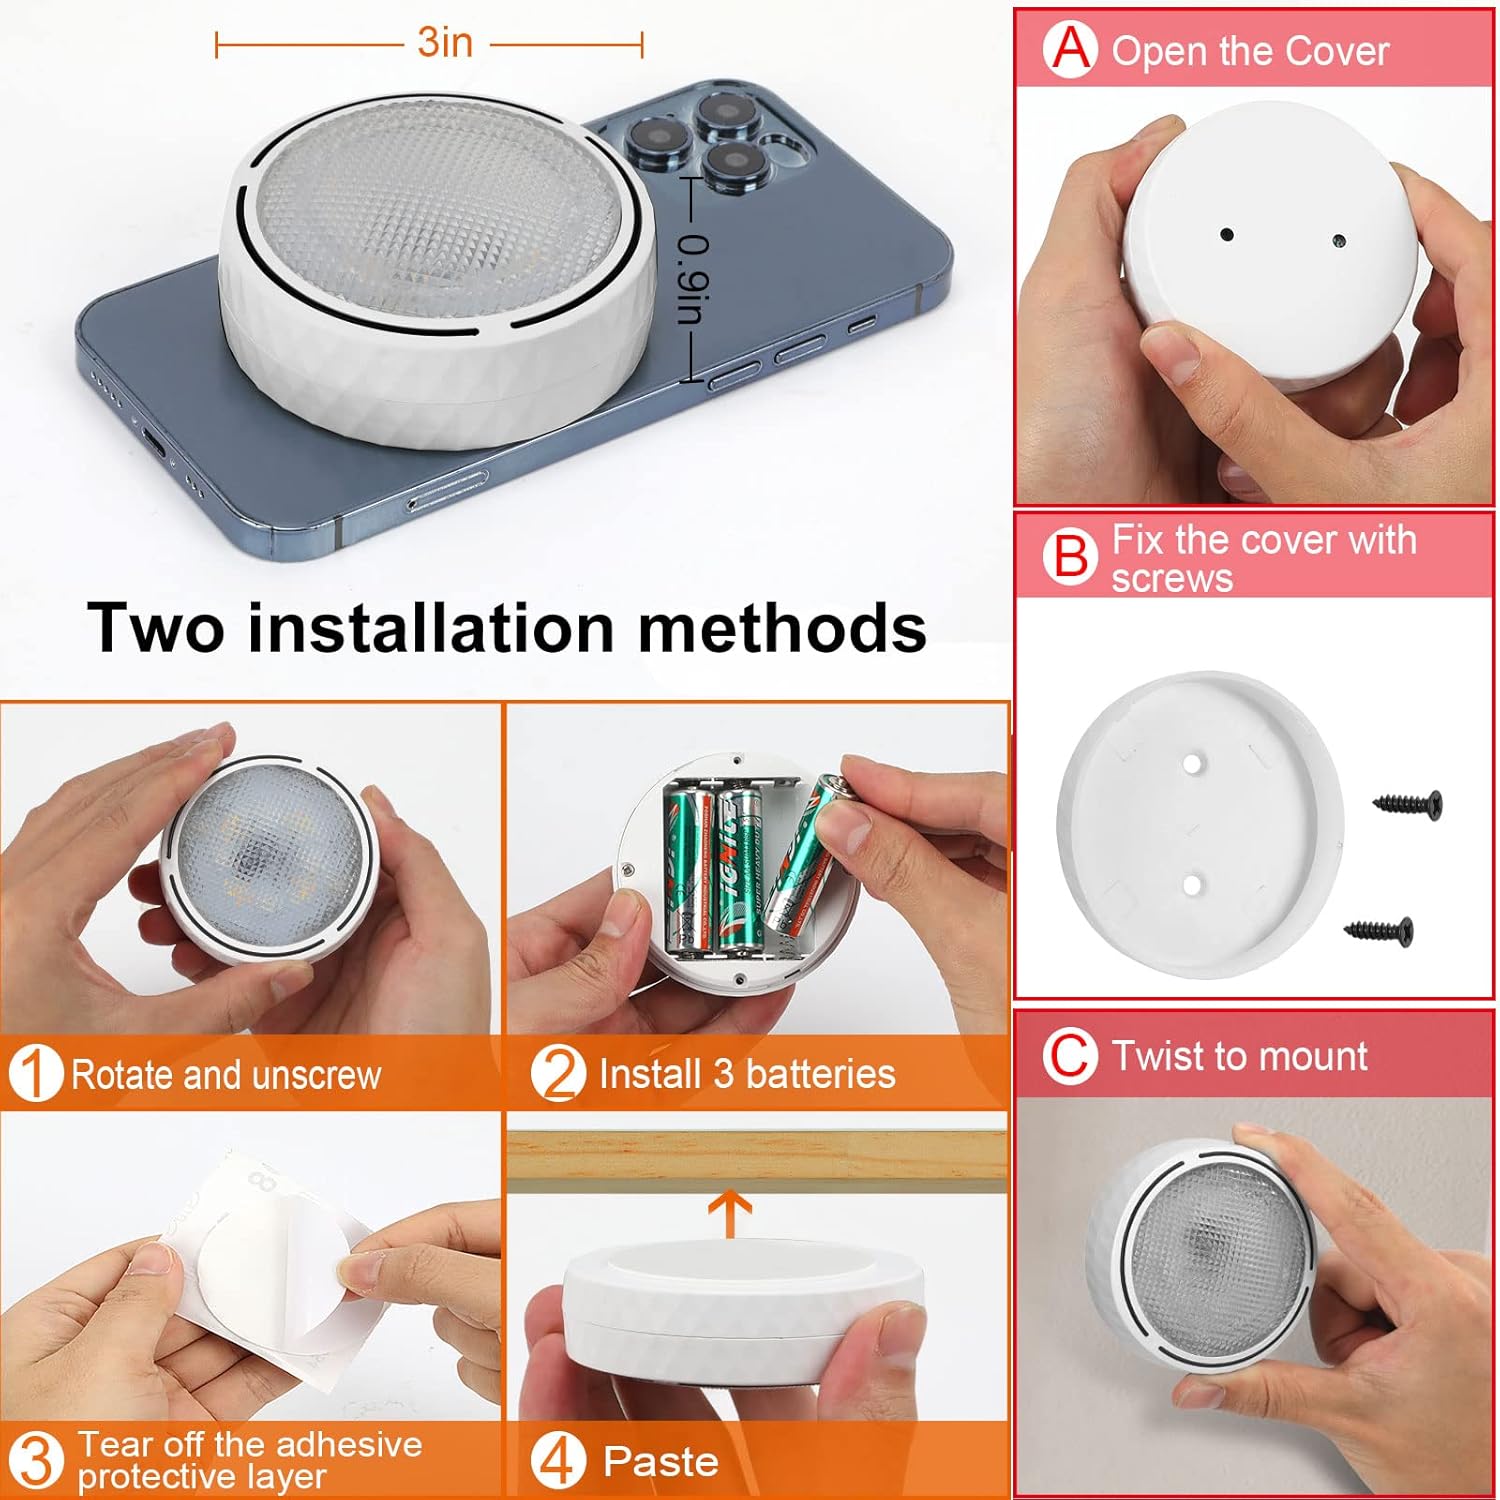
Figure 2: Battery Installation Steps
2. Mounting Options
The Onumii LED Puck Lights offer two installation methods:
Method A: Adhesive Pads
- Ensure the mounting surface is clean, dry, and smooth.
- Peel off the protective layer from one side of the adhesive pad and attach it to the back of the puck light.
- Peel off the remaining protective layer and firmly press the puck light onto the desired surface for at least 30 seconds.
- The adhesive pads are designed to be removable without damaging furniture.
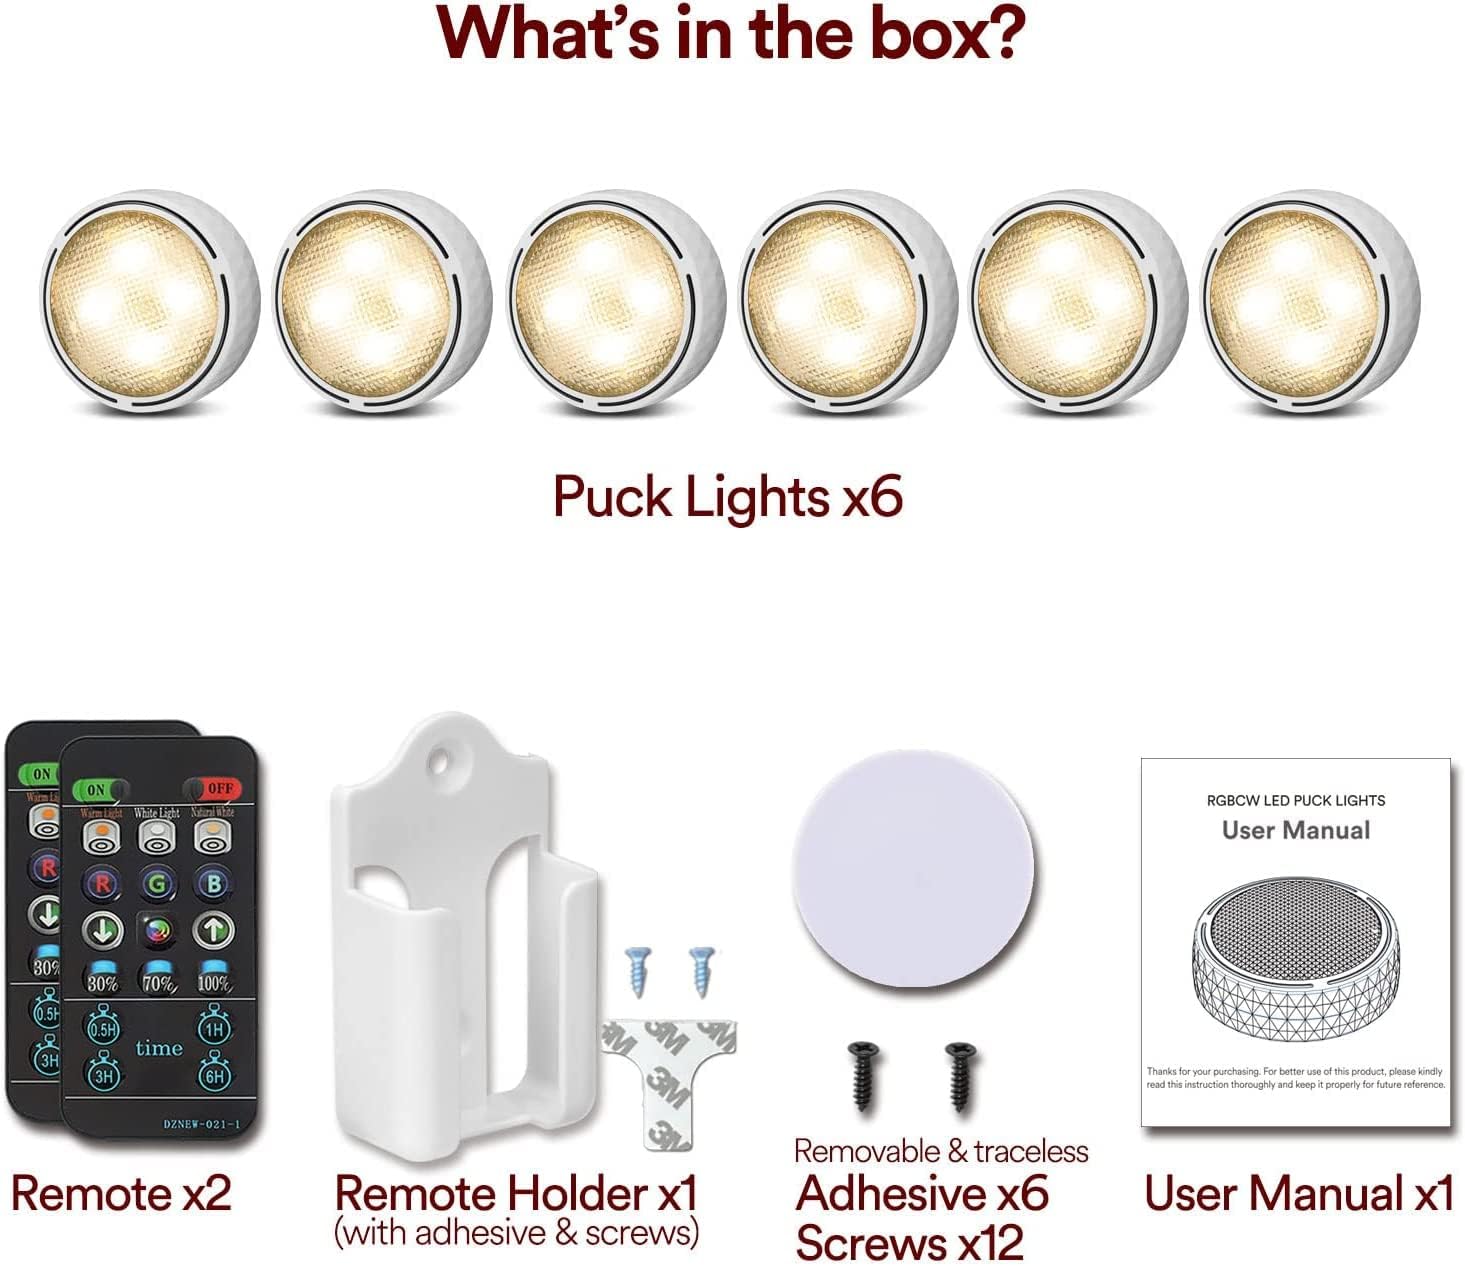
Figure 3: Adhesive Pad Installation
Method B: Screws
- Separate the back cover from the puck light.
- Position the back cover on the desired surface and mark the screw holes.
- Secure the back cover to the surface using the provided screws.
- Twist the puck light onto the secured back cover until it locks into place.
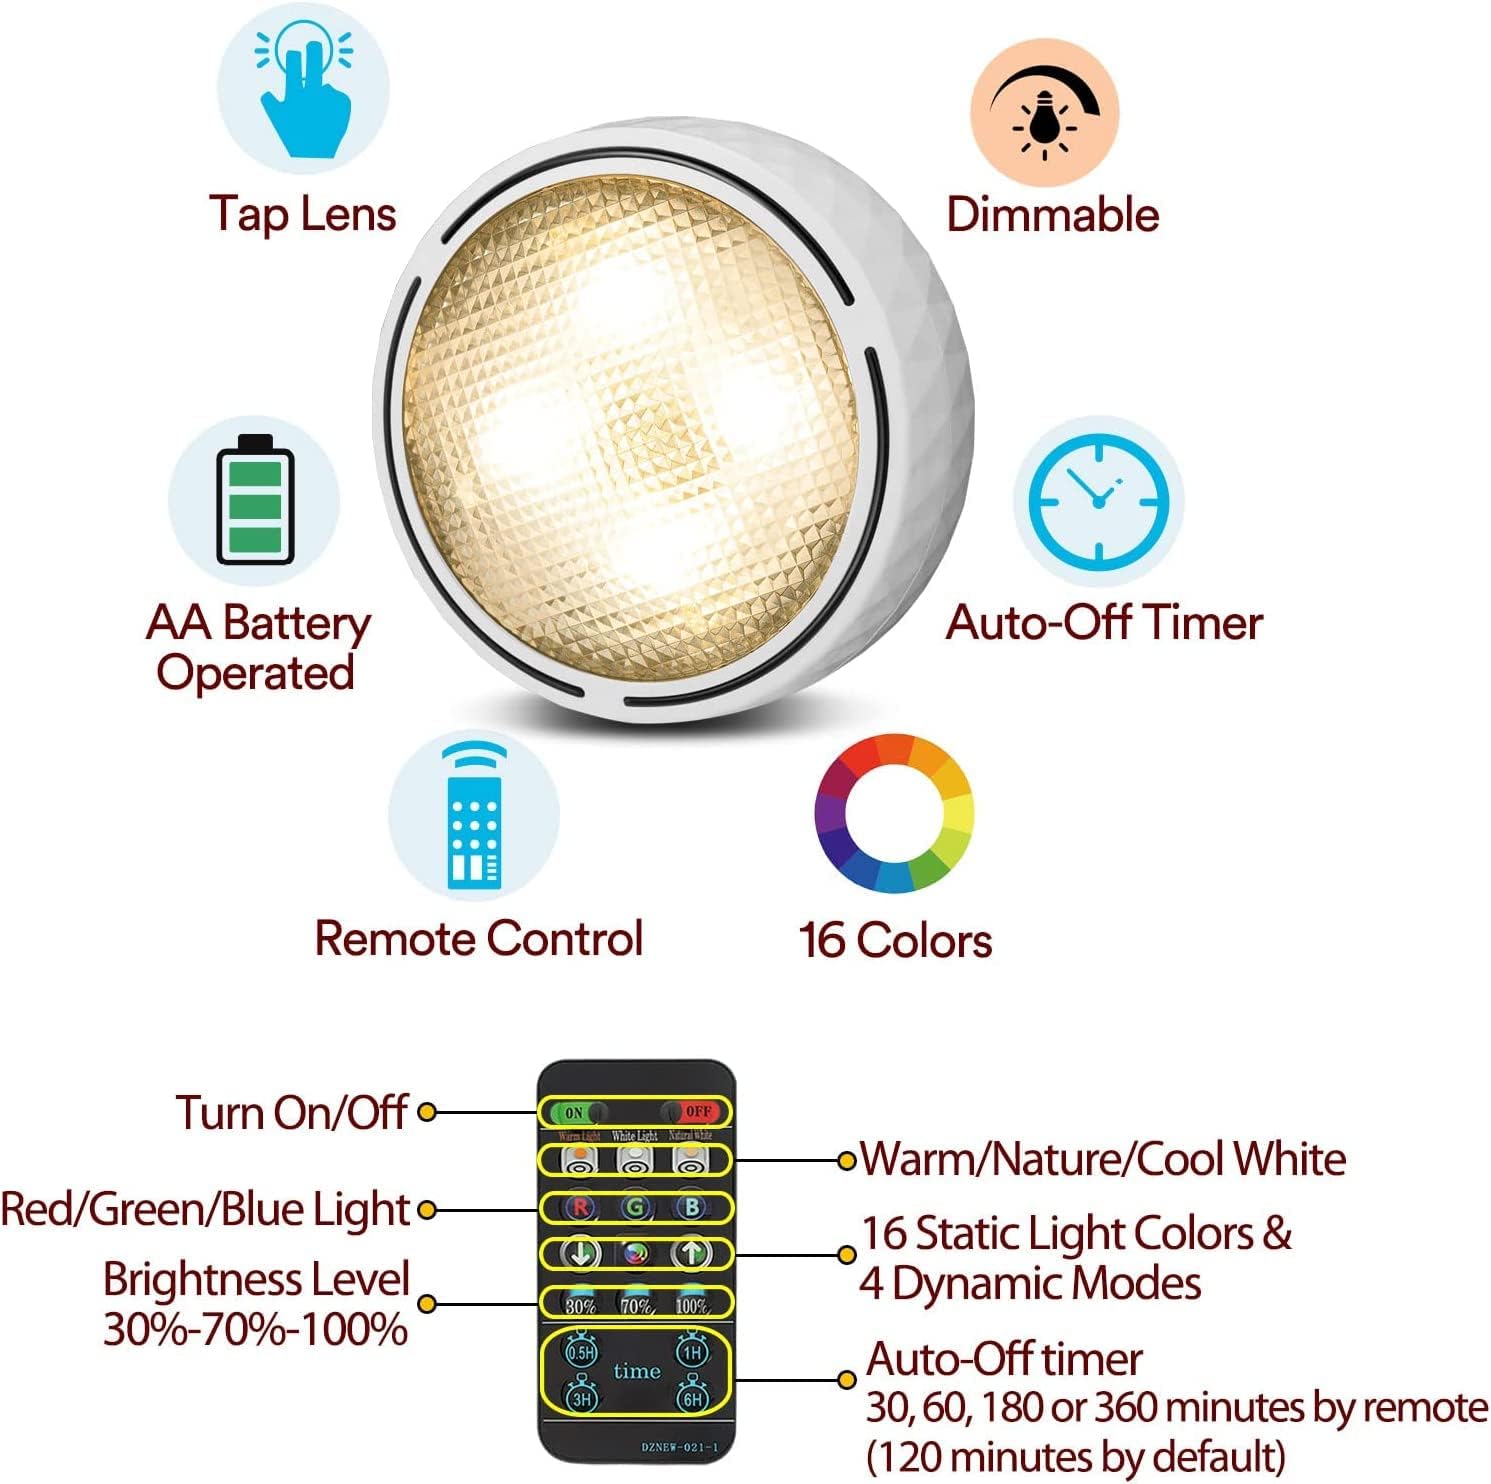
Figure 4: Screw Installation Components
Operation
1. Remote Control Functions
The included remote control allows for comprehensive management of your puck lights:
- ON/OFF: Power the lights on or off.
- Color Change: Select from 16 static colors (including Warm, Neutral, and Cool White) or cycle through 4 dynamic light modes.
- Dimming: Adjust brightness levels to 30%, 70%, or 100%.
- Timer: Set an auto-off timer for 30 minutes, 60 minutes, 180 minutes, or 360 minutes. By default, lights will turn off after 2 hours if no timer is set.

Figure 5: Remote Control Layout and Functions
2. Tap Control Functions
For individual light control, you can use the tap function:
- Short Press: Tap the front cover briefly to turn the light on or to change its color and mode.
- Long Press: Press and hold the front cover for 2 seconds to turn the light off.
Figure 6: Tap Control Operation
Maintenance and Safety
- Battery Replacement: When lights dim or stop responding, replace all three AA batteries in the unit. For optimal performance and cost-effectiveness, it is recommended to use rechargeable 1.5V AA batteries.
- Cleaning: Wipe the lights with a soft, dry cloth. Do not use abrasive cleaners or immerse in water.
- Usage Environment: These lights are designed for indoor use only. They are not water resistant.
- Heat Sources: Keep the lights away from open flames or direct heat sources.
- Disposal: Dispose of used batteries and the product according to local regulations.
Troubleshooting
| Problem | Possible Cause | Solution |
|---|---|---|
| Light does not turn on. | Batteries are dead or incorrectly inserted. | Replace batteries with new ones, ensuring correct polarity. |
| Remote control is not working. | Remote battery is dead; remote is too far or obstructed; infrared sensor blocked. | Replace the remote control battery. Ensure direct line of sight to the light's sensor. Move closer to the light. |
| Lights dim quickly. | Low quality or depleted batteries. | Use high-quality alkaline or rechargeable 1.5V AA batteries. Replace batteries when dimming occurs. |
| Lights do not respond to remote simultaneously. | Remote signal is directional; lights are out of range or obstructed. | Point the remote directly at each light or adjust your position to ensure all lights are within the remote's line of sight. |
Specifications
| Brand | Onumii |
| Model Number | 5#-F-22-02 |
| Product Dimensions | 2.95"L x 2.95"W x 1.2"H |
| Power Source | Battery Powered (3 AA batteries per light, not included) |
| Voltage | 4.5 Volts (DC) |
| Wattage | 1 Watt |
| Brightness | 100 Lumen |
| Light Source Type | LED |
| Control Method | Remote, Tap Control |
| Special Features | Tunable white, Color Changing, Dimmable, Cordless, Timer Function |
| Installation Type | Surface-Mounted (Adhesive Pads or Screws) |
| Indoor/Outdoor Usage | Indoor Only |
| Material | Acrylonitrile Butadiene Styrene |
| Included Components | Puck Lights, Remote Control, Remote Control Holder, Adhesive Pads, Screws, User Manual |
Warranty and Support
This product comes with a manufacturer's warranty. Please refer to the physical user manual included in your package for specific warranty terms and conditions. For further assistance or support, please visit the official Onumii store or contact customer service through your purchase platform.
Onumii Store: https://www.amazon.com/stores/Onumii/page/9C9A7FCA-72D6-45A5-AF32-060ED5B3AC7F


