PNI P15UV
PNI P15UV Dual Band Radio
Instruction Manual
Model: P15UV | Brand: PNI
Product Overview
The PNI P15UV is a versatile dual-band radio designed for communication across VHF and UHF frequencies. It offers extensive customization options to suit various user needs, including selectable transmission power, manual channel programming, and precise frequency scanning. This device operates in the 144-146MHz (VHF) and 430-440MHz (UHF) frequency ranges, supporting multiple operating modes such as UHF-VHF, VHF-VHF, and UHF-UHF. It is equipped with features like SOS alarm, adjustable squelch, and repeater tone selection, providing a comprehensive communication tool.

Front view of the PNI P15UV Dual Band Radio, showcasing its display and keypad.
Setup
1. What's in the Box
Upon unboxing your PNI P15UV radio, verify that all components are present:
- PNI P15UV VHF/UHF Portable Radio Station
- Office Charger
- 1500mAh Lithium-Ion Battery
- Belt Support
- Lanyard
- User Manual (this document)
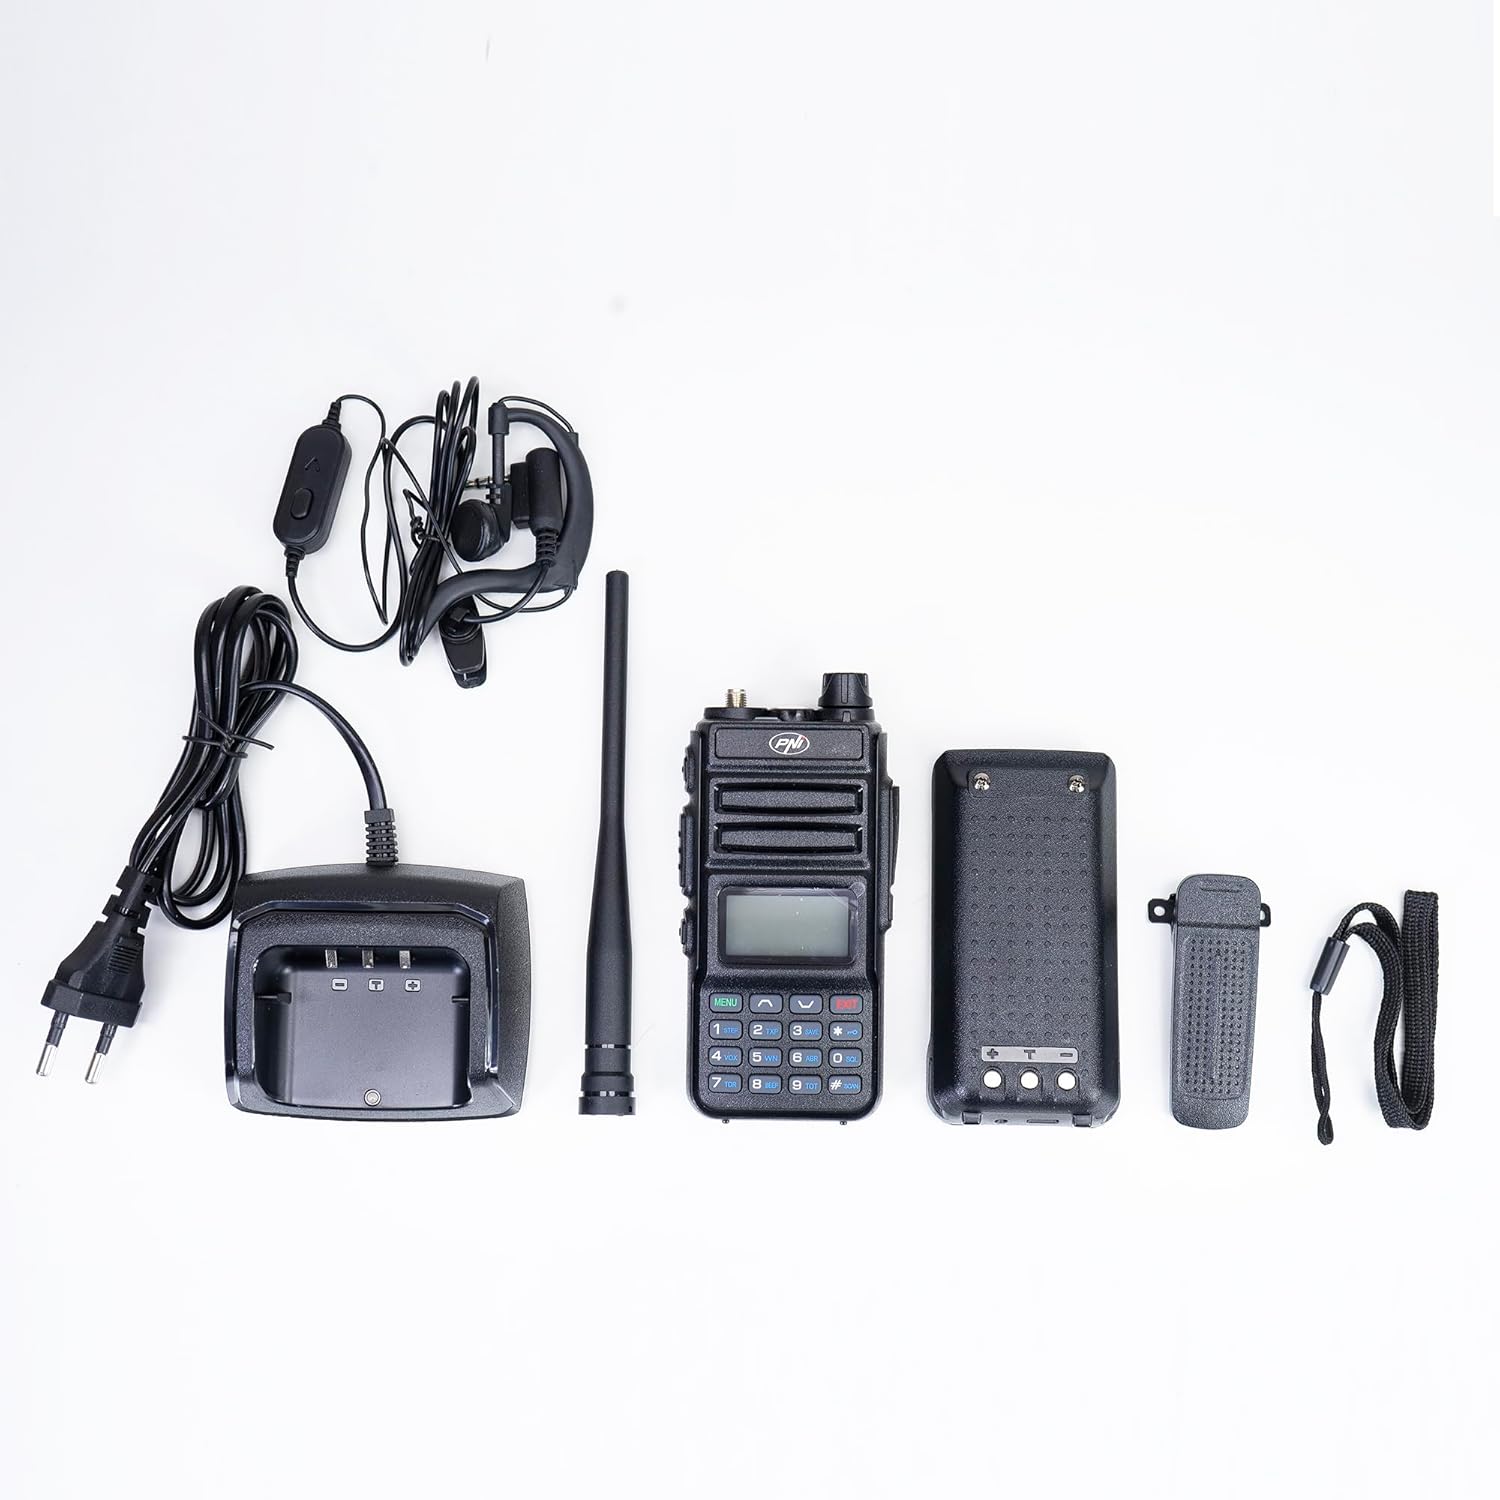
All components included in the PNI P15UV package: radio, battery, charger, belt clip, and antenna.
2. Battery Installation
To install the battery, align the battery pack with the grooves on the back of the radio and slide it upwards until it clicks into place. Ensure it is securely fastened to prevent accidental detachment during use.
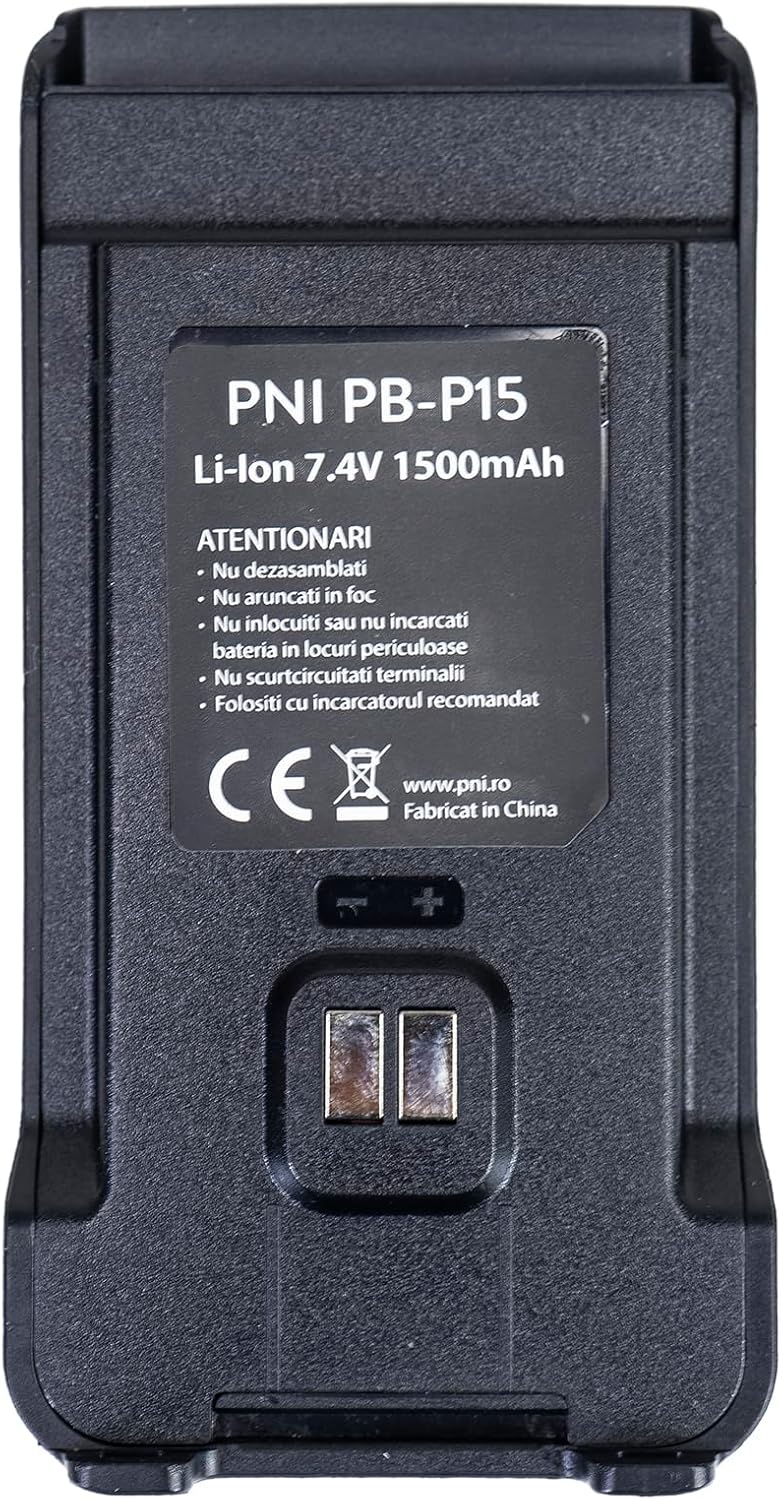
The PNI PB-P15 Lithium-Ion 7.4V 1500mAh battery pack.

Rear view of the PNI P15UV radio, showing the battery compartment and product label.
Video demonstrating the installation and removal of the battery pack (starts at 1:43).
3. Charging the Battery
Place the radio into the provided desktop charger. Ensure the charging contacts on the radio align with those on the charger. The charger typically has an indicator light that changes color to show charging status (e.g., red for charging, green for fully charged). Alternatively, the radio can be charged directly via its USB port using a compatible USB cable.
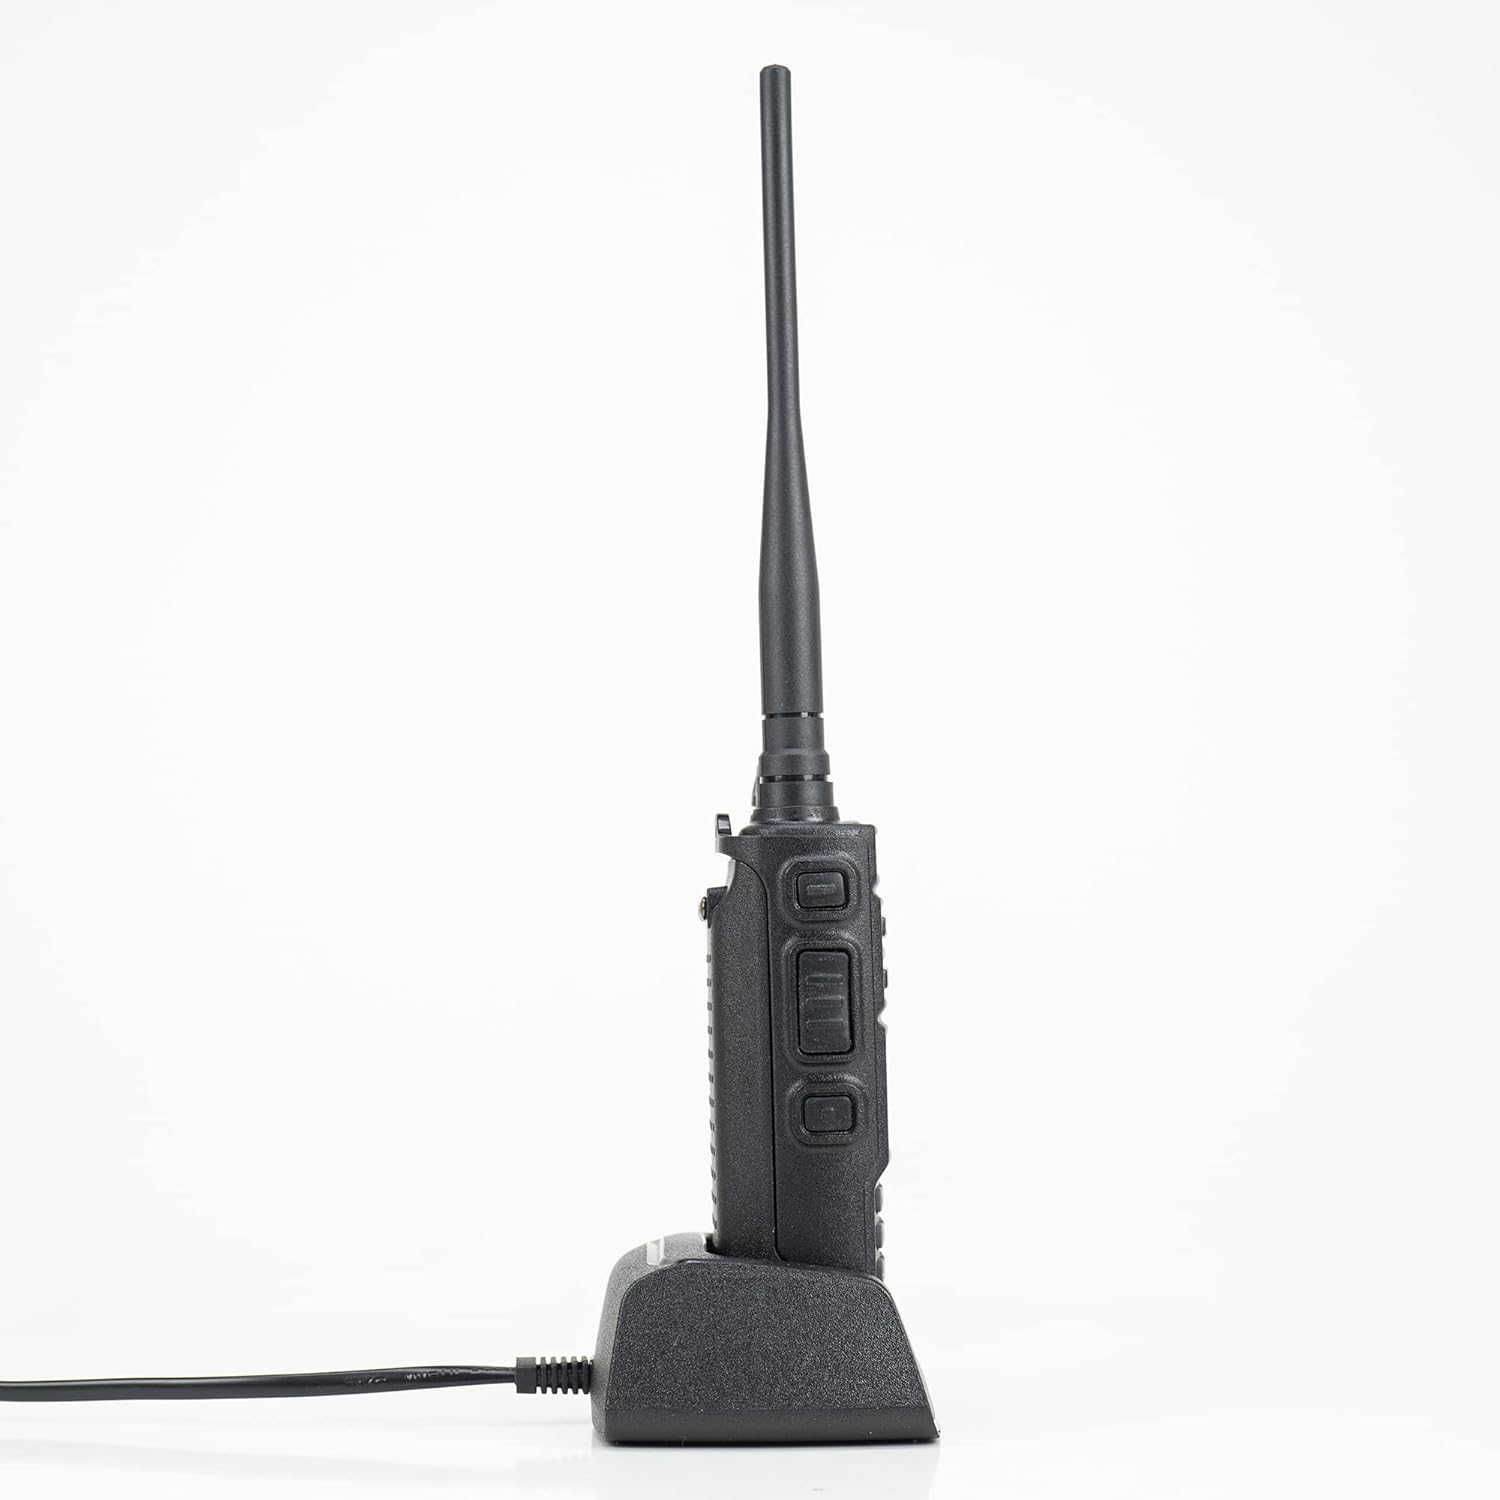
The PNI P15UV radio placed in its desktop charging cradle.

The desktop charger for the PNI P15UV radio, with its power cable.
Video demonstrating charging the radio via its USB port (starts at 1:47).
4. Attaching the Belt Clip and Antenna
Secure the belt clip to the back of the radio using the provided screws. This allows for convenient carrying. Screw the antenna clockwise onto the antenna connector on top of the radio until it is finger-tight. Do not overtighten.

Side view of the PNI P15UV radio, showing the attached belt clip.
Video demonstrating attaching the belt clip and an external accessory (starts at 1:26).
Operating Instructions
1. Power On/Off and Volume Control
To power on the radio, rotate the top-right knob clockwise. Continue rotating to increase the volume. Rotate counter-clockwise to decrease volume and power off the device.
2. Frequency and Channel Mode
The PNI P15UV supports both frequency mode (VFO) and channel mode (MR). You can switch between these modes to either manually input frequencies or select from pre-programmed channels. The display can show both frequencies or channels simultaneously depending on the selected operating mode.
Video demonstrating the radio's display showing both frequencies and menu navigation (starts at 0:14).
3. Menu Navigation and Settings
Use the 'MENU' button to access the radio's settings. Navigate through the options using the up/down arrow keys. Press 'MENU' again to select an option and 'EXIT' to go back or exit the menu. Key customizable functions include:
- Selectable Transmission Power: Choose between 5W (High) and 1W (Low) power output.
- Manual Channel Programming: Program new channels directly from the keypad.
- Manual Frequency Input: Enter specific frequencies using the numeric keypad.
- Scan Mode Selection: Activate frequency or channel scanning.
- Add/Exclude Channel from Scanning: Customize which channels are included in scans.
- Precise Frequency Scanning: Define a specific frequency range for scanning.
- Encoding and Decoding Calls: Utilize CTCSS/DCS tones for selective calling.
- SOS Alarm: Activate local, code, or audible emergency alerts.
- Repeater Tone Selection: Configure tones for repeater access.
- Adjustable Squelch: Set the squelch level (9 levels) to filter out weak signals and noise.
- Frequency Step Selection: Choose frequency steps (2.5 / 5.0 / 6.25 / 10.0 / 12.5 / 20.0 / 25.0 / 50.0 KHz).
Video demonstrating various menu options and settings on the PNI P15UV radio (starts at 0:35).
4. Transmitting and Receiving
To transmit, press and hold the Push-to-Talk (PTT) button on the side of the radio. Speak clearly into the microphone. Release the PTT button to receive. Ensure you are on an appropriate frequency or channel for communication.

The PNI P15UV radio connected to an external PNI MHS40 microphone for enhanced communication.
Video demonstrating the radio in use, including transmission (starts at 2:00).
Maintenance
1. Cleaning
Regularly clean the radio's exterior with a soft, damp cloth. Avoid using harsh chemicals or abrasive cleaners. Ensure the charging contacts and accessory ports are free of dust and debris.
2. Battery Care
To prolong battery life, avoid fully discharging the battery frequently. Charge the battery when the low battery indicator appears. If storing the radio for an extended period, charge the battery to about 50% and remove it from the radio.
3. Storage
Store the radio in a cool, dry place away from direct sunlight, extreme temperatures, and high humidity. Keep it away from strong magnetic fields.
Troubleshooting
If you encounter issues with your PNI P15UV radio, consider the following common solutions:
- No Power: Ensure the battery is properly installed and fully charged. Check the power/volume knob.
- No Signal/Poor Reception: Verify the antenna is securely attached. Check if you are on the correct frequency/channel. Adjust the squelch level. Ensure you are within range of other radios or repeaters.
- Cannot Transmit: Check if the PTT button is functioning correctly. Ensure the battery has sufficient charge. Verify the transmission power setting.
- Audio Issues: Check volume level. Ensure no external accessories (like headphones) are interfering.
For more detailed troubleshooting or complex issues, please refer to the comprehensive user manual PDF or contact PNI customer support.
Specifications
| Feature | Detail |
|---|---|
| Brand | PNI |
| Model Number | P15UV |
| Frequency Range | VHF: 144-146MHz / UHF: 430-440MHz |
| Number of Channels | 999 |
| Battery | 1 Lithium Ion battery (1500 mAh, 7.4V) |
| Item Weight | 1.21 pounds (approx. 547 grams) |
| Product Dimensions | 2.24 x 1.38 x 10.63 inches |
| Talking Range Maximum | 8 Kilometers (approximate, depends on terrain) |
| Special Feature | Portable, UHF/VHF Dual Band |
| Country of Origin | China |
Warranty Information
The PNI P15UV Dual Band Radio comes with a 24-month warranty from the date of purchase. Please retain your proof of purchase for warranty claims. For specific terms and conditions, refer to the official PNI website or contact customer support.
Support
For further assistance, detailed information, or technical support, please use the following resources:
- Official User Manual (PDF): Download PDF Manual
- PNI Official Website: www.pni.ro
- PNI Store on Amazon: Visit PNI Store
- Customer Support Email: comenzi@pni.ro
Ask a question about this manual
Ask about setup, troubleshooting, compatibility, parts, safety, or missing instructions. Manuals+ will review the question and use this page’s manual context to help answer it.