Introduction
This manual provides essential information for the proper installation, operation, and maintenance of your Generic Ceramic Replacement Blade, designed for use with Hatteker RFC-69031 and RFC-69001 trimmers. This high-quality replacement blade ensures continued optimal performance of your grooming device.
Key features of this replacement blade include:
- The combination of stainless steel and ceramic materials provides excellent cutting performance.
- Ceramic cutting technology ensures the blade stays cooler during operation and maintains its sharpness for an extended period.
- The blades are removable, facilitating easy replacement and cleaning.
Product Overview

Figure 1: Front view of the assembled Generic Ceramic Replacement Blade. This image shows the gold-colored ceramic cutting teeth and the black base, ready for installation into a compatible Hatteker trimmer.

Figure 2: Underside view of the replacement blade assembly. This image highlights the internal mechanism, including the springs and plastic components that secure the blade within the trimmer head and allow for proper cutting action.

Figure 3: Conceptual graphic illustrating the professional ceramic coated cutting blade. This image emphasizes the precision and quality of the ceramic cutting surface, designed for efficient and smooth trimming.
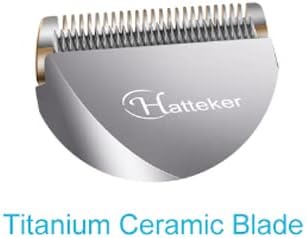
Figure 4: Close-up view of the blade, featuring the "Hatteker" logo and indicating it is a Titanium Ceramic Blade. This image highlights the brand compatibility and the dual material composition of the blade.

Figure 5: Diagram illustrating the benefits of the blade's material composition: "Ceramic for sharp, titanium for tough." It also labels the R-shaped design, titanium blade, and ceramic blade components, explaining their respective roles in performance.
Setup and Installation
Before installing the new blade, ensure your trimmer is turned off and unplugged from any power source. Always handle the blade with care to avoid injury.
- Remove the Old Blade:
Gently push the old blade assembly away from the trimmer body. Some models may require pressing a release button or lever. Refer to your trimmer's original manual for specific instructions on blade removal.
- Clean the Trimmer Head:
Use a small brush to remove any hair clippings or debris from the trimmer head area. Ensure the area is clean and dry before installing the new blade.
- Install the New Blade:
Align the new ceramic replacement blade with the grooves or slots on the trimmer head. Press firmly until you hear a click, indicating that the blade is securely locked into place. Ensure the blade is flush with the trimmer body and does not wobble.
- Test Functionality:
Once installed, turn on the trimmer briefly to ensure the blade operates smoothly and quietly. If there are any unusual noises or movements, re-check the installation.
Operating Instructions
This replacement blade is designed to function identically to the original blade on your Hatteker RFC-69031 or RFC-69001 trimmer. For detailed operating instructions, please refer to the original user manual provided with your trimmer.
General operating tips:
- Ensure the trimmer is fully charged or connected to power before use.
- Always use the appropriate comb attachment for your desired hair length.
- Move the trimmer against the direction of hair growth for optimal cutting.
- Do not apply excessive pressure, let the blade do the work.
Maintenance
Proper maintenance will extend the life of your ceramic replacement blade and ensure consistent performance.
- Cleaning After Each Use:
After each use, turn off and unplug the trimmer. Remove the blade assembly (refer to "Setup and Installation" for removal steps). Use the provided cleaning brush (or a soft brush) to remove all hair clippings from the blade and trimmer head. If the blade is washable, rinse it under running water, ensuring it is completely dry before reattaching or storing.
- Lubrication:
Regularly apply a few drops of clipper oil (not included) to the blade teeth. This helps reduce friction, keeps the blade running smoothly, and prevents rust. Apply oil while the trimmer is off, then briefly turn it on for a few seconds to distribute the oil.
- Storage:
Store the trimmer with the blade attached in a clean, dry place, away from direct sunlight and extreme temperatures. Protect the blade from impact to prevent damage to the ceramic teeth.
Troubleshooting
| Problem | Possible Cause | Solution |
|---|---|---|
| Blade not cutting effectively | Hair buildup; Lack of lubrication; Blade dullness (unlikely for new ceramic blade); Incorrect installation. | Clean the blade thoroughly. Apply clipper oil. Ensure the blade is correctly installed and locked into place. |
| Blade making unusual noise | Lack of lubrication; Loose installation; Debris caught in mechanism. | Apply clipper oil. Re-install the blade securely. Clean the trimmer head and blade thoroughly. |
| Blade feels hot during use | Lack of lubrication; Prolonged use without breaks. | Apply clipper oil. Allow the trimmer to cool down between uses. |
If problems persist after following these steps, please refer to your original Hatteker trimmer manual or contact the trimmer manufacturer's customer support.
Specifications
| Attribute | Detail |
|---|---|
| Product Type | Ceramic Replacement Blade |
| Compatibility | Hatteker RFC-69031, Hatteker RFC-69001 Trimmers |
| Blade Material | Stainless Steel and Ceramic |
| Manufacturer | Hattu (Generic Brand) |
| Model Number (Reference) | sb100 |
| Package Dimensions | 17.1 x 7.9 x 2.7 cm (6.73 x 3.11 x 1.06 inches) |
| Item Weight | 32 grams (1.13 ounces) |
Warranty and Support
As this is a generic replacement part, warranty coverage is typically provided by the retailer or the specific seller from whom the product was purchased. Please refer to your purchase receipt or the seller's terms and conditions for details regarding warranty and return policies.
For technical support related to the operation of your Hatteker trimmer, please consult the original Hatteker product manual or contact Hatteker customer service directly.
For inquiries specific to this replacement blade, please contact the seller through the platform where you made your purchase.