Introduction
Thank you for choosing the Zwilling Enfinigy Milk Frother. This manual provides essential information for the safe and efficient operation, maintenance, and care of your appliance. Please read all instructions carefully before first use and keep this manual for future reference.
Important Safety Information
- Read all instructions before operating the appliance.
- Do not immerse the base unit, power cord, or plug in water or any other liquid.
- Ensure the voltage indicated on the appliance matches your local power supply before connecting.
- Keep the appliance out of reach of children.
- Use the frother only for its intended purpose: frothing or heating milk and milk alternatives.
- Do not operate the appliance with an empty milk container.
- Unplug the appliance from the power outlet when not in use and before cleaning.
- Allow the appliance to cool completely before cleaning or storing.
Product Components
Familiarize yourself with the parts of your Zwilling Enfinigy Milk Frother:
- Base Unit (with control buttons)
- Removable Stainless Steel Milk Container
- Transparent Lid
- Frothing Whisk (for dense foam)
- Mixing Whisk (for stirring or light foam)

Description: An exploded view showing the separate components of the Zwilling Enfinigy Milk Frother, including the base, stainless steel container, lid, and whisks.
Setup and First Use
- Unpack: Carefully remove all components from the packaging. Retain packaging for future transport or storage.
- Initial Cleaning: Before first use, wash the removable stainless steel milk container, the lid, and both whisks with warm water and a mild dish soap. Rinse thoroughly with clean water and dry completely. Do not wash the base unit.
- Placement: Place the base unit on a stable, dry, and level surface, away from heat sources and water.
- Whisk Insertion: Select the desired whisk (frothing or mixing) and securely insert it onto the spindle at the bottom of the milk container.
Operating Instructions
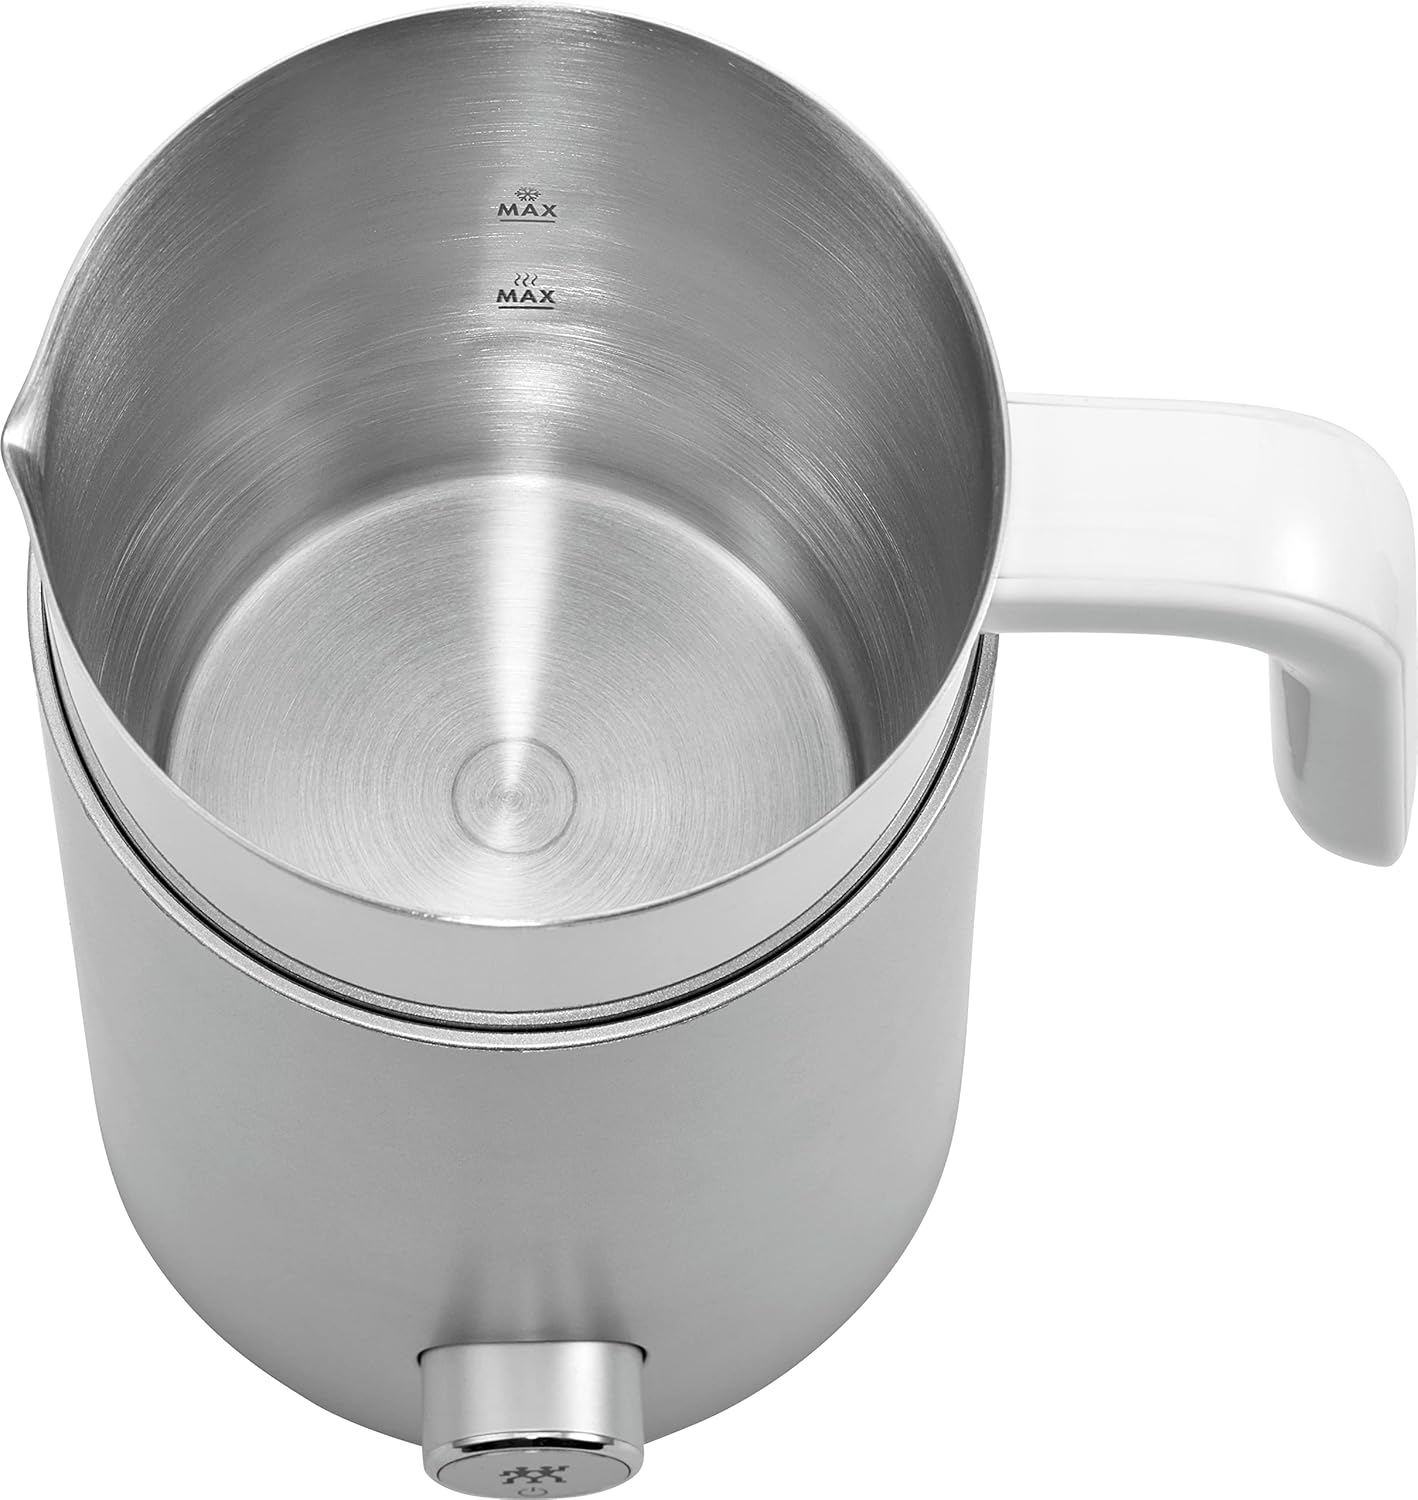
- Fill Milk Container: Pour fresh, cold milk or a milk alternative into the stainless steel container. Observe the internal MAX fill lines:
- For frothing warm milk: Do not exceed the lower "MAX" line (approximately 200 ml).
- For frothing cold milk or simply mixing: Do not exceed the upper "MAX" line (approximately 400 ml).
Description: A hand pours milk into the stainless steel container of the milk frother, illustrating the filling process.

Description: An overhead view of the frother's stainless steel container, clearly showing the two 'MAX' fill lines for different milk volumes.
- Attach Lid: Place the transparent lid securely onto the milk container. Ensure the whisk is properly attached to the lid's central spindle for optimal performance.

Description: A hand places the transparent lid, which has the frothing whisk attached, onto the milk container.
- Place Container: Position the filled milk container onto the base unit. Ensure it is seated correctly.
- Select Program: Press the desired button on the base unit to select your program (e.g., warm froth, cold froth, warm milk). The indicator light will illuminate.
- Start Frothing: The frother will begin operation automatically. The milk will be frothed or heated according to the selected program.

Description: A close-up view of milk actively frothing inside the container, visible through the transparent lid.
- Completion: The frother will automatically stop once the program is complete. The indicator light may change or turn off.
- Serve: Carefully remove the milk container from the base unit. Pour the frothed milk into your coffee or beverage.

Description: Frothed milk is poured from the frother's container into a glass cup containing coffee, demonstrating the serving process.

Description: The Zwilling Enfinigy Milk Frother stands on a wooden counter next to a glass of frothed coffee, showcasing the final product.
Cleaning and Maintenance
Proper cleaning ensures the longevity and hygiene of your milk frother.
- Unplug: Always unplug the appliance from the power outlet before cleaning.
- Cool Down: Allow the appliance to cool completely before cleaning.
- Clean Container and Whisks: Immediately after each use, remove the milk container, lid, and whisk(s). Wash them with warm water and a mild detergent. Rinse thoroughly and dry completely with a soft cloth.
- Base Unit: Wipe the exterior of the base unit with a soft, damp cloth. Do not immerse the base unit in water or any other liquid.
- Dishwasher Safety: The milk container, lid, and whisks are not suitable for cleaning in a dishwasher. Hand wash only.
- Storage: Store the frother in a clean, dry place when not in use.
Troubleshooting
If you encounter issues with your milk frother, please refer to the following common problems and solutions:
- Appliance does not start:
- Ensure the appliance is properly plugged into a functional power outlet.
- Verify that the milk container is correctly seated on the base unit.
- Check that the lid is securely closed.
- Milk not frothing properly:
- Ensure the correct whisk (frothing whisk) is installed.
- Check that the milk level is within the specified MAX lines. Overfilling or underfilling can affect frothing quality.
- Use fresh, cold milk (or milk alternative). Older milk or milk that is too warm may not froth effectively.
- Ensure the whisk is clean and free from any residue.
- Milk overflowing:
- Do not exceed the maximum fill lines for milk.
- Ensure the lid is securely in place during operation.
Technical Specifications
| Feature | Specification |
|---|---|
| Brand | Zwilling |
| Model Name | Enfinigy |
| Color | Silver |
| Housing Material | Plastic |
| Container Material | Stainless Steel |
| Capacity (Cold Milk) | 400 ml |
| Capacity (Warm Milk Frothing) | 200 ml |
| Product Weight | 1020 Grams |
| Special Feature | Milk frother |
| Care Instructions | Hand wash only (not dishwasher safe) |
| Included Components | Removable stainless steel milk container, frothing whisk, mixing whisk |
Warranty and Support
For detailed warranty information, product registration, or customer support, please refer to the documentation included with your purchase or visit the official Zwilling website. Keep your proof of purchase for warranty claims.