1. Introduction
This manual provides comprehensive instructions for the safe and efficient operation, installation, and maintenance of your Whirlpool AWZ9HPS/PRO Industrial Dryer. Please read this manual thoroughly before using the appliance and retain it for future reference. Proper use and care will ensure optimal performance and extend the lifespan of your dryer.
2. Important Safety Instructions
To reduce the risk of fire, electric shock, or injury to persons when using your appliance, follow basic precautions, including the following:
- Read all instructions before using the dryer.
- Do not dry articles that have been previously cleaned in, washed in, soaked in, or spotted with gasoline, dry-cleaning solvents, or other flammable or explosive substances, as they emit vapors that could ignite or explode.
- Do not allow children to play on or in the appliance. Close supervision of children is necessary when the appliance is used near children.
- Before the appliance is removed from service or discarded, remove the door to the drying compartment.
- Do not reach into the appliance if the drum is moving.
- Do not install or store this appliance where it will be exposed to the weather.
- Do not tamper with controls.
- Do not repair or replace any part of the appliance or attempt any servicing unless specifically recommended in this manual or in published user-repair instructions that you understand and have the skills to carry out.
- Do not use fabric softeners or products to eliminate static unless recommended by the manufacturer of the fabric softener or product.
- Do not use heat to dry articles containing foam rubber or similarly textured rubber-like materials.
- Clean lint screen before or after each load.
- Do not allow lint to accumulate around the dryer.
- Do not operate the dryer with missing or damaged parts.
- Do not obstruct the flow of combustion air and ventilation air.
- Keep area around the exhaust opening and adjacent surrounding areas free from the accumulation of lint, dust, and dirt.
- The interior of the appliance and exhaust duct should be cleaned periodically by qualified service personnel.
- Do not place items exposed to cooking oils in your dryer. Items contaminated with cooking oils may contribute to a chemical reaction that could cause a load to catch fire.
- Always contact qualified service personnel for installation, repair, or maintenance.
3. Product Overview
Familiarize yourself with the components of your Whirlpool AWZ9HPS/PRO Industrial Dryer.
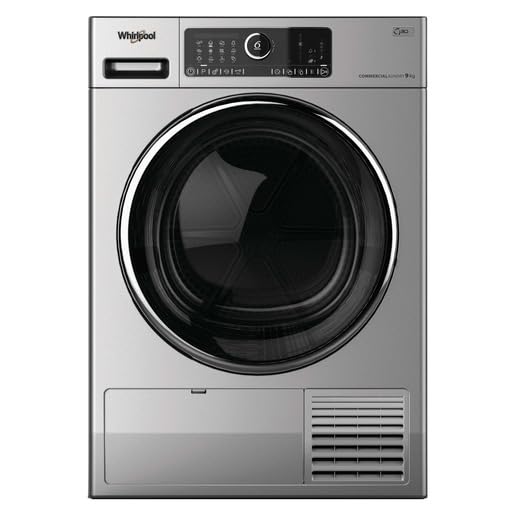
Figure 1: Front View of Whirlpool AWZ9HPS/PRO Industrial Dryer. This image displays the full front of the dryer, highlighting the main control panel at the top, the large loading door for the drum in the center, and the filter access panel at the bottom right.
Key Components:
- Control Panel: Located at the top, this panel features various buttons, indicators, and a rotary dial for program selection and settings adjustment.
- Loading Door: The large circular door in the center provides access to the drying drum.
- Lint Filter Access: A panel at the bottom right allows access to the lint filter for cleaning.
- Ventilation Grille: Located next to the lint filter access, this grille ensures proper airflow.
4. Setup and Installation
Proper installation is crucial for the safe and efficient operation of your dryer. It is recommended that installation be performed by a qualified technician.
4.1 Unpacking
- Carefully remove all packaging materials.
- Inspect the dryer for any shipping damage. Report any damage immediately to your dealer.
- Ensure all accessories are present.
4.2 Location Requirements
- Place the dryer on a solid, level floor capable of supporting its weight (approximately 50 kg).
- Ensure adequate space around the dryer for ventilation and servicing.
- The dryer dimensions are approximately 50 cm (L) x 50 cm (W) x 28 cm (H). Allow additional space for door opening and utility connections.
- Do not install the dryer in an area where it will be exposed to water or extreme temperatures.
4.3 Electrical Connection
Connect the dryer to a dedicated, grounded electrical outlet as specified in the electrical requirements section of the full installation manual. Do not use extension cords.
4.4 Venting
Proper venting is essential to prevent lint accumulation and ensure efficient drying. Connect the dryer to an approved exhaust duct system. The duct should be as short and straight as possible, made of rigid metal, and free of kinks or obstructions.
5. Operating Instructions
Follow these steps for optimal drying results and to ensure the longevity of your appliance.
5.1 Before Each Load
- Clean the lint filter.
- Sort laundry by fabric type and desired dryness level.
- Check pockets for items that could damage the dryer or clothes.
5.2 Loading the Dryer
- Open the loading door.
- Load items loosely into the drum. Do not overload the dryer, as this can reduce efficiency and increase drying time.
- Close the loading door firmly.
5.3 Selecting a Drying Program
The control panel allows you to select various drying programs and options.

Figure 2: Control Panel Detail. This image provides a detailed view of the dryer's control panel, showing the program selection dial, various indicator lights, and function buttons for customized drying cycles.
- Power On: Press the Power button (usually indicated by a circle with a vertical line).
- Select Program: Turn the program selection dial to choose the desired drying cycle (e.g., Cotton, Synthetics, Delicates, Timed Dry). The selected program will be indicated on the display or by an illuminated LED.
- Adjust Options (if available): Use the option buttons to modify settings such as dryness level, temperature, or anti-crease function.
- Start Cycle: Press the Start/Pause button to begin the drying cycle.
5.4 After the Cycle
- Remove clothes promptly to minimize wrinkling.
- Clean the lint filter after every load.
- Turn off the dryer if not in immediate use.
6. Maintenance
Regular maintenance ensures efficient operation and extends the life of your dryer.
6.1 Cleaning the Lint Filter
The lint filter should be cleaned before or after every load to maintain drying efficiency and prevent fire hazards.
- Open the lint filter access panel (bottom right of the dryer).
- Pull out the lint filter.
- Remove any accumulated lint by hand or with a soft brush.
- Rinse the filter with water if necessary, ensuring it is completely dry before reinserting.
- Reinsert the lint filter and close the access panel.
6.2 Cleaning the Dryer Exterior
Wipe the exterior surfaces with a soft, damp cloth. Do not use abrasive cleaners or solvents.
6.3 Cleaning the Dryer Interior
Periodically wipe the interior of the drum with a damp cloth. For stubborn stains, use a mild detergent and rinse thoroughly.
6.4 Exhaust System Maintenance
The exhaust duct should be inspected and cleaned periodically (at least once a year) by a qualified technician to remove lint buildup. Blocked ducts can reduce efficiency and pose a fire risk.
7. Troubleshooting
Before contacting service, review the following common issues and their solutions.
| Problem | Possible Cause | Solution |
|---|---|---|
| Dryer does not start. |
|
|
| Clothes are not drying. |
|
|
| Dryer is noisy. |
|
|
If the problem persists after attempting these solutions, please contact qualified service personnel.
8. Specifications
| Feature | Detail |
|---|---|
| Brand | Whirlpool |
| Model Name | AWZ9HPS/PRO |
| Article Model Number | 8003437609770 |
| Type | Freestanding |
| Loading Type | Front Load (Note: JSON data indicated Top Load, but product image shows Front Load.) |
| Material | Stainless Steel |
| Product Dimensions (L x W x H) | 50 x 50 x 28 cm |
| Weight | 50 kilograms |
| Manufacturer | WHIRLPOOL |
| ASIN | B09MKT1XG2 |
9. Warranty and Support
For warranty information, please refer to the warranty card included with your product or visit the official Whirlpool website. For technical support, service requests, or to order replacement parts, please contact Whirlpool customer service or an authorized service center in your region. Ensure you have your model number (AWZ9HPS/PRO) and serial number ready when contacting support.
Availability of spare parts: Information unavailable on spare parts.