1. Introduction
Thank you for choosing the AQUANEAT LED Aquarium Light. This manual provides essential information for the safe and efficient operation of your new aquarium light. Please read it thoroughly before installation and use, and retain it for future reference.

Image 1.1: The AQUANEAT LED Aquarium Light, showing the main light bar and its extendable mounting brackets.
2. Safety Instructions
- WARNING: This product is NOT WATERPROOF. Keep the light fixture and power adapter away from splashing water and moisture. Do not immerse in water.
- Ensure your hands are dry before handling the light or plugging/unplugging the power adapter.
- Always unplug the light from the power outlet before performing any maintenance, cleaning, or installation.
- Do not operate the light if the cord or plug is damaged.
- Do not attempt to repair or modify the light. Refer all servicing to qualified personnel.
- This light is designed for indoor use only.
- Ensure the voltage of your power supply matches the requirements of the light (110 Volts).
3. Package Contents
Verify that all components are present in the package:
- AQUANEAT LED Aquarium Light Fixture (Model TXF-301)
- Extendable Mounting Brackets (pre-attached or separate)
- Inline Controller with Power Cord
- Power Adapter (AC/DC)

Image 3.1: The power adapter for the aquarium light, which connects to the inline controller.
4. Setup Instructions
- Prepare the Aquarium: Ensure your aquarium is clean and ready for the light fixture. The light is suitable for tanks from 18 to 24 inches long.
- Install Brackets: If the extendable brackets are not already attached, slide them into the slots on each end of the light fixture.
- Adjust Length: Extend the brackets to fit the length of your aquarium. The light body itself is 17 inches long, and the brackets allow for extension up to 24 inches.
- Position Light: Carefully place the light fixture on the rim of your aquarium. Ensure it is stable and securely seated.
- Connect Power: Connect the power cord from the inline controller to the power adapter, then plug the power adapter into a standard 110V electrical outlet.
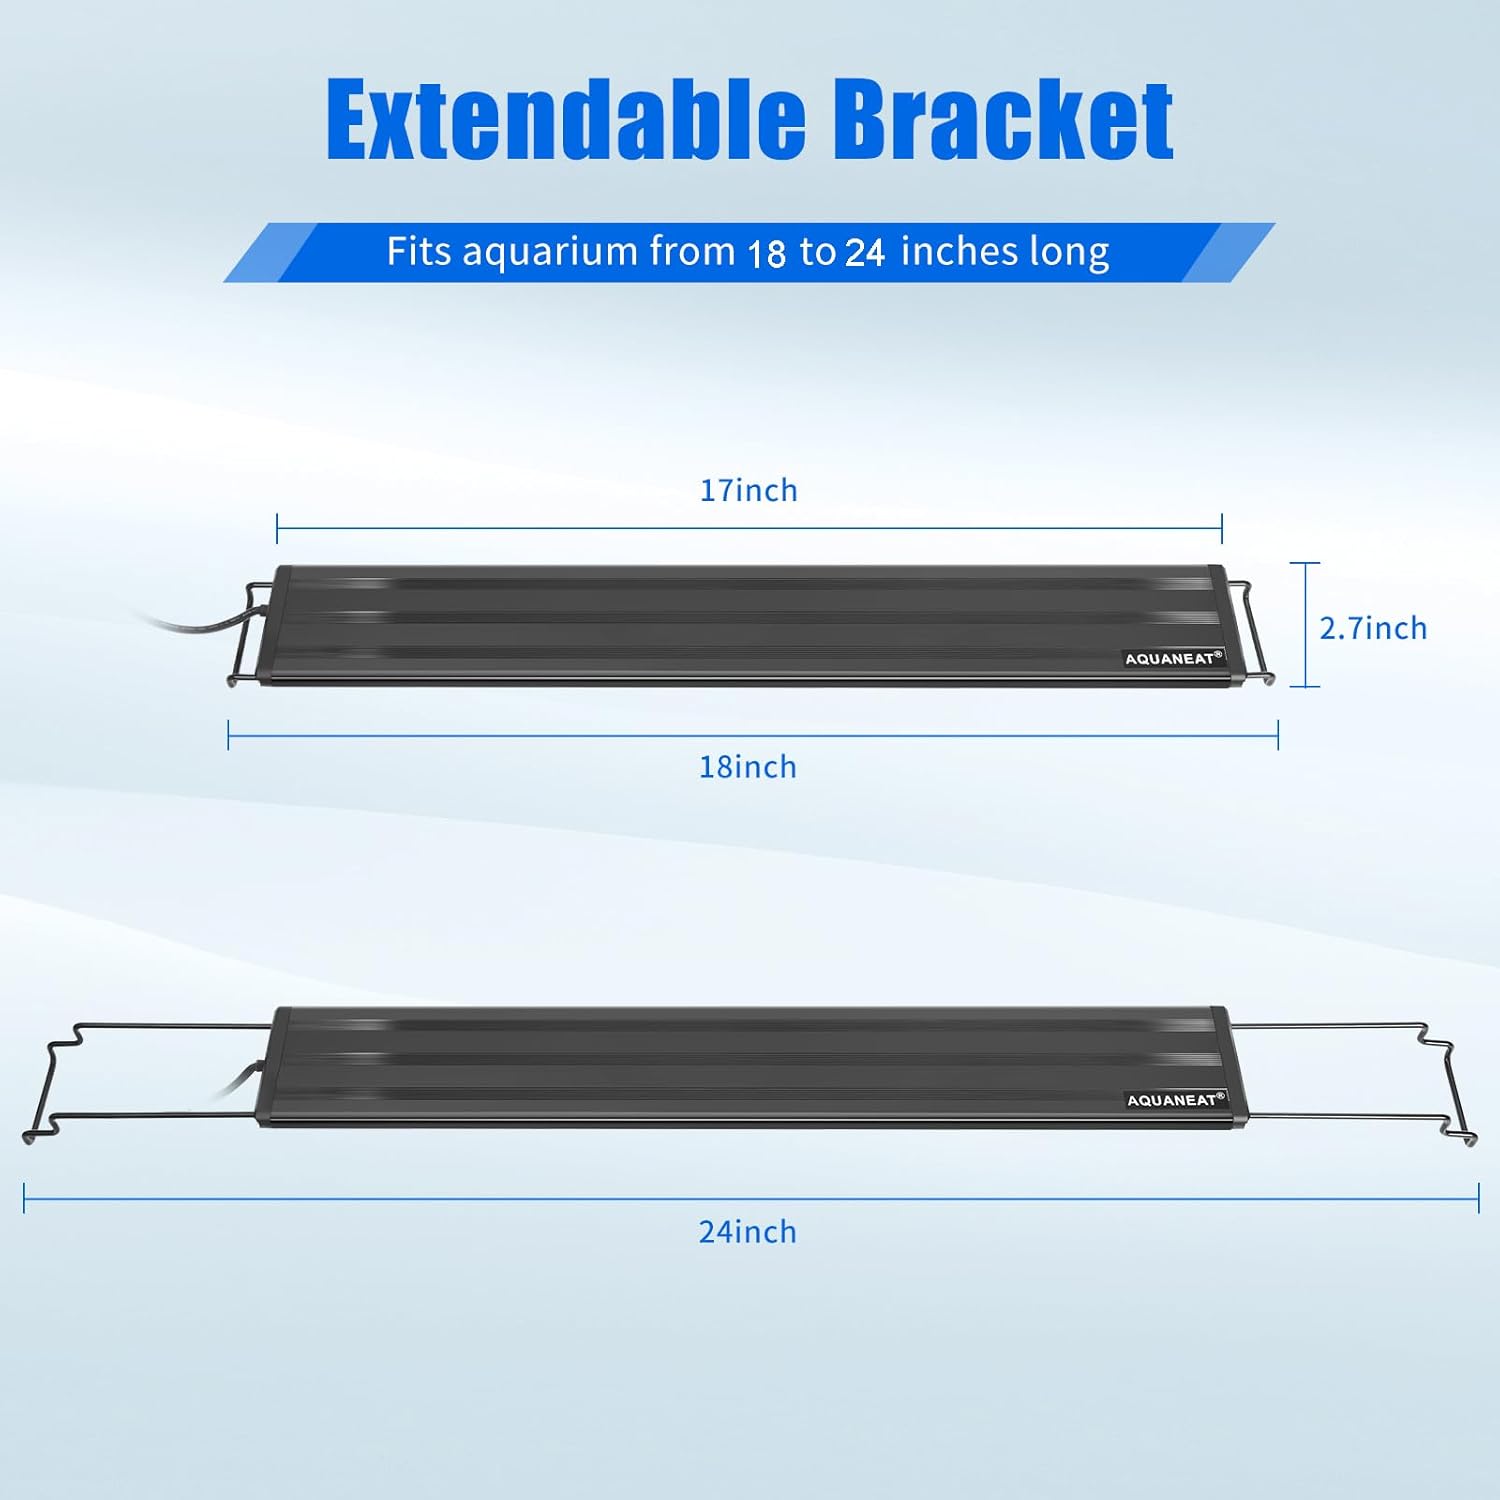
Image 4.1: Diagram illustrating the extendable brackets, showing the light body length of 17 inches and its ability to fit tanks from 18 to 24 inches.
5. Operating Instructions
The AQUANEAT LED Aquarium Light features an inline controller for easy operation of its various functions.

Image 5.1: The inline controller, detailing the functions of each button for brightness, light modes, timer, and power.
5.1 Power On/Off
- Press the Power Button (
 ) to turn the light on or off.
5.2 Brightness Adjustment
- Press the Plus (+) or Minus (-) buttons () to cycle through 5 levels of brightness: 20%, 40%, 60%, 80%, and 100%.
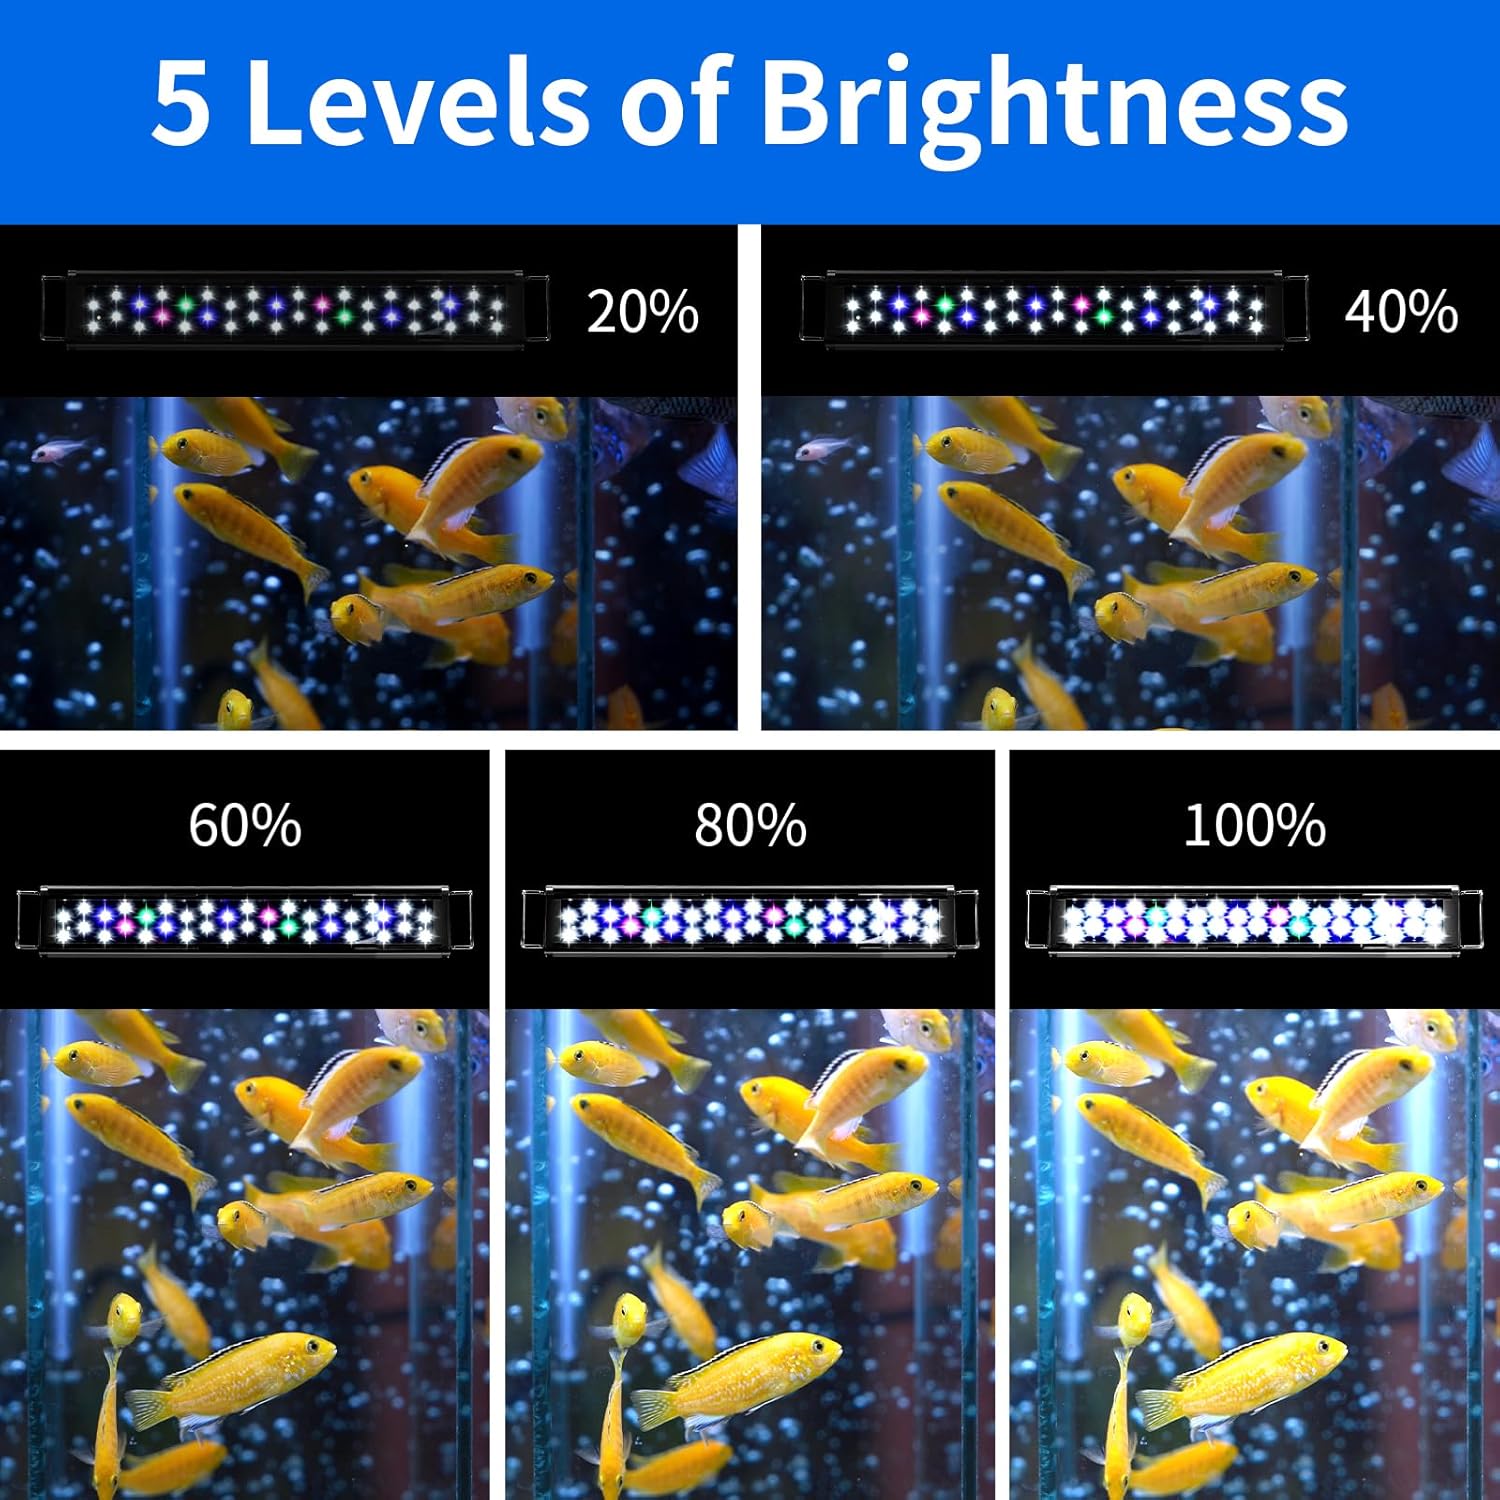
Image 5.2: Visual representation of the 5 adjustable brightness levels (20% to 100%) of the aquarium light.
5.3 Light Mode Selection
Press the Mode Button () to switch between three distinct lighting modes:
- Cool Daylight Mode: All LEDs (White + Pink + Green + Blue) are illuminated for a bright, full-spectrum effect.
- Warm Daylight Mode: All LEDs except blue lights (White + Pink + Green) are illuminated, providing a warmer daylight appearance.
- Moonlight Mode: Only the 6 blue LEDs are illuminated, simulating a nighttime moonlight effect.

Image 5.3: Comparison of the three light modes: Cool Daylight (all lights), Warm Daylight (no blue lights), and Moonlight (only blue lights).
5.4 Timer Function
The built-in timer allows for automatic on/off cycles. Press the Timer Button () to select one of the three timing modes:
- 4 Hours (4H)
- 8 Hours (8H)
- 10 Hours (10H)
Once a timer mode is selected, the light will automatically turn off after the set duration and then turn back on at the same time the next day, maintaining a consistent lighting schedule.
Note: The light's internal timer defaults to OFF if power is interrupted (e.g., by an external timer or power outage). It is recommended to use the built-in timer for consistent scheduling.
6. Maintenance
- Cleaning: Unplug the light before cleaning. Use a soft, dry cloth to wipe the light fixture. Do not use abrasive cleaners or immerse the light in water.
- Inspection: Regularly inspect the power cord and light fixture for any signs of damage. If damage is found, discontinue use and contact customer support.
- Water Contact: As the light is not waterproof, always ensure it is positioned to minimize exposure to splashing water.
7. Troubleshooting
| Problem | Possible Cause | Solution |
|---|---|---|
| Light does not turn on. | No power, loose connection, faulty power adapter. | Check if the power adapter is securely plugged into the outlet and the light. Test the outlet with another device. |
| Light modes or brightness not changing. | Controller malfunction, button not pressed correctly. | Ensure buttons are pressed firmly. Unplug and replug the light to reset the controller. |
| Timer function not working as expected. | Power interruption, incorrect timer setting. | Ensure the light is not connected to an external timer. Set the desired timer duration by pressing the timer button at the exact time you want the cycle to begin daily. If power is lost, the timer will need to be reset. |
| Light flickers or dims unexpectedly. | Unstable power supply, internal component issue. | Try plugging the light into a different outlet. If the issue persists, contact customer support. |
8. Specifications
| Feature | Specification |
|---|---|
| Model Name | TXF-301 |
| Brand | AQUANEAT |
| Product Dimensions (Light Body) | 17" L x 2.7" W x 2.7" H |
| Adjustable Tank Size | 18" to 24" long |
| Light Source Type | LED (5730 LEDs) |
| Number of LEDs | Total 36 LEDs (24x 6500K White, 6x Blue, 3x Pink, 3x Green) |
| Color Temperature | 6500 Kelvin (White LEDs) |
| Brightness | 2160 Lumen |
| Wattage | 18 Watts |
| Voltage | 110 Volts |
| Timer Modes | 4 hours, 8 hours, 10 hours |
| Brightness Levels | 5 levels (20%, 40%, 60%, 80%, 100%) |
| Light Modes | Cool Daylight, Warm Daylight, Moonlight |
| Material | Plastic, Acrylic, Glass |
| Water Resistance | Not Waterproof (IPX0) |
| Item Weight | 1 Pound (approx. 16 ounces) |

Image 8.1: Detailed view of the LED configuration, highlighting the 24 white, 6 blue, 3 pink, and 3 green LEDs for full spectrum lighting.
9. Warranty and Support
For warranty information or technical support, please refer to the product packaging or contact AQUANEAT customer service directly. Keep your purchase receipt as proof of purchase.
Manufacturer: AQUANEAT


