1. Introduction
This manual provides detailed instructions for the setup, operation, and maintenance of your JRHC 2D Wireless Barcode Scanner. Please read this manual thoroughly before using the device to ensure proper functionality and to maximize its lifespan.

Image 1.1: The JRHC 2D Wireless Barcode Scanner, accompanied by its USB wireless receiver and charging cable.
2. Product Features
- Multi-functionality: Integrates barcode scanning, data collection, and inventory counting.
- Decoding Capability: Reads 1D barcodes (Codabar, Code 11, Code93, MSI, Code 128, EAN, UPC, Code 39, UPC-A, ISBN, Industrial 25, Standard25, Matrix) and 2D codes (QR, DataMatrix, PDF417, Aztec, Micro PDF417), including those displayed on screens.
- Connectivity: Supports 2.4G wireless and USB wired connections.
- Long Transmission Distance: Up to 150 meters (492 feet) in barrier-free environments, 50 meters (164 feet) indoors or with obstacles.
- Display and Interface: Features an HD color screen and 26 physical buttons for convenient operation.
- Battery Life: Built-in 1000mAh lithium polymer battery provides 20-40 hours of continuous use after a 2-hour charge.
- System Compatibility: Compatible with Windows XP/7/8/10, iOS, Android, Mac OS, and Linux systems. Supports data export to Word, Excel, and Text files.
- Multi-language Support: Japanese, English, and Chinese.

Image 2.1: The scanner's capability to decode various 1D and 2D barcode types, including those that are distorted or on screens.
3. Setup and Connection
3.1 Package Contents
Before proceeding, ensure all items are present:
- JRHC 2D Wireless Barcode Scanner
- 2.4G Wireless USB Receiver
- USB Charging/Data Cable
- User Manual (this document)

Image 3.1: Contents of the product package.
3.2 Charging the Scanner
Connect the scanner to a power source using the provided USB charging cable. The battery indicator on the screen will show charging status. A full charge typically takes 2 hours and provides 20-40 hours of operational use or 30 hours of standby time.

Image 3.2: Battery capacity and charging information.
3.3 Connecting to a Device
The scanner offers two connection methods:
3.3.1 2.4G Wireless Connection
- Insert the 2.4G wireless USB receiver into an available USB port on your computer (laptop, desktop, etc.).
- Power on the barcode scanner.
- The scanner should automatically pair with the receiver within 3 seconds. No additional drivers are typically required.
3.3.2 USB Wired Connection
- Connect one end of the provided USB cable to the scanner's USB port.
- Connect the other end of the USB cable to an available USB port on your computer.
- The scanner will function as a wired device and also charge simultaneously.
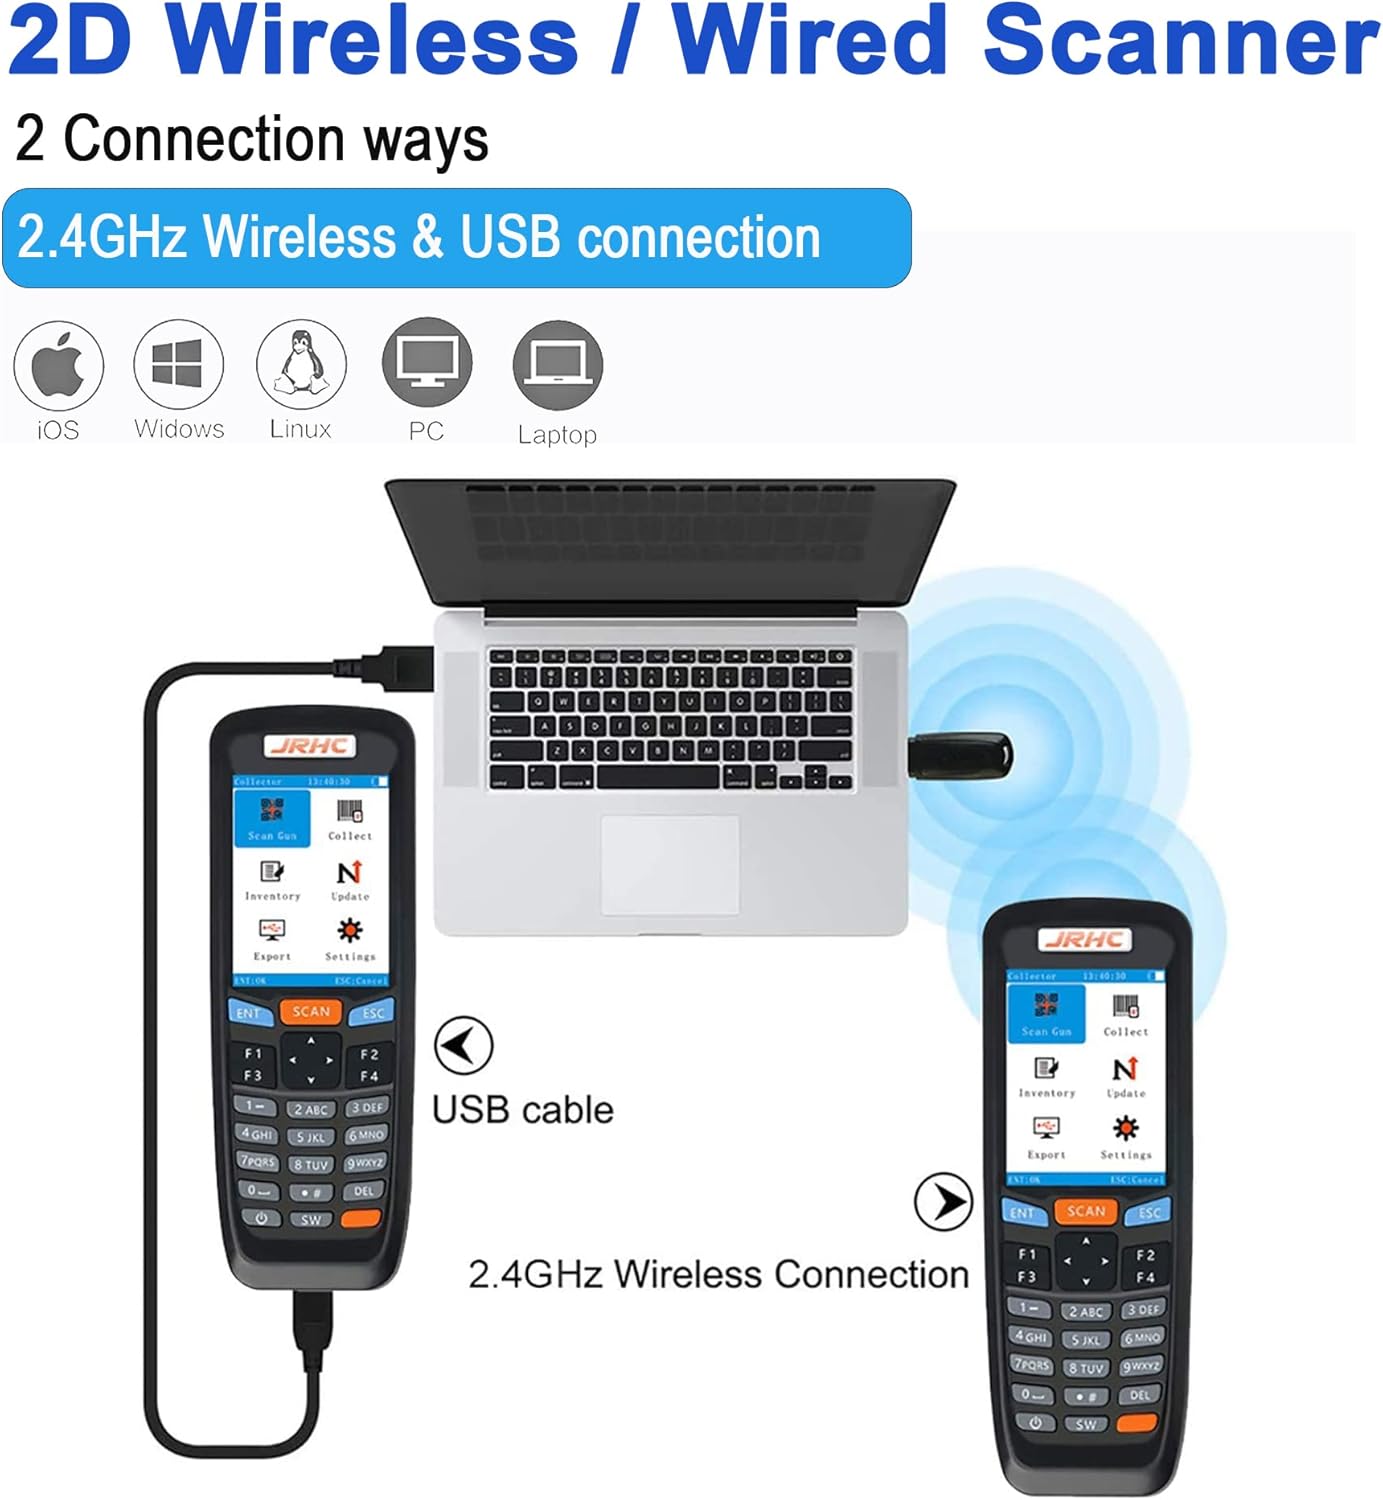
Image 3.3: Wireless and wired connection methods.
The scanner is compatible with various operating systems including Windows XP/7/8/10, iOS, Android, Mac OS, and Linux.
4. Operating Instructions
The scanner features a user-friendly interface with a main menu offering several functions:
- Scan Gun: For basic barcode scanning.
- Collect: For collecting multiple barcodes before exporting.
- Inventory: For managing inventory, including quantity input.
- Upgrade: For firmware updates (refer to manufacturer's website for instructions).
- Export: To transfer collected data to your connected device.
- Settings: To configure device parameters such as language, volume, and scan modes.

Image 4.1: Main menu and supported barcode types (1D, QR, Screen Code).
4.1 Scanning Barcodes
Point the scanner's window at the barcode you wish to scan and press the "SCAN" button. A successful scan will typically be indicated by a beep and the barcode data appearing on the screen.
4.2 Scan Modes
The scanner supports different operational modes to suit various needs:
4.2.1 Wireless Mode (Instant Upload)
In this mode, scanned barcode data is immediately transmitted to your connected device (e.g., computer) as if typed via a keyboard. This is suitable for real-time data entry.
4.2.2 Collect Mode
This mode allows you to scan and store multiple barcodes internally. The scanner's screen will display the number, length, and count of scanned items. After scanning, you can export the collected data to your device.
4.2.3 Inventory Mode
Designed for inventory management, this mode enables you to scan items and manually input quantities directly on the scanner. The device stores this information, which can then be exported to your computer for inventory tracking.

Image 4.2: Overview of Wireless, Collect, and Inventory scan modes.

Image 4.3: Manual quantity input feature on the scanner screen.
4.3 Data Export
After collecting data in Collect or Inventory mode, navigate to the "Export" option in the main menu. The scanner can export data in formats compatible with common office software like Microsoft Word, Excel, or plain text files.

Image 4.4: Data export functionality to various file types.

Image 4.5: Example of exported data with time and barcode information.
5. Maintenance
5.1 Cleaning
Use a soft, dry cloth to clean the scanner's exterior. For the scanning window, use a lens cleaning cloth to avoid scratches. Do not use abrasive cleaners or solvents.
5.2 Battery Care
To prolong battery life, avoid fully discharging the battery frequently. Store the scanner in a cool, dry place when not in use for extended periods. Recharge the battery regularly, even if not in active use.
6. Troubleshooting
6.1 Scanner Not Connecting
- Wireless: Ensure the USB receiver is securely plugged into your computer. Verify the scanner is powered on and within the effective transmission range (up to 150m barrier-free, 50m with obstacles). Try re-pairing by restarting both the scanner and the computer.
- Wired: Ensure the USB cable is securely connected to both the scanner and the computer. Try a different USB port or cable.
- Compatibility: Confirm your operating system is supported (Windows XP/7/8/10, iOS, Android, Mac OS, Linux).

Image 6.1: Wireless transmission distance considerations.
6.2 Barcodes Not Scanning
- Barcode Type: Ensure the barcode type is supported by the scanner (1D and 2D codes listed in Section 2).
- Condition: Check if the barcode is damaged, smudged, or poorly printed.
- Lighting: Ensure adequate lighting, but avoid direct glare on the barcode.
- Distance/Angle: Adjust the distance and angle between the scanner and the barcode.
6.3 Data Export Issues
- Ensure the scanner is properly connected to your computer (wired or wireless).
- Verify that the target application (e.g., Excel, Word) is open and ready to receive input.
- Check scanner settings for export options.
6.4 Inventory Quantity Management
When using Inventory Mode, if you scan an item and enter a quantity, then scan another item, and later scan the first item again, the scanner may not automatically add to the previous quantity. You may need to manually adjust the quantity for existing entries to ensure accuracy.
7. Specifications
| Feature | Detail |
|---|---|
| Model | B09MCHJLBQ |
| Product Dimensions | 6.69 x 2.36 x 1.18 inches |
| Item Weight | 9.6 ounces |
| Battery Type | 1 Lithium Polymer battery (included) |
| Battery Capacity | 1000mAh |
| Charging Time | Approx. 2 hours |
| Operating Time | 20-40 hours |
| Standby Time | 30 hours |
| Connectivity | 2.4G Wireless, USB Wired |
| Transmission Distance | Max 150m (barrier-free), Max 50m (with obstacles) |
| Compatible Systems | Windows XP/7/8/10, iOS, Android, Mac OS, Linux |
| Manufacturer | JRHC |
8. Warranty and Support
For warranty information and technical support, please refer to the official JRHC website or contact their customer service directly. Keep your purchase receipt as proof of purchase.
Contact Information: Please visit the JRHC store on Amazon or their official website for the most up-to-date support contact details.
Note: Specific warranty terms may vary by region and retailer.


