1. Important Safety Information
Please read this manual carefully before using your washing machine. Keep it for future reference. Always follow basic safety precautions to reduce the risk of fire, electric shock, and injury.
- Ensure the appliance is properly grounded.
- Do not allow children to play with or in the appliance.
- Unplug the appliance before cleaning or performing maintenance.
- Do not wash items that have been previously cleaned in, washed with, soaked in, or spotted with gasoline, dry-cleaning solvents, or other flammable or explosive substances.
- Do not install or store this appliance where it will be exposed to the weather or to freezing temperatures.
2. Setup and Installation
2.1 Unpacking
Carefully remove all packaging materials. Ensure all components are present and undamaged. Retain packaging for future transport if needed.
2.2 Removing Transport Bolts
Before operating the washing machine, you must remove the transport bolts located at the rear of the appliance. Failure to do so will cause severe vibration and damage during operation.

Figure 1: Rear view of the washing machine. Locate and remove the transport bolts before installation.
2.3 Positioning and Leveling
Place the washing machine on a firm, level floor. Adjust the leveling feet to ensure the appliance is stable and balanced. A level washing machine reduces noise and vibration during operation.

Figure 2: Side view of the washing machine. Adjust the feet to ensure the appliance is level.
2.4 Water and Electrical Connections
Connect the water inlet hose to a cold water tap. Ensure connections are tight to prevent leaks. Plug the power cord into a grounded electrical outlet. Do not use extension cords.
3. Operating Instructions
3.1 Control Panel Overview
The control panel features a program selector dial, function buttons, and a digital display. Familiarize yourself with these controls for optimal use.

Figure 3: Detailed view of the control panel, showing the program dial, display, and function buttons.
3.2 Loading Laundry
Open the door and load laundry into the drum. Do not overload the machine; leave enough space for clothes to tumble freely. Close the door firmly.

Figure 4: The washing machine drum with the door open, ready for loading laundry.
3.3 Adding Detergent and Additives
Pull out the detergent dispenser drawer. Add appropriate amounts of detergent to the main wash compartment and fabric softener to its designated compartment. Refer to detergent packaging for dosage recommendations.
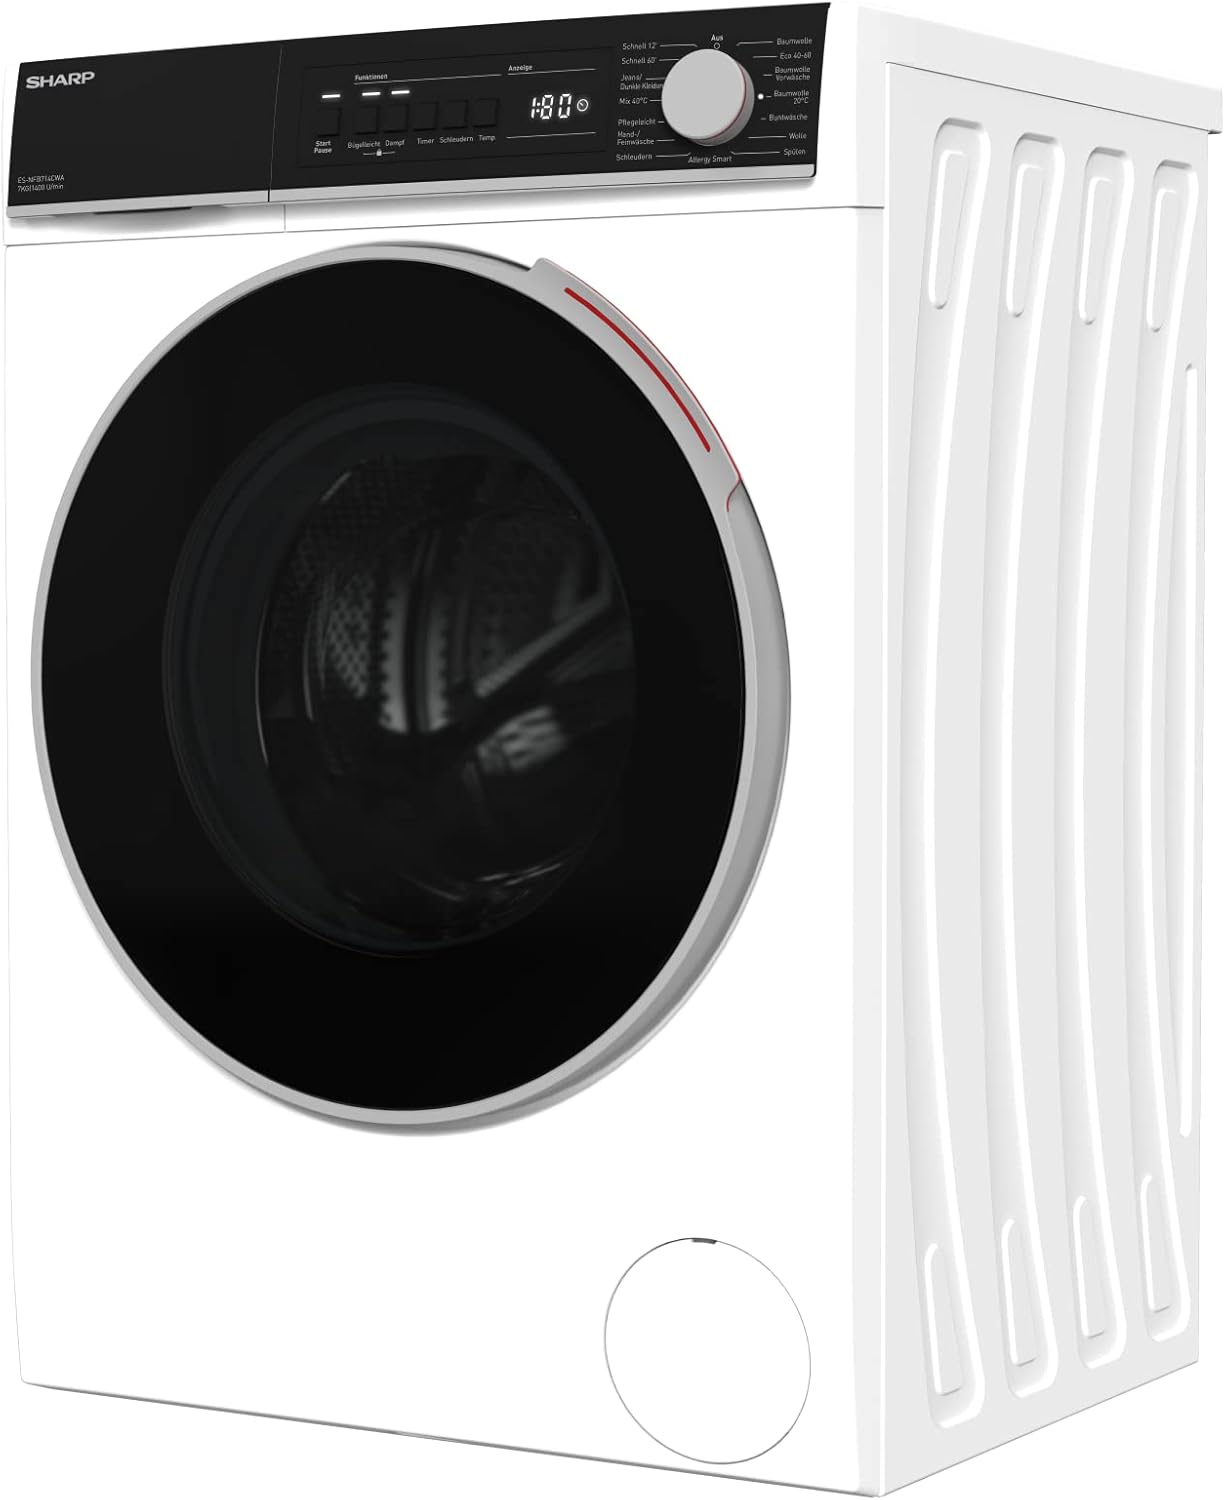
Figure 5: The detergent dispenser drawer, showing compartments for detergent and fabric softener.
3.4 Program Selection and Start
Turn the program selector dial to choose your desired wash program (e.g., Cotton, Eco 40-60, Quick 12'). Use the function buttons to select additional options like steam or extra rinse. Press the Start/Pause button to begin the cycle.
- Advanced Inverter Motor: This motor provides powerful yet quiet operation, enhancing durability and energy efficiency.
- Steam Function: Select programs offer a steam option for deep cleaning and improved hygiene, reducing allergens and making clothes easier to iron.
4. Maintenance
4.1 Cleaning the Detergent Dispenser
Regularly clean the detergent dispenser drawer to prevent residue buildup. Remove the drawer, rinse it under warm water, and clean any stubborn deposits with a brush. Reinsert the drawer.
4.2 Cleaning the Drum
Run a maintenance wash cycle (e.g., a hot wash with no laundry and a descaling agent) periodically to clean the drum and remove any odors or residue.
4.3 Cleaning the Drain Filter
The drain filter should be cleaned regularly to ensure proper drainage and prevent blockages. Refer to the full manual for detailed instructions on accessing and cleaning the filter.
4.4 Exterior Care
Wipe the exterior of the washing machine with a soft, damp cloth. Do not use abrasive cleaners or solvents.
5. Troubleshooting
If you encounter issues with your washing machine, consult the following table before contacting service.
| Problem | Possible Cause | Solution |
|---|---|---|
| Machine does not start | Power cord not plugged in; door not closed properly; program not selected; Start/Pause button not pressed. | Check power connection; ensure door is latched; select a program; press Start/Pause. |
| Water not filling | Water tap closed; water inlet hose kinked; water pressure too low. | Open water tap; straighten hose; check household water pressure. |
| Excessive vibration/noise | Transport bolts not removed; machine not level; uneven load. | Remove transport bolts; adjust leveling feet; redistribute laundry inside the drum. |
| Water leakage | Hose connections loose; detergent dispenser overflowing; drain filter not properly closed. | Tighten hose connections; do not overfill detergent dispenser; ensure drain filter is secure. |
6. Technical Specifications
- Brand: Sharp
- Model: ES-NFB714CWA-DE
- Capacity: 7 kg
- Maximum Spin Speed: 1400 rpm
- Energy Efficiency Class: A (A-G scale)
- Dimensions (WxDxH): 59.7 x 52.7 x 84.5 cm
- Weight: 72.5 kg
- Noise Level (Spin): 75 dB
- Voltage: 220 Volt
- Wattage: 2200 watt
- Special Features: Advanced Inverter Motor, Steam Function, AquaStop


Figure 6: EU Energy Label and Technical Data Sheet for the ES-NFB714CWA-DE model. For more details, visit the EPREL database.
7. Warranty and Support
7.1 Warranty Information
This Sharp washing machine comes with a standard manufacturer's warranty of 24 months from the date of purchase. Please retain your proof of purchase for warranty claims. The warranty covers manufacturing defects and malfunctions under normal use conditions.
7.2 Customer Support
For technical assistance, spare parts, or warranty service, please contact Sharp customer support. You can find contact information and additional resources on the official Sharp website or by visiting the Sharp Store on Amazon.


