APARO RADI-12 Pro Air
APARO RADI-12 Pro Air 90W RGBCW Flexible Inflatable RGB Panel User Manual
Model: RADI-12 Pro Air
1. Introduction
This manual provides detailed instructions for the safe and effective use of your APARO RADI-12 Pro Air 90W RGBCW Flexible Inflatable RGB Panel. Please read this manual thoroughly before operation and retain it for future reference.

Image 1: APARO RADI-12 Pro Air Flexible RGB Panel with included accessories.
2. Product Features
- Flexible and Inflatable Design: The panel is roll-able and flexible, designed for portability and versatile positioning.
- RGBCW LED Technology: Features 180 white, 180 yellow, and 180 RGB LEDs for a wide range of color temperatures (2700K-9999K) and full RGB color control.
- Integrated Control Box: The control box includes a built-in power supply, eliminating the need for an external AC adapter.
- Multiple Control Options: Supports ON/OFF, turning knob for dimming, Bluetooth APP control (DeSal Lite+), and DMX-512.
- Scene Effects: Includes 9 pre-programmed scene effects: Lightning 1, Lightning 2, TV Screen, Candle, Paparazzi, Strobe, High/Low Beam, Double Flash (Hazard), and Warm Breathing.
- High Color Rendering Index (CRI): CRI 93+ ensures accurate color reproduction.
- Waterproof Panel: The flexible panel is tested to be waterproof at a depth of 30 meters for 30 minutes.
- Dual Power Compatibility: Operates with both AC power (100V-240V) and V-mount DC battery (not included).
3. Package Contents
Verify that all items listed below are present in your package:
- 1 x Radi-12 Air Lamp (Flexible Panel)
- 1 x Control Box
- 1 x Grid Softbox
- 1 x Inflator
- 1 x DMX Cable
- 1 x Power Cord
- 1 x Extension Cord
- 1 x Clamp
- 1 x X-Frame
- 1 x Carry Case

Image 2: Contents of the APARO RADI-12 Pro Air package.
4. Setup Instructions
- Attach X-Frame: Secure the flexible Radi-12 Air Lamp panel to the X-Frame. The X-Frame provides structural support for mounting the panel on a light stand.
- Mount on Light Stand: Attach the assembled panel and X-Frame to a compatible light stand using the provided clamp. Ensure it is securely fastened.

Image 3: Flexible panel mounted on a light stand.
- Install Air Softbox and Grid:
- Unfold the Grid Softbox.
- Attach the softbox to the flexible panel.
- Use the provided inflator to inflate the air softbox until it takes its proper shape.
- If desired, attach the foldable honeycomb grid to the front of the softbox for more controlled light direction.

Image 4: Flexible panel with honeycomb grid.

Image 5: Flexible panel with softbox.
- Connect Control Box: Connect the Radi-12 Air Lamp to the control box using the extension cord.
- Power Connection:
- For AC power, connect the power cord to the control box and then to a standard AC outlet (100V-240V).
- For DC power, connect a compatible V-mount battery (not included) to the control box.
5. Operating Instructions
The APARO RADI-12 Pro Air offers various control methods for adjusting light output.
5.1 Manual Control (Control Box)
- Power ON/OFF: Use the dedicated ON/OFF switch on the control box to power the unit.
- Dimming: Rotate the turning knob to adjust the brightness from 0% to 100% (stepless dimming).
- CCT Adjustment: Select CCT mode and use the knob to adjust the color temperature between 2700K and 9999K.
- RGB/HSI Adjustment: Select RGB or HSI mode to fine-tune color hue, saturation, and intensity.
- Scene Effects: Navigate through the control box menu to select from 9 built-in scene effects: Lightning 1, Lightning 2, TV Screen, Candle, Paparazzi, Strobe, High/Low Beam, Double Flash (Hazard), and Warm Breathing. Adjust speed and intensity as needed.
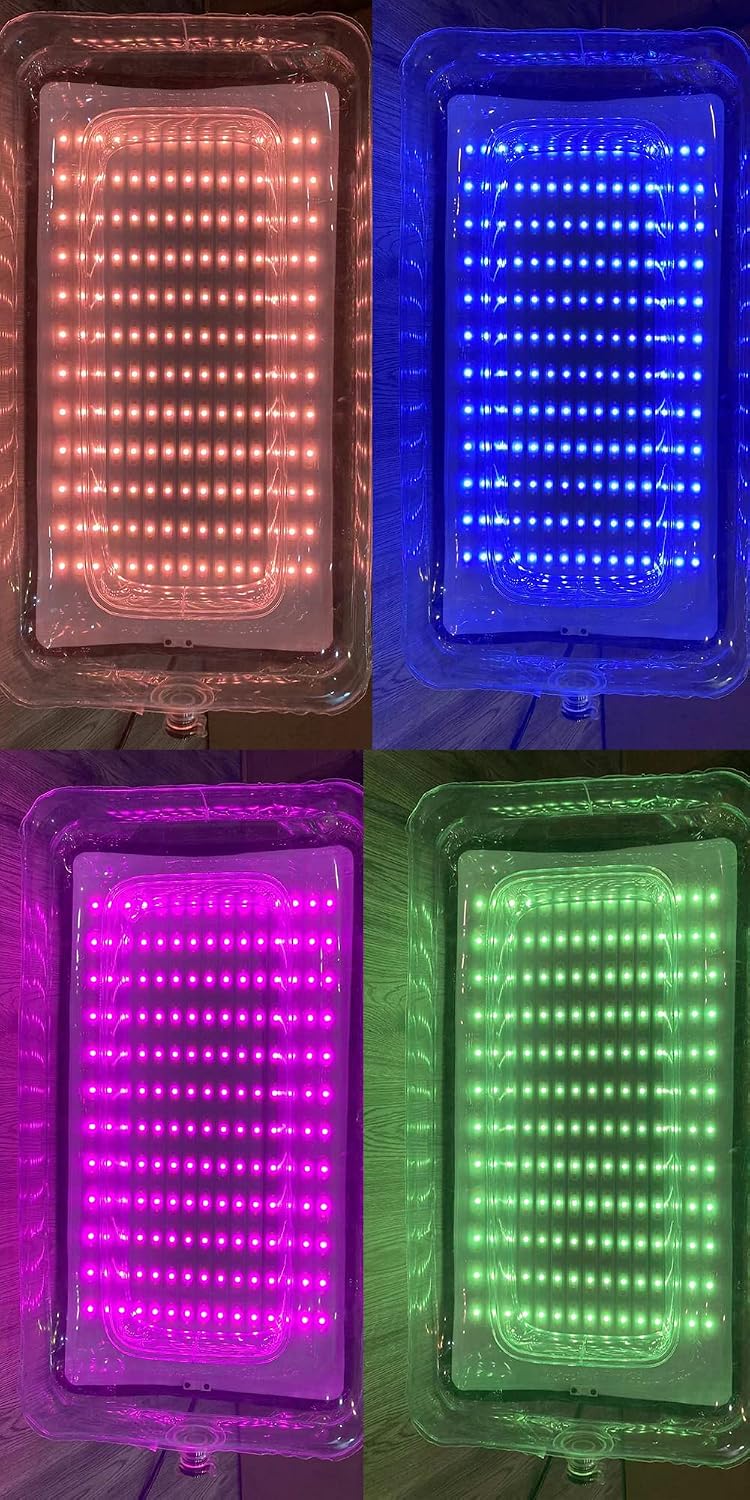
Image 6: Flexible panel displaying various RGB colors.

Image 7: Flexible panel displaying various CCT and RGB colors.
5.2 APP Control (DeSal Lite+)
- Download App: Download the "DeSal Lite+" app from your device's app store (available for iOS and Android).
- Enable Bluetooth: Ensure Bluetooth is enabled on your smartphone or tablet.
- Connect to Device: Open the DeSal Lite+ app and follow the on-screen instructions to connect to your RADI-12 Pro Air control box via Bluetooth. The app allows remote control of dimmer, CCT, RGB & HSI, and scene effects with adjustable speed and intensity.

Image 8: DeSal Lite+ app interface for light control.
5.3 DMX-512 Control
The RADI-12 Pro Air supports DMX-512 control for integration into professional lighting setups. Connect a DMX controller (not included) to the control box using the provided DMX cable. Refer to your DMX controller's manual and the RADI-12 Pro Air's DMX channel chart (if available separately) for detailed configuration.
6. Maintenance
- Cleaning: Gently wipe the flexible panel and control box with a soft, dry cloth. For stubborn dirt, use a slightly damp cloth and mild detergent, then dry thoroughly. Avoid abrasive cleaners or solvents.
- Storage: When not in use, deflate the softbox and carefully roll or fold the flexible panel. Store all components in the provided carry case in a cool, dry place away from direct sunlight.
- Water Resistance: The flexible panel is designed to be waterproof up to 30 meters for 30 minutes. Ensure all connections to the control box are dry before operation, especially after exposure to moisture. The control box itself is not waterproof.
7. Troubleshooting
If you encounter issues with your RADI-12 Pro Air, refer to the following common problems and solutions:
- Light Not Powering On:
- Check if the power cord is securely connected to both the control box and the AC outlet.
- If using a V-mount battery, ensure it is fully charged and properly attached.
- Verify the ON/OFF switch on the control box is in the 'ON' position.
- No Light Output or Incorrect Color:
- Ensure the extension cord connecting the panel to the control box is secure.
- Check the dimming level; it might be set to 0%.
- If using APP control, verify the app is connected and settings are correct.
- APP Control Not Connecting:
- Ensure Bluetooth is enabled on your mobile device.
- Make sure the control box is powered on and within Bluetooth range.
- Restart the DeSal Lite+ app and try reconnecting.
- If issues persist, try restarting both your mobile device and the light panel.
- Softbox Not Inflating:
- Ensure the inflator is properly attached to the softbox valve.
- Check for any punctures or leaks in the softbox material.
8. Specifications
| Feature | Detail |
|---|---|
| LEDs & Power | 180 pcs (White), 180 pcs (Yellow), 180 pcs (RGB) |
| Output Wattage | 90W |
| Color Temperature | 2700K-9999K |
| Operating Voltage | AC 100V-240V |
| Compatibility | AC Power / V Mount Battery (DC) |
| Dimming | 0-100% Stepless dimming ON/OFF Turning Knob |
| Beam Angle | 65° |
| Control Functions | ON/OFF/ Turning Knob/ APP/ DMX-512/ 2.4G remote |
| CRI | 93 |
| Mounting Method | X-Frame |
| Lux (2700K) | 0.5m: 7070 / 1m: 2070 / 2m: 577 |
| Lux (5600K) | 0.5m: 7580 / 1m: 2250 / 2m: 600 |
| Dimensions | 465 x 460 mm (Panel) |
| Weight | Light: 0.85KG, Control Box: 1.37KG |
| Package Dimensions | 28.9 x 21.34 x 6.93 inches |
| Item Weight (Total) | 20.1 pounds |
| Connectivity Technology | Bluetooth |
| UPC | 755454638483 |
9. Warranty and Support
For warranty information, please refer to the documentation provided with your purchase or contact the manufacturer directly. Technical support and service inquiries should be directed to the product seller or manufacturer.
Manufacturer: APARO
Ask a question about this manual
Ask about setup, troubleshooting, compatibility, parts, safety, or missing instructions. Manuals+ will review the question and use this page’s manual context to help answer it.