1. Introduction
Thank you for purchasing the Higfra Native 1080P Projector. This manual provides essential information for setting up, operating, and maintaining your projector. Please read it thoroughly before use to ensure optimal performance and safety.

Figure 1.1: Higfra Native 1080P Projector and accessories.
1.1 What's in the Box
- Higfra Native 1080P Projector (Model C56)
- Carrying Bag
- Power Cord
- Remote Control
- AV Cable
- HDMI Cable
2. Safety Information
To prevent fire or electric shock, do not expose this appliance to rain or moisture. Do not open the casing. Refer servicing to qualified personnel only.
- Ensure proper ventilation around the projector.
- Do not block ventilation openings.
- Use only the power cord supplied with the projector.
- Avoid direct eye exposure to the projector lens when the lamp is on.
- Keep the projector away from water or any liquids.
- Do not place the projector on an unstable surface.
3. Setup
3.1 Projector Placement
Place the projector on a stable, flat surface or mount it to the ceiling. Ensure the projector is positioned to project onto a flat screen or wall. The optimal projection distance varies based on desired screen size.

Figure 3.1: Example of projector placement and screen size capabilities.
3.2 Connecting Power and Devices
Connect the power cord to the projector and then to a power outlet. Connect your desired input devices (e.g., TV stick, game console, laptop) using the appropriate ports.

Figure 3.2: Available input ports on the Higfra Projector.
3.3 Initial Power On
Press the power button on the projector or the remote control to turn on the device. The projector will display the main interface.
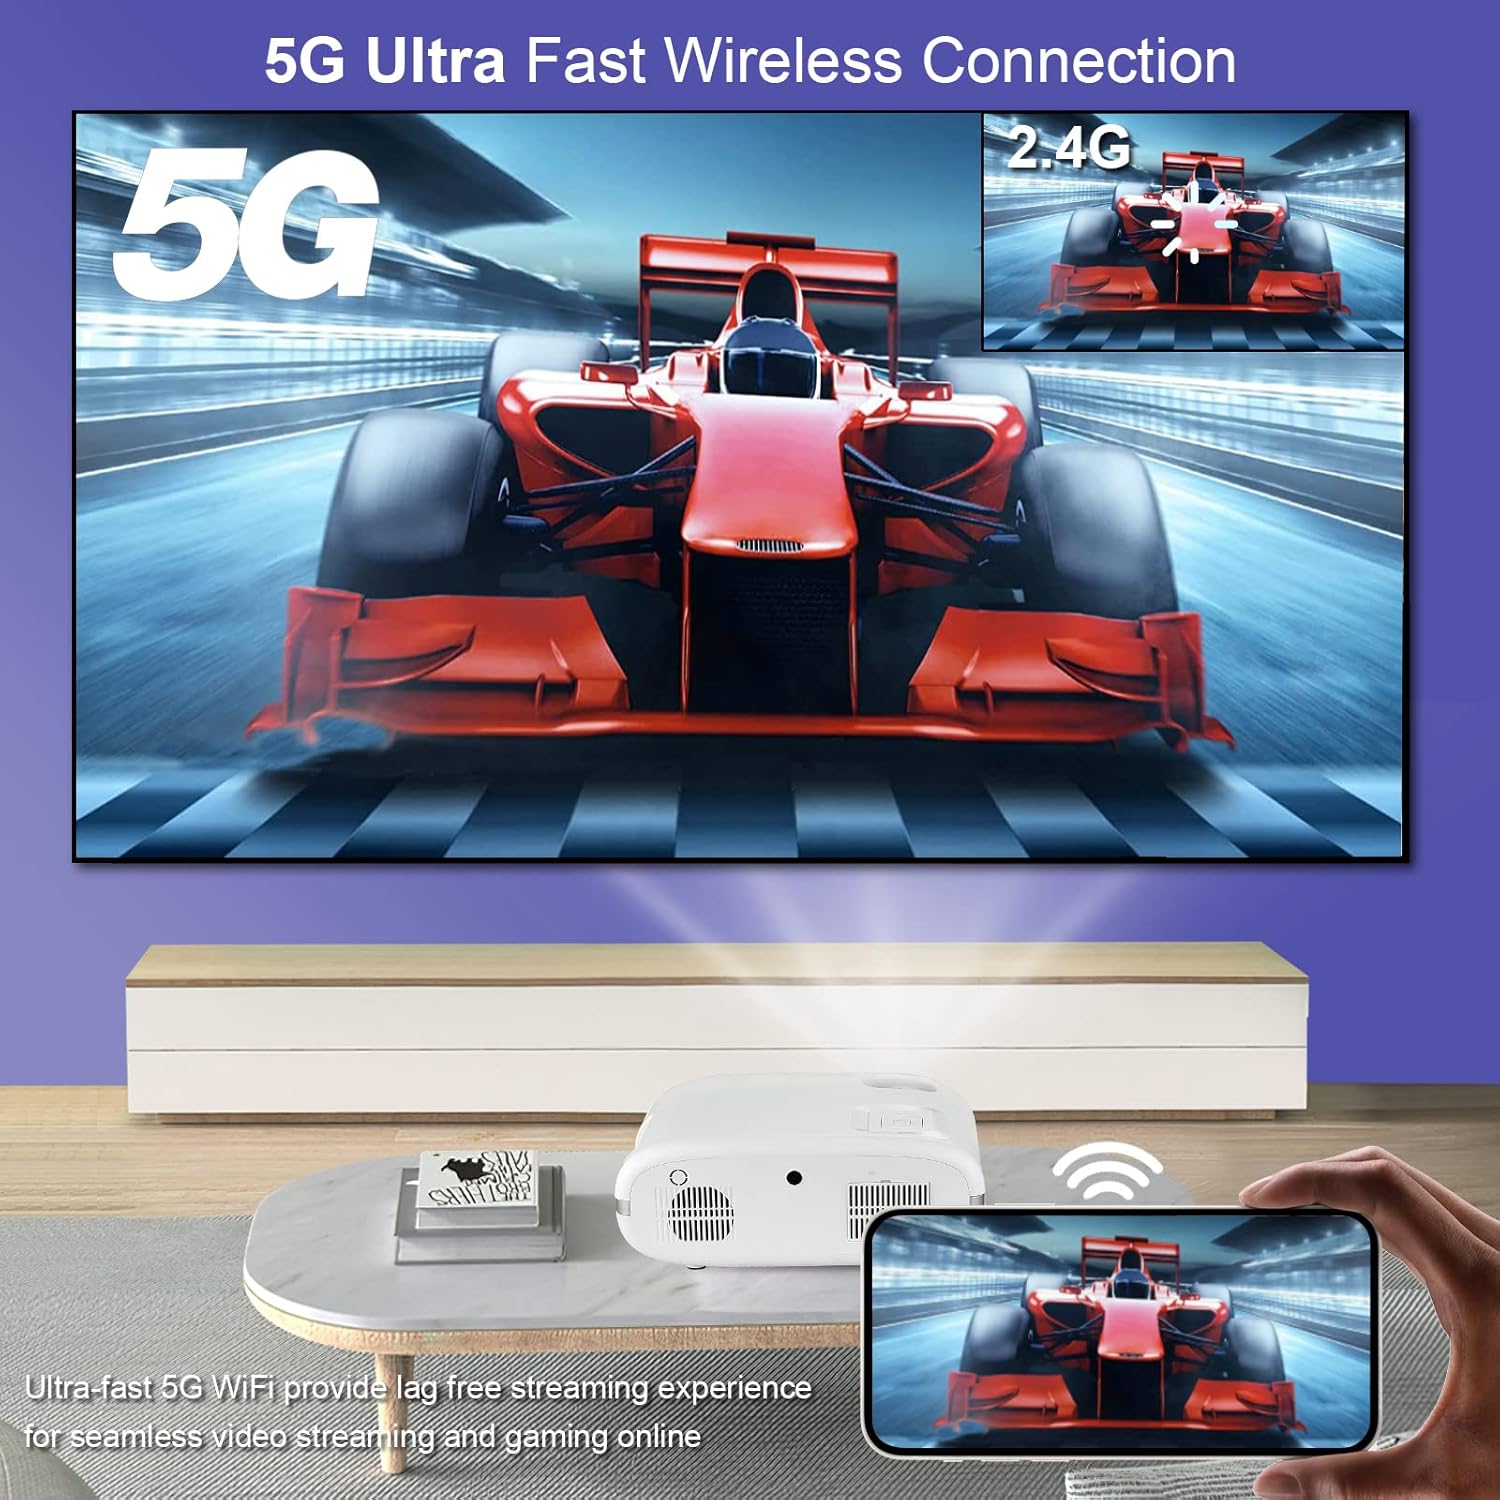
Figure 3.3: Remote control for easy operation.
4. Operating Instructions
4.1 Basic Navigation
Use the arrow keys on the remote control to navigate through menus and select options. The "OK" button confirms selections, and the "Return" button goes back to the previous screen.
4.2 Connectivity Options
The Higfra projector offers multiple connectivity options for various devices.
- 5G WiFi: Connect to your home network for fast and stable streaming.
- Bluetooth 5.0: Pair with external speakers or headphones for enhanced audio.
- HDMI/USB/VGA: Connect wired devices like laptops, gaming consoles, or USB drives.

Figure 4.1: Wireless screen mirroring capabilities.
4.2.1 Screen Mirroring (iOS)
- Select "Screen Mirroring" as the input source on your projector.
- Connect your projector to your WiFi network.
- Open Control Center on your iOS device and tap "Screen Mirroring".
- Select your Projector name (e.g., LZS-XXXXXX) and connect.

Figure 4.2: iOS Screen Mirroring steps.
4.3 Image Adjustments
- Focus: Rotate the focus ring near the lens to sharpen the image.
- Keystone Correction: Use the 4D keystone correction feature to adjust the image shape if the projector is not perfectly perpendicular to the screen.
- Zoom: Adjust the image size without moving the projector using the digital zoom function.

Figure 4.3: Four-point keystone correction in action.
5. Maintenance
5.1 Cleaning the Projector
Regular cleaning helps maintain optimal performance and extends the lifespan of your projector.
- Lens: Use a soft, lint-free cloth and lens cleaning solution. Do not use abrasive cleaners.
- Casing: Wipe the exterior with a soft, dry cloth. For stubborn marks, use a slightly damp cloth and mild detergent, then wipe dry.
- Ventilation Openings: Use a soft brush or compressed air to remove dust from the ventilation openings.
5.2 Storage
When not in use for extended periods, store the projector in its original carrying bag in a cool, dry place, away from direct sunlight and extreme temperatures.
6. Troubleshooting
If you encounter issues with your Higfra Projector, please refer to the following common problems and solutions.
| Problem | Possible Cause | Solution |
|---|---|---|
| No Power | Power cord not connected; Power outlet issue. | Ensure power cord is securely connected. Try a different power outlet. |
| No Image | Incorrect input source; Device not connected properly. | Select the correct input source. Check HDMI/USB/AV cable connections. |
| Blurry Image | Focus not adjusted; Keystone not adjusted. | Adjust the focus ring. Use keystone correction to square the image. |
| No Sound | Volume too low; External speaker not connected; Audio format not supported. | Increase volume. Ensure Bluetooth speaker is paired or wired speaker is connected. Check audio format compatibility. |
| Screen Mirroring Issues | Unstable WiFi connection; Device compatibility. | Ensure strong 5G WiFi signal. Restart both projector and source device. |
7. Specifications
| Feature | Detail |
|---|---|
| Brand | Higfra |
| Model Number | C56 |
| Native Resolution | 1920 x 1080 (1080P) |
| Brightness | 560 ANSI Lumens (9500 Lumen) |
| Connectivity Technology | Bluetooth, WiFi (5G), HDMI, USB, VGA, TV BOX, DVD |
| Product Dimensions | 12.2 x 14.2 x 5.3 inches |
| Item Weight | 6.03 pounds |
| Recommended Uses | Home Theater, Outdoor Entertainment, Business Presentation |
8. Warranty and Support
For warranty information and technical support, please refer to the contact details provided with your purchase or visit the official Higfra website. Keep your proof of purchase for warranty claims.
For further assistance, you may also contact Higfra customer service through the Amazon platform or their official support channels.


