1. Product Overview
This manual provides detailed instructions for the installation, operation, and maintenance of your VLAND Projector LED Headlights. These headlights are designed as a direct replacement for factory headlamps, offering enhanced lighting features and a modern aesthetic.
Model: YAX-TY-6004A
Compatibility:
- Toyota Tundra: 2007, 2008, 2009, 2010, 2011, 2012, 2013
- Toyota Sequoia: 2008, 2009, 2010, 2011, 2012, 2013, 2014, 2015, 2016, 2017, 2018, 2019, 2020, 2021
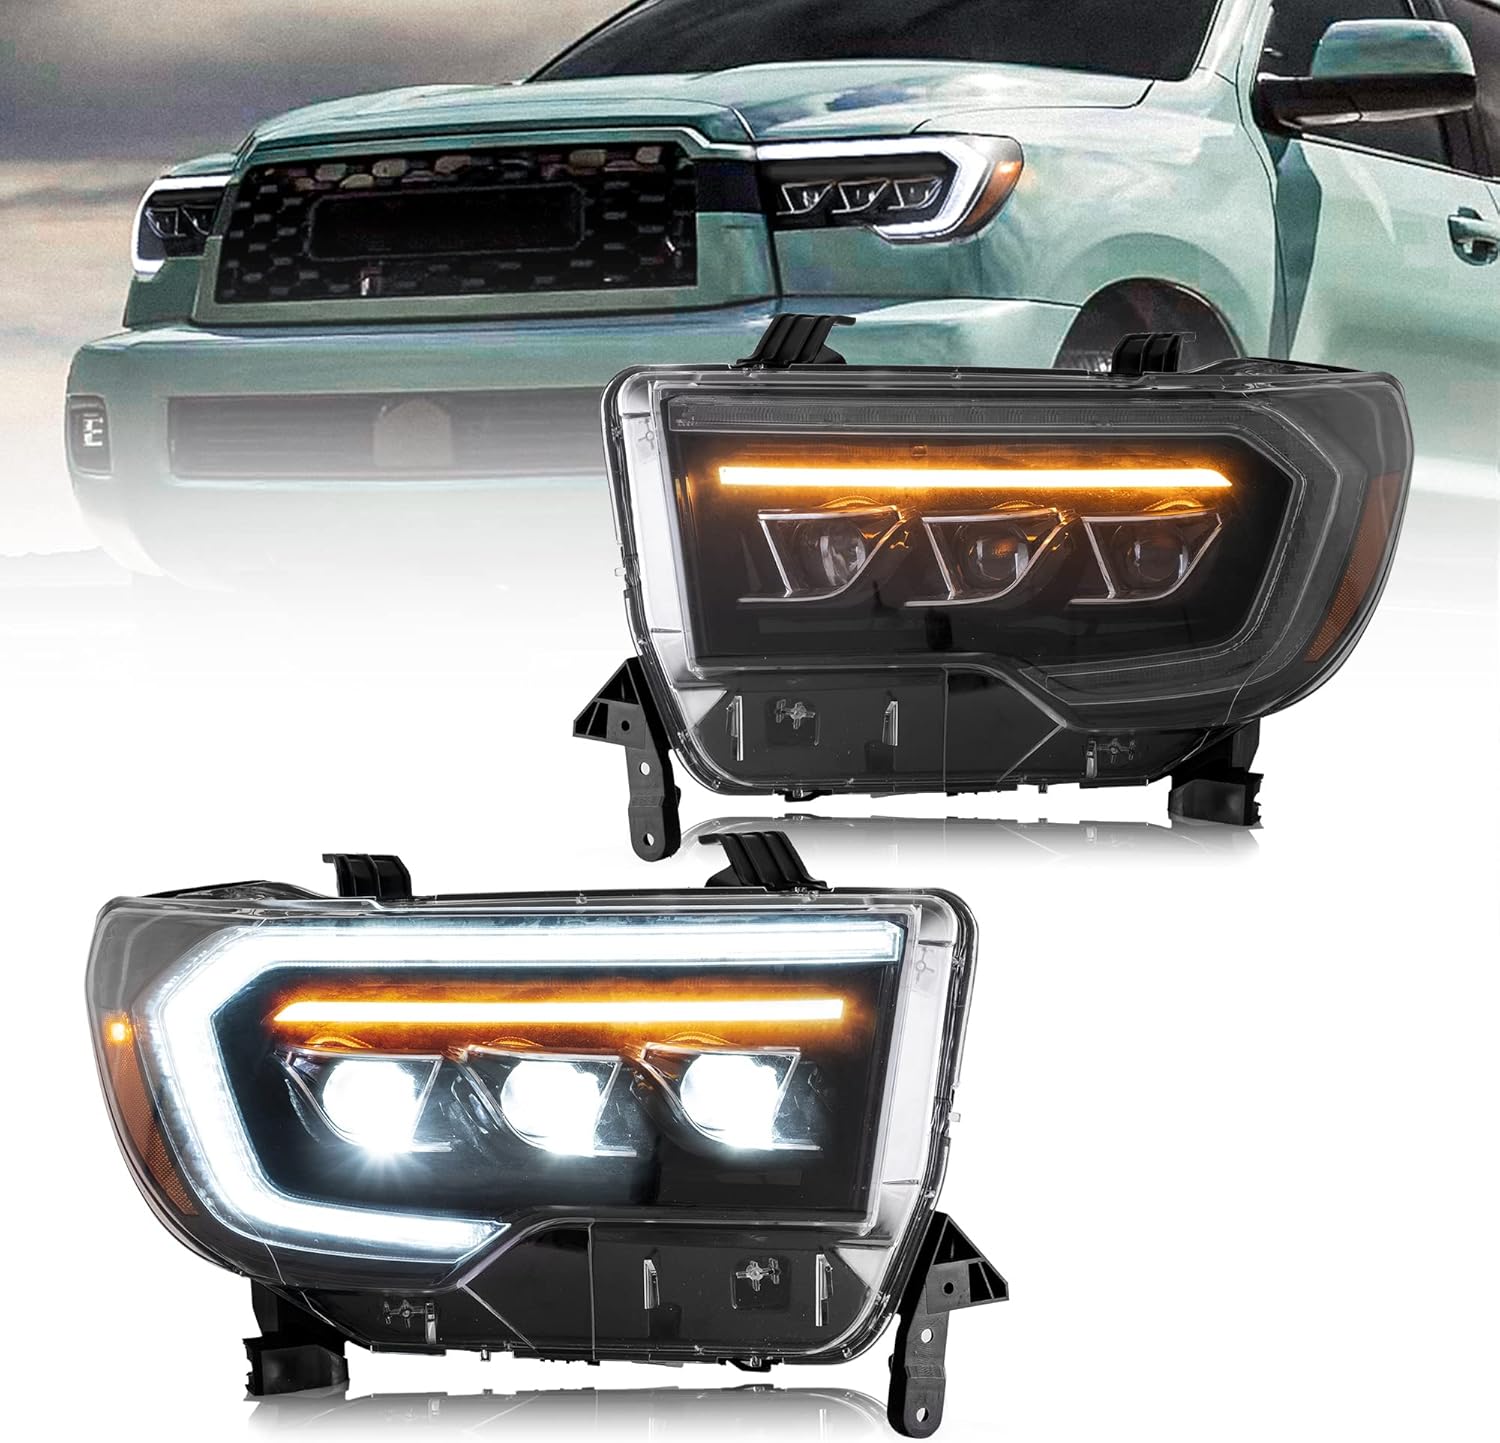
Image 1.1: VLAND Projector LED Headlights, showcasing their design and appearance when installed on a vehicle.
2. Package Contents
Verify that all components are present and undamaged upon opening the package. If any items are missing or damaged, please contact customer support.
- 1 Set of Headlights (Driver side & Passenger side)
- 2 Adaptor Cables (For 2018-2021 Sequoia models)
- 1 ACC Harness (For DRL function if vehicle lacks OEM LED DRL)
- 2 Black Trim Panels (For Tundra 2007-2013 and Sequoia 2008-2018)
- 1 Instruction Manual
3. Specifications
| Feature | Description |
|---|---|
| Bulb Type | Full LED (No external bulbs required) |
| Waterproof Rating | IP67 |
| Certifications | DOT, SAE compliant, FMVSS 108 |
| Operating Voltage | 12V |
| Wattage | 55 watts |
| Functions | Daytime Running Light (DRL with amber side marker), High Beam, Low Beam, Sequential Turn Signal |
| Housing Color | Black |
| Lens Color | Clear |
| Reflector Color | Amber |
| Housing Material | ABS Plastic |
| Lens Material | Polycarbonate |
| Item Weight | 25.7 pounds (total package) |
| Item Model Number | YAX-TY-6004A |

Image 3.1: Illustration of the headlights' durability, highlighting their IP67 waterproof, dust-proof, and shock-proof design.
4. Installation Instructions
Professional installation is recommended. If performing self-installation, ensure the vehicle's battery is disconnected before beginning. Refer to your vehicle's service manual for specific grille and headlight removal procedures.
4.1. Pre-Installation Check
- Ensure the package is undamaged upon receipt.
- Verify all components listed in Section 2 are present.
- Familiarize yourself with the headlight's connection points and adjustment screws.

Image 4.1: Rear view of the headlight assembly, indicating the locations of the left/right and up/down adjusting screws, and various electrical plugs for signal line, DRL/turn signal, low beam, high beam, and side marker.
4.2. Installation Steps
- Remove Existing Headlights: Carefully remove the vehicle's grille and existing headlight assemblies. Disconnect all electrical connectors.
- Connect Wiring:
- Match the new headlight connectors to the vehicle's wiring harness.
- For 2018-2021 Sequoia models, use the provided adaptor cables.
- If your vehicle does not have OEM LED DRL functionality, connect the ACC wire from the provided ACC Harness to the fuse box to enable the DRL.
- Two sets of master harnesses are provided; select the appropriate set for your vehicle's year and trim.
- Connect the relay box plugs as part of the wiring.
- Install Trim Panels: For Tundra 2007-2013 and Sequoia 2008-2018, install the black trim panels. These panels may require painting to match your vehicle's color.
- Mount New Headlights: Secure the new VLAND Projector LED Headlights into position. Do not fully tighten mounting bolts yet.
- Test Functionality: Before re-installing the grille, reconnect the battery and test all headlight functions: DRL, low beam, high beam, and turn signals.
- Aim Headlights: Park the vehicle on a level surface facing a wall or garage door. Adjust the headlight aim using the left/right and up/down adjusting screws (refer to Image 4.1) until the light beams are properly aligned.
- Final Securement: Once satisfied with the aim, fully tighten the headlight mounting bolts.
- Re-install Grille: Re-install the vehicle's grille and any other removed components.

Image 4.2: Wiring diagram illustrating the connection of the ACC harness to the vehicle's fuse box for DRL functionality and the placement of the trim panel.
5. Operating Instructions
The VLAND Projector LED Headlights offer advanced lighting features designed for optimal visibility and safety.
5.1. Daytime Running Lights (DRL)
- The DRLs feature a dynamic animation that activates when the DRL is turned on, providing a welcome sequence.
- The DRLs are designed to turn on automatically when the vehicle is started.
- The DRLs incorporate a diamond white fiber optic LED with breath lighting.

Image 5.1: Visual representation of the dynamic animation feature of the DRLs, showing a choreographed light sequence.
5.2. Turn Signal with Sequential LED Display
- When the turn signal is activated, a row of amber LEDs will illuminate in a sequential, flowing pattern.
- This sequential display enhances visibility and provides a modern appearance.

Image 5.2: Depiction of the sequential turn signal indicator, showing the amber LEDs illuminating in a directional flow.
5.3. Low Beam and High Beam
- The headlights feature integrated LED low beam and high beam functions.
- Operate these functions using your vehicle's standard headlight controls.

Image 5.3: Overview of the various lighting functions: Daytime Running Light (DRL), LED Low Beam, LED High Beam, and Amber Side Marker.
6. Maintenance
To ensure the longevity and optimal performance of your VLAND Projector LED Headlights, follow these maintenance guidelines:
- Cleaning: Clean the headlight lenses regularly with a soft cloth and mild automotive soap or glass cleaner. Avoid abrasive materials or harsh chemicals that could scratch or damage the polycarbonate lens.
- Inspection: Periodically inspect the headlights for any signs of damage, condensation, or loose connections.
- Seal Integrity: The headlights are designed with an IP67 waterproof rating. If any signs of moisture ingress are observed, inspect the seals and contact support if necessary.
7. Troubleshooting
If you encounter issues with your VLAND Projector LED Headlights, refer to the following common troubleshooting steps:
- Lights Not Functioning:
- Check all electrical connections to ensure they are secure.
- Verify that the correct wiring harness was used for your vehicle model.
- Inspect vehicle fuses related to lighting.
- DRL Not Activating:
- Ensure the ACC harness is correctly connected to the fuse box if your vehicle lacks OEM LED DRL functionality.
- Confirm the vehicle is running, as DRLs typically activate with the ignition.
- Condensation Inside Lens:
- Minor condensation can occur due to temperature changes and usually dissipates.
- If persistent or excessive condensation is present, inspect the housing for cracks or seal breaches. Contact customer support if the issue persists.
- Damaged Package Upon Arrival: If the package is damaged upon receipt, do not install the headlights. Keep all boxes, labels, and user manuals. Document the damage with videos and pictures, clearly showing the defect, and contact customer support immediately.
8. Warranty and Support
VLAND products are covered by a warranty period. For specific warranty details and support inquiries, please refer to the information below:
- Warranty Period: Any VLAND products found to be defective are covered for a period of One Year following the original purchase date.
- Return & Replacement Policy: For defective items, please contact VLAND customer support. You will need to provide the product label, video, and picture proof clearly showing the defect.
- Customer Support: If you have questions after purchase, or if merchandise is damaged, becomes defective, or needs to be returned, please message VLAND customer support. Keep all boxes, labels, and user manuals.
For further assistance, visit the official VLAND store or contact their customer service directly.