Introduction
This manual provides comprehensive instructions for the installation, operation, and maintenance of the Global Industrial Adjustable Spring-Loaded Safety Swing Gate. This gate is engineered to enhance safety in commercial and industrial environments by providing a reliable barrier to limit access to specific areas. It features a self-closing mechanism and adjustable width to suit various openings.
Safety Information
Important Safety Instructions
Read all instructions carefully before installation and use. Failure to follow these instructions could result in serious injury or property damage.
- Always install the gate securely according to these instructions.
- Ensure all hardware is tightened before placing the gate into service.
- Regularly inspect the gate for any signs of damage, wear, or loose components. Replace worn or damaged parts immediately.
- Do not modify the gate or its components. Unauthorized modifications may compromise safety and void any warranties.
- This gate is designed for industrial safety applications and is not intended for child safety.
- This product meets OSHA 1910.23a requirements for guarding floor openings, holes, and wall openings.
This image shows a close-up of the warning label affixed to the gate, highlighting critical safety instructions and warnings regarding proper installation and use to prevent falls and injuries.
Parts List
Components Included
Verify all parts are present and undamaged before beginning installation. If any parts are missing or damaged, contact Global Industrial customer service.

This image displays all individual components of the safety swing gate, including the main gate frame, mounting brackets, U-bolt, bolts, washers, and nuts, laid out separately for identification.
- Adjustable Gate Arm Assembly (1)
- Mounting Brackets (2)
- U-Bolt (1)
- Assorted Bolts, Washers, and Nuts for assembly
Setup and Installation
Installation Guide
The gate can be mounted to rails or posts from either the left or right side, offering flexibility for various applications.
Step 1: Prepare Mounting Surface
Ensure the chosen mounting surface is structurally sound, clean, and capable of securely supporting the gate's weight (approximately 33 lbs) and operational forces.
Step 2: Attach Mounting Brackets
Position the two mounting brackets on the desired rail or post. Use appropriate fasteners (not included, unless specified in packaging) to secure the brackets firmly. Ensure they are level and correctly spaced for the gate assembly.

This image illustrates the side profile of the safety gate, with its mounting brackets securely fastened to a vertical support structure, demonstrating how the gate is intended to be installed.
Step 3: Adjust Gate Arm Width
The gate arm is adjustable to fit openings ranging from 24 to 40 inches. Loosen the adjustment bolts on the gate arm. Extend or retract the arm to achieve the desired width for your opening. Once the correct width is set, securely tighten the adjustment bolts.

This image provides a detailed view of the gate arm's adjustable segment, showing the series of holes that allow for width customization and the bolt used to secure the chosen length.

This image focuses on the mechanism used to adjust the gate's width, displaying the bolt and nut assembly that locks the two sections of the gate arm into place at the desired length.
Step 4: Attach Gate Arm to Brackets
Align the gate arm assembly with the installed mounting brackets. Insert the pivot bolts through the gate arm hinges and the corresponding holes in the brackets. Secure these connections with the provided washers and nuts, ensuring they are tightened firmly but allow for smooth gate movement.

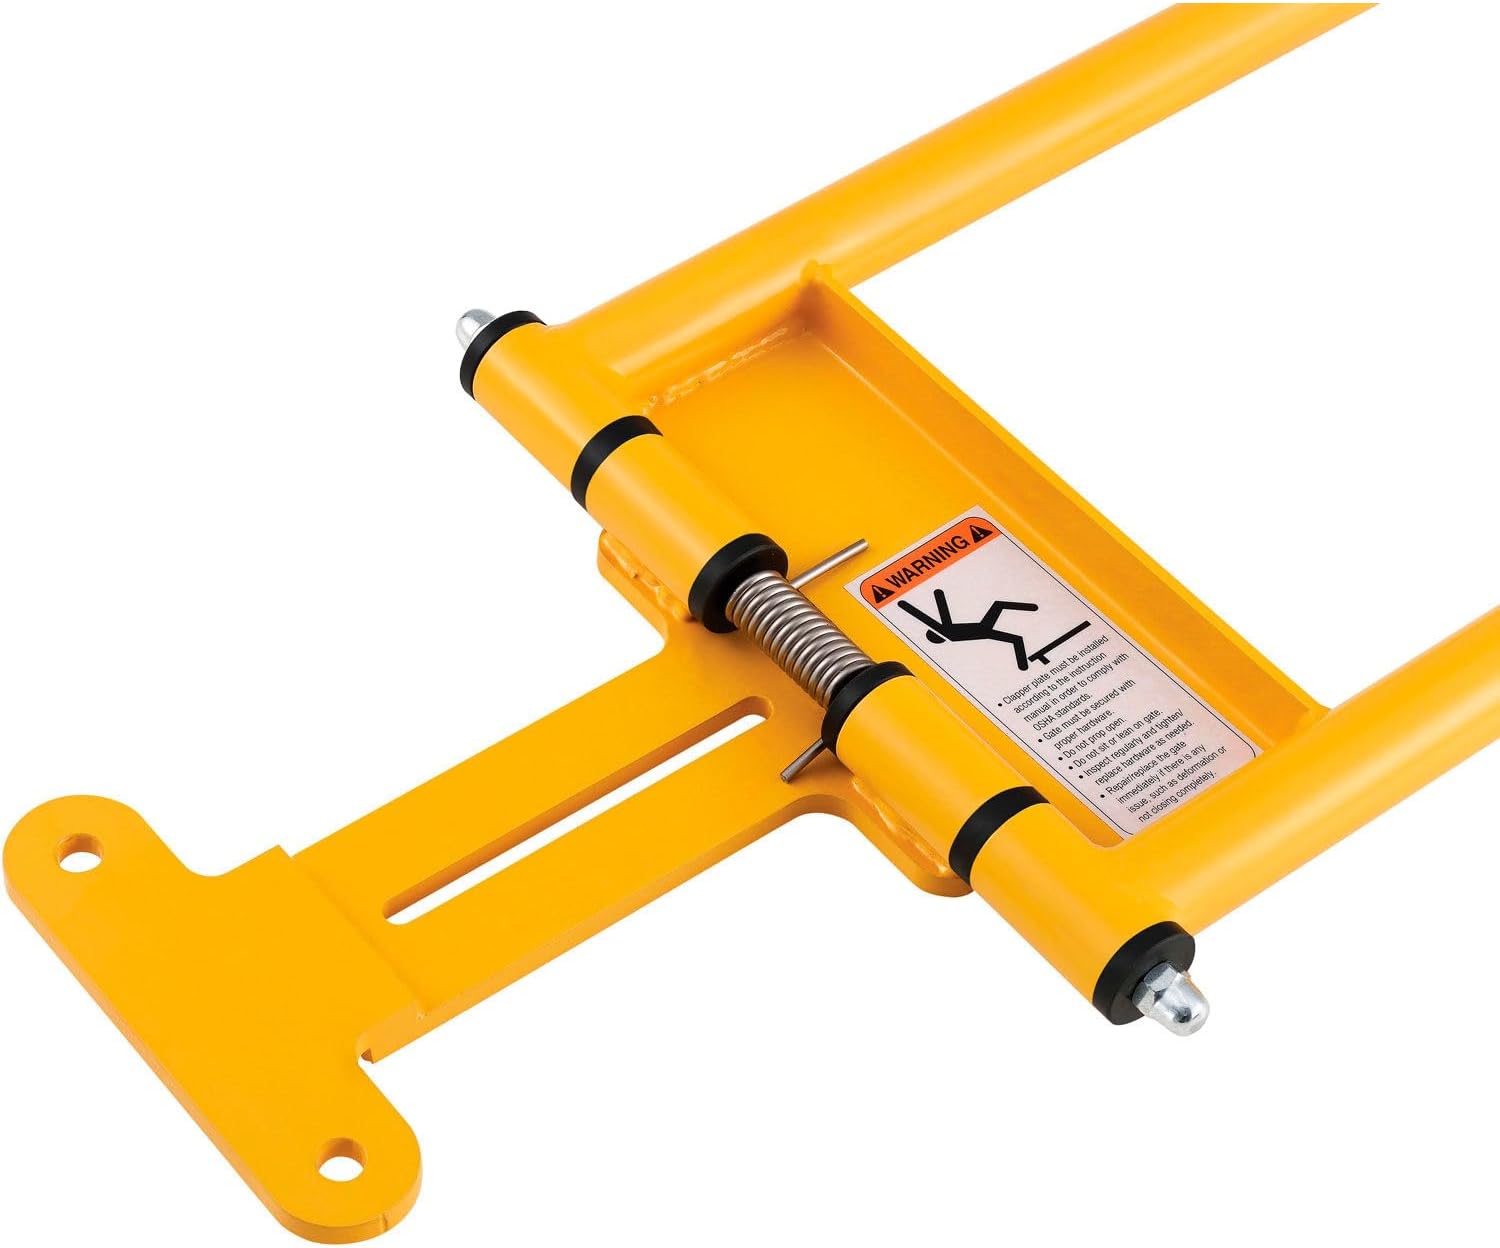
This image shows a detailed view of the gate's hinge assembly, where the gate arm connects to the mounting plate, along with the spring mechanism that enables its self-closing function.
Step 5: Install U-Bolt and Gate Stop
Install the U-bolt on the opposite side of the opening from the hinges. This U-bolt acts as a gate stop. Ensure it is positioned so that the gate closes fully and securely against it, creating a complete barrier.

This image highlights the rubber bumper located at the end of the gate arm, designed to absorb impact when the gate closes, along with the bolts that secure it.
Step 6: Final Check
After assembly, verify that all bolts and fasteners are securely tightened. Test the gate's swing and self-closing action multiple times to ensure smooth operation and proper, consistent closure. The gate should return to its closed position automatically without obstruction.

This image presents the complete Global Industrial Adjustable Spring-Loaded Safety Swing Gate, showcasing its yellow powder-coated finish and robust construction, ready for installation.
Operating Instructions
How to Use
The Global Industrial Safety Swing Gate is designed for simple and effective operation, featuring a spring-loaded mechanism for automatic closure.
- To open the gate, simply push it in the desired direction. The gate will swing open on its hinges.
- Upon release, the integrated spring mechanism will automatically return the gate to its closed position, providing a continuous and reliable barrier.
- Always ensure the path of the gate is clear of obstructions to allow for unobstructed and complete closing.
Maintenance
Care and Maintenance
Regular maintenance is crucial to ensure the longevity, optimal performance, and safe operation of your safety gate.
- Cleaning: Wipe down the gate with a damp cloth and mild detergent as needed to remove dirt and grime. Avoid using abrasive cleaners or solvents that could damage the powder-coated finish.
- Inspection: Periodically (e.g., monthly or as required by facility safety protocols) check all bolts, nuts, and moving parts for tightness and signs of wear. Tighten any loose fasteners immediately.
- Lubrication: If the gate's swing becomes stiff or noisy, apply a small amount of general-purpose lubricant to the hinge points and the spring mechanism.
- Damage: If any part of the gate is damaged, bent, or shows significant wear, discontinue use immediately. Replace the affected components or the entire gate if necessary to maintain safety standards.
Troubleshooting
Common Issues and Solutions
- Issue: Gate does not close fully or automatically.
Solution: Check for obstructions in the gate's path. Ensure the mounting brackets are level and securely installed. Verify the gate stop (U-bolt) is correctly positioned and not allowing the gate to over-swing or get stuck. Inspect the spring mechanism for damage or debris. - Issue: Gate is stiff, difficult to open, or squeaks.
Solution: Apply a general-purpose lubricant to the hinge points and the spring mechanism. Check for any bent components or debris that might be impeding smooth movement within the hinges. - Issue: Gate feels loose or wobbly after installation.
Solution: Inspect and tighten all mounting bolts and hinge fasteners. Ensure the mounting surface itself is stable and not flexing. Re-check the adjustment bolts on the gate arm for tightness.
Specifications
Product Specifications
| Feature | Detail |
|---|---|
| Brand | Global Industrial |
| Model Number | 708537YL |
| UPC | 707022452779 |
| Adjustable Width | 24" to 40" (61 cm to 101.6 cm) |
| Height | 13" (33 cm) |
| Material | Alloy Steel |
| Color | High-Visibility Yellow |
| Item Weight | 33 lbs (14.97 kg) |
| Mounting Type | Hardware Mount |
| Compliance | Meets OSHA 1910.23a |
Customer Support
For further assistance, parts replacement, or warranty inquiries regarding your Global Industrial Adjustable Spring-Loaded Safety Swing Gate, please contact Global Industrial customer service.
Visit the official Global Industrial website for the most current contact information and support resources.


