Introduction
Thank you for choosing the Global Industrial Residential Wall Safe. This manual provides essential information for the safe and efficient installation, operation, and maintenance of your new wall safe. Please read these instructions thoroughly before use and retain them for future reference.
Safety Information
- Always keep override keys in a secure location, separate from the safe and away from unauthorized access.
- Do not store override keys inside the safe.
- Ensure the safe is securely mounted to prevent unauthorized removal.
- The internal volume of this safe is not sealed. Small items may fall into the wall cavity if not properly contained within the safe.
- This safe is not water resistant. Avoid installation in areas prone to moisture or water exposure.
Package Contents
Verify that all components are present before beginning installation:
- Global Industrial Residential Wall Safe unit
- Electronic Keypad Lock (pre-installed)
- Mechanical Override Keys (2)
- Expandable Shelves (quantity may vary)
- Assembly Guide (separate document for detailed installation)
- Mounting Hardware (screws, washers - refer to Assembly Guide for specifics)
Product Overview
The Global Industrial Residential Wall Safe is designed for discreet storage within a wall cavity. It features an electronic keypad lock for quick access and mechanical override keys for emergency entry. The unique expandable depth design allows for flexible installation in various wall thicknesses, maximizing internal storage capacity.
Key features include a pry-resistant recessed door with concealed hinges for enhanced security.
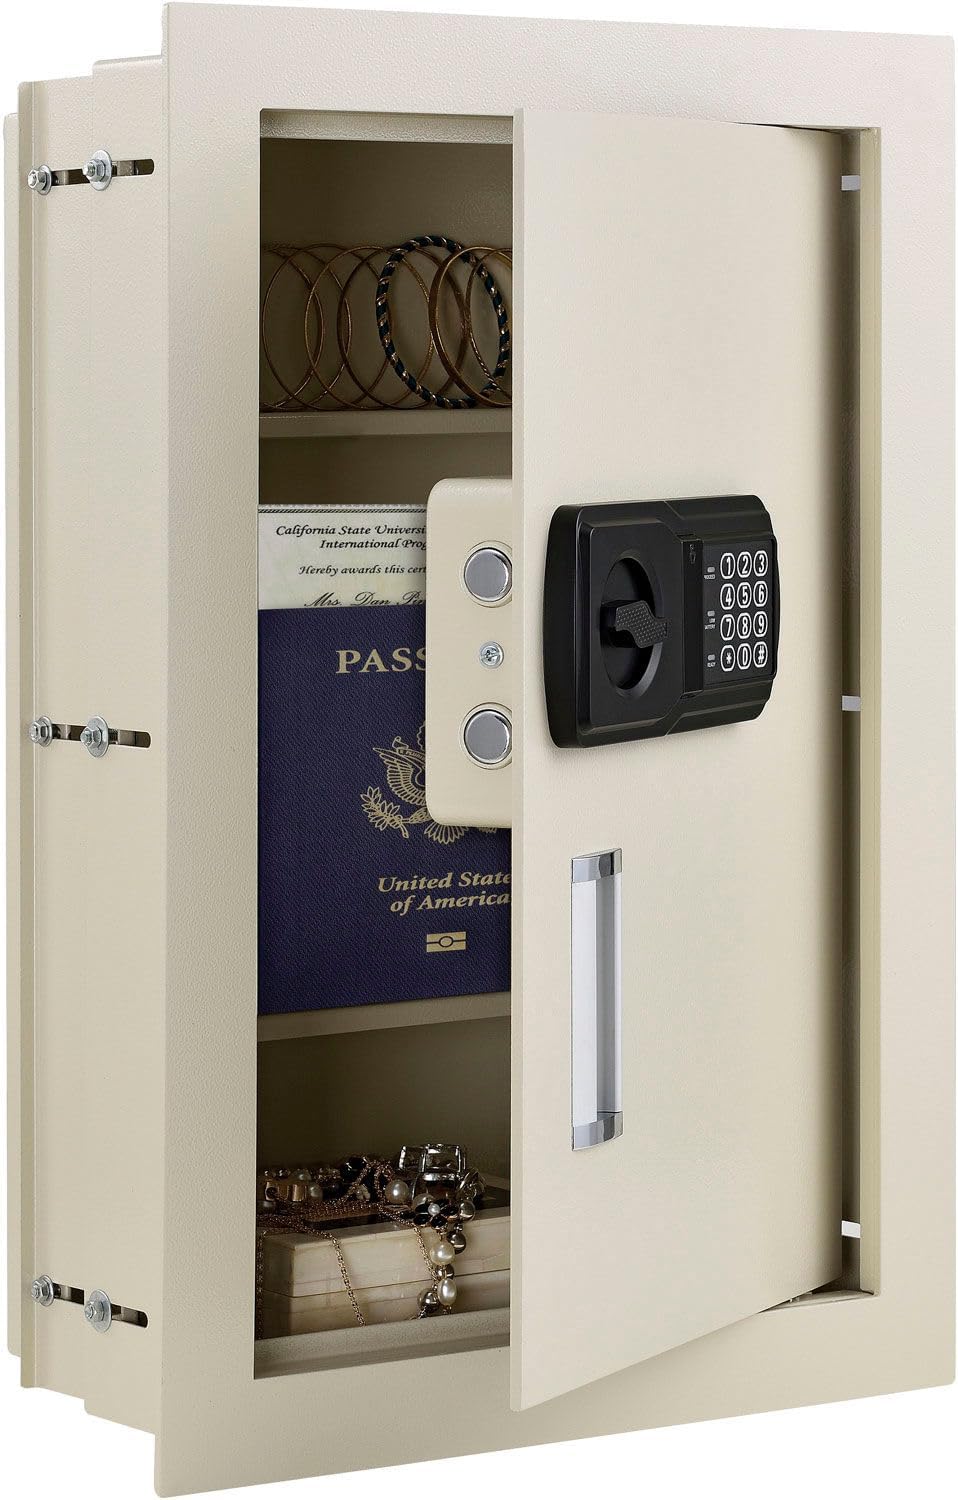
Figure 1: Front view of the Global Industrial Residential Wall Safe with the door open, revealing the interior shelves and example items.

Figure 2: Interior view of the safe with the door open, highlighting the adjustable shelves and the internal components of the electronic lock.

Figure 3: Exterior view of the safe door, featuring the electronic keypad for access.
Installation
This wall safe is designed for installation between standard 16-inch on-center wall studs. Refer to the separate Assembly Guide included with your product for detailed, step-by-step installation instructions, including wall preparation, mounting, and securing the safe.
Expandable Depth Feature
The safe features an adjustable depth mechanism, allowing it to expand from approximately 3-1/4 inches to 6 inches deep. This maximizes usable space within different wall thicknesses. To adjust the depth:
- Loosen the screws on the side panels of the safe body.
- Gently slide the inner and outer sections of the safe body to achieve the desired depth. Ensure the sections are aligned.
- Tighten the screws firmly to secure the safe at the chosen depth.
- Install the expandable shelves as needed, fitting them into the appropriate slots for your chosen depth.
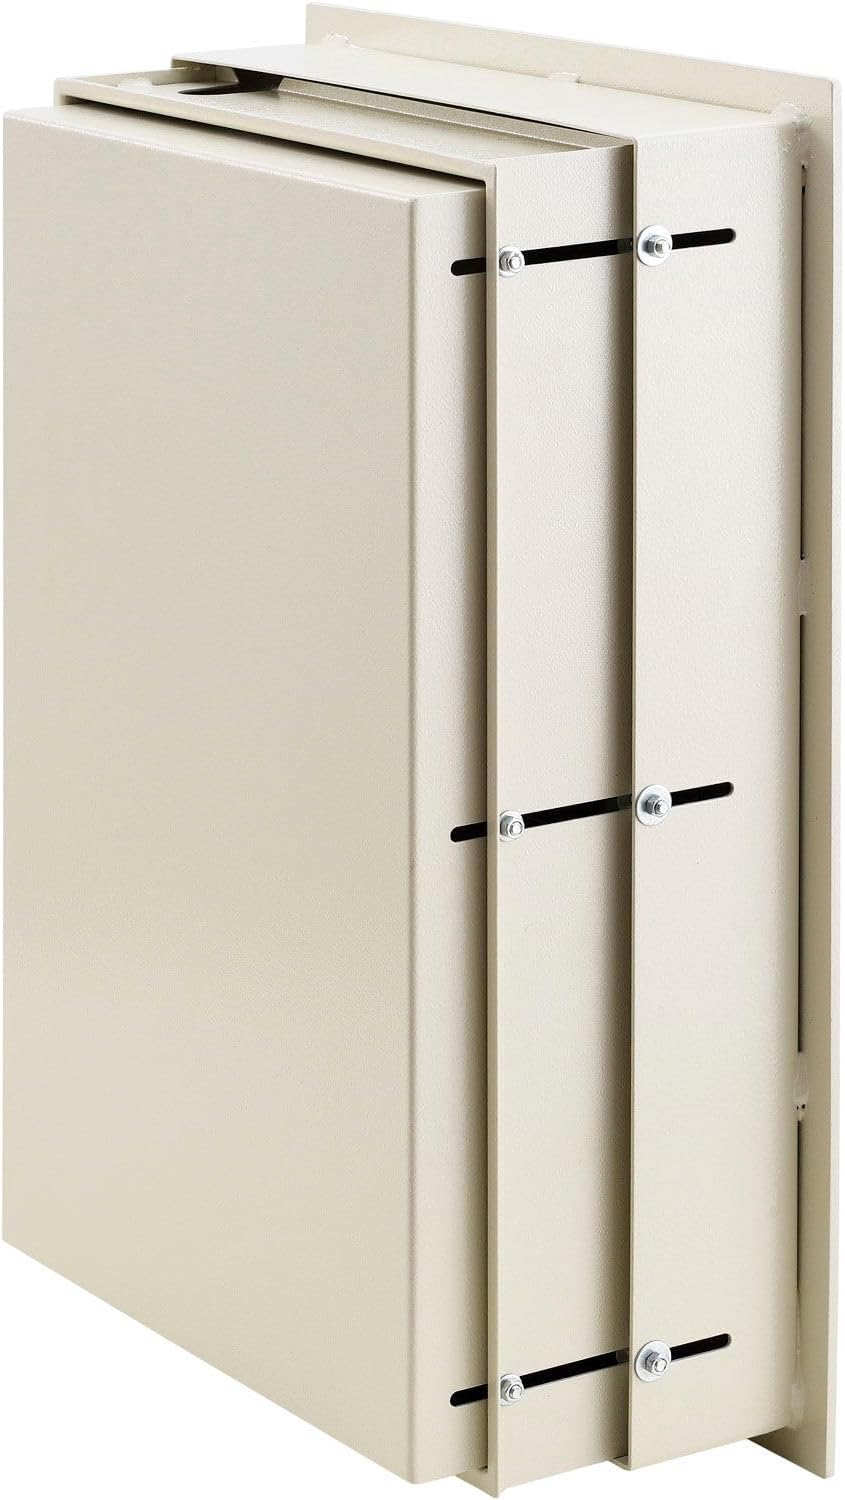
Figure 4: Side view illustrating the expandable depth feature of the wall safe, showing how the sections slide to adjust depth.

Figure 5: Angled side view of the safe demonstrating the expandable depth feature, with the safe body extended to its maximum depth.
Initial Setup
Battery Installation
The electronic lock requires batteries (typically 4x AA, not included) for operation. Locate the battery compartment on the inside of the safe door, usually behind a cover on the electronic lock mechanism. Install batteries according to the polarity markings.
Setting Your Personal Code
Your safe comes with a factory default code (e.g., "159"). It is crucial to change this immediately to a personal code of your choice. The electronic lock supports an 8-digit code.
- With the safe door open, locate the red or green reset button on the inside of the door, typically near the battery compartment or on the lock mechanism.
- Press the reset button. You should hear a beep and/or see an indicator light.
- On the exterior keypad, enter your desired 8-digit personal code.
- Press the "#" or "Lock" button to confirm. You should hear a confirmation beep.
- Test your new code multiple times with the door open before closing it to ensure it has been set correctly.
If the code is not accepted, repeat the steps. If issues persist, refer to the Troubleshooting section.
Operating Instructions
Opening the Safe with Electronic Keypad
- Enter your 8-digit personal code on the keypad.
- Press the "#" or "Lock" button.
- Within 5 seconds, turn the handle clockwise (or counter-clockwise, depending on model) to open the door.
Closing and Locking the Safe
- Close the safe door firmly.
- Turn the handle counter-clockwise (or clockwise) to engage the locking bolts. The safe is now locked.
Mechanical Override Key Usage
The mechanical override keys are for emergency access in case of dead batteries, forgotten code, or electronic lock malfunction.
- Locate the keyhole, usually concealed behind a removable cover on the keypad panel.
- Insert the override key and turn it to unlock the safe.
- Turn the handle to open the door.
- Important: Do not store override keys inside the safe.

Figure 6: Close-up of the electronic keypad, showing the hidden keyhole for mechanical override and an inserted key.
Internal LED Light
The safe may include a small LED light inside the door that illuminates briefly when the door is opened. This provides minimal illumination for the safe's contents.
Maintenance
- Battery Replacement: Replace batteries annually or when the "Low Battery" indicator (if present) illuminates, or if the keypad becomes unresponsive. Use only new, high-quality alkaline batteries.
- Cleaning: Wipe the exterior and interior surfaces with a soft, damp cloth. Avoid abrasive cleaners or solvents.
- Hinge Lubrication: Periodically apply a small amount of silicone-based lubricant to the door hinges to ensure smooth operation.
- Code Management: Periodically change your personal code for enhanced security. Always test the new code with the door open.
Troubleshooting
| Problem | Possible Cause | Solution |
|---|---|---|
| Safe does not open with code. | Incorrect code entered. Dead or low batteries. Electronic lock malfunction. | Re-enter code carefully. Replace batteries. Use mechanical override key. |
| Keypad is unresponsive. | Dead batteries. Electronic malfunction. | Replace batteries. Use mechanical override key. |
| Door will not close/lock. | Obstruction in door frame. Locking bolts misaligned. | Check for obstructions. Ensure safe is level and securely mounted. |
| Forgotten code. | Code forgotten. | Use mechanical override key to open, then reset code. |
Specifications
| Brand | Global Industrial |
| Model Number | 493492N |
| Product Dimensions | 15"W x 3-1/4"-6"D x 22-1/8"H (Approximate, expandable depth) |
| Lock Type | Electronic Keypad with Mechanical Override |
| Capacity | 0.3 to 0.7 Cubic Feet (depending on depth setting) |
| Material | Alloy Steel |
| Mounting Type | Wall Mount (between 16" on-center studs) |
| Item Weight | 40 Pounds |
| Water Resistance | Not Water Resistant |
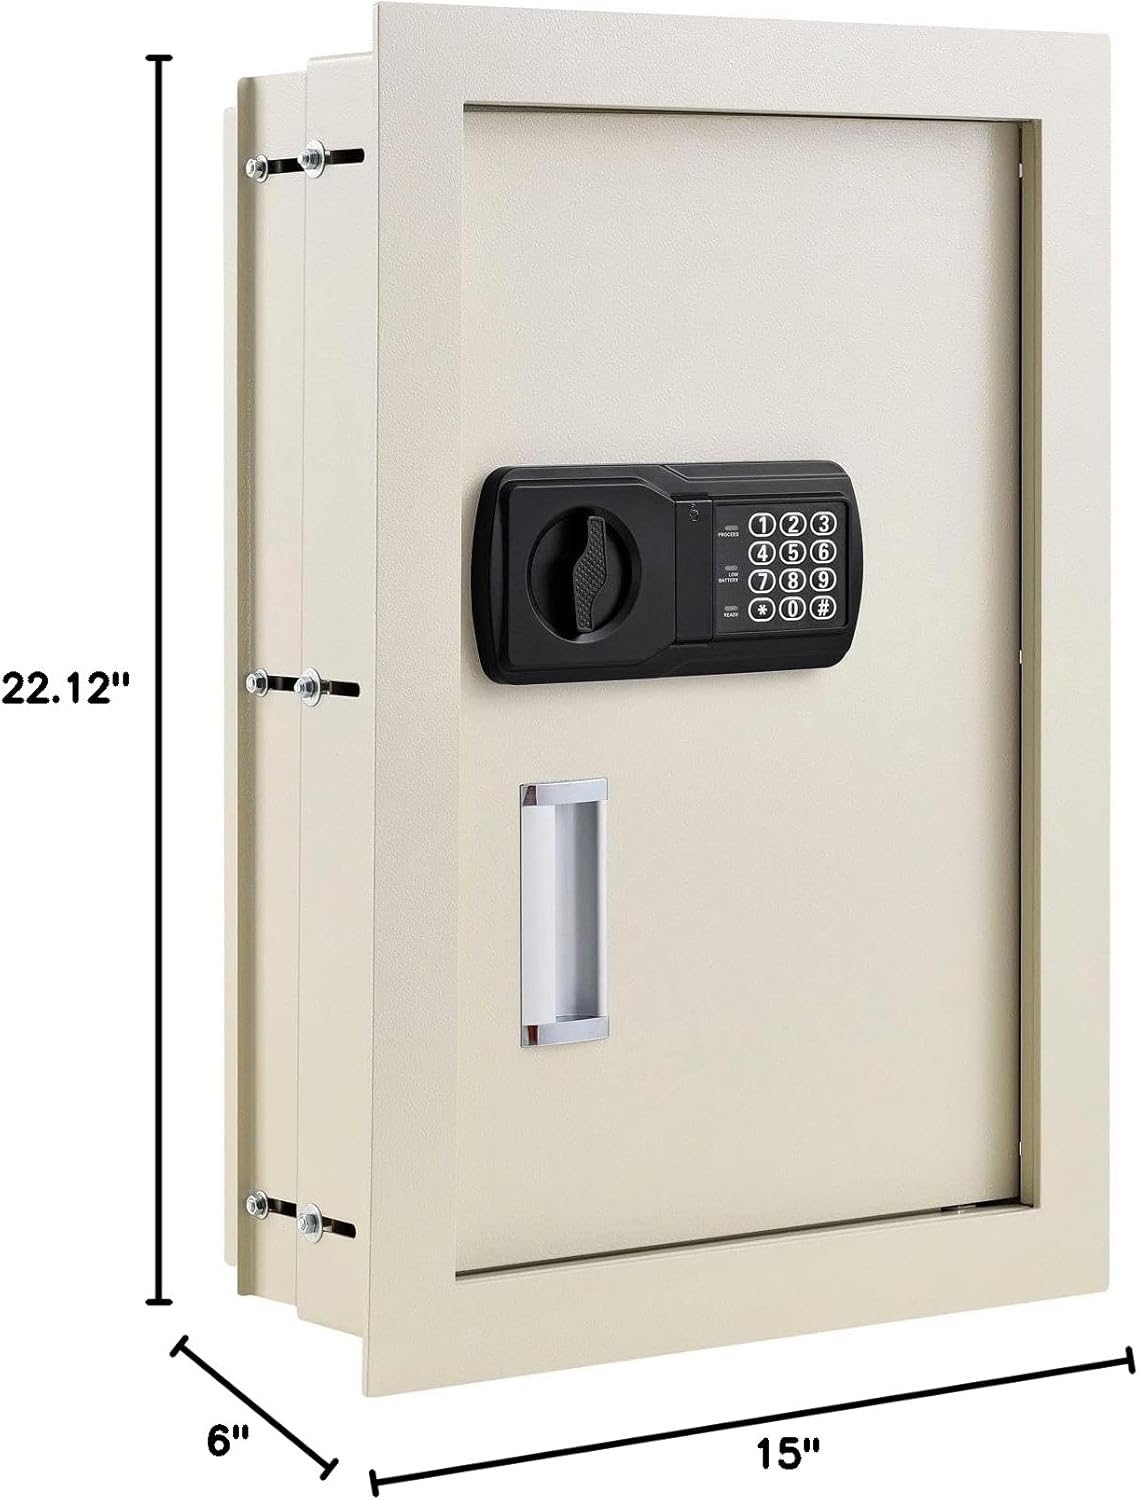
Figure 7: Dimensional drawing of the wall safe, indicating approximate height (22.12"), width (15"), and maximum depth (6").
Warranty and Support
For warranty information, technical support, or to order replacement parts, please contact Global Industrial customer service. Refer to the contact information provided with your purchase documentation or visit the official Global Industrial website.
Please have your model number (493492N) and purchase date available when contacting support.