
Hilitand TS-WS-07-C1
Hilitand Digital Thermometer Hygrometer User Manual
Model: TS-WS-07-C1
1. Introduction
This user manual provides detailed instructions for the Hilitand Digital Thermometer Hygrometer, Model TS-WS-07-C1. This device is designed to accurately monitor indoor and outdoor temperature and humidity, offering comprehensive environmental data for various settings including homes, baby rooms, and outdoor areas. It supports multiple remote sensors for extensive monitoring capabilities.
2. Key Features
- Expandable Sensor System: Supports up to 6 additional remote sensors (F007TH, F007TP, F007PF, F007T) for comprehensive monitoring.
- Clear Display: Shows current temperature and humidity, along with minimum and maximum values.
- Manual/Daily Reset: Min/Max values can be reset manually or automatically daily.
- Remote Sensor Configuration: Remote sensors feature DIP switches for channel selection and unit conversion (Celsius/Fahrenheit).
- Rolling Display Mode: Automatically cycles through indoor and all detected outdoor sensor readings every 5 seconds.
- Easy Readability: Large, clear display for simultaneous monitoring of up to eight remote thermo-hygrometer sensors.

Figure 2.1: The Hilitand system supports multiple remote sensors for multi-channel monitoring.
3. Product Specifications
| Feature | Detail |
|---|---|
| Model | TS-WS-07-C1 |
| Power Supply (Console) | 4 x AAA batteries (not included) |
| Power Supply (Outdoor Unit) | 2 x AAA batteries (not included) |
| Indoor Temperature Range | 0-60 °C (error: ±1°C) |
| Indoor Humidity Range | 10%-99% RH (error: ±5% RH) |
| Maximum Outdoor Units | Up to 8 |
| Dimensions (Console) | Approximately 115mm (4.53in) x 125mm (4.92in) x 20mm (0.79in) |
| Mounting Type | Tabletop |

Figure 3.1: Detailed specifications of the Hilitand Thermometer Hygrometer.

Figure 3.2: Dimensions of the Hilitand Digital Thermometer Hygrometer console.
4. Setup Guide
4.1. Battery Installation
The main console requires 4 AAA batteries, and each remote sensor requires 2 AAA batteries. Ensure correct polarity when inserting batteries.
- Open the battery compartment on the back of the main console.
- Insert 4 AAA batteries, observing the polarity markings (+/-).
- Close the battery compartment.
- Repeat steps 1-3 for each remote sensor, inserting 2 AAA batteries.
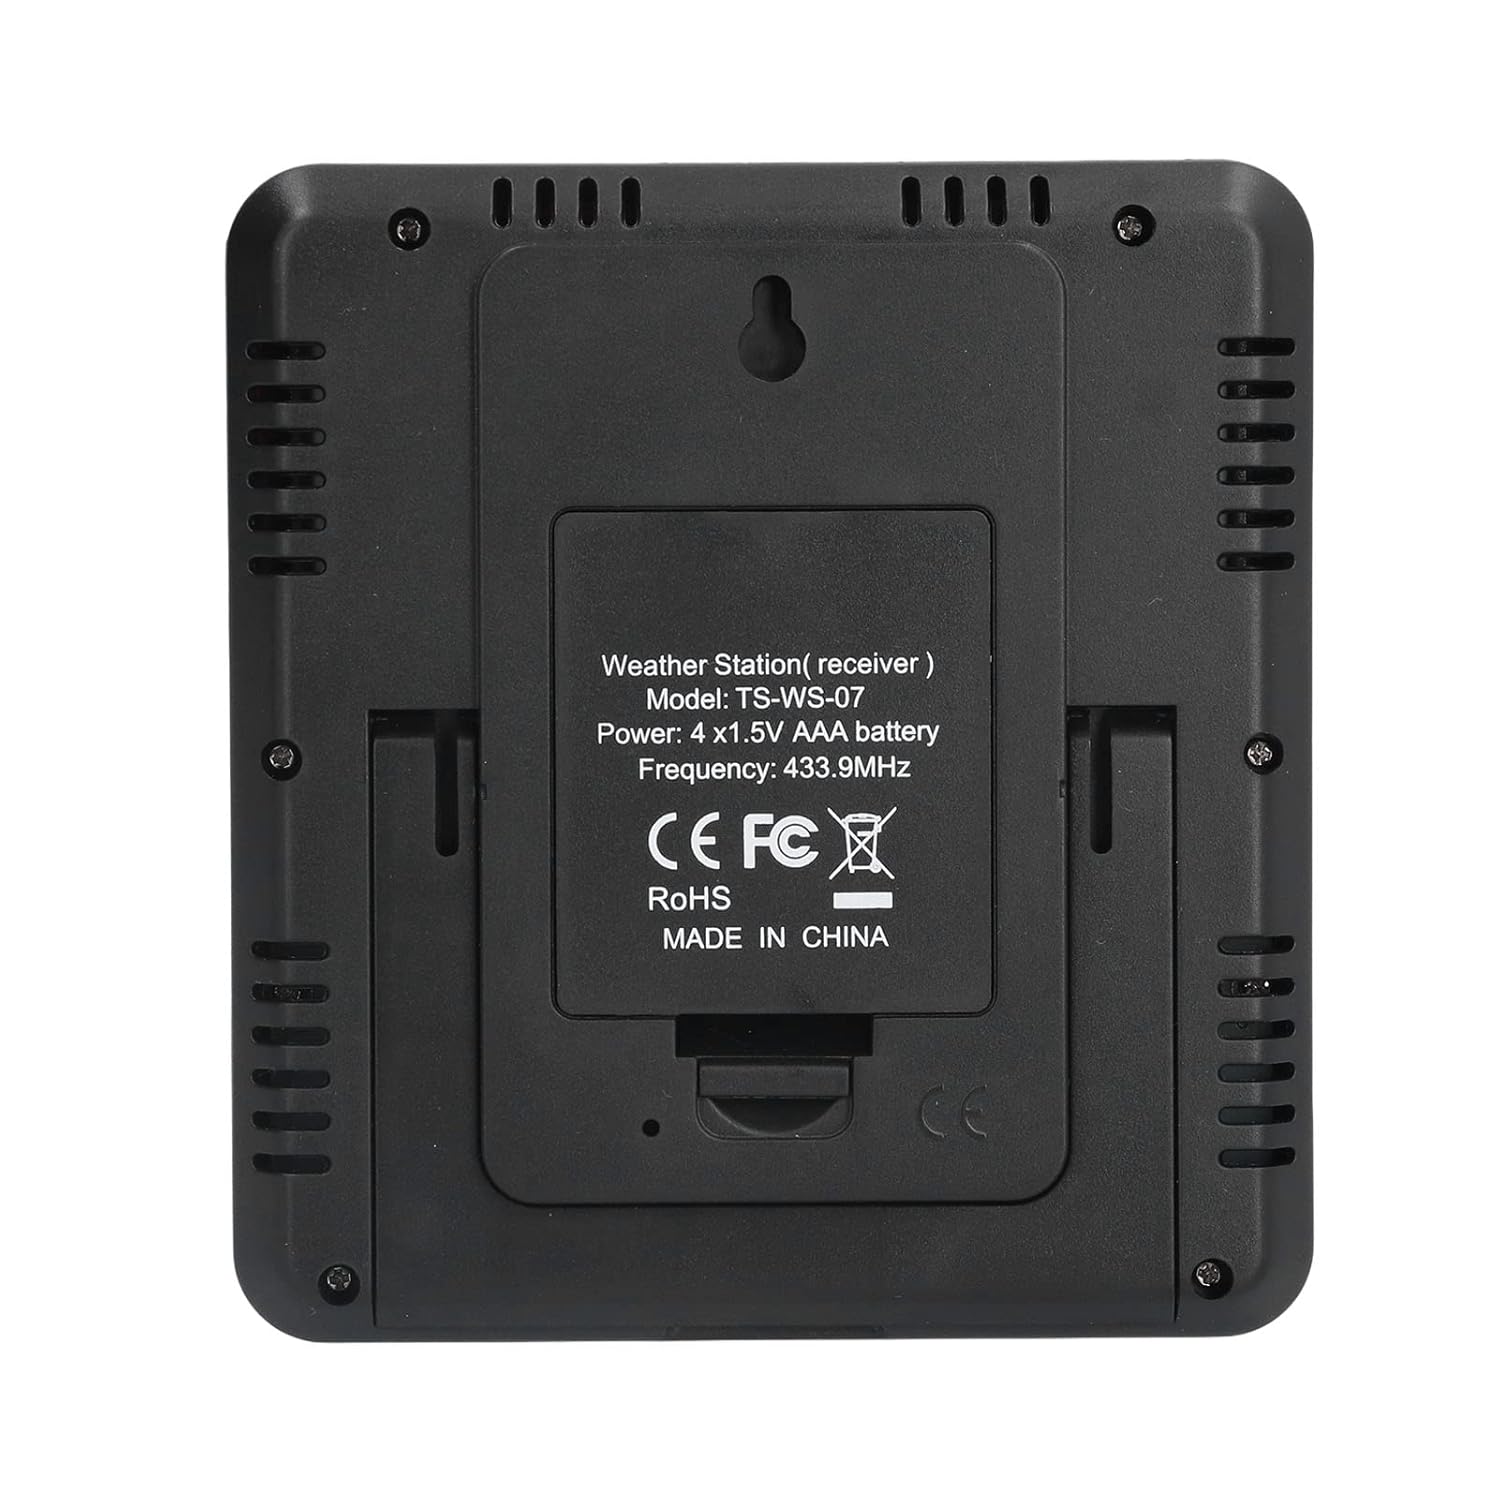
Figure 4.1: Rear view of the main console, indicating the battery compartment and wall-mount hole.
4.2. Remote Sensor Configuration (DIP Switches)
Each remote sensor has DIP switches to set its channel (1-8) and temperature unit (Celsius/Fahrenheit). This allows the main console to distinguish between multiple sensors.
- Locate the DIP switches inside the battery compartment of the remote sensor.
- Set the desired channel (CH1-CH8) using the switches. Ensure each sensor is set to a unique channel.
- Select the temperature unit (Celsius or Fahrenheit) using the dedicated switch.

Figure 4.2: Diagram illustrating the DIP switch settings for channel selection and temperature unit on the remote sensor.
5. Operating Instructions
5.1. Main Console Overview

Figure 5.1: Front view of the Hilitand Digital Thermometer Hygrometer console.

Figure 5.2: Illustration of the main console buttons and their functions.
- MIN/MAX Button: Press to view minimum and maximum temperature/humidity readings. Press and hold to reset these values.
- CLEAR Button: Used for clearing certain settings or values.
- CHANNEL Button: Press to cycle through different remote sensor channels.
- ADJUST Buttons (+/-): Used for manual calibration or setting adjustments.
5.2. Viewing Readings
Upon power-on, the console will display indoor temperature and humidity. It will automatically search for and connect to active remote sensors.
- Indoor Readings: Always displayed on the main screen.
- Remote Sensor Readings: Press the "CHANNEL" button to cycle through readings from connected remote sensors (CH1, CH2, etc.).
- Rolling Mode: The device features a rolling mode that automatically displays indoor temperature/humidity and then cycles through all detected outdoor sensor channels at 5-second intervals. This mode activates automatically if no buttons are pressed for a period.
5.3. Manual Calibration
The device supports manual calibration for temperature and humidity to ensure accuracy.

Figure 5.3: Instructions for manual calibration of temperature and humidity.
- Calibrate Humidity: Simultaneously press and hold the "MIN/MAX" and "CLEAR" buttons.
- Calibrate Temperature: Simultaneously press and hold the "CLEAR" and "CHANNEL" buttons.
Note: After calibration, the temperature or humidity display will flicker. Wait for 10 seconds for the device to update automatically.
6. Maintenance
- Cleaning: Wipe the device with a soft, dry cloth. Do not use abrasive cleaners or solvents.
- Battery Replacement: Replace batteries when the low battery indicator appears on the display. Dispose of old batteries responsibly.
- Storage: If storing the device for an extended period, remove all batteries to prevent leakage. Store in a cool, dry place.
7. Troubleshooting
| Problem | Possible Cause | Solution |
|---|---|---|
| No display on console | Batteries are dead or incorrectly inserted. | Check battery polarity and replace with fresh batteries. |
| Remote sensor not connecting |
|
|
| Inaccurate readings |
|
|
8. Warranty and Support
For warranty information and technical support, please refer to the product packaging or contact Hilitand customer service directly. Details can often be found on the official Hilitand website or through your point of purchase.
Hilitand is committed to providing quality products and customer satisfaction. For further assistance, please visit the Hilitand Store on Amazon.
Ask a question about this manual
Ask about setup, troubleshooting, compatibility, parts, safety, or missing instructions. Manuals+ will review the question and use this page’s manual context to help answer it.