
1. Introduction
This manual provides essential information for the installation and maintenance of the DNJ P929.20 Piston Set. This set is designed for specific Lexus and Toyota 1.8L L4 DOHC 2ZR-FXE engines. Proper installation and adherence to maintenance guidelines are crucial for optimal engine performance and longevity.
The DNJ P929.20 Piston Set includes pistons, piston pins, and retaining clips, all manufactured to precise specifications for a .020 inch (.50mm) oversize application. This product is intended for use by qualified automotive technicians or individuals with extensive experience in engine rebuilding.
2. Compatibility
This piston set is compatible with the following vehicle models and engine specifications:
- Engine Type: 1.8L L4 DOHC Naturally Aspirated 2ZR-FXE
- Years: 2010-2015
- Vehicles:
- Lexus CT200h
- Toyota Prius
- Toyota Prius Plug-In
- Toyota Prius V
Note: This is an oversize piston set (.020 in. / .50mm). Ensure your engine block has been machined to accommodate this oversize specification before installation.
3. Package Contents
The DNJ P929.20 Piston Set includes the following components:
- 4 x Oversize Pistons (.020 in. / .50mm)
- 4 x Piston Pins
- 8 x Piston Pin Retaining Clips
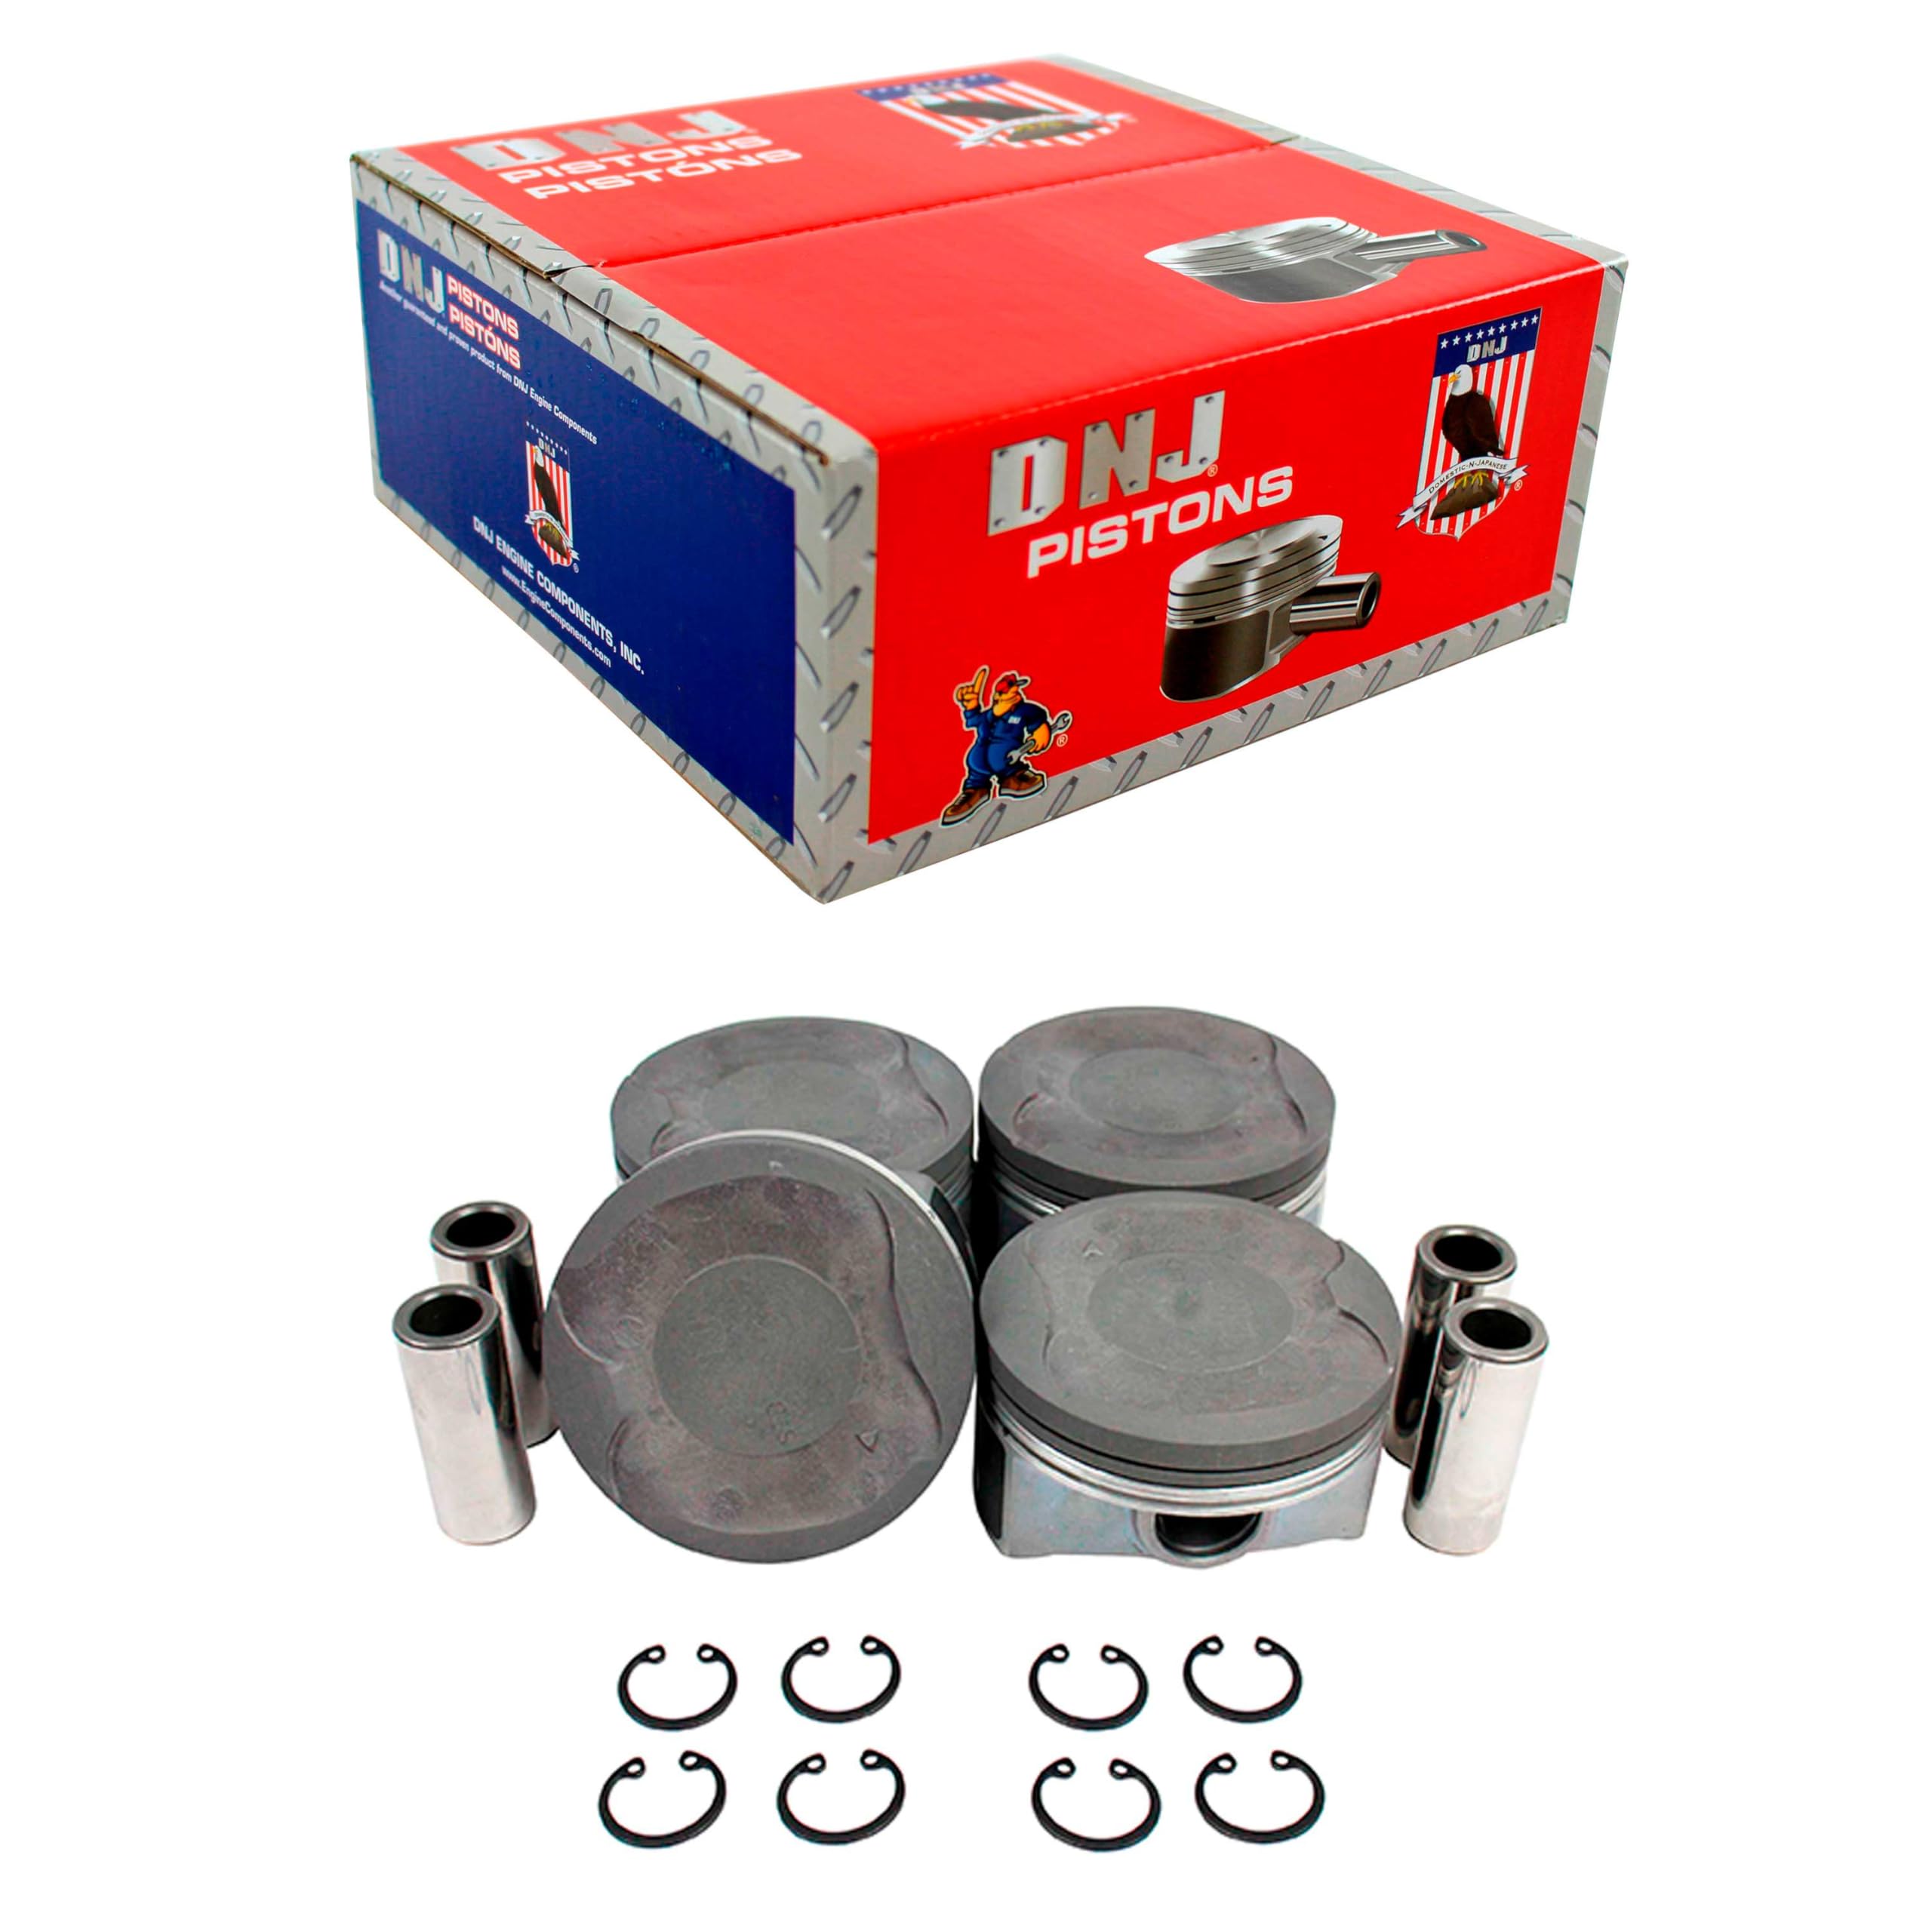
Image 1: Complete DNJ P929.20 Piston Set, showing four pistons, four piston pins, and eight retaining clips.
4. Safety Information
Always prioritize safety when working on automotive engines. Failure to follow safety precautions can result in serious injury or damage to components.
- Wear appropriate personal protective equipment (PPE), including safety glasses, gloves, and protective clothing.
- Ensure the vehicle is securely supported on jack stands or a lift before beginning any work.
- Disconnect the vehicle's battery to prevent accidental electrical discharge.
- Work in a well-ventilated area.
- Refer to the vehicle manufacturer's service manual for specific torque specifications and procedures.
- Keep all tools and components clean and organized to prevent contamination or loss.
5. Installation Guidelines
This section provides general guidelines for installing the DNJ P929.20 Piston Set. It is imperative to consult a comprehensive service manual for your specific vehicle and engine for detailed, step-by-step instructions and critical specifications.
5.1. Pre-Installation Checks
- Engine Block Preparation: Ensure the cylinder bores have been professionally machined and honed to the correct .020 in. (.50mm) oversize specification. Verify bore dimensions with a precision measuring tool.
- Cleanliness: Thoroughly clean the engine block, connecting rods, and all piston components. Remove any debris, old gasket material, or machining residue.
- Component Inspection: Inspect each piston, pin, and clip for any manufacturing defects or shipping damage. Ensure piston rings (sold separately) are correctly sized and free of damage.
- Piston Orientation: Note any directional markings on the piston crowns (e.g., 'FRONT' or an arrow) which indicate the correct orientation towards the front of the engine.

Image 2: Top view of a single piston, highlighting potential orientation markings.
5.2. Assembly and Installation Steps (General)
- Piston Pin Installation: Install the piston pins into the pistons and connecting rods. Use the provided retaining clips to secure the pins. Ensure clips are fully seated in their grooves.
- Piston Ring Installation: Install piston rings (compression rings and oil control rings) onto the pistons according to the ring manufacturer's instructions and the vehicle service manual. Pay close attention to ring orientation and gap placement.
- Lubrication: Liberally lubricate the piston skirts, cylinder walls, piston pins, and connecting rod bearings with clean engine assembly lubricant or engine oil.
- Piston Insertion: Using a piston ring compressor, carefully insert each piston assembly into its corresponding cylinder bore, ensuring correct orientation. Gently tap the piston crown with a rubber mallet until the piston is fully seated.
- Connecting Rod Installation: Connect the connecting rod to the crankshaft journal. Install connecting rod bearing caps and tighten the bolts to the vehicle manufacturer's specified torque using a torque wrench. Follow the correct tightening sequence and angle torque specifications if required.
- Final Checks: Rotate the crankshaft manually to ensure smooth movement of all piston assemblies without binding.

Image 3: A single piston with its corresponding pin and retaining clips, ready for assembly.
Professional Installation: Due to the precision required for engine internal components, professional installation by a certified mechanic is highly recommended to ensure correct fitment and operation.
6. Post-Installation and Break-in
After the piston set is installed and the engine is reassembled, follow these general guidelines:
- Initial Start-up: Ensure all fluids are at correct levels. Start the engine and check for any unusual noises, leaks, or warning lights. Allow the engine to reach operating temperature.
- Engine Break-in: Follow the vehicle manufacturer's recommended break-in procedure for a rebuilt engine. This typically involves varying engine speeds and avoiding prolonged high RPMs or heavy loads for the first few hundred miles. This allows piston rings to properly seat against the cylinder walls.
- Oil Change: Perform an initial oil and filter change after the recommended break-in period (e.g., 500-1000 miles) to remove any assembly lubricants or wear particles.
7. Maintenance
Proper engine maintenance is essential for the longevity of your piston set and overall engine health.
- Regular Oil Changes: Adhere to the vehicle manufacturer's recommended oil change intervals using the specified oil type and viscosity.
- Quality Fuel: Use high-quality fuel to prevent pre-ignition and detonation, which can damage pistons.
- Cooling System: Maintain a properly functioning cooling system to prevent engine overheating, which can lead to piston damage.
- Air Filtration: Ensure the engine's air filter is clean to prevent abrasive particles from entering the cylinders.
8. Troubleshooting
If you experience issues after installing the piston set, consider the following common areas:
- Excessive Oil Consumption: Could indicate improperly seated piston rings, incorrect ring gap, or damaged oil control rings. Re-check ring installation and cylinder bore finish.
- Low Compression: May point to improperly seated or broken piston rings, incorrect piston-to-bore clearance, or valve train issues. Perform a compression test.
- Engine Knocking/Pinging: Can be caused by incorrect piston-to-bore clearance, improper ignition timing, or fuel issues. Consult a professional for diagnosis.
- Unusual Engine Noises: Could be related to incorrect piston pin installation, connecting rod bearing issues, or other internal engine problems. Immediate diagnosis is recommended.
For complex engine issues, it is always best to consult a certified automotive technician.
9. Specifications
| Specification | Detail |
|---|---|
| Part Number | P929.20 |
| Oversize | .020 in. (.50mm) |
| Engine Compatibility | 1.8L L4 DOHC Naturally Aspirated 2ZR-FXE |
| Vehicle Compatibility | Lexus CT200h, Toyota Prius, Prius Plug-In, Prius V (2010-2015) |
| Piston Ring Grooves | 1.0mm x 1.0mm x 1.5mm (for piston rings, sold separately) |
| Item Weight | Approximately 10 pounds (for the set) |
| Package Dimensions | Approximately 14 x 10 x 6 inches |
10. Warranty Information
DNJ Engine Components products are backed by a manufacturer's warranty. For specific details regarding the warranty period, coverage, and claims process, please refer to the official DNJ Engine Components website or contact their customer service directly. Retain your proof of purchase for any warranty claims.
11. Support
For technical assistance, product inquiries, or support, please contact DNJ Engine Components through their official channels. You can typically find contact information on their website or through the retailer where the product was purchased.
Online Resources: Visit the DNJ Store on Amazon for additional product information and resources.