Introduction
This manual provides instructions for the proper installation, operation, and maintenance of your UpStart Components Replacement Bobbin Case. This bobbin case is designed to be compatible with the Necchi 513 Sewing Machine and Singer #62740. Please read these instructions carefully before use to ensure optimal performance and longevity of the product.
Safety Information
- Always turn off and unplug your sewing machine before installing or removing any parts, including the bobbin case.
- Keep small parts away from children.
- Handle the bobbin case carefully to avoid dropping or damaging it.
- If you are unsure about any step, consult your sewing machine's original instruction manual or a qualified technician.
Setup and Installation
Replacing the bobbin case is a straightforward process. Ensure your sewing machine is powered off and unplugged before proceeding.
1. Identify the Bobbin Case
Locate the existing bobbin case in your sewing machine. It is typically found beneath the needle plate, often accessible by opening a small cover or sliding a plate.

Figure 1: The UpStart Components Replacement Bobbin Case. This image shows the overall appearance of the bobbin case, highlighting its metallic finish and the latch mechanism.
2. Remove the Old Bobbin Case
Carefully open the latch on the old bobbin case and remove it from the sewing machine. If a bobbin is inside, remove it as well.
3. Inspect the New Bobbin Case
Examine your new UpStart Components bobbin case for any visible defects or damage before installation.

Figure 2: Top view of the bobbin case. This perspective shows the opening where the bobbin is inserted and the tension spring.

Figure 3: Side view of the bobbin case. This image highlights the latch mechanism used for securing and releasing the bobbin case within the sewing machine.
4. Insert the New Bobbin Case
Hold the new bobbin case by its latch. Align it correctly with the bobbin housing in your sewing machine. Gently push it into place until it clicks or sits securely. Ensure it is fully seated and does not wobble.
Operating Instructions
Once the bobbin case is installed, you can proceed with inserting a bobbin and threading your machine.
1. Insert Bobbin into Case
- Take a wound bobbin and place it into the bobbin case.
- Guide the thread through the tension spring slot on the bobbin case. Ensure the thread moves smoothly through the tension spring.
- Pull a few inches of thread tail out from the bobbin case.
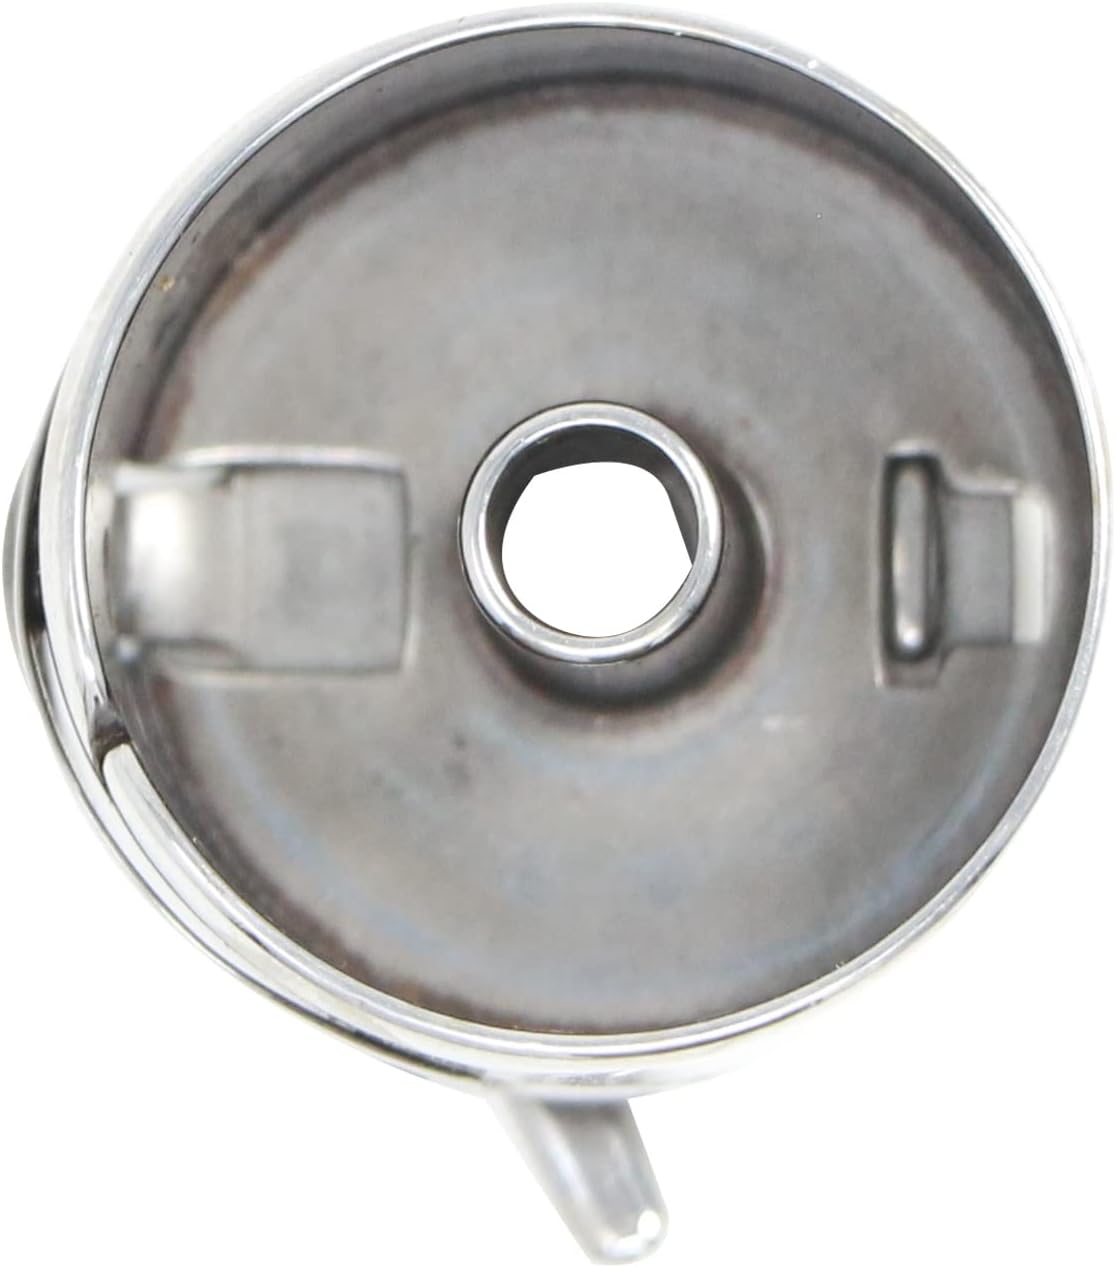
Figure 4: Interior view of the bobbin case. This shows the internal structure where the bobbin rests and the path for the thread through the tension mechanism.
2. Place Bobbin Case into Machine
- Hold the bobbin case by its latch with the thread tail hanging freely.
- Insert the bobbin case into the bobbin housing of your sewing machine. It should fit snugly.
- Close the bobbin cover or slide plate.
3. Draw Up Bobbin Thread
- Hold the needle thread lightly.
- Turn the handwheel towards you to lower the needle, allowing it to catch the bobbin thread.
- Continue turning the handwheel until the needle rises, bringing a loop of bobbin thread up through the needle plate.
- Pull both the needle thread and the bobbin thread towards the back of the machine, under the presser foot.
Your sewing machine is now ready for operation. Refer to your sewing machine's main manual for specific threading and sewing instructions.
Maintenance
Regular maintenance of your bobbin case will help ensure smooth sewing and extend its lifespan.
Cleaning
- Periodically remove the bobbin case from the machine.
- Use a small brush or lint roller to remove any lint, dust, or thread fragments that may accumulate inside or around the bobbin case and its tension spring.
- Do not use harsh chemicals or abrasive materials for cleaning, as this may damage the finish or functionality.
Inspection
- Regularly inspect the bobbin case for any signs of wear, such as nicks, burrs, or deformation, especially around the thread path and tension spring.
- A damaged bobbin case can cause thread breakage, skipped stitches, or uneven tension. Replace the bobbin case if significant wear or damage is observed.
Troubleshooting
If you encounter issues related to the bobbin case, consider the following common problems and solutions:
- Thread Jamming or Nesting:
- Ensure the bobbin is wound evenly and inserted correctly into the bobbin case.
- Check that the bobbin thread is properly routed through the tension spring.
- Clean any lint or debris from the bobbin case and the bobbin area of the machine.
- Uneven Stitching or Looping:
- Verify that the bobbin thread tension is appropriate. The tension screw on the bobbin case can be adjusted slightly, but typically, the top thread tension is adjusted first.
- Ensure the bobbin case is fully seated and not loose in the machine.
- Thread Breakage:
- Inspect the bobbin case for any burrs or sharp edges that might be snagging the thread.
- Ensure the bobbin is not overfilled or wound too tightly.
Specifications
- Product Type: Replacement Bobbin Case
- Model Number: SM-62740-DL4
- Compatibility: Necchi 513 Sewing Machine, Singer #62740
- Manufacturer: UpStart Components
Warranty and Support
This product is an UpStart Components Brand replacement part. Any warranties for this product are offered solely by UpStart Battery. This product is not affiliated with any other brands mentioned and is not covered under any warranties offered by the original manufacturers of compatible sewing machines.
For support or warranty inquiries, please contact UpStart Battery directly.