JIEEDRAP DC44
JIEEDRAP Dash Cam DC44 User Manual
1080P Full HD On-Dashboard Camera Video Recorder
Introduction
Thank you for choosing the JIEEDRAP Dash Cam DC44. This device is designed to provide reliable video recording of your journeys, offering enhanced safety and peace of mind. Equipped with 1080P Full HD resolution, a 170° wide-angle lens, night vision, G-Sensor, and parking mode, it captures critical details on the road. Please read this manual thoroughly before using the product to ensure proper operation and maintenance.

Image: JIEEDRAP Dash Cam DC44, showing the camera unit and its suction cup mount. The camera's screen displays a clear view of a road with a car ahead, illustrating its primary function as a vehicle video recorder.
Safety Information
- Do not operate the dash cam or attempt to adjust its settings while driving. This can distract you and lead to accidents.
- Ensure the dash cam is securely mounted and does not obstruct your view of the road or interfere with airbag deployment.
- Use only the original power cable and accessories provided with the device. Using unauthorized accessories may damage the product and void the warranty.
- Avoid exposing the dash cam to extreme temperatures, direct sunlight for prolonged periods, or excessive humidity.
- Keep the lens clean to ensure clear video recordings. Use a soft, dry cloth for cleaning.
- Do not attempt to disassemble or repair the device yourself. Contact customer support for assistance.
Package Contents
Please check the box for the following items:
- JIEEDRAP Dash Cam DC44 Unit
- Suction Cup Mount
- Car Charger Power Cable
- User Manual (this document)
- Note: An SD card is not included and must be purchased separately.
Product Overview
Familiarize yourself with the components of your dash cam:
- Front Lens: Captures 170° wide-angle video.
- 3-inch LCD Display: For real-time viewing, menu navigation, and playback.
- Control Buttons: Power, Menu, Up, Down, OK/Record.
- Micro SD Card Slot: Insert your memory card here.
- USB Power Port: Connect the car charger.
- Speaker/Microphone: For audio recording and playback.
- Reset Button: For factory reset if needed.

Image: Diagram highlighting key features of the dash cam, including IPS Screen, Optional GPS, Loop Recording, Infrared Night Vision, Accident Recording Lock (G-Sensor), and User-Friendly Interface.
Setup
1. Inserting the Micro SD Card
Before first use, insert a high-speed (Class 10 or higher) Micro SD card (up to 32GB recommended, not included) into the designated slot until it clicks into place. Ensure the card is inserted correctly to avoid damage. To remove, gently push the card in until it springs out.
2. Mounting the Dash Cam
The DC44 offers two mounting options:
- Suction Cup Mount: Attach the suction cup mount to the dash cam. Clean the windshield surface thoroughly. Press the suction cup firmly against the windshield and flip the lever to secure it. Adjust the camera angle as desired.
- Adhesive-Backed Mount (if included): For a more compact and secure installation, use the adhesive mount. Clean the desired surface, peel off the protective film, and firmly press the mount into place. Allow 24 hours for the adhesive to fully bond before attaching the camera.
Position the dash cam where it has a clear view of the road ahead and does not obstruct your driving visibility or interfere with safety features like airbags.

Image: The JIEEDRAP Dash Cam mounted on a car's windshield, demonstrating its discreet placement and wide field of view from the driver's perspective.
3. Power Connection
Connect the provided car charger to the dash cam's USB power port and plug the other end into your vehicle's 12V power outlet (cigarette lighter socket). The camera will automatically power on and begin recording when the vehicle's ignition is turned on.
Operating the Dash Cam
1. Power On/Off
- Automatic: The dash cam powers on and starts recording automatically when connected to power and the vehicle ignition is on. It powers off automatically when the ignition is turned off.
- Manual: Press and hold the Power button to manually turn the device on or off.
2. Loop Recording
The dash cam records video in continuous loops (e.g., 1, 3, or 5-minute segments). When the memory card is full, the oldest unlocked footage will be overwritten by new recordings. This ensures continuous recording without manual intervention.
3. G-Sensor (Emergency Recording)
The built-in G-Sensor detects sudden impacts or rapid acceleration/deceleration. When triggered, the current video segment is automatically locked and saved to a protected folder on the SD card, preventing it from being overwritten by loop recording. This feature is crucial for preserving accident footage.
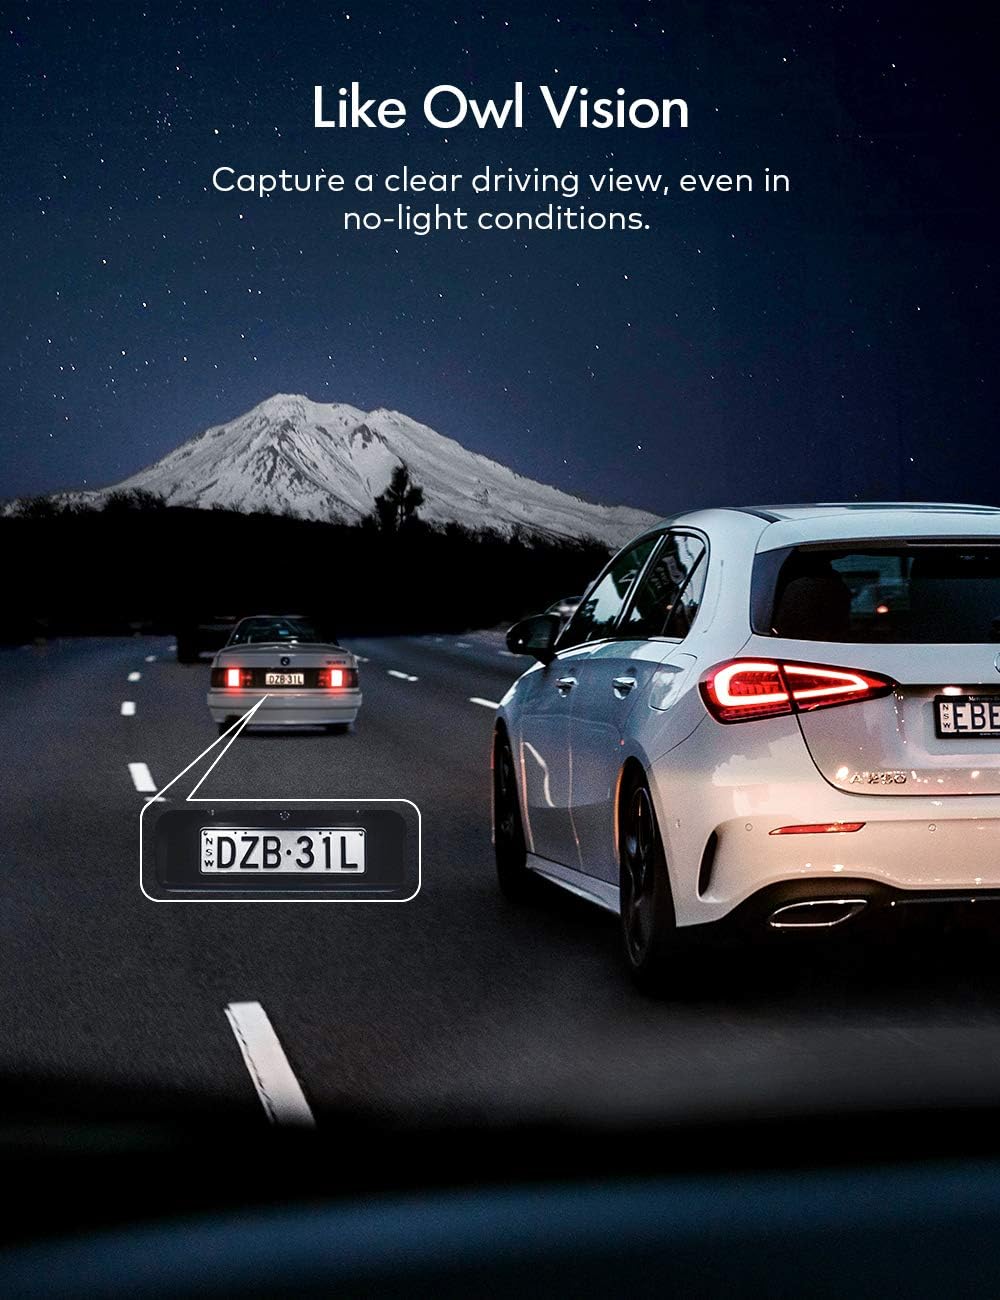
Image: A visual representation of the dash cam's seamless recording and collision detection (G-Sensor) feature, showing how critical footage is automatically locked and saved in case of an incident.
4. Parking Mode (Parking Monitor)
When Parking Mode is enabled, the dash cam will automatically wake up and begin recording for 30 seconds if it detects any vibration or motion while your vehicle is parked. This provides surveillance even when you're away from your car. For long-term parking monitoring, a hardwire kit (sold separately) is recommended to provide continuous power.

Image: An illustration of the Parking Monitor feature, depicting a car in a parking lot with a protective shield icon, signifying the camera's ability to record automatically when impact or collision is sensed while parked.
5. Night Vision
The DC44 features advanced night vision capabilities, utilizing a STARVIS sensor and intelligent exposure adjustment to capture clear video footage even in low-light or no-light conditions. This ensures visibility of details like license plates at night.
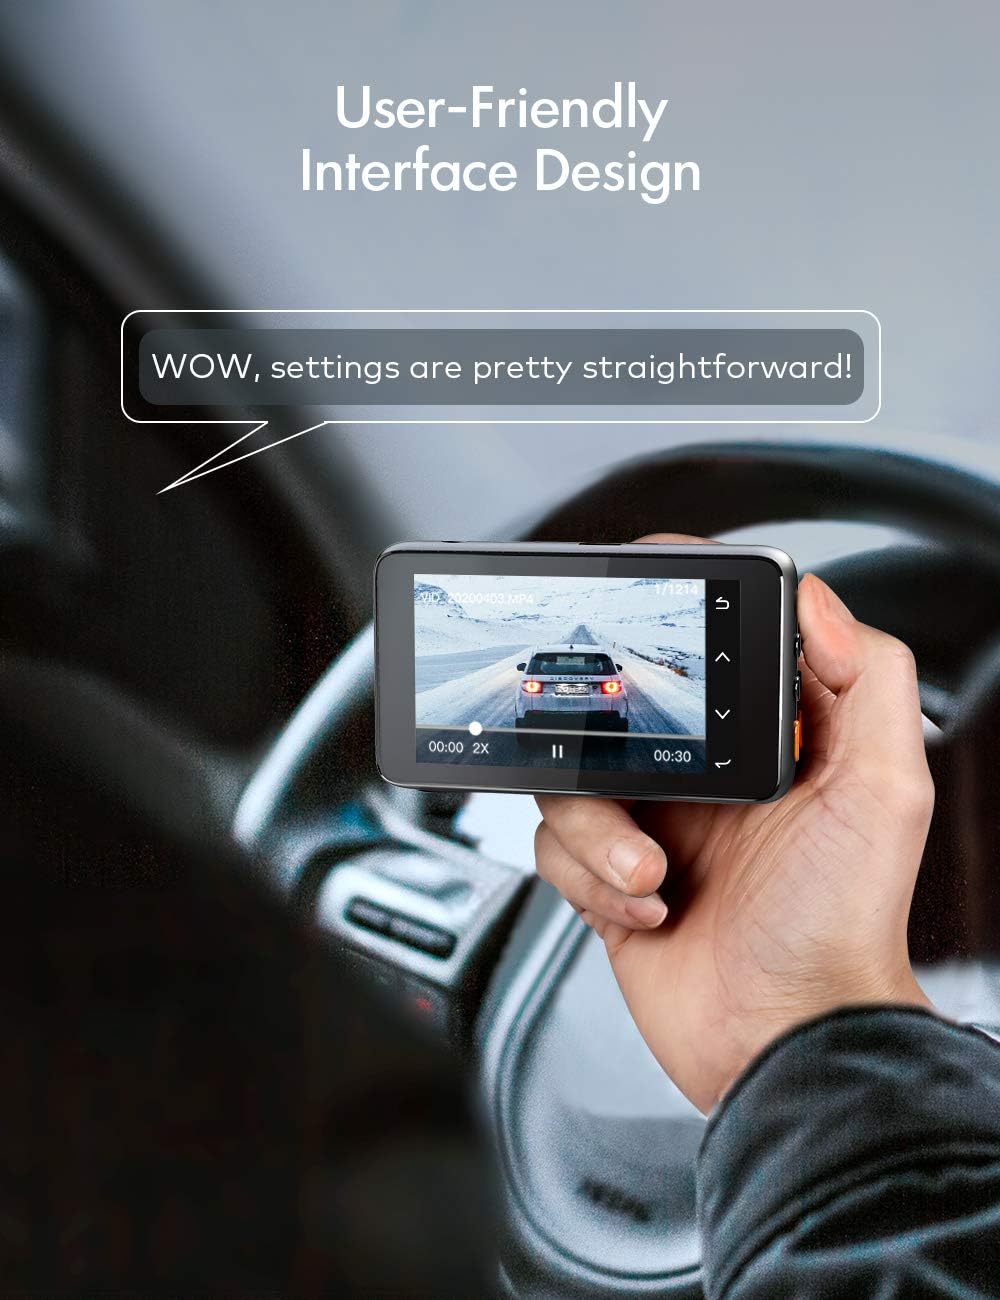
Image: Close-up of the dash cam's lens, emphasizing its Real Infrared Night Vision capabilities, supported by 8 IR Lights, a Starvis Sensor, and Wide Dynamic Range (WDR) technology.

Image: A night scene showing the dash cam's "Owl Vision" capability, capturing a clear driving view in low-light conditions, with a license plate highlighted for clarity.
6. Menu Navigation and Settings
Use the Menu button to access settings. Navigate through options using the Up/Down buttons and confirm selections with the OK button. Common settings include:
- Resolution: Set video quality (e.g., 1080P, 720P).
- Loop Recording: Adjust segment length.
- G-Sensor Sensitivity: Adjust sensitivity for impact detection.
- Parking Monitor: Enable/Disable.
- Date/Time: Set correct date and time for accurate timestamps.
- Format SD Card: Erase all data on the SD card.

Image: A hand holding the dash cam, demonstrating its user-friendly interface with straightforward settings and playback controls visible on the screen.
7. Playback
To view recorded videos:
- Stop recording (if active) by pressing the OK button.
- Press the Mode button to switch to Playback mode.
- Use the Up/Down buttons to browse through recorded files.
- Press the OK button to play a selected video.
- Press the Menu button to access playback options (e.g., delete, protect).
Maintenance
- Cleaning: Regularly wipe the camera lens with a soft, lint-free cloth to ensure clear recordings. Clean the device body with a slightly damp cloth, avoiding harsh chemicals.
- SD Card Formatting: It is recommended to format the Micro SD card every 2-4 weeks to prevent data corruption and ensure optimal performance. This can be done through the camera's menu settings.
- Firmware Updates: Periodically check the manufacturer's website for available firmware updates. Updates can improve performance, add features, or fix bugs. Follow the provided instructions carefully for any firmware update process.
Troubleshooting
| Problem | Possible Solution |
|---|---|
| Camera does not power on. |
|
| Camera stops recording or freezes. |
|
| Video footage is blurry or unclear. |
|
| Suction cup mount keeps falling off. |
|
| Parking Mode does not work. |
|
Specifications
| Feature | Detail |
|---|---|
| Model Name | DC44 |
| Product Dimensions | 3.46 x 2.05 x 1.34 inches |
| Item Weight | 10.9 ounces |
| Video Capture Resolution | 1080p Full HD |
| Wide Angle Lens | 170° |
| Display | 3" LCD Display |
| Special Features | Loop Recording, G-Sensor, Night Vision, Parking Monitoring, Wide Dynamic Range (WDR) |
| Connectivity Technology | USB |
| Mounting Type | Suction Mount (Adhesive option may be available) |
| Battery | 1 Lithium Metal battery (included) |
Warranty and Support
JIEEDRAP stands behind the quality of its products. Your Dash Cam DC44 comes with a two-year warranty. Additionally, all users are entitled to LIFETIME technical support. If you encounter any issues, require spare parts (such as suction cups), or have questions regarding firmware updates, please do not hesitate to contact our highly trained service technicians. We are committed to providing responsive and responsible support to ensure your satisfaction.
For support, please refer to the contact information provided on the product packaging or the official JIEEDRAP website.
Ask a question about this manual
Ask about setup, troubleshooting, compatibility, parts, safety, or missing instructions. Manuals+ will review the question and use this page’s manual context to help answer it.