Introduction
This manual provides essential information for the installation, operation verification, and maintenance of your Owigift Washer Water Inlet Valve. This replacement part is designed for specific Maytag top-load washer models. Please read these instructions carefully before proceeding with installation to ensure proper function and safety.
Safety Information
Warning: Always disconnect power to the washer and shut off the water supply before attempting any repairs or installation. Failure to do so can result in electric shock, water damage, or personal injury. If you are unsure about any step, consult a qualified technician.
- Ensure the washer is unplugged from the electrical outlet.
- Turn off both hot and cold water supply valves to the washer.
- Wear appropriate personal protective equipment, such as gloves and safety glasses.
- Keep children and pets away from the work area.
Compatibility
This Owigift Water Inlet Valve is an aftermarket replacement part compatible with the following Maytag top-load washer models:
- MAV6200AWW
- MAV5000AWW
- MAV7650AWW
- MAV6300AWW
- MAV5057AWW
- MAV4057AWW
- MAV6250AWW
- MAV6200AWQ
- MAV5000AWQ
- MAV6300AWQ
- MAV5057AWQ
- MAV4500AWW
- MAV5960AWW
- MAV6250AWQ
- MAV7650AWQ
- MAV4057AWQ
- XAV13PRBWW
To confirm compatibility, locate your washer's model number, typically found on a label inside the lid, on the back of the control panel, or on the side of the tub. If you are uncertain about compatibility, please contact the seller for assistance.
Setup and Installation
This section outlines the general steps for replacing a water inlet valve. Specific washer models may vary slightly. Refer to your washer's service manual for detailed instructions if available.
Tools Required (Typical):
- Screwdriver (Phillips and/or flathead)
- Nut driver or socket set
- Pliers
- Bucket and towels (for water spills)
Installation Steps:
- Prepare the Washer:
Disconnect the washer from the electrical outlet. Turn off the hot and cold water supply valves at the wall. Move the washer away from the wall to access the back panel. - Drain Water Hoses:
Place a bucket behind the washer. Disconnect the hot and cold water inlet hoses from the back of the washer and allow any residual water to drain into the bucket. - Access the Valve:
Remove the screws securing the washer's back panel (or control panel, depending on the model) and carefully remove the panel to expose the water inlet valve. - Disconnect Old Valve:
Take a photograph of the existing wiring and hose connections for reference. Disconnect the electrical connectors from the solenoids on the old valve. Loosen and remove any clamps or screws holding the internal water dispenser hoses to the valve. - Remove Old Valve:
Unscrew the mounting screws or clips that secure the water inlet valve to the washer frame. Carefully remove the old valve. - Install New Valve:
Position the new Owigift Water Inlet Valve in the same location as the old one. Secure it with the mounting screws or clips. - Connect Hoses and Wiring:
Reconnect the internal water dispenser hoses to the new valve, ensuring they are securely clamped. Reattach the electrical connectors to the solenoids, matching them to your reference photograph. - Reassemble Washer:
Replace the washer's back panel (or control panel) and secure it with screws. - Reconnect Water and Power:
Reconnect the hot and cold water inlet hoses to the new valve's threaded ports on the back of the washer. Ensure connections are tight to prevent leaks. Slowly turn on the hot and cold water supply valves at the wall. Check for any leaks at the connections. Plug the washer back into the electrical outlet.

Figure 1: Side view of the water inlet valve, highlighting the two threaded water inlet ports and the electrical terminals for the solenoids.
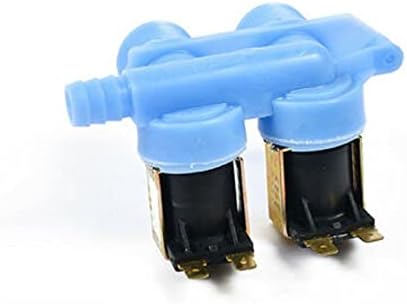
Figure 2: Top view of the blue plastic valve body with two black solenoid coils attached. Shows the hose barb connection on one side.

Figure 3: Angled view of the water inlet valve, showing it mounted on a metal bracket, with the two solenoid coils and the water outlet barb visible.
Operating Verification
After installation, perform a test cycle to ensure the new water inlet valve is functioning correctly.
- Select a short wash cycle on your washer (e.g., Rinse & Spin or a small load cycle).
- Start the cycle and observe the water filling process.
- Listen for the sound of water flowing into the tub. The water should fill at a normal rate.
- Check for any leaks around the water inlet valve and hose connections during the fill cycle.
- Allow the cycle to complete. If any issues arise, refer to the Troubleshooting section.
Maintenance
The water inlet valve is a sealed component and generally does not require routine maintenance. However, to ensure its longevity and optimal performance:
- Periodically inspect the water inlet hoses for cracks, bulges, or leaks. Replace hoses every 3-5 years or if any damage is observed.
- Ensure the screens inside the water inlet ports (where the hoses connect) are clean and free of debris. These screens prevent sediment from entering the valve and can be cleaned by carefully removing them and rinsing under water.
- Avoid overtightening water hose connections, as this can damage the valve's plastic threads.
Troubleshooting
If you encounter issues after installing the new water inlet valve, consider the following common problems and solutions:
| Problem | Possible Cause | Solution |
|---|---|---|
| No water entering the washer | Water supply valves are off Kinked or blocked inlet hoses Clogged inlet screens Electrical connection issue to valve | Ensure water supply valves are fully open. Straighten hoses. Clean inlet screens. Verify electrical connectors are securely attached to the valve solenoids. |
| Slow water fill | Partially closed water supply valves Partially clogged inlet screens Low household water pressure | Fully open water supply valves. Clean inlet screens. Check household water pressure. |
| Water leaks from valve or hoses | Loose hose connections Damaged rubber washers in hoses Cracked valve housing (rare) | Tighten hose connections. Replace rubber washers in inlet hoses. If valve housing is cracked, the valve may need replacement. |
| Washer fills with wrong temperature water | Hot and cold hoses reversed One solenoid not functioning | Ensure hot and cold hoses are connected to the correct ports. Verify electrical connections to both solenoids. |
If troubleshooting steps do not resolve the issue, it is recommended to contact a qualified appliance repair technician.
Specifications
| Feature | Detail |
|---|---|
| Brand | Owigift |
| Material | Metal, Plastic |
| Exterior Finish | Stainless Steel (bracket), Plastic (valve body) |
| Number of Ports | 2 (Hot and Cold) |
| UPC | 718997260412 |
Warranty and Support
Specific warranty details for this aftermarket part are not provided in the product information. For any questions regarding compatibility, installation, or product performance, please contact the seller directly. They are available to assist you within 24 hours.