1. Important Safety Instructions
Please read all instructions carefully before operating your EuropAce EPAC12W3 portable air conditioner. Retain this manual for future reference.
- Always connect the unit to a properly grounded power outlet with the correct voltage.
- Do not operate the unit with a damaged cord or plug. If the cord is damaged, it must be replaced by the manufacturer, its service agent, or similarly qualified persons to avoid a hazard.
- Do not block air outlets or inlets. Ensure adequate clearance around the unit for proper airflow.
- Do not insert fingers or foreign objects into the air inlets or outlets.
- Do not use the unit near water or in excessively damp environments.
- This appliance is not intended for use by persons (including children) with reduced physical, sensory or mental capabilities, or lack of experience and knowledge, unless they have been given supervision or instruction concerning use of the appliance by a person responsible for their safety.
- Always unplug the unit before cleaning or servicing.
- Use only accessories recommended by the manufacturer.
- Do not attempt to repair or modify the unit yourself. Contact qualified service personnel for all repairs.
2. Product Overview
The EuropAce EPAC12W3 is a versatile 3-in-1 portable air conditioner designed to provide cooling, dehumidification, and fan-only operation. It features a powerful 12000 BTU cooling capacity and a self-evaporating system for convenience.
Key Features:
- Powerful Cooling Capacity (12000 BTU)
- CFC-free refrigerant
- Self-evaporating system
- Dual motor for rapid cooling & better performance
- Auto left/right oscillation louver
- Adjustable upward/downward louver
- Dehumidifier Function
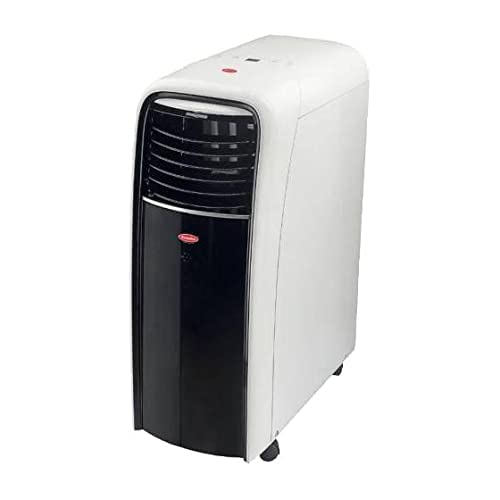
Image showing the compact design of the EuropAce EPAC12W3 portable air conditioner, highlighting its sleek appearance.
3. Package Contents
Carefully unpack your air conditioner and check that all items are present and in good condition. If any items are missing or damaged, contact your retailer immediately.
- EuropAce EPAC12W3 Portable Air Conditioner Unit
- Exhaust Hose
- Window Sealing Kit
- Remote Control
- User Manual (this document)
- Drain Hose (for continuous drainage)
4. Setup and Installation
4.1 Choosing a Location
- Place the unit on a firm, level surface in a room that is not obstructed by furniture or other objects.
- Ensure there is at least 20 cm (8 inches) of space around the unit for proper air circulation.
- Position the unit near a window or opening to allow for exhaust hose installation.
4.2 Exhaust Hose Installation
- Screw the exhaust hose connector onto one end of the exhaust hose.
- Attach the other end of the exhaust hose to the exhaust outlet on the back of the air conditioner unit.
- Connect the window kit adapter to the free end of the exhaust hose.
- Adjust the window sealing kit to fit your window opening and secure it. Insert the window kit adapter into the opening of the window sealing kit.
- Ensure the exhaust hose is as straight and short as possible to maximize efficiency. Avoid sharp bends.
4.3 Power Connection
Plug the power cord into a dedicated, grounded 220-240V, 50Hz electrical outlet. Do not use extension cords or multi-plugs.
5. Operating Instructions
5.1 Control Panel and Remote Control
The unit can be operated using the control panel on the top of the unit or the included remote control. The control panel typically includes buttons for Power, Mode, Fan Speed, Temperature Up/Down, and Timer.
5.2 Basic Operation
- Power On/Off: Press the POWER button to turn the unit on or off.
- Mode Selection: Press the MODE button repeatedly to cycle through Cooling, Dehumidifying, and Fan modes.
- Temperature Adjustment: In Cooling mode, use the UP (▲) and DOWN (▼) buttons to set the desired temperature.
- Fan Speed: Press the FAN SPEED button to select Low, Medium, or High fan speed.
- Oscillation: Press the SWING or OSCILLATION button to activate or deactivate the automatic louver swing function.
- Timer Function: Press the TIMER button to set a delay for the unit to turn on or off. Use the temperature adjustment buttons to set the desired time.
6. Maintenance
Regular maintenance ensures optimal performance and extends the lifespan of your air conditioner. Always unplug the unit before performing any maintenance.
6.1 Cleaning the Air Filter
- Turn off and unplug the air conditioner.
- Locate the air filter panel, usually at the back or side of the unit.
- Remove the filter by gently pulling it out.
- Wash the filter under running tap water (warm water, not hot) or use a vacuum cleaner to remove dust. If heavily soiled, a mild detergent can be used.
- Allow the filter to air dry completely before reinstalling it. Do not expose to direct sunlight.
- Reinsert the dry filter into the unit.
- Recommended: Clean the air filter every two weeks or more frequently if used in dusty environments.
6.2 Draining Condensed Water
The EPAC12W3 features a self-evaporating system, which typically expels most condensed water with the exhaust air. However, in high humidity conditions, the internal water tank may fill up. The unit will stop operating and display an error code (e.g., "FL" for Full Water) when the tank is full.
- Turn off and unplug the air conditioner.
- Place a shallow pan or tray under the drainage port, usually located at the bottom rear of the unit.
- Remove the drain plug/cap. Water will begin to flow out.
- Once all water has drained, replace the drain plug/cap securely.
- For continuous drainage, attach the provided drain hose to the drainage port and direct it to a floor drain or suitable container.
6.3 Cleaning the Exterior
Wipe the exterior of the unit with a soft, damp cloth. Do not use harsh chemicals, abrasive cleaners, or waxes, as these may damage the surface.
6.4 Storage
If storing the unit for an extended period:
- Drain all condensed water completely.
- Clean the air filter.
- Run the unit in fan-only mode for a few hours to dry the internal components.
- Unplug the power cord and coil it neatly.
- Store the unit in its original packaging or cover it with a plastic sheet to protect it from dust. Store in a dry, cool place.
7. Troubleshooting
Before contacting customer service, please refer to the following troubleshooting guide for common issues.
| Problem | Possible Cause | Solution |
|---|---|---|
| Unit does not turn on. | No power supply. Power cord not plugged in. Fuse blown/circuit breaker tripped. | Check power outlet. Ensure power cord is securely plugged in. Reset circuit breaker or replace fuse. |
| Unit is on but no cooling. | Air filter is dirty. Exhaust hose is blocked or improperly installed. Room temperature is too low. Doors/windows are open. | Clean the air filter. Check and properly install the exhaust hose. Set desired temperature lower. Close all doors and windows. |
| Unit displays "FL" (Full Water). | Internal water tank is full. | Drain the condensed water from the unit as described in Section 6.2. |
| Loud noise during operation. | Unit is not on a level surface. Air filter is dirty. | Place the unit on a flat, stable surface. Clean the air filter. |
| Remote control not working. | Batteries are dead or incorrectly inserted. Obstruction between remote and unit. | Replace batteries. Ensure correct polarity. Remove any obstructions. |
8. Specifications
| Feature | Detail |
|---|---|
| Brand | EuropAce |
| Model Name | EPAC12W3 |
| Cooling Capacity | 12000 BTU |
| Wattage | 1200 watts |
| Mounting Type | Freestanding |
| Special Features | Auto Evaporative, Portable |
| Controls Type | Button |
| Form Factor | Personal |
| Operation Mode | Automatic |
| Refrigerant | CFC-free |
9. Warranty and Customer Support
For warranty information, please refer to the warranty card included with your product or contact your retailer. Keep your purchase receipt as proof of purchase.
If you encounter issues not covered in the troubleshooting section, or require further assistance, please contact EuropAce customer support or your authorized service center. Do not attempt to repair the unit yourself.
For the latest support information and contact details, please visit the official EuropAce website.