Sharp YC-GC52BEB
Sharp YC-GC52BEB Combination Microwave Oven User Manual
Model: YC-GC52BEB | Brand: Sharp
1. Introduction
This user manual provides comprehensive instructions for the safe and efficient operation of your Sharp YC-GC52BEB Flatbed Combination Microwave Oven. Please read this manual thoroughly before using the appliance and retain it for future reference.
Your Sharp YC-GC52BEB is a versatile appliance combining microwave, grill, and hot air convection functions, designed for modern kitchen needs. It features a 25-liter capacity and a user-friendly semi-digital control panel.
2. Important Safety Instructions
Always follow basic safety precautions when using electrical appliances to reduce the risk of fire, electric shock, injury to persons, or exposure to excessive microwave energy.
- Read all instructions before using the appliance.
- Do not attempt to operate this oven with the door open as this can result in harmful exposure to microwave energy.
- Do not place any object between the oven front face and the door or allow soil or cleaner residue to accumulate on sealing surfaces.
- Do not operate the oven if it is damaged. It is particularly important that the oven door closes properly and that there is no damage to the: (1) Door (bent), (2) Hinges and latches (broken or loosened), (3) Door seals and sealing surfaces.
- The oven should not be adjusted or repaired by anyone except properly qualified service personnel.
- Ensure the appliance is properly grounded.
- Do not use corrosive chemicals or vapors in this appliance.
- This appliance is intended for household use only.
- Supervise children closely when the appliance is in use.
- Do not heat liquids or other foods in sealed containers since they are liable to explode.
- Clean the oven regularly and remove any food deposits.
3. Product Overview
The Sharp YC-GC52BEB features a sleek black design with a flatbed interior, eliminating the need for a turntable and offering more usable cooking space. The control panel is located on the right side, featuring both buttons and a rotary dial for intuitive operation.

Figure 3.1: Front view of the Sharp YC-GC52BEB Combination Microwave Oven, showcasing its black finish and digital display.
3.1 Components
- Oven Cavity: 25-liter capacity, scratch-resistant stainless steel interior.
- Flatbed Design: No turntable, allowing for larger or rectangular dishes.
- Control Panel: Semi-digital interface with buttons for functions and a rotary dial for time/power adjustments.
- LED Display: Shows time, cooking settings, and program indicators.
- Door: Pull-out door with left hinge, made of glass and plastic.
- Accessories: Includes a baking tray and a cooking rack.
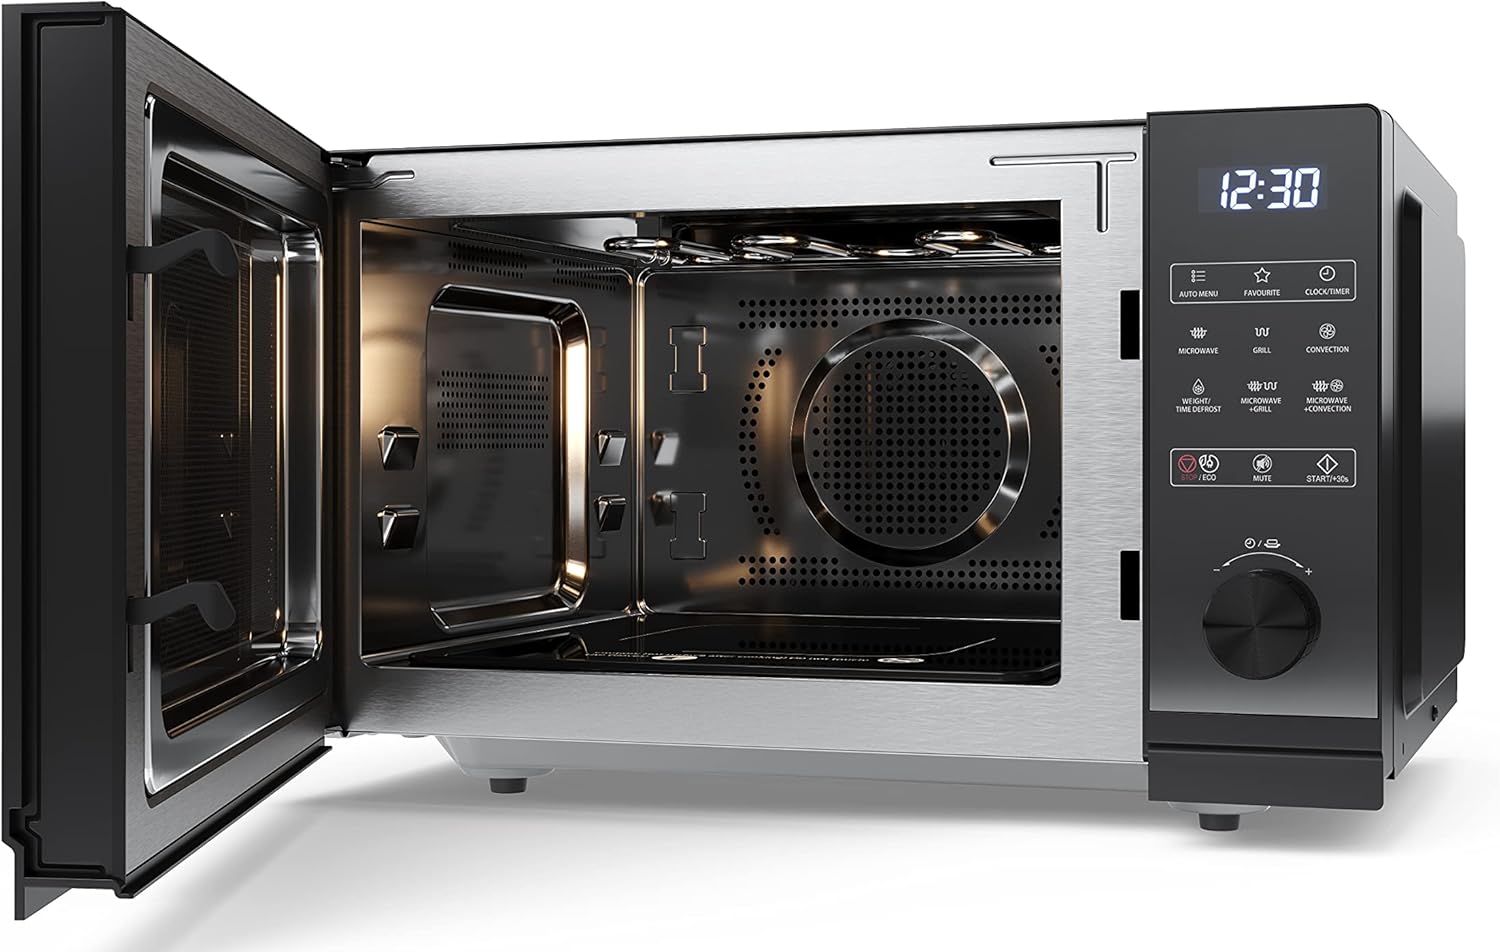
Figure 3.2: Interior view of the microwave oven, showing the spacious flatbed design and stainless steel cavity.
4. Setup and Installation
4.1 Unpacking
Carefully remove the microwave oven from its packaging. Retain the packaging materials for future transport or storage if needed. Check for any signs of damage. If the appliance appears damaged, do not operate it and contact your retailer.
4.2 Placement
Place the microwave oven on a stable, flat, heat-resistant surface, such as a kitchen countertop. Ensure there is adequate ventilation around the appliance. Maintain a minimum clearance of 20 cm (8 inches) above the oven, 10 cm (4 inches) at the rear, and 5 cm (2 inches) on each side for proper airflow.
4.3 Power Connection
Plug the power cord into a grounded 230V, 50Hz AC electrical outlet. Ensure the outlet is easily accessible. Do not use extension cords or adapters.
5. Operating Instructions
5.1 Setting the Clock
- Press the CLOCK/TIMER button.
- Use the rotary dial to set the hour.
- Press the CLOCK/TIMER button again.
- Use the rotary dial to set the minutes.
- Press the CLOCK/TIMER button to confirm.
5.2 Microwave Cooking
This function uses microwave energy to cook or reheat food. The microwave power is 900W with 10 adjustable power levels.
- Place food in a microwave-safe dish inside the oven.
- Press the MICROWAVE button repeatedly to select the desired power level (e.g., P100 for 100% power).
- Use the rotary dial to set the cooking time.
- Press the START/+30s button to begin cooking.
5.3 Grill Cooking
Ideal for browning and crisping food. The grill power is 1200W.
- Place food on the cooking rack provided, inside the oven.
- Press the GRILL button.
- Use the rotary dial to set the grilling time.
- Press the START/+30s button to begin.
5.4 Convection Cooking (Hot Air)
This function circulates hot air for even cooking, similar to a conventional oven. The convection power is 2050W, with a minimum temperature of 200°C.
- Place food on the baking tray or a suitable oven-safe dish.
- Press the CONVECTION button.
- Use the rotary dial to set the desired temperature (e.g., 200°C).
- Press the START/+30s button to preheat the oven.
- Once preheated, place the food inside and use the rotary dial to set the cooking time.
- Press the START/+30s button to begin cooking.
5.5 Combination Cooking
Combine microwave with grill or convection for faster cooking with browning/crisping results.
- Microwave + Grill: Press MICROWAVE + GRILL button, set time, then START/+30s.
- Microwave + Convection: Press MICROWAVE + CONVECTION button, set temperature and time, then START/+30s.
5.6 Automatic Programs
The oven features 14 automatic cooking programs for various food types. Refer to the internal label or a quick guide for specific program numbers.
- Press the AUTO MENU button.
- Use the rotary dial to select the desired program number (e.g., A-1 for pizza).
- Press the START/+30s button to confirm and start.
5.7 Defrost Function
Defrost food by weight or time.
- Weight Defrost: Press WEIGHT/TIME DEFROST button once, use dial to set weight, then START/+30s.
- Time Defrost: Press WEIGHT/TIME DEFROST button twice, use dial to set time, then START/+30s.
5.8 Child Lock
To prevent accidental operation, especially by children.
- Activate: Press and hold the STOP/CANCEL button for 3 seconds until "LOCK" appears on the display.
- Deactivate: Press and hold the STOP/CANCEL button for 3 seconds until "LOCK" disappears.
5.9 ECO Function
Reduces power consumption when the oven is idle.
- Press the ECO button to activate/deactivate.
6. Maintenance and Cleaning
Regular cleaning of your microwave oven will ensure its longevity and hygienic operation. Always unplug the appliance before cleaning.
6.1 Interior Cleaning
Wipe the interior cavity, including the flatbed and stainless steel walls, with a damp cloth and mild detergent after each use. For stubborn food residues, place a bowl of water with lemon slices inside and microwave for 2-3 minutes to loosen the grime, then wipe clean. The scratch-resistant interior makes cleaning easier.
6.2 Exterior Cleaning
Clean the exterior surfaces, including the door and control panel, with a soft, damp cloth. Avoid abrasive cleaners or scouring pads that could scratch the finish.
6.3 Accessories
Wash the baking tray and cooking rack with warm, soapy water. They are generally not dishwasher safe unless specified.
7. Troubleshooting
Before contacting service, please check the following common issues and solutions:
| Problem | Possible Cause | Solution |
|---|---|---|
| Oven does not start. | Power cord not plugged in; Door not closed properly; Fuse blown or circuit breaker tripped. | Ensure plug is firmly in outlet; Close door securely; Check household fuse/circuit breaker. |
| Food not cooking evenly. | Incorrect power level or cooking time; Food not stirred/rotated. | Adjust power/time; Stir or rotate food halfway through cooking. |
| Light not working. | Bulb needs replacement. | Contact qualified service personnel for bulb replacement. |
| Child lock activated. | Accidentally engaged. | Press and hold the STOP/CANCEL button for 3 seconds to deactivate. |
8. Technical Specifications
| Feature | Specification |
|---|---|
| Brand | Sharp |
| Model Number | YC-GC52BEB |
| Product Dimensions (L x W x H) | 28.7 x 49 x 49.5 cm (11.3 x 19.3 x 19.5 inches) |
| Weight | 18.6 kg (41 lbs) |
| Interior Capacity | 25 Liters |
| Installation Type | Freestanding (Countertop) |
| Cooking Mode | Electric |
| Color | Black |
| Voltage | 230 Volts |
| Microwave Power | 900 Watts |
| Grill Power | 1200 Watts |
| Convection Power | 2050 Watts |
| Number of Power Levels | 11 |
| Control Type | Buttons, Rotary Dial |
| Display Type | LED |
| Interior Material | Stainless Steel |
| Door Material | Glass, Plastic |
| Child Lock | Yes |
| Automatic Programs | 14 |
9. Warranty and Support
Sharp products are manufactured to the highest quality standards. For warranty information, please refer to the warranty card included with your purchase or visit the official Sharp website for details specific to your region. Keep your proof of purchase for warranty claims.
For technical support, troubleshooting assistance beyond this manual, or to inquire about spare parts, please contact Sharp customer service. Contact details can typically be found on the Sharp website or in your product documentation.
Ask a question about this manual
Ask about setup, troubleshooting, compatibility, parts, safety, or missing instructions. Manuals+ will review the question and use this page’s manual context to help answer it.