1. Introduction
This manual provides essential information and instructions for the installation and use of your new LCDOLED Replacement Display Assembly for HP Envy x360 laptops. This product is designed to replace damaged or non-functional screen assemblies, restoring your laptop's visual and touch capabilities.
1.1. Product Compatibility
This replacement display assembly is compatible with the following HP Envy x360 models:
- HP ENVY x360 15m-eu series
- HP ENVY x360 15-eu series
- Specific models include: 15m-eu0013dx, 15m-eu0023dx, 15-eu0097nr, 15m-eu0033dx, 15m-eu0043dx, 15m-eu0xxx, 15-eu0xxx, 15m-eu0000, 15-eu0000.
Important Note: This item is only available for laptops with existing touch functionality. It does NOT support stylus or active pen input.
2. Safety Precautions
- Professional Installation Recommended: Replacing a laptop screen assembly requires specialized tools and technical expertise. Incorrect installation can lead to further damage to your laptop or the new display. It is highly recommended to seek professional assistance for installation.
- Power Off Completely: Before beginning any installation, ensure your laptop is completely powered off and disconnected from all power sources, including the battery.
- Handle with Care: The display assembly is fragile. Handle it carefully to avoid bending, dropping, or applying excessive pressure.
- Static Electricity: Take precautions against static electricity, which can damage electronic components. Use an anti-static wrist strap or work on an anti-static mat.
- Retain Original Parts: This package includes the LCD screen, touch digitizer, bezel assembly, and touch control board ONLY. You will need to reuse your original gravity sensor board, LCD cable, back cover, hinges, webcam, and any other components not included.
- Verify Model and Resolution: Double-check your exact laptop model and display resolution (1920x1080 IPS) before purchase and installation to ensure compatibility. This product is not for 3840x2160 resolution screens.
3. Package Contents
Your LCDOLED Replacement Display Assembly package includes:
- 1x 15.6-inch FullHD (1920x1080) IPS LCD Display
- 1x Touch Screen Digitizer
- 1x Bezel Assembly
- 1x Touch Control Board
Please note: The package does NOT include extra gravity sensor board, LCD cable, back cover, hinges, webcam, or installation tools. Please retain and reuse these components from your original laptop.
4. Setup and Installation
The installation process involves careful disassembly and reassembly of laptop components. It is crucial to follow proper procedures to avoid damage. We strongly recommend watching the provided installation video and consulting a professional if you are unsure.
4.1. Visual Overview of the Replacement Assembly

Figure 1: Front view of the complete LCDOLED replacement display assembly.

Figure 2: Back view of the display assembly, highlighting the internal structure and connection points.
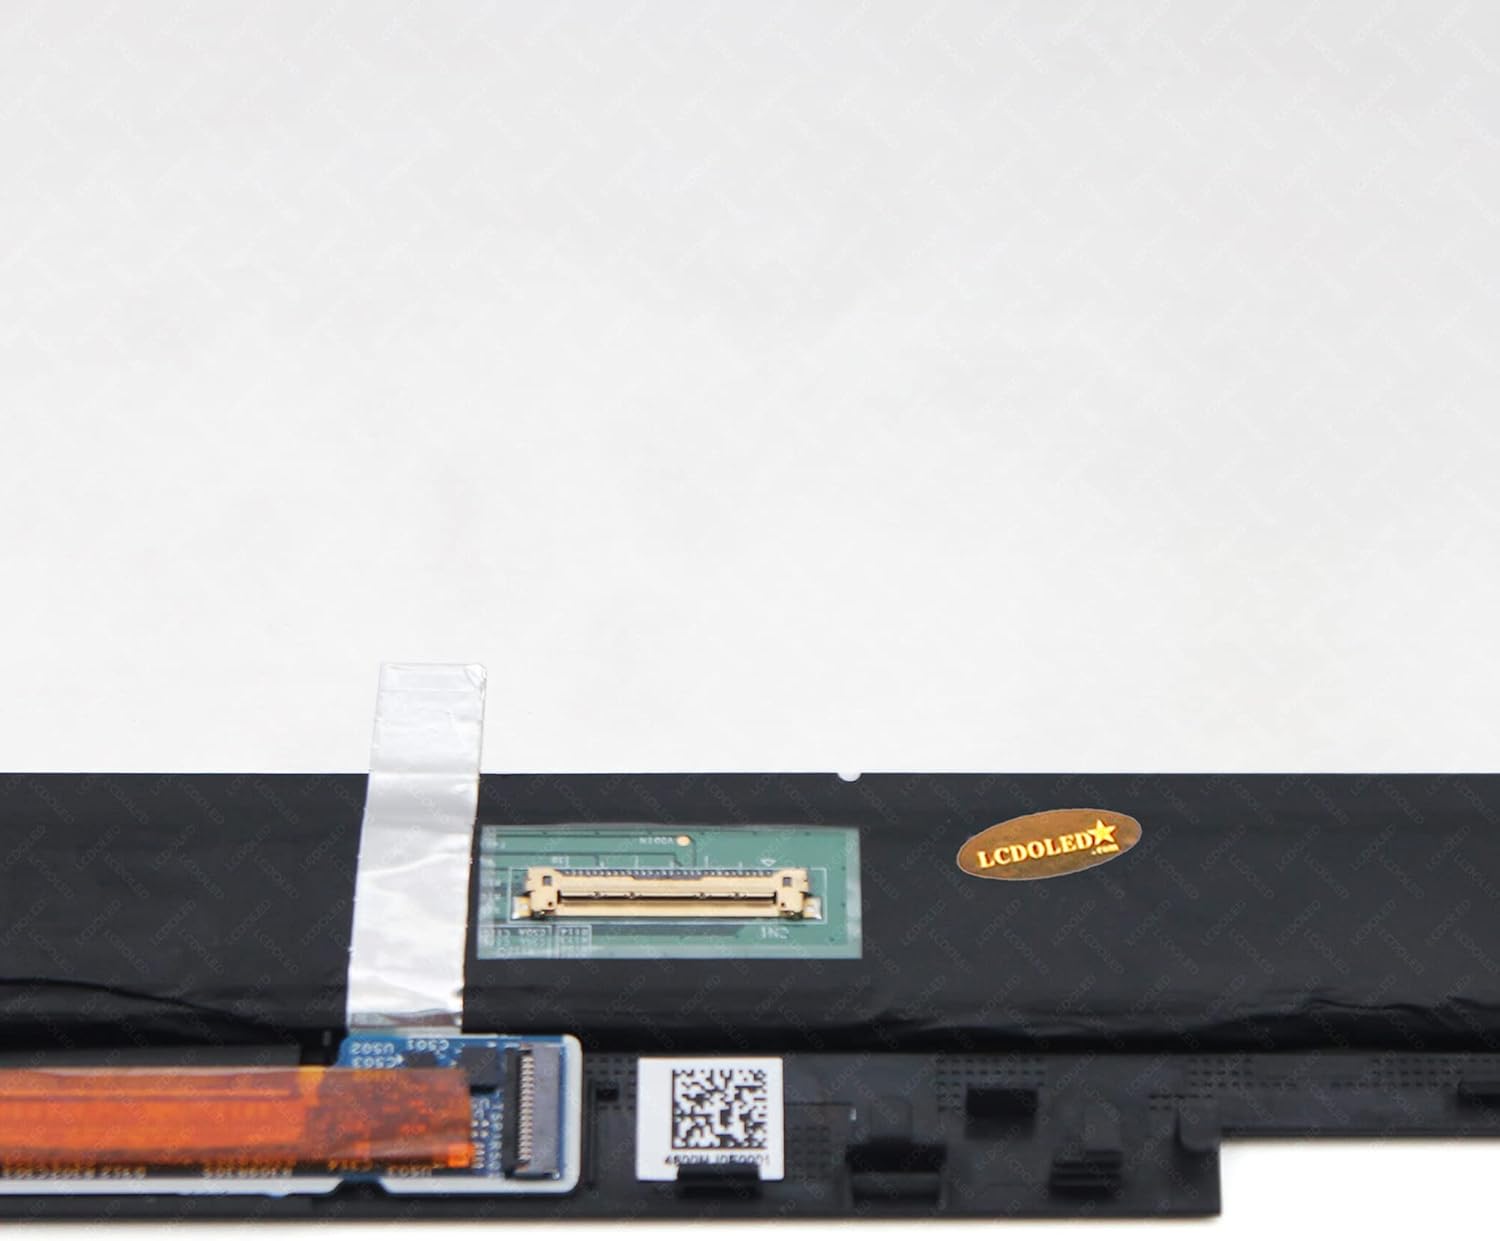
Figure 3: Detailed view of the EDP 30-pin connector on the replacement display.
4.2. Installation Video Guide
For a detailed step-by-step visual guide, please refer to the official installation video:
Video 1: Installation guide for HP Envy x360 15-eu, 15m-eu, and 15z-eu series laptops. This video demonstrates the process of removing the old screen and installing the new replacement assembly.
4.3. General Installation Steps (Summary)
- Preparation: Power off your laptop completely and disconnect the power adapter and battery.
- Remove Bezel: Carefully pry off the front bezel surrounding the screen. Use plastic tools to avoid scratching.
- Disconnect Cables: Gently disconnect the display cable (EDP 30-pin) and any other cables (e.g., webcam, touch) from the old screen.
- Remove Old Screen: Unscrew and remove the old screen assembly from the laptop lid.
- Install New Screen: Position the new LCDOLED display assembly into the laptop lid.
- Connect Cables: Reconnect all necessary cables, ensuring they are securely seated.
- Test Functionality: Before reattaching the bezel, temporarily connect the battery and power on the laptop to test the display and touch functionality.
- Reassemble: If the screen functions correctly, reattach the front bezel and any other removed components.
5. Operating Instructions
Once installed, the LCDOLED Replacement Display Assembly functions as the original screen. Your laptop's operating system will automatically detect and utilize the new display and touch digitizer. No special drivers are typically required for basic display and touch functionality.
- Touch Functionality: The screen supports multi-touch input. Ensure your operating system's touch settings are configured as desired.
- Display Settings: Adjust brightness, resolution, and color settings through your laptop's display settings. The native resolution is 1920x1080.
6. Maintenance
- Cleaning: Use a soft, lint-free cloth slightly dampened with water or a screen-specific cleaning solution to clean the display surface. Avoid harsh chemicals or abrasive materials.
- Protection: To prevent future damage, consider using a screen protector or a laptop sleeve when transporting your device.
- Avoid Pressure: Do not place heavy objects on the laptop lid or apply excessive pressure to the screen, as this can cause damage.
7. Troubleshooting
If you encounter issues after installation, please review the following common problems and solutions:
| Problem | Possible Cause | Solution |
|---|---|---|
| Screen is blank or no display | Loose display cable connection, incorrect screen type, faulty installation. | Ensure the EDP 30-pin cable is securely connected at both ends. Verify the screen is compatible with your laptop model and resolution. Recheck all connections. |
| Touch function not working | Loose touch digitizer cable, incorrect installation, laptop not originally touch-enabled. | Check the touch digitizer cable connection. Confirm your original laptop model had touch functionality. Ensure all small ribbon cables are properly seated. |
| Distorted image or lines on screen | Loose display cable, damaged cable, faulty screen. | Reseat the display cable. Inspect the cable for any damage. If the issue persists, the screen itself might be defective. |
| Screen flickers | Loose display cable, incompatible display settings, power issue. | Check display cable connection. Update graphics drivers. Ensure power supply is stable. |
If these steps do not resolve your issue, please contact LCDOLED customer support for further assistance.
8. Specifications
- Screen Size: 15.6 inches
- Resolution: 1920x1080 (FullHD)
- Panel Type: IPS
- LCD Connector: EDP 30-pins
- Backlight: LED LCD
- Touch Functionality: Yes (Digitizer included)
- Stylus/Active Pen Support: No
- Manufacturer: LCDOLED
- ASIN: B09L1C5LDF
- Date First Available: November 4, 2021
9. Warranty and Support
This product is covered by a standard return policy, typically 30 days from the date of purchase for refunds or replacements. For specific warranty details, please refer to the terms provided by your retailer or contact LCDOLED directly.
9.1. Customer Support
If you have any questions, concerns, or require technical assistance, please do not hesitate to contact LCDOLED customer support. All messages are typically answered within 24 hours.
- Seller Name: LCDOLED
- Seller Store Link: Visit the LCDOLED Store on Amazon