1. Important Safety Information
Read and understand all instructions in this manual before installing, operating, or servicing this heater. Failure to follow these instructions may result in fire, explosion, property damage, personal injury, or death.
- Local Codes: Always check local and state codes regarding the installation and use of vent-free gas heaters. Some regions prohibit the use of vent-free heaters.
- Ventilation: This is a vent-free appliance. Adequate ventilation is crucial for safe operation. Do not install in bedrooms or bathrooms.
- Carbon Monoxide: This heater produces carbon monoxide, which is an odorless and colorless gas that can cause death. Install a carbon monoxide detector in your home.
- Clearances: Maintain minimum clearances from combustible materials as specified in the installation section.
- Fuel Type: Ensure the heater is connected to the correct fuel type (Propane or Natural Gas) as configured. Do not attempt to convert the heater between fuel types without proper authorization and conversion kit.
- Children and Pets: Keep children and pets away from the heater, especially when it is operating. The surface of the heater can become hot.
- Storage: Do not store or use gasoline or other flammable vapors and liquids in the vicinity of this or any other appliance.
2. Product Overview
The UTY 30,000 BTU Dual Fuel Vent-Free Wall Heater is designed to provide supplemental indoor heating. It operates efficiently on either liquid propane or natural gas, offering flexibility for various installations. This heater features a blue flame burner for clean combustion and does not require electricity for operation, making it suitable for emergency heating during power outages.
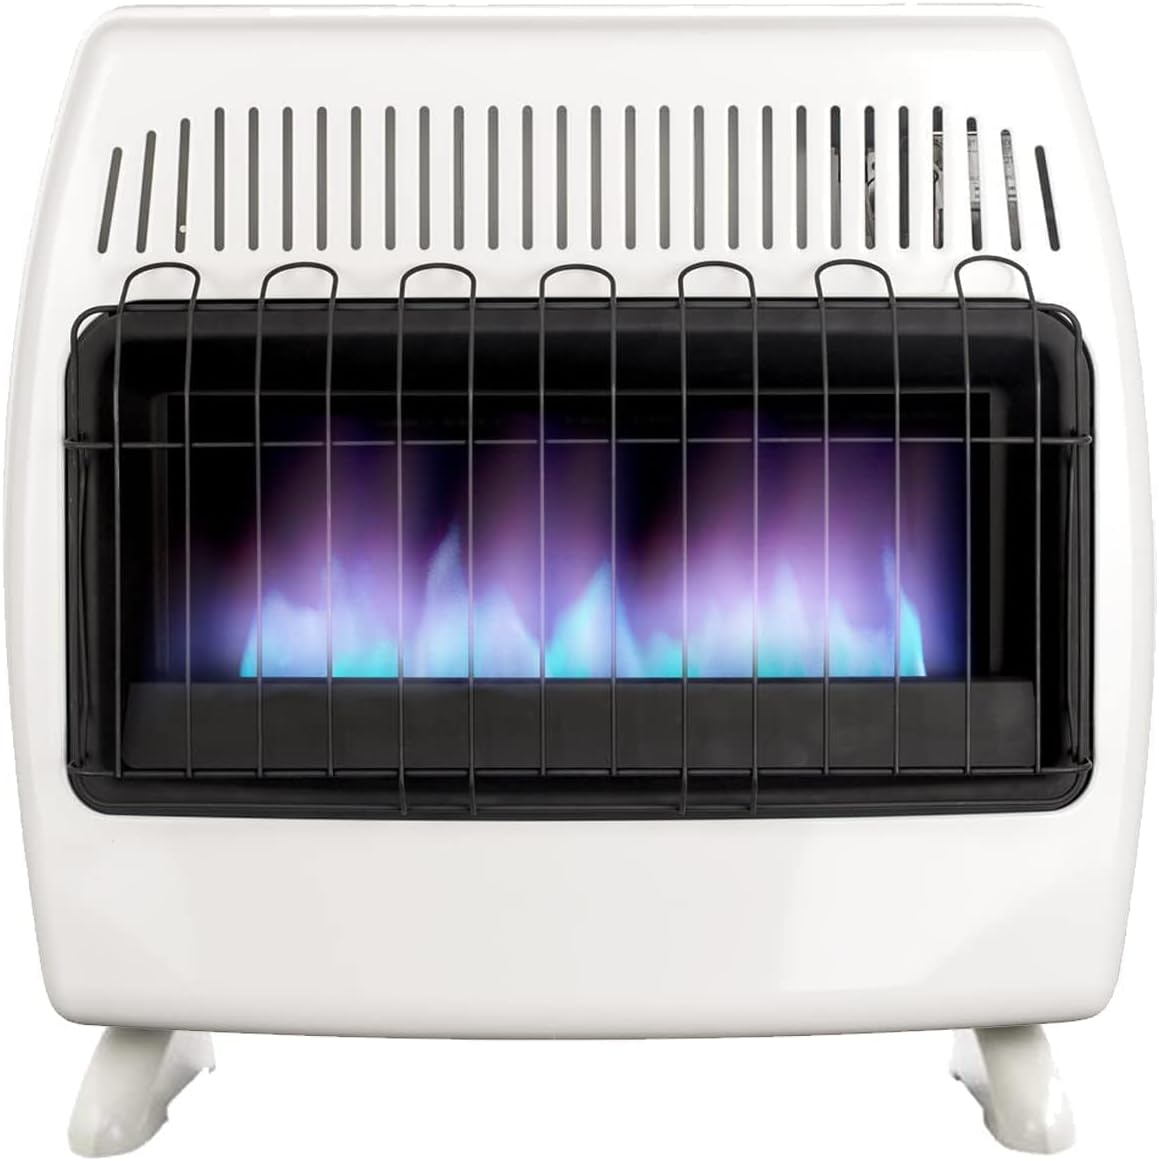
Figure 2.1: Front view of the UTY 30,000 BTU Vent-Free Wall Heater, showcasing the blue flame operation.

Figure 2.2: Annotated diagram illustrating the main features of the heater, including the electronic ignition, thermostat, convection heating, blue flame burner, oxygen depletion sensor (ODS), and removable legs.
3. Specifications
| Feature | Specification |
|---|---|
| Brand | UTY |
| Model | 30,000 BTU Propane / Natural Gas Wall Heater |
| Heat Output | 30,000 British Thermal Units (BTU) |
| Fuel Type | Dual Fuel (Propane / Natural Gas) |
| Ventilation Type | Vent-Free |
| Efficiency | 99.9% Efficient |
| Ignition Type | Electronic Spark Ignition (Piezo) |
| Material | Metal |
| Color | White |
| Item Weight | 32.4 Pounds |
| Mounting Type | Wall Mount or Free Standing |
| Assembly Required | No (for main unit) |
| UPC | 744591638562 |
| ASIN | B09L199DMP |
4. Setup and Installation
4.1 Pre-Installation Checks
- Verify that the heater's fuel type matches your available gas supply (Propane or Natural Gas).
- Ensure the installation location complies with all local and national codes.
- Confirm adequate room size and ventilation for a vent-free appliance.
- Maintain minimum clearances from combustible materials:
- Sides: 6 inches (15 cm)
- Top: 36 inches (91 cm)
- Bottom: 4 inches (10 cm)
- Front: 36 inches (91 cm)
4.2 Mounting Options
This heater can be installed as a wall-mounted unit or used as a free-standing unit with the included base legs.
4.2.1 Free-Standing Installation
Attach the provided base legs to the bottom of the heater using the supplied hardware. Ensure the legs are securely fastened and the heater is stable on a level surface.
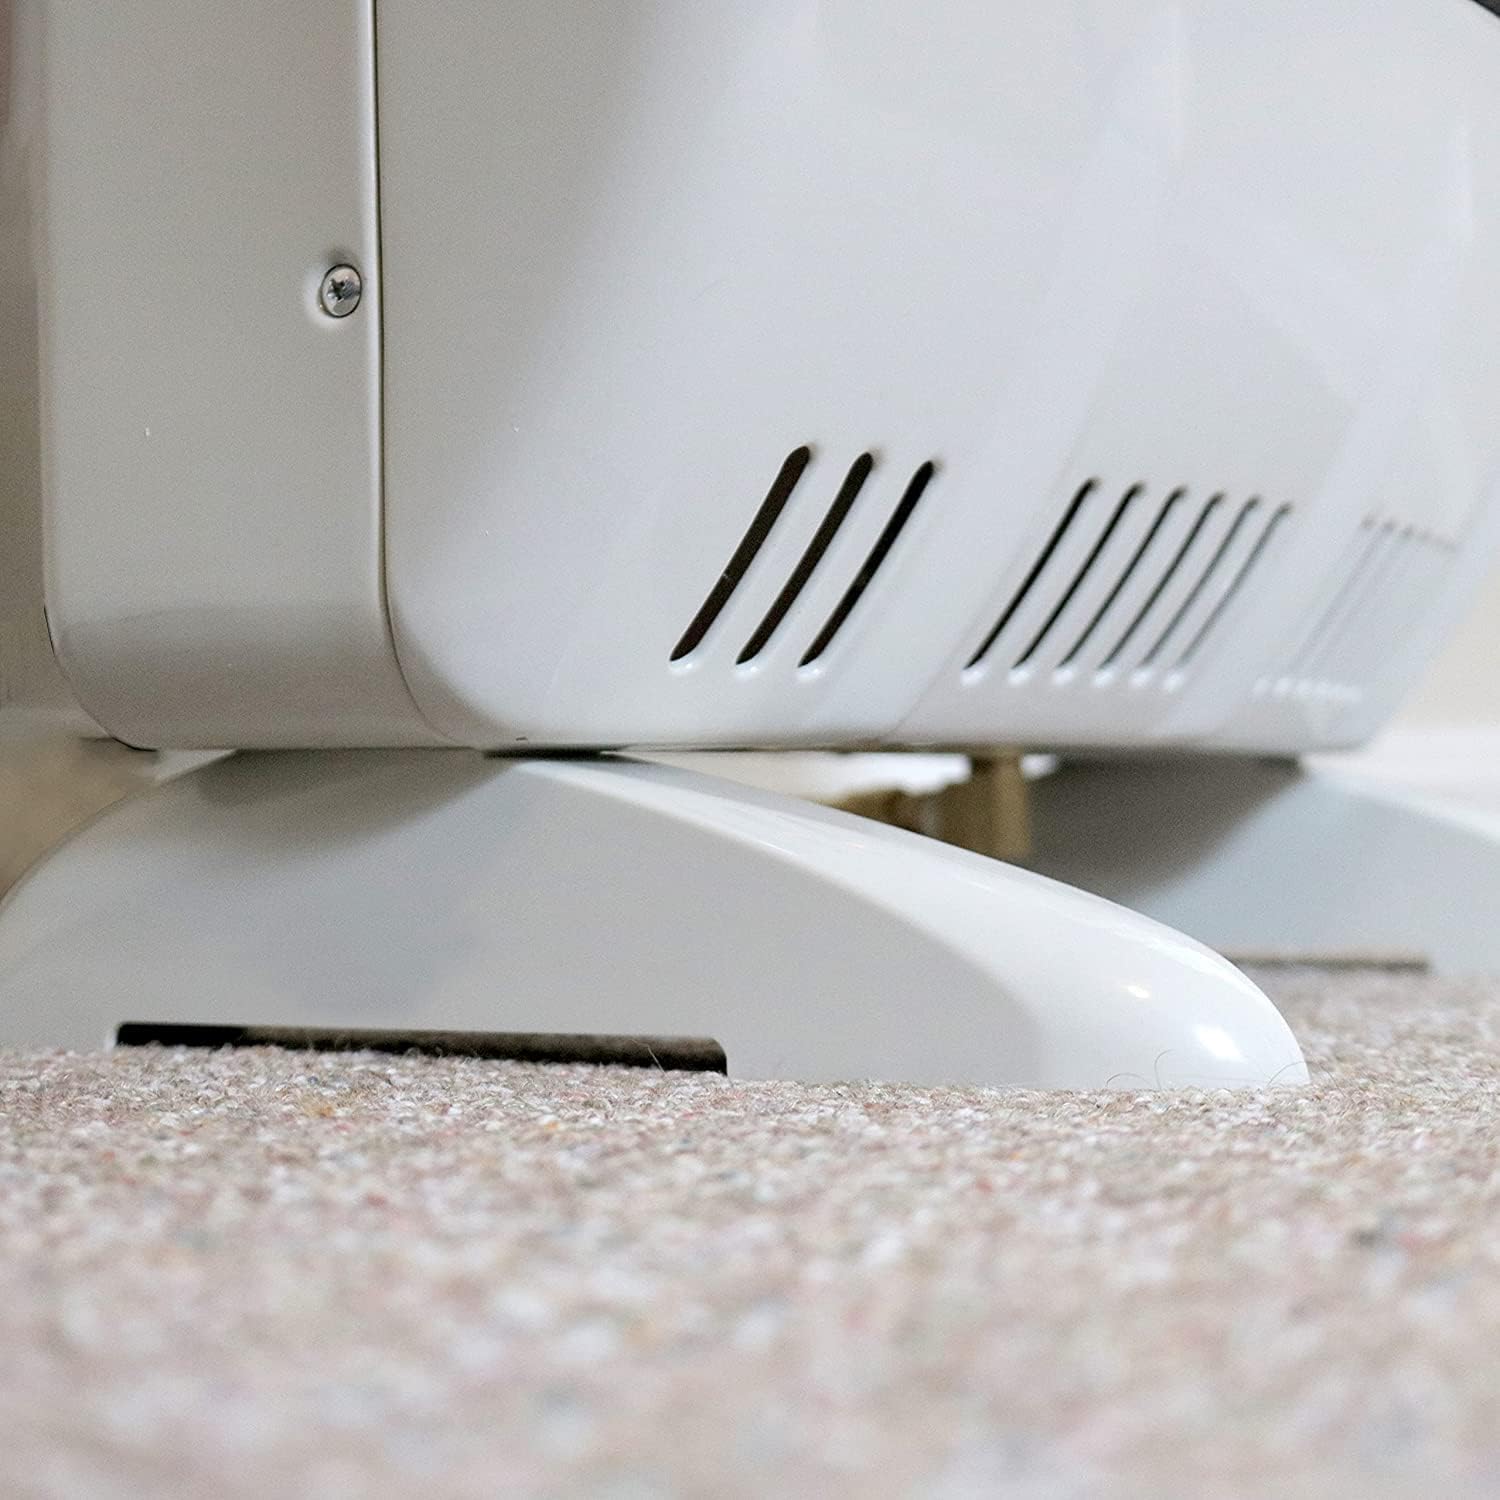
Figure 4.1: Side view of the heater demonstrating the free-standing base legs.
4.2.2 Wall-Mounted Installation
If wall-mounting, remove the base legs. Secure the heater to a non-combustible wall surface using appropriate mounting hardware (not included) and following the minimum clearance requirements. Ensure the wall can support the weight of the heater.

Figure 4.2: Example of the heater installed as a wall-mounted unit in a garage.
4.3 Fuel Connection
A qualified gas technician must perform all gas connections. Ensure the gas supply is turned off before making any connections.
- Connect the gas supply line to the appropriate inlet on the heater (Propane or Natural Gas).
- Use only approved gas connectors and fittings.
- After connection, check all joints for leaks using a non-corrosive leak detection solution. Never use an open flame to check for leaks.
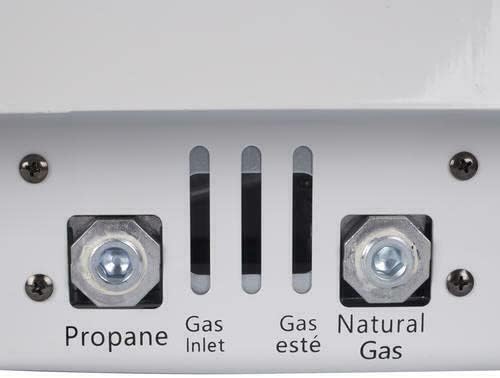
Figure 4.3: Detail of the gas inlet connections, clearly marked for Propane and Natural Gas.
5. Operating Instructions
5.1 Initial Startup and Purging
- After gas connections are complete, slowly turn on the main gas supply valve.
- It may take several attempts to light the pilot light during the initial startup as air is purged from the gas lines.
5.2 Lighting the Pilot and Main Burner
This heater uses an electronic spark ignition system.
- Ensure the gas supply is on.
- Turn the control knob to the 'PILOT' position.
- Press and hold the control knob in. While holding, repeatedly press the igniter button until the pilot flame lights.
- Continue to hold the control knob in for approximately 30-60 seconds after the pilot lights to allow the thermocouple to heat up. Release the knob slowly. If the pilot goes out, repeat steps 2-4.
- Once the pilot is stable, turn the control knob to the desired heat setting (e.g., '1' to '5' or 'HI'). The main burner will ignite.
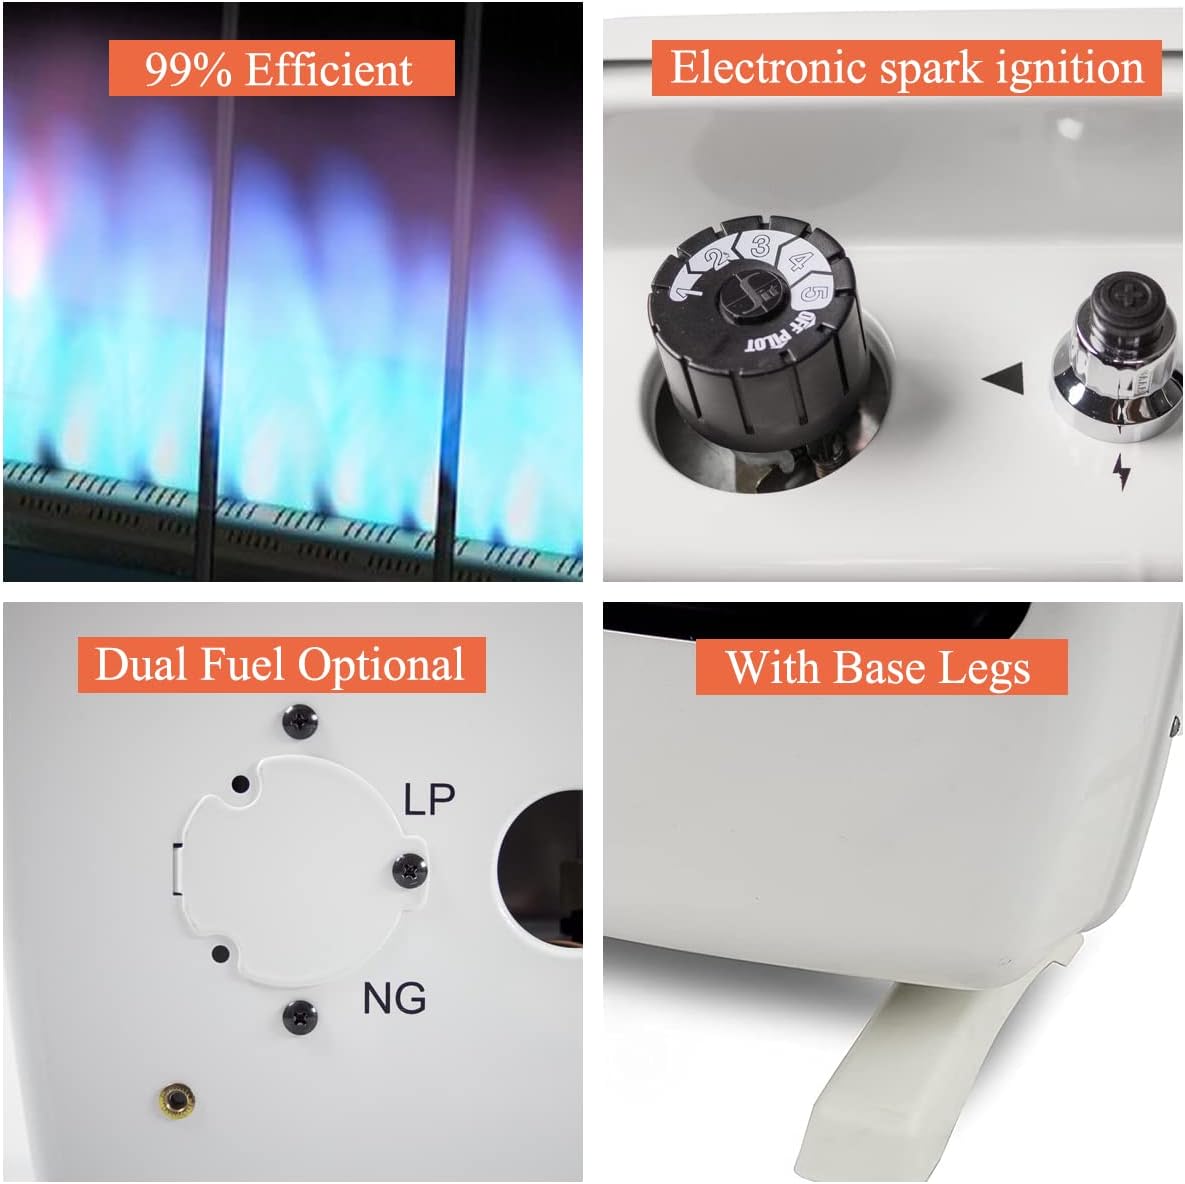
Figure 5.1: Detail of the electronic spark ignition knob, used for lighting the pilot and main burner.
5.3 Temperature Control
The heater is equipped with a thermostat control. Adjust the control knob to your desired heat level. The heater will cycle on and off to maintain the set temperature.
6. Maintenance
Regular maintenance ensures safe and efficient operation of your heater.
- Cleaning: Keep the heater's exterior clean. Use a soft, damp cloth to wipe surfaces. Do not use abrasive cleaners.
- Burner and Pilot: Periodically inspect the burner and pilot assembly for dust, lint, or debris. Clean gently with a soft brush or compressed air if necessary. Ensure all burner ports are clear.
- Air Openings: Ensure all air openings on the heater are clear and unobstructed.
- Gas Connections: Annually inspect gas connections for any signs of wear or leaks.
- Professional Inspection: It is recommended to have a qualified service technician inspect the heater annually.
7. Troubleshooting
Before calling for service, review the following common issues and solutions:
| Problem | Possible Cause | Solution |
|---|---|---|
| Heater will not light | No gas supply Air in gas line Pilot orifice clogged Igniter not sparking | Check gas valve Purge air by attempting to light pilot multiple times Clean pilot orifice Check igniter electrode for damage or proper gap |
| Pilot lights but main burner does not | Control knob not held long enough Thermocouple faulty Low gas pressure | Hold control knob for 30-60 seconds Contact service technician Verify adequate gas supply pressure |
| Heater cycles off frequently | Oxygen Depletion Sensor (ODS) activated Room too warm Inadequate ventilation | Increase ventilation, open a window Adjust thermostat setting Ensure proper room size and air circulation |
| Unusual odor | New heater burn-off Gas leak Dust accumulation | Initial operation may produce slight odor, which will dissipate Immediately turn off gas and ventilate area, contact gas company Clean heater thoroughly |
If troubleshooting steps do not resolve the issue, contact a qualified service technician.
8. Warranty and Support
For warranty information or technical support, please refer to the warranty card included with your product or contact UTY customer service. Keep your purchase receipt for warranty claims.
Contact information for UTY customer service can typically be found on the manufacturer's website or on the product packaging.