
Introduction
Thank you for choosing the Royal Catering RC-JDD03 Refrigerated Beverage Dispenser. This manual provides essential information for the safe and efficient installation, operation, and maintenance of your appliance. Please read these instructions thoroughly before use and keep them for future reference.
This appliance is designed for commercial use in establishments such as snack bars, cafeterias, and bars, for dispensing chilled non-carbonated beverages.
Important Safety Instructions
WARNING: Failure to follow these safety instructions may result in electric shock, fire, or serious injury.
- Read all instructions before operating the appliance.
- Ensure the power supply matches the voltage specified on the appliance's rating label (230 V).
- Do not immerse the appliance, cord, or plug in water or other liquids.
- Keep children away from the appliance.
- Unplug from the outlet when not in use, before putting on or taking off parts, and before cleaning.
- Do not operate any appliance with a damaged cord or plug, or after the appliance malfunctions or has been damaged in any manner.
- Use only accessories recommended by the manufacturer.
- Ensure adequate ventilation around the appliance. Do not block ventilation openings.
- This appliance uses R290 refrigerant. Servicing should only be performed by qualified personnel.
- Do not store explosive substances such as aerosol cans with a flammable propellant in this appliance.
Product Overview
The Royal Catering RC-JDD03 is a robust refrigerated beverage dispenser designed for commercial use. It features three transparent polycarbonate containers, each with a 10-liter capacity, allowing for professional presentation and easy monitoring of beverage levels. The unit provides both cooling and agitation functions to keep drinks perfectly chilled and mixed.

Image: Front view of the Royal Catering RC-JDD03 Refrigerated Beverage Dispenser, showing three transparent containers, dispensing taps, and a drip tray.
Setup and Assembly
- Unpacking: Carefully remove the appliance from its packaging. Inspect for any damage during transit. Keep packaging materials for potential future transport or returns.
- Placement: Place the dispenser on a stable, level, and dry surface. Ensure there is sufficient space around the unit (at least 10-15 cm) for proper ventilation, especially at the rear and sides. Avoid direct sunlight or heat sources.
- Initial Cleaning: Before first use, thoroughly clean all parts that will come into contact with beverages. This includes the containers, lids, taps, and agitator rods. Refer to the "Maintenance and Cleaning" section for detailed instructions.
- Container Assembly:

Image: Close-up view showing the secure attachment of the transparent beverage containers to the main unit, highlighting the metal clips and the base where the agitator rod connects.
Attach the cleaned transparent containers to the main unit. Ensure they are securely seated on their respective bases and the agitator rods are correctly positioned within each container. The containers are designed to fit snugly into the designated slots on the main unit.
- Drip Tray Installation:

Image: View of the removable drip tray positioned below the dispensing taps, designed to catch spills and maintain cleanliness.
Place the removable drip tray(s) beneath the dispensing taps. This tray collects any drips or spills, keeping the serving area clean. Ensure it is correctly aligned and stable.
- Power Connection: Plug the power cord (1.5 m) into a grounded electrical outlet that matches the appliance's voltage requirements.
Operating Instructions
- Filling Containers: Open the lids of the transparent containers. Pour your desired chilled beverages into each container. Each container has a capacity of 10 liters. Do not overfill.
- Powering On:

Image: Close-up of the two control switches located on the side of the dispenser. One switch controls the "COOLING" function, and the other controls the "SPRAY" (agitation) function.
Locate the control switches, typically on the side or rear of the unit. There are usually two switches:
- COOLING: Flip this switch to the "ON" position to activate the refrigeration system. The indicator light will illuminate.
- SPRAY (Agitation): Flip this switch to the "ON" position to activate the agitator rods, which continuously mix the beverages to prevent settling and maintain an even temperature. The indicator light will illuminate.
Allow sufficient time for the beverages to reach the desired chilled temperature before serving.
- Dispensing Beverages: To dispense a beverage, place a glass (maximum height 160 mm) under the desired tap. Pull the tap lever towards you to open the valve. Push the lever back to close the valve and stop the flow.
- Turning Off: When finished, turn off both the "COOLING" and "SPRAY" switches. Unplug the appliance from the power outlet.
Maintenance and Cleaning
Regular cleaning and maintenance are crucial for the hygiene and longevity of your beverage dispenser.
- Daily Cleaning:
- Empty any remaining beverages from the containers.
- Remove the containers, lids, and drip trays.
- Wash these removable parts with warm, soapy water. The polycarbonate containers are dishwasher safe.
- Use the provided cleaning brush to clean the taps and agitator rods thoroughly.
- Wipe down the exterior of the main unit with a damp cloth. Do not use abrasive cleaners or immerse the main unit in water.
- Rinse all cleaned parts thoroughly with clean water and allow them to air dry completely before reassembly.
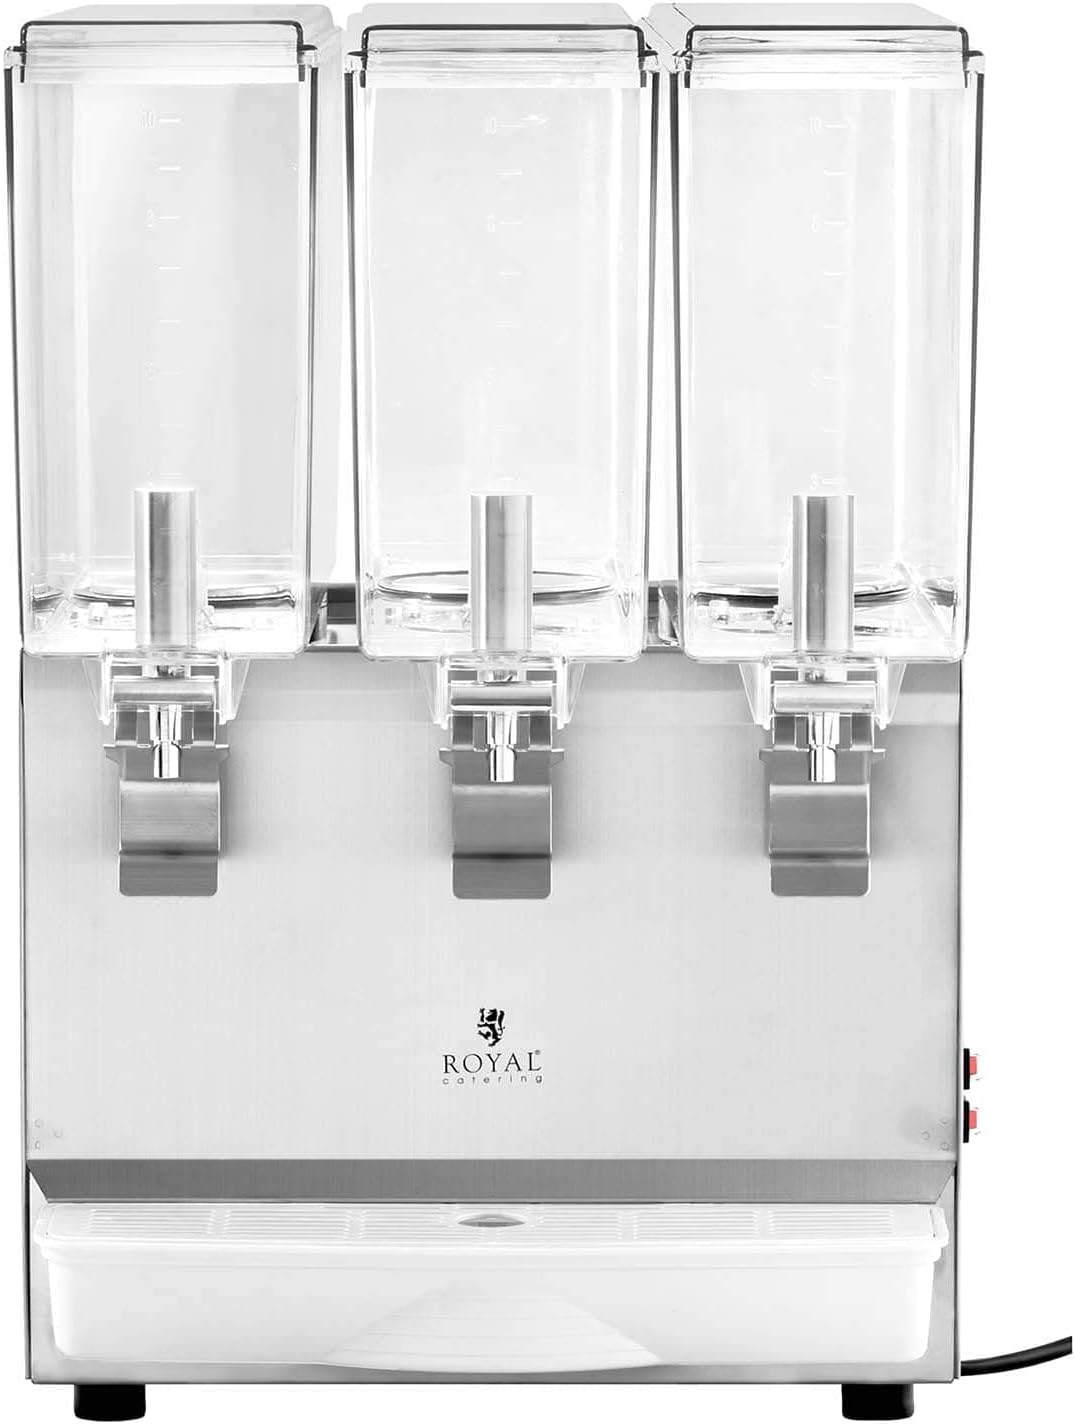
Image: A cleaning brush with a long handle and bristles, alongside two black rubber seals and one small white seal, indicating parts used for maintenance and cleaning.
- Gasket and Seal Inspection: Regularly inspect the rubber gaskets and seals around the taps and container connections for wear or damage. Replace them if necessary to prevent leaks. (Refer to the image showing seals).
- Condenser Cleaning: Periodically clean the condenser coils at the rear of the unit to ensure efficient cooling. Use a soft brush or vacuum cleaner to remove dust and debris. Ensure the unit is unplugged before performing this task.
Troubleshooting
| Problem | Possible Cause | Solution |
|---|---|---|
| Appliance does not turn on. | No power supply. | Check if the power cord is securely plugged in and the outlet is functional. Check circuit breaker. |
| Beverages are not cooling. | Cooling switch is off. Insufficient ventilation. Dirty condenser. | Ensure the "COOLING" switch is on. Check for proper ventilation around the unit. Clean the condenser coils. |
| Beverages are not agitating/mixing. | Spray/Agitation switch is off. Agitator rod obstructed. | Ensure the "SPRAY" switch is on. Check if the agitator rod is properly installed and free from obstructions. |
| Leakage from taps or containers. | Taps not fully closed. Damaged or improperly seated seals/gaskets. Containers not properly installed. | Ensure taps are fully closed after dispensing. Inspect and replace worn seals/gaskets. Re-seat containers correctly. |
| Excessive noise during operation. | Unit not level. Obstruction in fan/motor. | Ensure the unit is on a level surface. Check for any foreign objects near the fan or motor. |
Technical Specifications
| Feature | Specification |
|---|---|
| Model | RC-JDD03 |
| Voltage | 230 V |
| Power | 320 W |
| Number of Containers | 3 |
| Container Capacity | 3 x 10 L (Total 30 L) |
| Container Material | Plastic (Polycarbonate) |
| Functions | Refrigeration, Agitation |
| Refrigerant | R290 |
| Max Glass Height | 160 mm |
| Power Cord Length | 1.5 m |
| Container Dimensions (approx.) | 120 mm (W) x 430 mm (D) x 260 mm (H) |
| Dishwasher Safe Parts | Containers, Lids, Drip Trays |
| Country of Origin | China |
Warranty and Customer Support
For warranty information, please refer to the terms and conditions provided at the time of purchase or contact your retailer. Royal Catering offers specialized customer support for assistance with product inquiries, troubleshooting, and spare parts.
Please retain your proof of purchase for any warranty claims.
