Introduction
This manual provides comprehensive instructions for the installation, operation, and maintenance of your Ostark AS2X DVB-S/S2/S2X Satellite Receiver. Please read this manual thoroughly before using the device to ensure proper functionality and to maximize your viewing experience. The Ostark AS2X is designed to receive DVB-S, DVB-S2, and DVB-S2X satellite signals, supporting 1080P H.265 video decoding, USB WiFi, Ethernet connectivity, and various multimedia features.
Package Contents
Verify that all items listed below are included in your package:
- 1 x Ostark AS2X TV Receiver
- 1 x HD Cable (HDMI)
- 1 x Remote Control
- 1 x EU Power Adapter
- 1 x User Manual
- 1 x USB WiFi Dongle
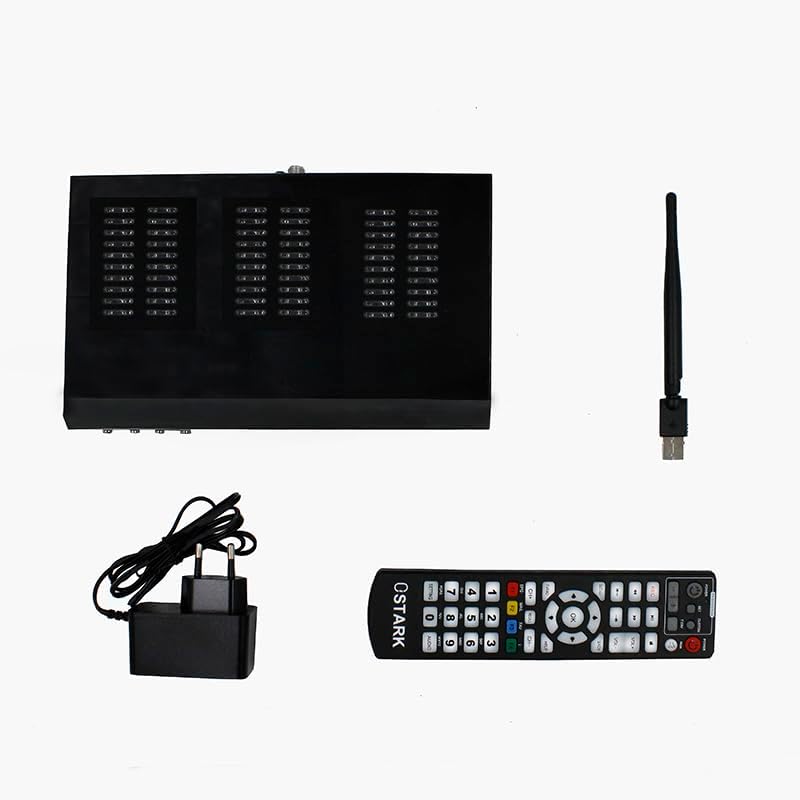
Image: All components included in the Ostark AS2X package, laid out for inspection.
Product Overview
Front Panel

Image: Front panel of the Ostark AS2X receiver, featuring power, channel up/down, and OK buttons, along with the Ostark logo and AS2X model name.
- Power Button: Turns the receiver on or off.
- CH- / CH+ Buttons: Navigates through channels or menu options.
- OK Button: Confirms selections.
- Display: Shows channel number or time.
Rear Panel

Image: Rear panel of the Ostark AS2X receiver, displaying all available connection ports.
- SCART Port: For connecting to older televisions.
- LNB IN: Connects to the satellite dish.
- USB 2.0 Ports (x2): For USB WiFi dongle, external storage (PVR, multimedia playback).
- HD-OUT (HDMI): Connects to modern televisions for high-definition output.
- AV Out: Analog audio/video output.
- Ethernet (RJ45): For wired network connection.
- DC 12V IN: Power input.
Setup Guide
1. Connecting to Your Television
- HDMI Connection (Recommended): Connect one end of the provided HD cable (HDMI) to the HD-OUT port on the receiver and the other end to an available HDMI input on your television.
- SCART Connection: For older televisions, connect a SCART cable (not included) from the SCART port on the receiver to the SCART input on your television.
- AV Connection: Connect an AV cable (not included) from the AV Out port on the receiver to the corresponding AV inputs on your television.
2. Connecting to Satellite Dish
Connect the coaxial cable from your satellite dish's LNB to the LNB IN port on the rear panel of the Ostark AS2X receiver.
3. Network Connection
- Wired Connection (Ethernet): Connect an Ethernet cable from your router or network switch to the Ethernet (RJ45) port on the receiver.
- Wireless Connection (WiFi): Insert the provided USB WiFi dongle into one of the USB 2.0 ports on the receiver. You will configure the WiFi connection in the system settings after powering on.
4. Powering On
Connect the EU Power Adapter to the DC 12V IN port on the receiver, then plug the adapter into a power outlet. The receiver will power on or enter standby mode. Press the Power button on the front panel or the remote control to turn it on.
Operating Instructions
Use the remote control to navigate the menus and control the receiver. Ensure the remote control has batteries installed and is pointed towards the receiver.
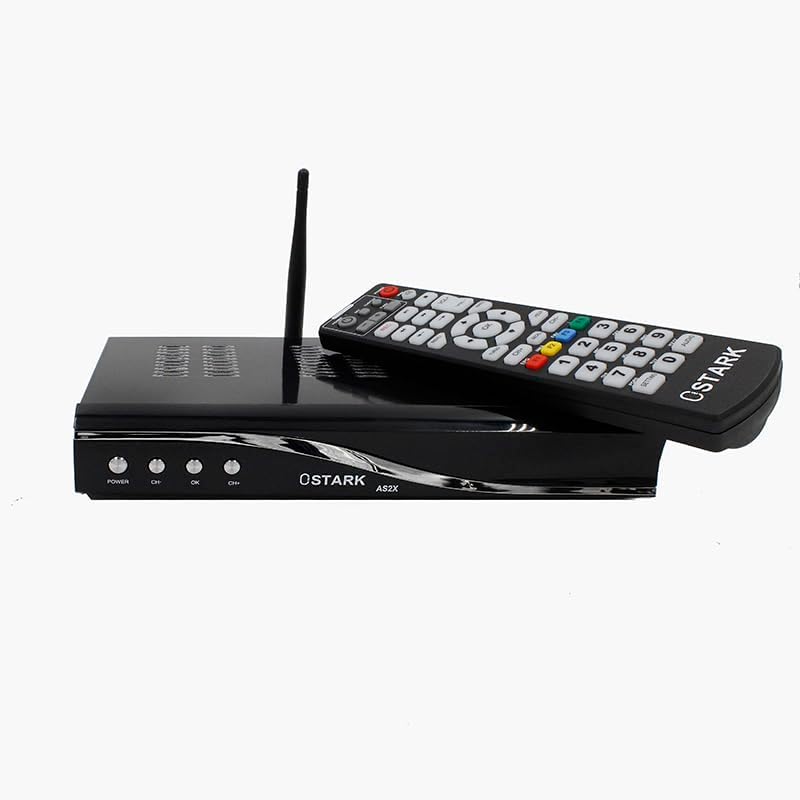
Image: The Ostark AS2X receiver accompanied by its remote control and USB WiFi dongle, illustrating the complete setup.
1. Initial Setup Wizard
Upon first power-on, the receiver may guide you through an initial setup wizard. Follow the on-screen prompts to select your language, country, and perform a channel scan.
2. Channel Scan
To receive satellite channels:
- Press the MENU button on the remote control.
- Navigate to Installation or Channel Search.
- Select your satellite from the list.
- Choose a scan type:
- Auto Scan: Scans all available transponders on the selected satellite.
- TP Scan: Scans specific transponders.
- Blind Scan: Scans for all transponders and channels without prior knowledge.
- Start the scan and wait for it to complete. Channels will be saved automatically.
3. EPG (Electronic Program Guide)
Press the EPG button on the remote control to view the Electronic Program Guide. This displays current, next, and up to 7 days of TV program information.
4. DiSEqC Settings
If you have multiple LNBs or a motorized dish, configure DiSEqC settings under the Installation menu. The receiver supports DiSEqC 1.0 / 1.1 / 1.2 and USALS.
5. Parental Control
Access Parental Control settings via the main menu to restrict access to certain channels or programs based on age ratings. A PIN code is typically required to enable or disable this feature.
6. Multimedia Playback & PVR
Insert a USB storage device (e.g., USB flash drive, external hard drive) into one of the USB 2.0 ports. You can then:
- Play Multimedia Files: Access photos, music, and videos stored on the USB device through the Multimedia menu.
- Record TV Programs (PVR): Use the PVR function to record live TV programs to your connected USB storage device. Consult the on-screen menu for recording options (instant record, scheduled record).
7. Network Features
After connecting to the internet (via Ethernet or WiFi), you can access various online features:
- YouTube: Stream videos from YouTube.
- IXtream: Access various online streaming content.
- Weather Forecasts: View local and global weather information.
- Google Maps: Browse maps.
- Jamendo: Access music.
- IP Camera Support: Connect and view compatible IP cameras.
- DLNA: Share media across your home network.
- SAT to IP: Stream satellite channels to other devices on your network.
Maintenance
- Cleaning: Use a soft, dry cloth to clean the receiver's exterior. Do not use liquid cleaners or abrasive materials.
- Ventilation: Ensure the receiver has adequate ventilation. Do not block the ventilation holes on the top or sides of the unit.
- Software Updates: Periodically check for firmware updates through the system settings menu. Updates can improve performance and add new features. Follow on-screen instructions carefully during updates.
Troubleshooting
| Problem | Possible Cause / Solution |
|---|---|
| No power |
|
| No signal / "No Signal" message |
|
| No picture or sound |
|
| Remote control not working |
|
| Network features not working |
|
Specifications
| Feature | Detail |
|---|---|
| Model | AS2X |
| Compatibility | DVB-S/S2/S2X, MPEG-2/4 H.264, H.265 |
| Video Output Resolution | 1080P, 1080i, 720P, 576P |
| Aspect Ratio | 16:9, 4:3 |
| Connectivity |
|
| DiSEqC Support | 1.0 / 1.1 / 1.2, USALS |
| Features | EPG (7 days), Parental Control, Favorites Group, Auto/TP/Blind Scan, Teletext/Subtitle, USB Multimedia Playback, PVR, Unicable Support, YouTube, IXtream, Weather, Google Maps, Jamendo, IP Camera, DLNA, SAT to IP |
| Power Supply | DC 12V |
Warranty and Support
Information regarding specific warranty terms and conditions for the Ostark AS2X receiver is not available in this document. Please refer to the product packaging or contact your retailer for warranty details.
For technical support or further assistance, please contact Ostark customer service or visit the official Ostark website. Contact information may be provided on the product packaging or included documentation.