
Swaytail MC200
Swaytail MC200 Professional 80mm Mecanum Wheel Robot Car Chassis Instruction Manual
Model: MC200
Introduction
This manual provides comprehensive instructions for the assembly, operation, maintenance, and troubleshooting of your Swaytail MC200 Professional 80mm Mecanum Wheel Robot Car Chassis. Designed for educational and DIY robotics projects, this 4WD metal smart robot car chassis offers omnidirectional movement capabilities, making it suitable for platforms like Arduino, Raspberry Pi, and Microbit. It is an ideal platform for learning AI, ROS, and STEAM concepts.
The MC200 chassis features a robust 3mm aluminum alloy panel and is equipped with four 80mm Mecanum wheels and high-torque DC encoder motors, providing precise control and movement feedback.
Setup and Assembly
The MC200 chassis is shipped unassembled to facilitate transportation. Follow these instructions for proper assembly. A basic understanding of mechanical assembly is recommended.
1. Unpacking and Component Verification
Carefully unpack all components and verify against the following list:
- 1x Metal Chassis Plate (3mm aluminum alloy)
- 4x 80mm Mecanum Wheels
- 4x DC Encoder Motors
- 4x Motor Couplings (for Mecanum wheels)
- 4x Encoders (pre-attached to motors or separate)
- Screw Kit and Fasteners
- Necessary cables for motor/encoder connection
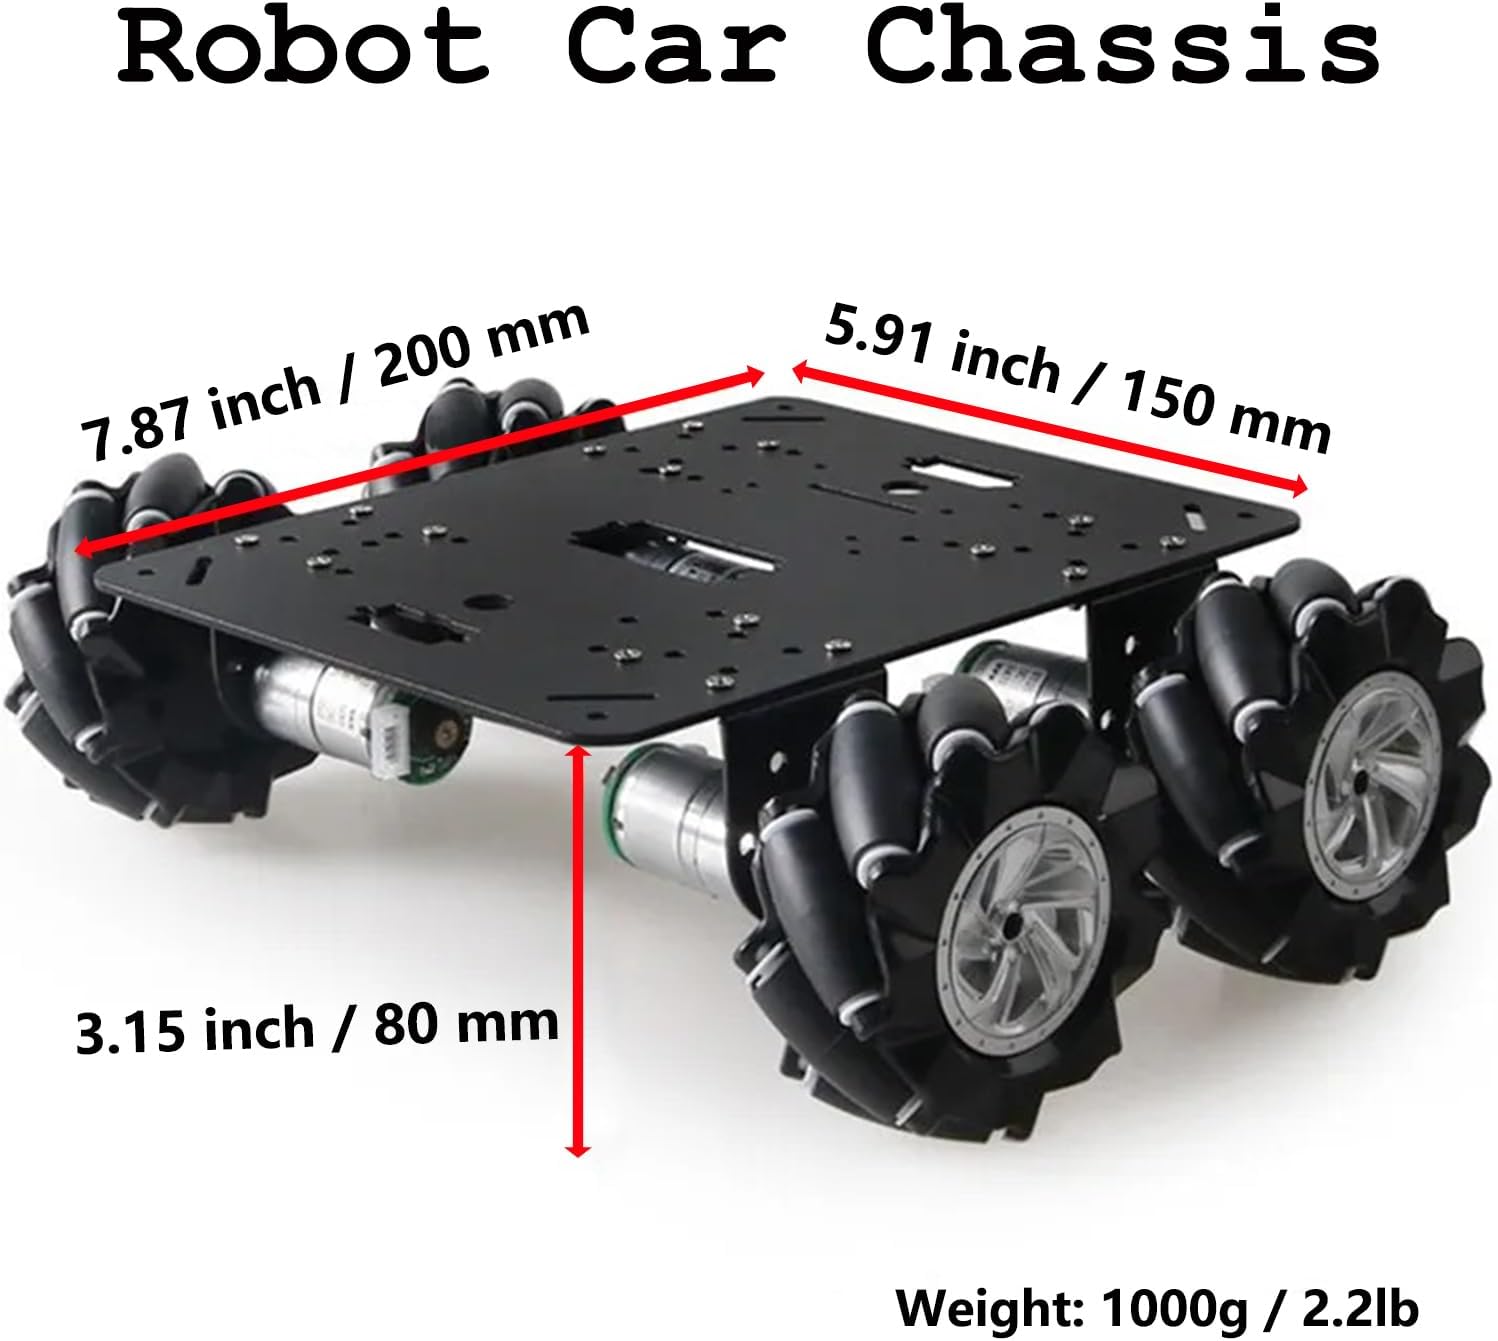
Image: The MC200 robot car chassis with key dimensions highlighted. This image illustrates the overall structure and size of the assembled chassis, including the metal plate and Mecanum wheels.
2. Chassis Plate Overview
The metal chassis plate features multiple mounting holes compatible with various components, including standard servos (MG995, MG996r), 25mm and 37mm motors, and popular development boards such as Arduino UNO R3, NodeMCU, and Raspberry Pi.

Image: Top view of the metal chassis plate, showing various mounting points for different components like motors, servos, and controller boards. Dimensions are also indicated.
3. Motor and Wheel Assembly
- Attach the DC encoder motors to the designated motor mounting points on the chassis plate using the provided screws. Ensure the motor shafts are oriented correctly.
- Securely attach the motor couplings to the motor shafts.
- Mount the 80mm Mecanum wheels onto the motor couplings. Ensure they are firmly attached and can rotate freely.
- Connect the encoder wires from each motor to your chosen controller board (e.g., Arduino, Raspberry Pi) according to your project's wiring diagram.

Image: A fully assembled Mecanum wheel robot chassis, showcasing the integration of the metal plate, motors, and Mecanum wheels.
4. Controller Integration
Mount your chosen controller board (e.g., Arduino UNO R3, NodeMCU, Raspberry Pi) onto the chassis using appropriate standoffs and screws. Connect the motor power and control wires, as well as the encoder feedback wires, to the controller as per your specific project requirements. Arduino source code for basic operation may be available upon request or through provided resources.
Operating Instructions
The Swaytail MC200 chassis, once assembled and programmed, offers versatile movement capabilities due to its Mecanum wheels and 4WD system.
1. Basic Movement
The Mecanum wheels allow for omnidirectional movement. Depending on the motor control signals, the robot can:
- Move forward and backward.
- Turn left and right (rotation).
- Strafe left and right (sideways movement).
- Move diagonally.
Precise control of these movements is achieved by independently controlling the speed and direction of each of the four DC encoder motors.
2. Encoder Feedback
The integrated encoders on each DC motor provide real-time feedback on motor rotation and speed. This data is crucial for advanced robotics applications such as:
- Accurate odometry and position tracking.
- Closed-loop speed control.
- Implementing complex navigation algorithms (e.g., for AI and ROS systems).
Refer to your controller's documentation and the provided Arduino source code (if applicable) for details on reading and utilizing encoder data.
Maintenance
Regular maintenance ensures the longevity and optimal performance of your MC200 robot chassis.
- Chassis Cleaning: Periodically wipe down the aluminum alloy chassis with a dry, soft cloth to remove dust and debris. Avoid using harsh chemicals that could damage the sandblasting oxidation finish.
- Wheel Inspection: Check the Mecanum wheels for any debris lodged in the rollers. Ensure all rollers rotate freely. Clean as necessary.
- Motor and Wiring Check: Inspect motor connections and wiring for any loose contacts or damage. Ensure motors are free from obstructions and operate smoothly.
- Fastener Tightness: Over time, vibrations can loosen screws. Periodically check and tighten all fasteners on the chassis, motors, and wheels.
Troubleshooting
This section addresses common issues you might encounter with your MC200 chassis.
- Robot Does Not Move:
- Verify power supply to the motors and controller.
- Check all motor wiring connections for looseness or incorrect polarity.
- Ensure your control code is correctly sending signals to the motor drivers.
- Inspect motors for any physical obstructions preventing rotation.
- Erratic Movement or Incorrect Direction:
- Double-check motor wiring for correct connections to the motor driver.
- Review your control code for logical errors in motor direction or speed commands.
- Ensure Mecanum wheels are mounted with the correct orientation (rollers should form a 'V' shape when viewed from the top, pointing towards the center of the robot).
- Encoder Data Issues:
- Verify encoder wiring to the controller.
- Ensure the controller's input pins are correctly configured to read encoder signals.
- Check for electrical noise that might interfere with encoder readings.
- Loose Components:
- Tighten any loose screws or fasteners on the chassis, motors, or wheels.
Specifications
MC200 Metal Smart Car Chassis Parameters:
- Name: MC200 4WD Metal Smart Robot Car Chassis
- Panel Material: 3mm aluminum alloy
- Surface Treatment: Sandblasting oxidation
- Panel Color: Black
- Size (L*W*H): 200mm * 150mm * 80mm (7.87 * 5.91 * 3.15 inches)
- Motor Type: DC encoder motor
- Weight: Approximately 1000g (2.2lb) for the chassis (without additional electronics)
Image: The MC200 robot car chassis with key dimensions highlighted, showing length, width, and height measurements.
80mm Mecanum Wheel Parameters:
- Name: Mecanum Wheel
- Weight (single): 120 g
- Inner Diameter: 6.5mm
- Outer Wheel Diameter: 80mm
- Thickness: 37mm
- Number of Sub-wheels: 9
- Bearing Capacity (4 wheels): Up to 10kg

Image: Detailed view of an 80mm Mecanum wheel, with a diagram outlining its key parameters such as diameter, thickness, and number of sub-wheels.
Motor Parameters (25mm Gear Motor):
- Output Speed: 150 ±10% rpm
- No-load Current: 200mA (Max)
- Stall Current: 4500mA (Max)
- Stall Torque: 9.5kgNaN
- Rated Speed: 100 ±10% rpm
- Rated Torque: 3000gNaN
- Rated Current: 1200mA (Max)
- Noise: 56dB
- Working Voltage: 9-12V
- Outside Shaft Length: 14.5mm
- Shaft End Play: 0.05-0.50mm
- Screw Size: M3.0
- Shaft Diameter: 4mm, D3.5

Image: A detailed diagram and specifications table for the 25mm DC gear motor, including electrical and mechanical parameters, and an outline drawing.
Encoder Parameters:
- Type: AB-phase incremental Hall encoder
- Pulses per Circle: 2 pulses / circle
- Working Voltage of Sensor: 3-5V
Warranty and Support
Customer Support:
For any questions, technical assistance, or issues encountered with your Swaytail MC200 Mecanum Wheel Robot Car Chassis, please do not hesitate to contact our customer support team. We are committed to providing timely assistance and will respond to your inquiries within 24 hours.
Please refer to the retailer's website or your purchase documentation for specific contact methods.
Warranty Information:
Specific warranty details for the Swaytail MC200 are typically provided at the point of purchase or can be found on the product's official listing. Please retain your proof of purchase for warranty claims. This product is intended for DIY and educational purposes, and warranty coverage may vary based on usage and modifications.
Ask a question about this manual
Ask about setup, troubleshooting, compatibility, parts, safety, or missing instructions. Manuals+ will review the question and use this page’s manual context to help answer it.