1. Introduction
The Fyearfly EN8829A Wireless Weather Station is a multi-functional electronic device designed to provide real-time weather information, time, date, and alarm functions. It features a color LCD screen and includes a remote sensor for outdoor temperature and humidity monitoring. This manual provides instructions for setup, operation, and maintenance of your weather station.

Image 1.1: The Fyearfly EN8829A Weather Station displayed in a study, greenhouse, kitchen, and wine cellar, illustrating its versatile placement options.
2. Product Overview
The Fyearfly EN8829A Weather Station provides comprehensive environmental monitoring and timekeeping features. Key functionalities include:
- Wireless Data Transmission: Receives outdoor temperature and humidity data from a remote sensor.
- Multi-functional Display: Shows calendar, time, indoor/outdoor temperature, indoor/outdoor humidity, air pressure, alarm clock, and moon phase.
- Weather Forecast: Provides a 6-12 hour weather forecast based on barometric trends.
- Adjustable Backlight: 4-level brightness adjustment for the 15cm LCD screen when connected to power.
- Multi-language Day of Week: Supports five languages (German, English, French, Italian, Spanish).
- Temperature and Humidity Alerts: User-definable alerts for indoor and outdoor conditions.

Image 2.1: The main display unit of the Fyearfly EN8829A Weather Station alongside its wireless remote sensor.
3. Package Contents
Please check the package for the following items:
- 1 x Wireless Weather Clock (Main Receiver Unit)
- 1 x Transmitter (Remote Sensor)
- 1 x USB Cable
- 1 x User Manual
4. Setup
4.1 Powering the Devices
The main weather station unit can be powered by either 3 AAA batteries (not included) or via the included USB cable connected to a power adapter (not included). The remote sensor requires 2 AA batteries (not included).
- Remote Sensor: Open the battery compartment on the back of the remote sensor and insert 2 AA batteries, observing the correct polarity (+/-). Close the compartment.
- Main Unit: Open the battery compartment on the back of the main unit and insert 3 AAA batteries, observing the correct polarity (+/-). Alternatively, connect the USB cable to the main unit's power input and plug the other end into a compatible USB power adapter.

Image 4.1: The Fyearfly EN8829A Weather Station connected via its USB interface for power, showing input and output voltage specifications.
4.2 Sensor Placement and Synchronization
For optimal performance, place the remote sensor within 60 meters (open area) of the main unit. Avoid placing the sensor in direct sunlight or rain to ensure accurate readings and longevity.
- Place the remote sensor outdoors in a shaded, dry location, protected from direct weather elements.
- Place the main unit indoors, away from large metal objects or electronic devices that may interfere with the wireless signal.
- Once both devices are powered, the main unit will automatically attempt to synchronize with the remote sensor. This may take a few minutes. The outdoor temperature and humidity readings will appear on the main display once connected.
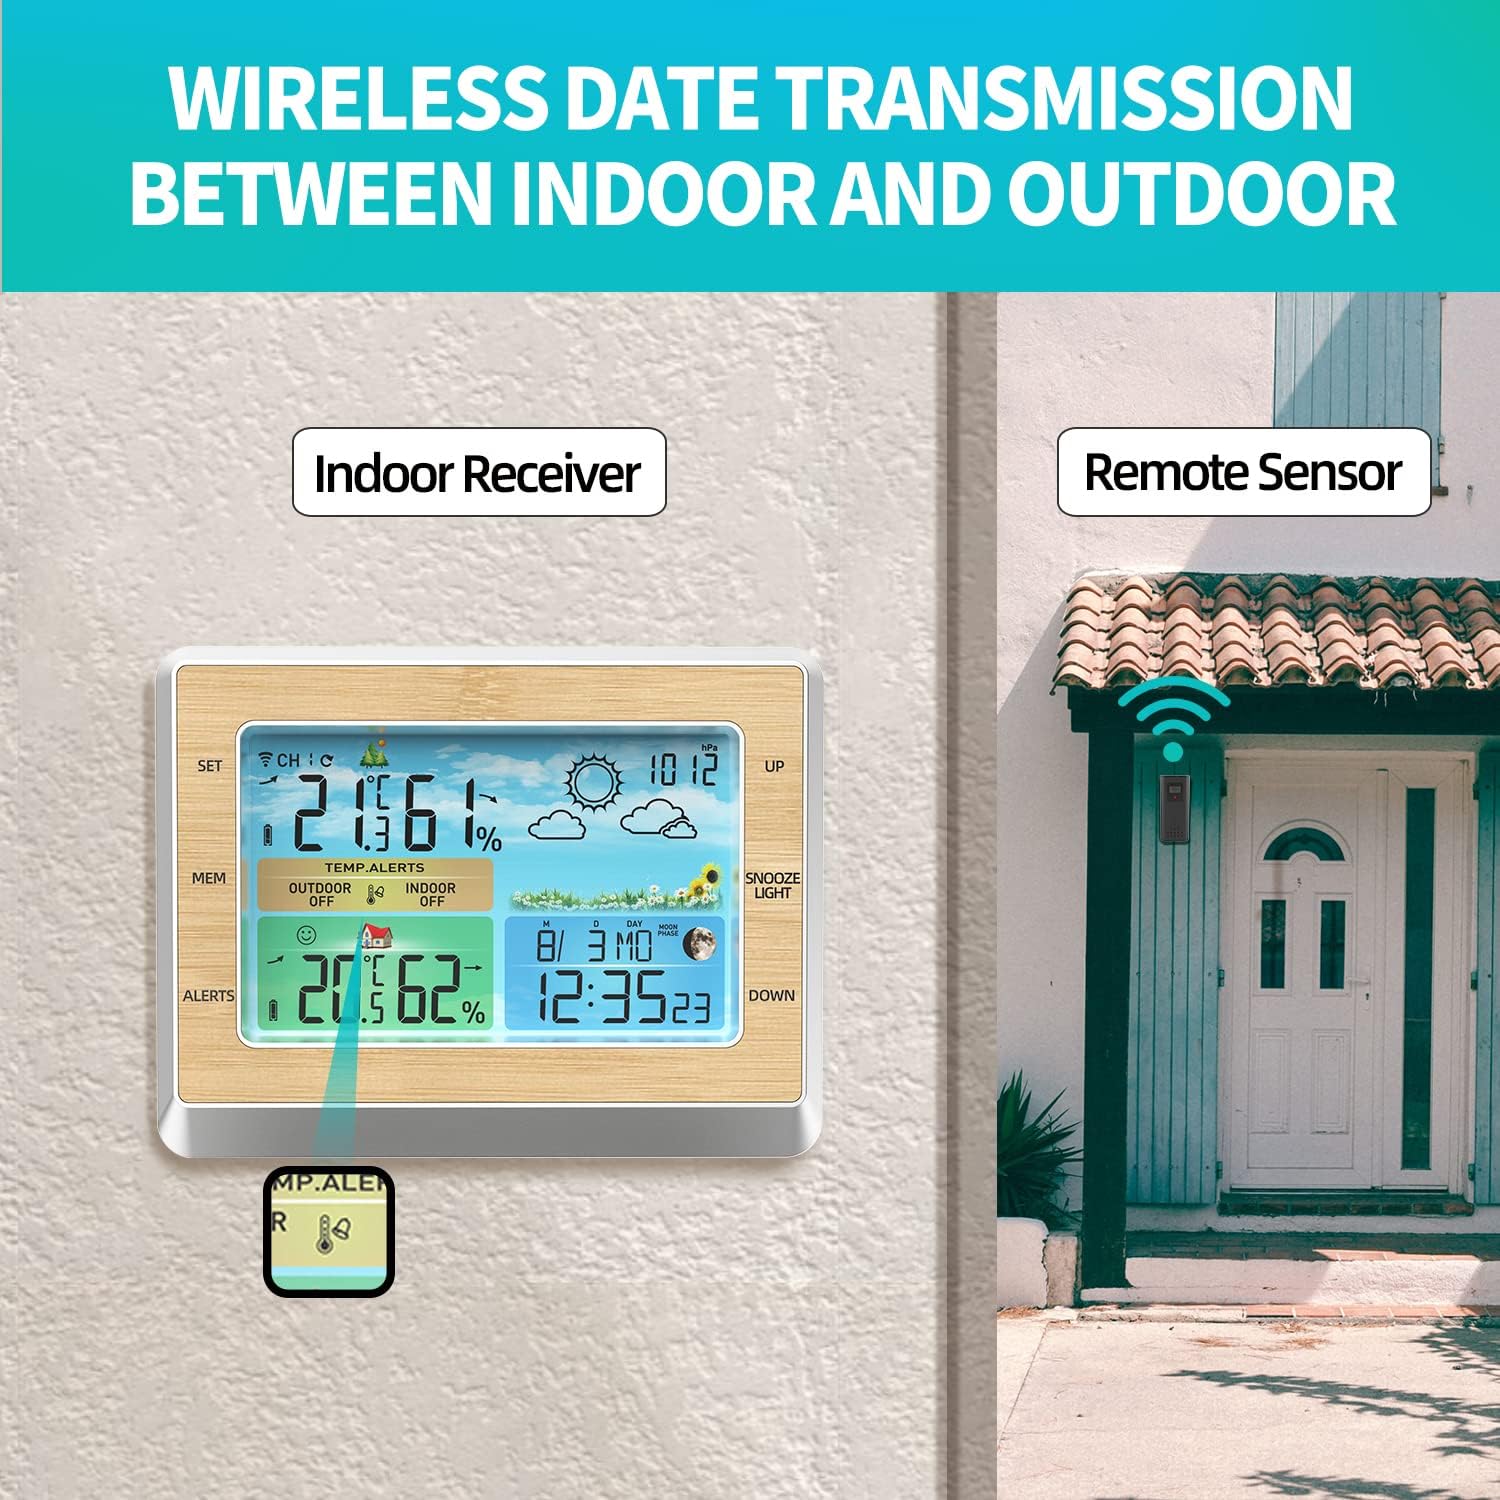
Image 4.2: Diagram illustrating the wireless data transmission between the indoor receiver unit and the outdoor remote sensor.
5. Operating Instructions
5.1 Display Overview
The color LCD screen is divided into several sections, providing various pieces of information at a glance.

Image 5.1: The Fyearfly EN8829A Weather Station's colorful display, highlighting sections for outdoor temperature & humidity, weather forecast, indoor temperature & humidity, and time, date & moon phase.
5.2 Basic Settings (Time, Date, Language)
Use the 'SET' button to enter settings mode and navigate through options. Use 'UP' and 'DOWN' buttons to adjust values.
- Press and hold the 'SET' button to enter time/date setting mode.
- The first adjustable item will flash. Use 'UP' or 'DOWN' to change the value.
- Press 'SET' again to confirm and move to the next item (e.g., 12/24 hour format, hour, minute, year, month, day, day of week language).
- The day of the week can be set to German, English, French, Italian, or Spanish.
- After setting all desired parameters, press 'SET' to exit the setting mode.
5.3 Alarm Clock Function
The weather station includes an alarm clock feature.
- Press the 'SET' button briefly to cycle through display modes (e.g., Time, Alarm 1, Alarm 2).
- When the alarm time is displayed, press and hold 'SET' to enter alarm setting mode.
- Adjust the alarm hour and minute using 'UP' and 'DOWN', confirming each with 'SET'.
- To activate/deactivate the alarm, press the 'UP' button when the alarm time is displayed (not in setting mode). An alarm icon will appear/disappear.
- When the alarm sounds, press 'SNOOZE/LIGHT' to activate snooze (typically 5-10 minutes) or any other button to turn off the alarm for 24 hours.
5.4 Display Brightness Adjustment
When the main unit is powered via USB, the backlight brightness can be adjusted.
- Press the 'SNOOZE/LIGHT' button repeatedly to cycle through 4 levels of brightness.
- If operating on batteries, the backlight will only illuminate briefly when 'SNOOZE/LIGHT' is pressed to conserve power.

Image 5.2: The Fyearfly EN8829A Weather Station on a nightstand, demonstrating its 4-level adjustable brightness feature for comfortable viewing at night.
5.5 Weather Forecast
The weather station provides a forecast for the next 6-12 hours based on changes in barometric pressure. This is an approximation and should not replace official weather services.

Image 5.3: The Fyearfly EN8829A Weather Station showing various weather forecast icons, indicating different weather conditions.
5.6 Temperature and Humidity Alerts
The device supports setting high and low alerts for both indoor and outdoor temperature and humidity.
- Press the 'ALERTS' button to cycle through alert settings (e.g., Outdoor Temp High, Outdoor Temp Low, Indoor Temp High, etc.).
- When the desired alert is displayed, press and hold 'ALERTS' to enter setting mode.
- Use 'UP' and 'DOWN' to adjust the alert threshold.
- Press 'ALERTS' to confirm and move to the next setting or exit.
- An alarm will sound and the corresponding icon will flash when an alert threshold is met.
6. Maintenance
- Clean the display and casing with a soft, dry cloth. Do not use abrasive cleaners or solvents.
- Avoid exposing the main unit to excessive moisture or extreme temperatures.
- Ensure the remote sensor is protected from direct rain and prolonged direct sunlight.
- Replace batteries in both units when the low battery indicator appears on the display to ensure continuous operation and accurate readings.
- If the device will not be used for an extended period, remove all batteries to prevent leakage.
7. Troubleshooting
7.1 No Outdoor Temperature/Humidity Reading
- Check Batteries: Ensure both the main unit and remote sensor have fresh batteries installed correctly.
- Proximity: Move the remote sensor closer to the main unit. The maximum range is 60m in open areas, but obstacles can reduce this.
- Interference: Relocate both units away from large metal objects, thick walls, or other electronic devices that may cause interference.
- Resynchronize: Remove batteries from both units, wait a few minutes, then reinsert batteries into the remote sensor first, followed by the main unit. Allow time for reconnection.
7.2 Incorrect Temperature/Humidity Readings
- Sensor Placement: Ensure the remote sensor is not in direct sunlight or near heat sources/vents, which can skew readings.
- Ventilation: Ensure both units have adequate airflow around their sensors.
- Calibration: This device does not support manual calibration. If readings are consistently inaccurate after checking placement, contact support.
7.3 Display is Dim or Blank
- Power Source: If using batteries, replace them. If using USB, ensure the cable is securely connected and the power adapter is functional.
- Brightness Setting: If powered by USB, press 'SNOOZE/LIGHT' to adjust brightness levels.
8. Specifications
| Feature | Specification |
|---|---|
| Model Number | Fyearflyox64kw2mbe (EN8829A) |
| Material | Plastic |
| Indoor Temperature Range | -20℃ to +70℃ (-4°F to 158°F) |
| Outdoor Temperature Range | -40℃ to +70℃ (-40°F to 158°F) |
| Temperature Resolution | 0.1°C / 0.1°F |
| Humidity Range | 20% RH to 95% RH |
| Air Pressure Range | 850 hPa/Mb to 1100 hPa/Mb (25.1 to 32.48 inch Hg) |
| Wireless Transmission Range | Up to 60m (open area) |
| Main Unit Power Supply | 3 x AAA Batteries (not included) or USB Power Adapter (not included) |
| Remote Sensor Power Supply | 2 x AA Batteries (not included) |
| Main Unit Dimensions | 180 x 25 x 140mm (7.1 x 1.0 x 5.5in) |
| Transmitter Dimensions | 50 x 25 x 110mm (2.0 x 1.0 x 4.3in) |
| Special Features | Temperature display, charging port, alarm |

Image 8.1: Detailed dimensions of the Fyearfly EN8829A Weather Station and its remote sensor, along with icons representing key features like 6-inch LED display, CH1-2-3 switch, date trend, comfort level, lunar phases, weather forecast, calendar, and temperature alarm.
9. Warranty and Support
For warranty information or technical support, please refer to the contact details provided with your purchase or visit the official Fyearfly website. Keep your purchase receipt as proof of purchase for any warranty claims.