1. Introduction
This manual provides essential information for the proper installation, operation, and maintenance of your IndustrialMaker GreatWall Victory V5 GW-ATX500BL Power Supply Unit (PSU). Please read this manual thoroughly before installation and retain it for future reference. This PSU is designed to provide stable and efficient power to your personal computer system.
2. Safety Information
- Always disconnect the power cord from the wall outlet before installing, removing, or cleaning the PSU or any other computer components.
- The PSU contains high voltage components. Do not open the PSU casing. There are no user-serviceable parts inside. Opening the casing will void the warranty and poses a risk of electric shock.
- Ensure proper grounding of your computer system to prevent electrical hazards.
- Install the PSU in a well-ventilated area, free from excessive heat, humidity, and dust.
- Do not block the PSU's fan or ventilation openings.
- Use only the modular cables provided with this PSU. Using incompatible cables may damage the PSU and connected components.
3. Product Overview
3.1 Key Features
- Model: IndustrialMaker GreatWall Victory V5 GW-ATX500BL
- Rated Power: 500 Watts
- Peak Power: 600 Watts
- Form Factor: ATX
- Modularity: Full Module for flexible cable management
- Efficiency: 80 PLUS Gold Certified for high energy efficiency
- Cooling: Optimized for mute operation
- Compatibility: Designed for personal computer systems
3.2 Component Identification
Familiarize yourself with the various parts of your PSU.

Figure 1: Angled view of the GW-ATX500BL PSU, highlighting the modular cable connection ports on one side and the cooling fan grill on the other.
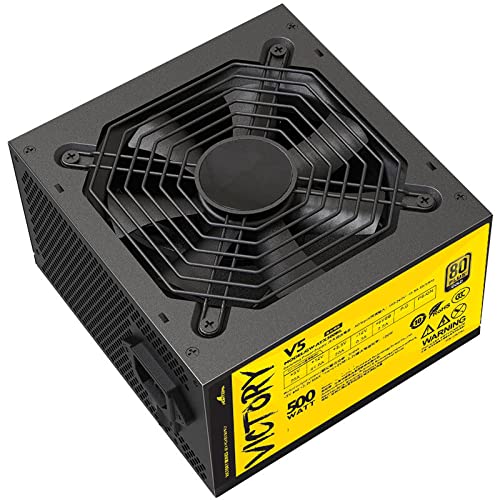
Figure 2: Top-down view of the GW-ATX500BL PSU, showing the central cooling fan and its protective grill.
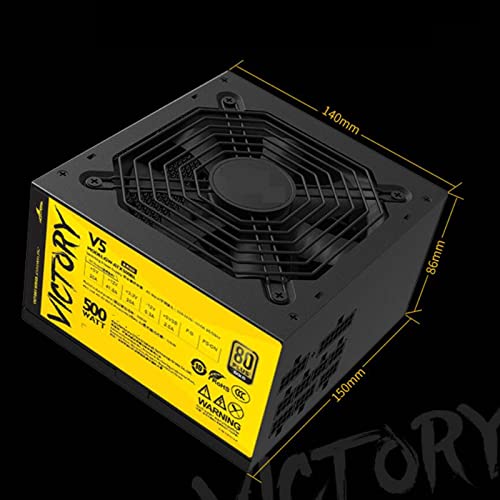
Figure 3: The GW-ATX500BL PSU with its physical dimensions indicated: 150mm length, 140mm width, and 86mm height.

Figure 4: The electrical specification label on the GW-ATX500BL PSU, detailing AC input, DC output voltages and amperages, and 80 PLUS Gold certification.
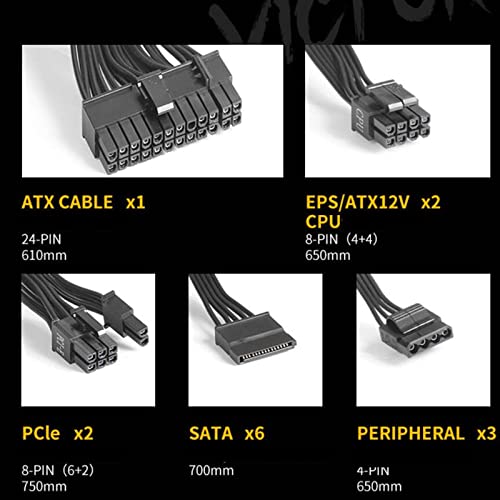
Figure 5: An overview of the modular cables provided with the PSU, including ATX 24-PIN, EPS/ATX12V (CPU), PCIe, SATA, and Peripheral (Molex) connectors with their respective quantities and lengths.
4. Specifications
| Feature | Detail |
|---|---|
| Model | GW-ATX500BL (Victory V5) |
| Brand | IndustrialMaker |
| Rated Wattage | 500W |
| Peak Wattage | 600W |
| Efficiency | 80 PLUS Gold Certified |
| Form Factor | ATX |
| Modularity | Full Module |
| Fan Count | 1 |
| AC Input | 100-240V~ 10.5A 50/60Hz |
| DC Output (+5V) | 20A |
| DC Output (+12V) | 41.6A |
| DC Output (+3.3V) | 20A |
| DC Output (-12V) | 0.3A |
| DC Output (+5VSB) | 2.5A |
| Dimensions (L x W x H) | 150mm x 140mm x 86mm |
| Compatible Devices | Personal Computer |
| Connector Type | ATX |
5. Setup and Installation
5.1 Before Installation
- Unpack the PSU and all modular cables from the packaging.
- Ensure your computer system is completely powered off and unplugged from the wall outlet.
- Discharge any static electricity by touching a grounded metal object (e.g., the bare metal of your computer case) before handling components.
5.2 Physical Installation
- Locate the PSU mounting area in your computer case, typically at the bottom or top rear.
- Carefully slide the GW-ATX500BL PSU into the designated slot.
- Align the screw holes on the PSU with those on the case.
- Secure the PSU to the case using the provided screws.
5.3 Cable Connections
Connect the necessary modular cables to the PSU first, then to your computer components. Refer to Figure 5 for cable types.
- 24-Pin ATX Motherboard Cable: Connect the 24-pin cable to the main power connector on your motherboard. Ensure it clicks into place.
- EPS/ATX12V (CPU) Cable: Connect the 8-pin (4+4 pin) CPU power cable to the corresponding connector on your motherboard, usually located near the CPU socket.
- PCIe (GPU) Cables: For graphics cards requiring additional power, connect the 8-pin (6+2 pin) PCIe cables. Use separate cables for each connector on the GPU if possible.
- SATA Cables: Connect SATA power cables to your SSDs, HDDs, and optical drives.
- Peripheral (Molex) Cables: Connect 4-pin Peripheral cables to any other components that require them, such as case fans or older peripherals.
- Ensure all connections are firm and secure. Utilize cable management features in your case to maintain good airflow.
6. Operating Instructions
- After all components are installed and cables are connected, ensure the PSU's power switch on the rear panel is in the OFF (0) position.
- Connect the AC power cord to the PSU's power inlet and then to a grounded wall outlet.
- Flip the PSU's power switch to the ON (I) position.
- You can now power on your computer system using the case's power button.
7. Maintenance
- Dust Cleaning: Periodically inspect the PSU's fan and ventilation grilles for dust accumulation. Use compressed air to gently remove dust, ensuring the fan blades do not spin excessively during cleaning.
- Airflow: Ensure that the computer case has adequate airflow and that the PSU's intake and exhaust vents are not obstructed.
- Environment: Operate the PSU within its specified environmental conditions (temperature, humidity) to ensure optimal performance and longevity.
- Do not attempt to lubricate the fan or disassemble the PSU for cleaning.
8. Troubleshooting
8.1 No Power to System
- Verify the AC power cord is securely connected to both the PSU and the wall outlet.
- Ensure the PSU's power switch on the rear panel is in the ON (I) position.
- Check that the 24-pin ATX motherboard cable and the 8-pin CPU power cable are firmly seated in their respective connectors.
- Test the wall outlet with another device to confirm it is supplying power.
- If possible, test the PSU with a known working system or a PSU tester.
8.2 System Instability or Crashes
- Ensure all power connections to components (motherboard, CPU, GPU, storage) are secure.
- Verify that the PSU's rated wattage is sufficient for all installed components. An underpowered PSU can lead to instability.
- Check for signs of overheating in the system, as this can cause crashes.
8.3 Excessive Fan Noise
- Inspect the PSU fan for dust accumulation and clean it as described in the Maintenance section.
- Ensure no cables or other obstructions are interfering with the fan blades.
- If the noise persists and is unusual, it may indicate a fan malfunction. Contact support.
9. Warranty and Support
The IndustrialMaker GreatWall Victory V5 GW-ATX500BL Power Supply Unit is covered by a manufacturer's warranty. For specific warranty terms, duration, and conditions, please refer to the warranty card included with your product or visit the official IndustrialMaker website.
For technical support, troubleshooting assistance beyond this manual, or warranty claims, please contact your retailer or the manufacturer directly. Do not attempt to repair the unit yourself, as this will void the warranty and may cause further damage or injury.


