
Amsta AMPI3Z5000
AMSTA AMPI3Z5000 Induction Hob User Manual
Model: AMPI3Z5000 | Brand: Amsta
1. Introduction
This manual provides essential information for the safe and efficient operation, installation, and maintenance of your AMSTA AMPI3Z5000 Induction Hob. Please read these instructions carefully before using the appliance and keep them for future reference.

The AMSTA AMPI3Z5000 Induction Hob features three cooking zones and intuitive touch controls, designed for modern kitchens.
2. Safety Information
Always adhere to basic safety precautions when using electrical appliances to reduce the risk of fire, electric shock, and injury. This appliance is intended for domestic use only.
- Ensure the hob is installed by a qualified electrician in accordance with local wiring regulations.
- Do not touch hot surfaces. Use oven mitts or pot holders.
- Never leave the hob unattended during operation, especially when cooking with oil or fat.
- Keep children away from the appliance.
- Do not use abrasive cleaners or sharp metal scrapers to clean the hob surface, as they can scratch the glass.
- Ensure proper ventilation around the appliance.
- Do not place metallic objects such as knives, forks, spoons, and lids on the hob surface as they can get hot.
3. Setup and Installation
3.1 Unpacking
Carefully remove the hob from its packaging. Inspect the appliance for any signs of damage. Retain the packaging materials for future transport or if the appliance needs servicing.
3.2 What's in the Box
- AMSTA AMPI3Z5000 Induction Cooktop Unit
3.3 Installation Requirements
The AMSTA AMPI3Z5000 is designed for built-in installation. Ensure the countertop opening dimensions are suitable for the hob's size (66 x 60 x 13 cm). A dedicated electrical circuit with appropriate voltage (230V) and wattage (4800W) capacity is required. Consult the detailed installation diagram provided in the separate installation guide for precise cutout dimensions and ventilation requirements.
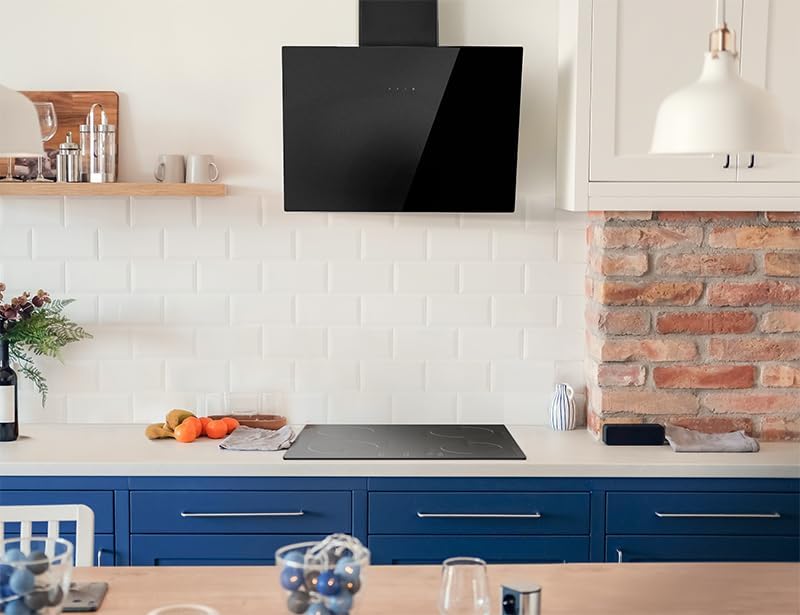
The induction hob seamlessly integrates into a modern kitchen design when properly installed.
4. Operating Instructions
The AMSTA AMPI3Z5000 Induction Hob features touch-sensitive controls for easy operation.
4.1 Powering On/Off
- To turn on: Touch the power symbol (O) on the control panel.
- To turn off: Touch and hold the power symbol until the hob switches off.
4.2 Zone Selection and Power Adjustment
- Select a cooking zone by touching its corresponding zone selection button.
- Adjust the power level using the '+' and '-' touch controls. The hob offers multiple power levels for precise cooking.
4.3 Booster Function
The Booster function (B) provides maximum power to a selected cooking zone for a short period, ideal for rapidly boiling water or searing. Activate by touching the Booster button after selecting a zone.
4.4 Digital Timer
The integrated digital timer allows you to set a cooking duration for individual zones. Once the set time expires, the cooking zone will automatically switch off. To use, select a zone, then touch the timer symbol (clock icon) and adjust the time with '+' and '-'.
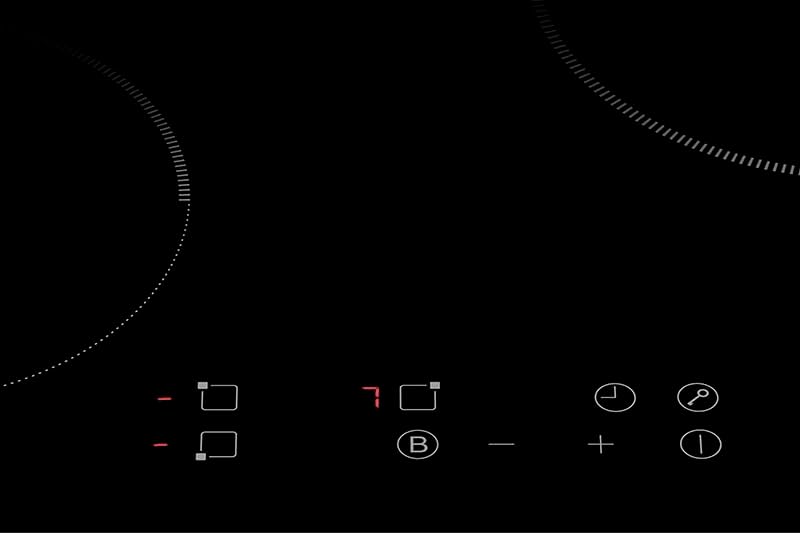
The touch controls provide precise command over cooking zones, power levels, and timer functions.
4.5 Suitable Cookware
Induction hobs require cookware with a magnetic base. Look for the induction symbol on the bottom of your pots and pans. Cast iron, enameled steel, and stainless steel with a magnetic base are generally suitable. Glass, ceramic, copper, or aluminum cookware without a magnetic base will not work.

Ensure your cookware has a magnetic base for optimal performance on the induction hob.
5. Maintenance and Cleaning
Regular cleaning and maintenance will ensure the longevity and optimal performance of your induction hob.
- Daily Cleaning: After each use, wipe the hob surface with a damp cloth and a small amount of mild dish soap. Rinse with a clean damp cloth and dry thoroughly with a soft cloth to prevent water spots.
- Stubborn Stains: For burnt-on food or stubborn stains, use a specialized ceramic hob cleaner and a non-abrasive scraper designed for glass-ceramic surfaces. Follow the cleaner's instructions.
- Avoid: Do not use abrasive sponges, scouring pads, harsh chemicals, or steam cleaners, as these can damage the glass surface.
- Ensure the hob is cool before cleaning.
6. Troubleshooting
Before contacting customer support, please refer to the following common issues and their solutions:
| Problem | Possible Cause | Solution |
|---|---|---|
| Hob does not turn on. | No power supply; control panel locked. | Check circuit breaker. Unlock control panel if child lock is active. |
| Cooking zone not heating. | Incorrect cookware; cookware not centered. | Use induction-compatible cookware. Center the pot on the zone. |
| Display shows 'E' or error code. | Overheating; internal fault. | Turn off and let cool. If error persists, consult a technician. |
| Unusual noise during operation. | Normal fan noise; cookware vibration. | Some noise is normal. Check if cookware is flat and stable. |
7. Specifications
| Feature | Specification |
|---|---|
| Brand | Amsta |
| Model | AMPI3Z5000 |
| Product Dimensions | 66 x 60 x 13 cm |
| Item Weight | 8.27 kg |
| Installation Type | Built-in |
| Number of Heating Elements | 3 |
| Burner Type | Induction |
| Control Console | Touch |
| Voltage | 230 Volts |
| Wattage | 4800 Watts |
| Fuel Type | Electric |
| Material Type | Glass-Ceramic |
| Special Features | Timer, Booster |
| Colour | Black |
8. Warranty and Support
Your AMSTA AMPI3Z5000 Induction Hob comes with a standard manufacturer's warranty. Please refer to the warranty card included with your purchase for specific terms and conditions. For technical support, spare parts, or warranty claims, please contact your retailer or the authorized Amsta service center. Ensure you have your model number and purchase date available when contacting support.
Ask a question about this manual
Ask about setup, troubleshooting, compatibility, parts, safety, or missing instructions. Manuals+ will review the question and use this page’s manual context to help answer it.