1. Introduction
Thank you for choosing RGBZONE 3 Pin 10mm LED Strip Connectors. These connectors are designed for extending and connecting 10mm wide, 3-pin LED strip lights (such as WS2811, WS2812B) to wires without the need for soldering. They are suitable for both waterproof (IP65) and non-waterproof (IP20) LED strips.
2. Package Contents
Each package contains:
- 10 x 3-pin 10mm LED Strip to Wire Connectors

Image: A set of 10 clear plastic 3-pin 10mm LED strip connectors, showing their design for connecting wires and LED strips.
3. Specifications
| Feature | Detail |
|---|---|
| Connector Type | 3-pin, Strip to Wire |
| LED Strip Width | 10mm |
| Wire Gauge Compatibility | 22 AWG (not 18 AWG) |
| Water Resistance | Suitable for waterproof (IP65) and non-waterproof (IP20) strips |
| Rated Voltage | 0-36V |
| Rated Current | 5A |
| Material | Premium Transparent PC, Tinned Copper |
| Model Number | FB0425 |

Image: A close-up of the connector, highlighting its transparent PC material and tinned copper parts for durability and anti-oxidation.
4. Compatibility
These connectors are specifically designed for:
- 3-pin LED strip lights with 10mm wide pads.
- Examples include WS2811 and WS2812B LED strips.
- Compatible with 22 AWG wires. Do not use with 18 AWG wires.
Important: Ensure your LED strip matches these specifications. Connectors are not suitable for 2-pin, 4-pin, 5-pin, or 3-pin strips with narrow pads.

Image: A visual guide illustrating compatible 3-pin 10mm wide LED strips (IP20/IP65) and incompatible strip types (2-pin, 3-pin narrow, 4-pin, 5-pin).
5. Safety Information
- Always disconnect power to the LED strip and power supply before installation or maintenance.
- Ensure correct polarity (+V, DI, GND) when connecting to avoid damage to the LED strip or power supply.
- Do not exceed the rated voltage (0-36V) or current (5A) of the connectors.
- Keep out of reach of children.
- Use only with compatible 22 AWG wires.
6. Installation Guide
6.1. Preparing the Wire
The connectors feature a sharp copper thorn design that penetrates the PVC insulation of the wire, eliminating the need to strip the wire sheath. This works with both solid and stranded wires.

Image: Diagram showing how the sharp copper thorns inside the connector penetrate the wire insulation to make contact with the copper conductor.
6.2. Connecting the Wire
- Cut the wire to your desired length.
- Open the cover of the wire end of the LED connector.
- Insert each of the three wires into the corresponding guide slots. Ensure they are fully seated.
- Close the connector cover firmly. Pliers can be used for easier closure if needed.
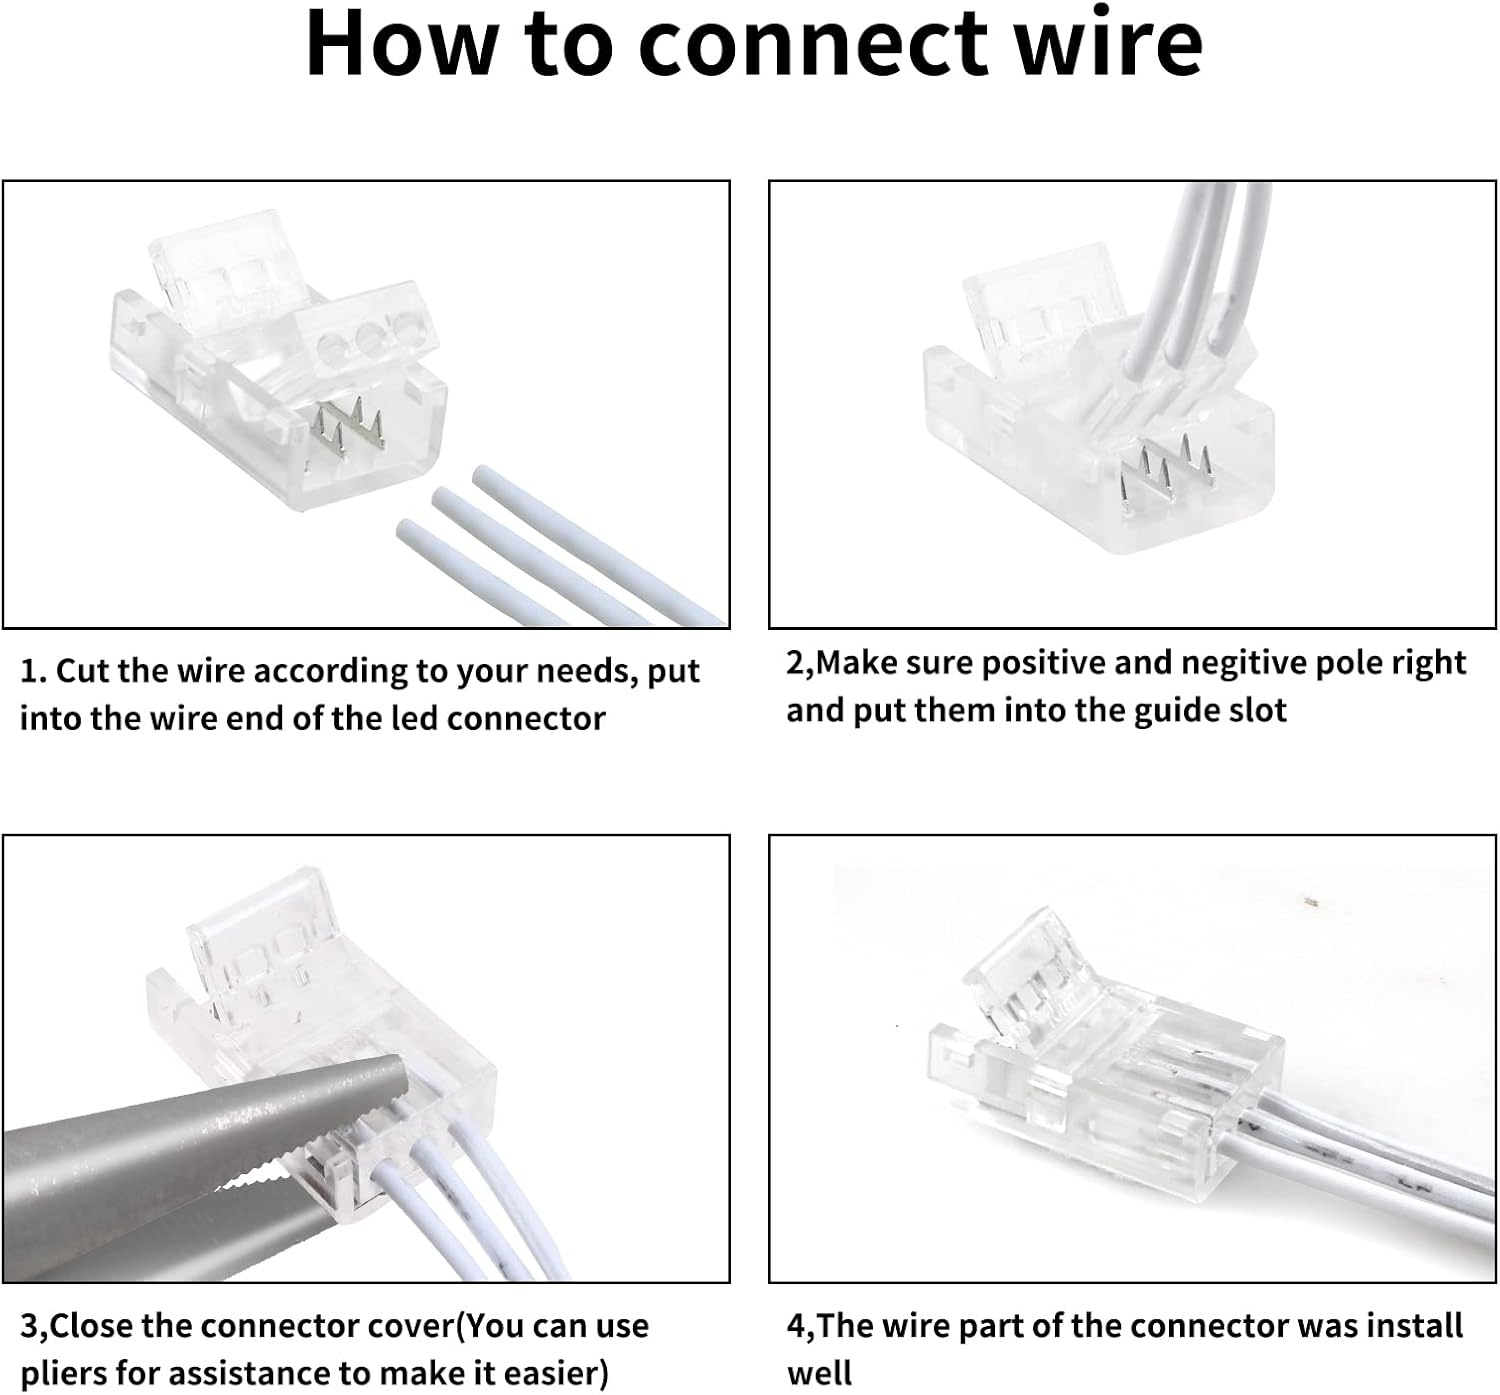
Image: A four-panel sequence demonstrating how to cut a wire, insert it into the connector's wire end, and close the cover.
6.3. Connecting the LED Strip
These steps apply to both waterproof and non-waterproof LED strips.
- Ensure the LED strip is cut at the designated cut mark.
- Flip up the strip end of the LED connector.
- Carefully slide the LED strip into the strip end of the connector. Make sure the copper pads on the LED strip align with the metal pins inside the connector. For waterproof strips, you may need to gently peel back a small portion of the silicone covering at the connection point to ensure proper contact.
- Press down the connector cover firmly until it clicks into place.

Image: A four-panel sequence demonstrating how to prepare an LED strip, open the connector's strip end, insert the strip, and close the cover.
6.4. Important Installation Tips
- Polarity: Always ensure the "+V", "DI", and "GND" markings on the LED strip align with the corresponding pins in the connector. Incorrect polarity can damage the strip.
- Secure Connection: The front of the LED strip should face down to ensure the contacts make proper connection with the copper pins of the connector.
- Waterproof Strips: For IP65 waterproof strips, it is crucial to remove a small section of the silicone coating over the copper pads at the cut point to allow the connector pins to make direct contact.

Image: Visual instructions emphasizing correct polarity alignment and ensuring the copper tips of the connector make contact with the LED strip's pads.
7. Operating the Connected LED Strip
Once the connectors are securely installed and all connections are verified:
- Connect the wires from the connector to your compatible 0-36V DC power supply.
- Power on the LED strip. The strip should illuminate according to its design (e.g., WS2811/WS2812B addressable LEDs).
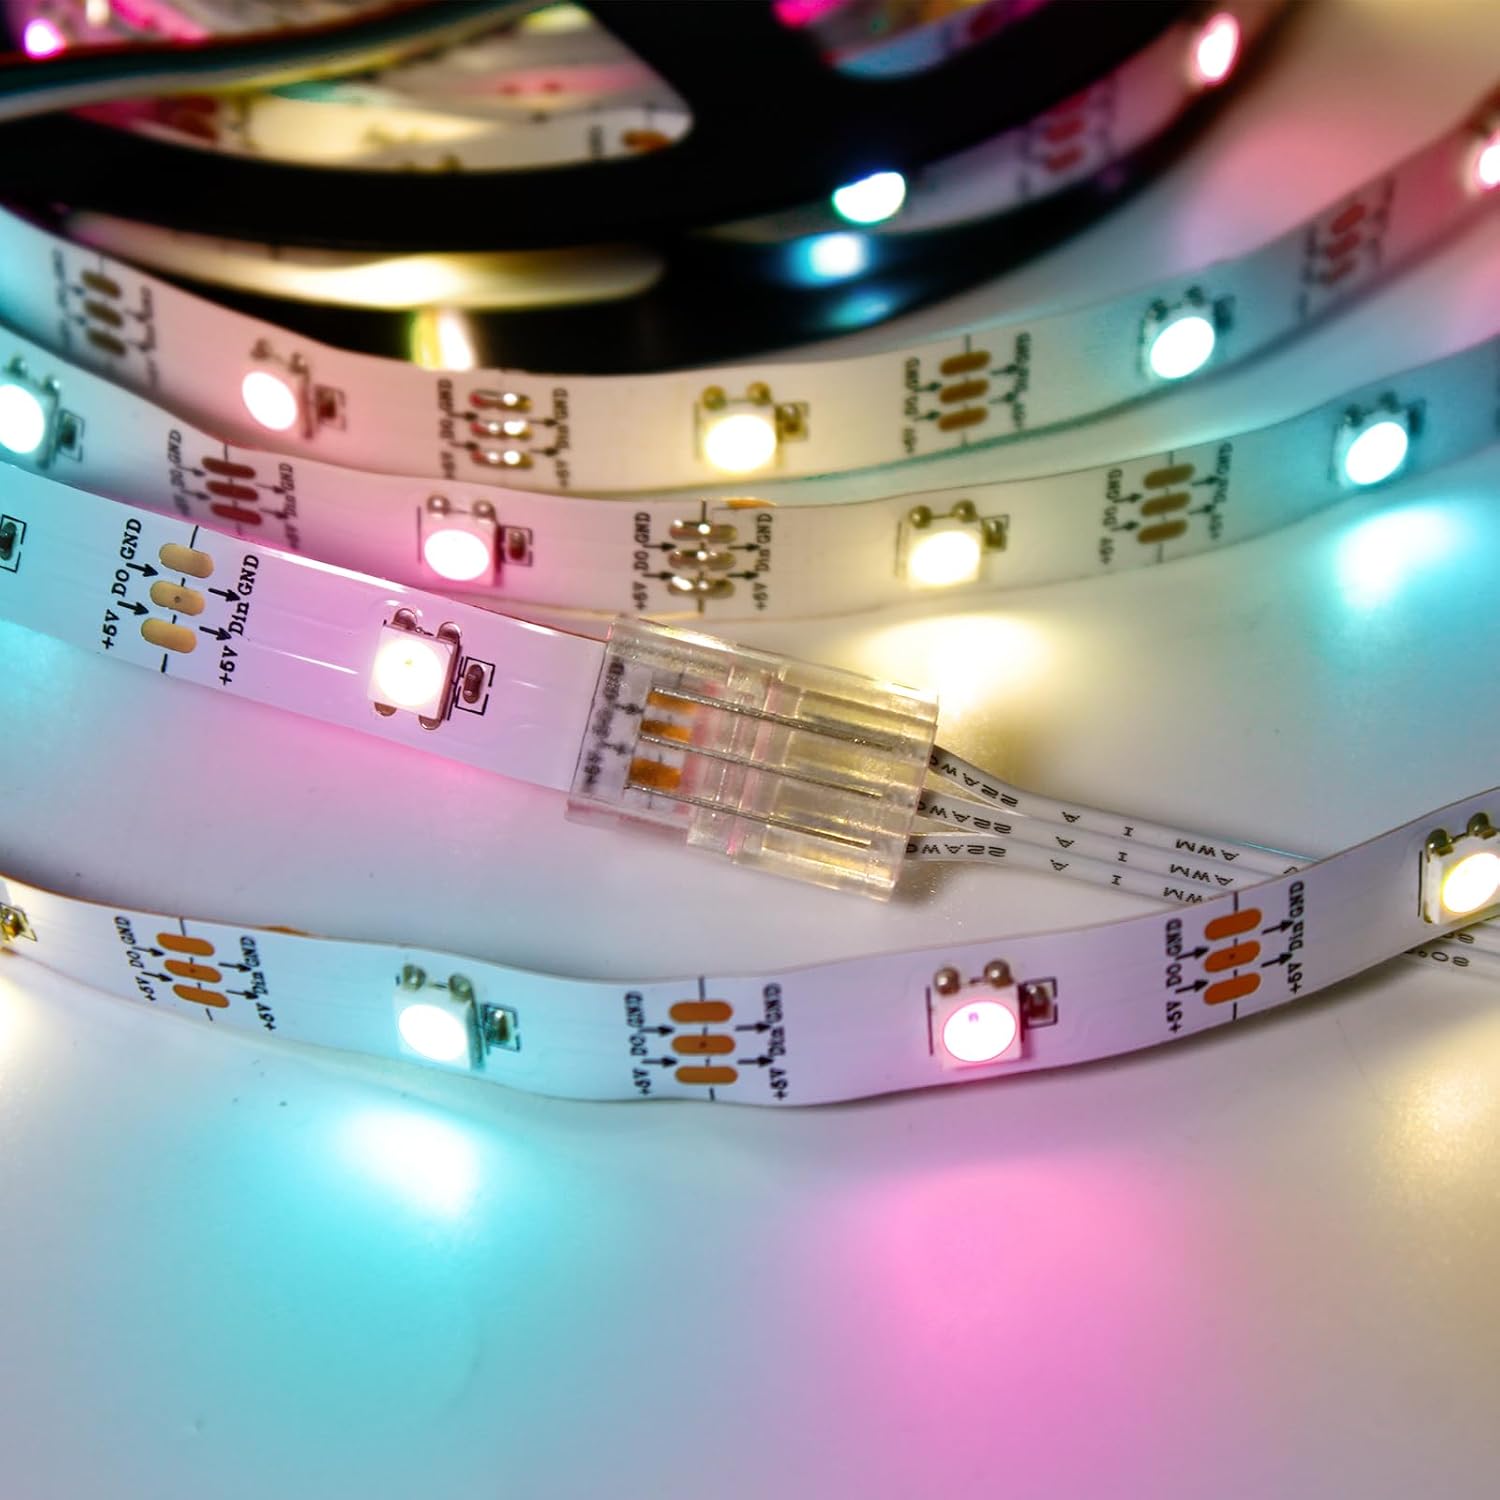
Image: An illuminated LED strip connected with the RGBZONE connector, demonstrating a successful connection.
8. Troubleshooting
- LED strip not lighting up:
- Check if the power supply is connected and functioning correctly.
- Verify that the LED strip is inserted fully and correctly into the connector, ensuring the copper pads make contact with the pins.
- Confirm correct polarity (+V, DI, GND) alignment.
- For waterproof strips, ensure the silicone coating has been removed from the contact points.
- Check if the wire gauge is 22 AWG.
- Partial illumination or flickering:
- Re-check all connections for secure contact. The pins might not be fully piercing the wire insulation or contacting the LED strip pads.
- Ensure the connector covers are firmly closed.
- Connector difficult to close:
- Ensure the wires and LED strip are properly aligned in their respective channels.
- Use pliers gently to assist in closing the cover, applying even pressure.
9. Instructional Videos
For visual guidance, please refer to the following instructional videos:
9.1. How to use the 3 pin LED strip connector
Video: A step-by-step demonstration on how to properly use the 3-pin LED strip connector for connecting LED strips to wires. Duration: 0:45.
9.2. How to use the 3 pin 10mm LED strip connector
Video: A detailed guide on the installation process for the 3-pin 10mm LED strip connector, showing how to achieve a secure connection. Duration: 0:36.
10. Warranty and Support
For warranty information or technical support, please contact RGBZONE customer service through the retailer where the product was purchased. Please have your model number (FB0425) and purchase date available.