1. Introduction
Thank you for choosing the Vive Precision Automatic Blood Pressure Machine. This device is designed for accurate and convenient blood pressure and pulse rate measurement on the upper arm. It is intended for home use and provides reliable readings to help you monitor your cardiovascular health.
2. Important Safety Information
- Consult your physician before using this device if you have any medical conditions or are on medication.
- Do not use this device for diagnostic purposes. Always consult a healthcare professional for interpretation of your readings.
- Avoid taking measurements in a moving vehicle or during physical activity.
- Do not use the cuff on an injured arm or an arm undergoing medical treatment.
- Keep the device out of reach of children.
- Do not attempt to disassemble or modify the device.
3. Package Contents
Your Vive Precision Blood Pressure Machine package includes the following items:
- Blood Pressure Monitor (Main Unit)
- 1 Wide Range Arm Cuff (fits arm circumferences 8.5" to 16.5")
- 4 AAA Batteries
- Instruction Manual
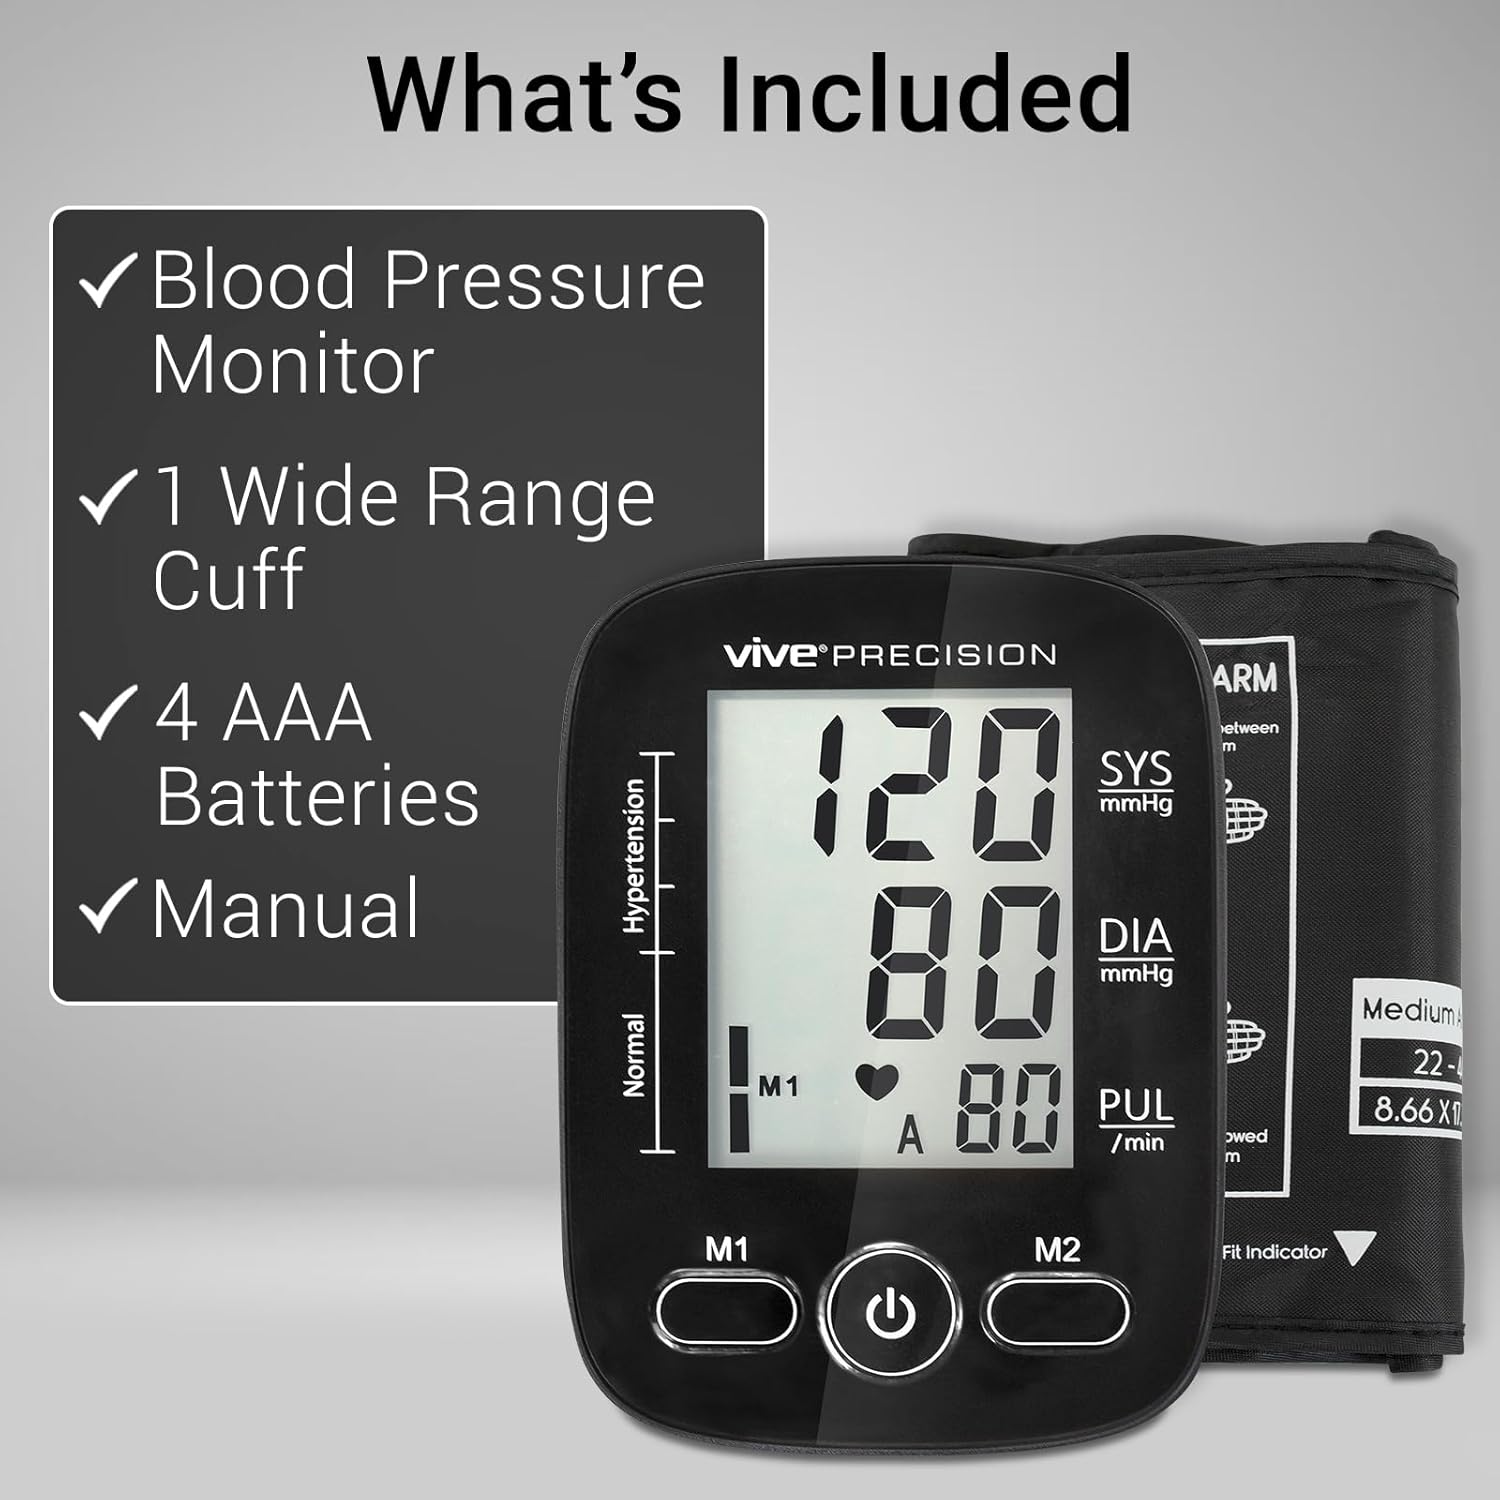
Image: The package contents, including the monitor, cuff, batteries, and manual.
4. Setup
4.1. Battery Installation
- Open the battery compartment cover on the back of the monitor.
- Insert the four AAA batteries, ensuring correct polarity (+/-).
- Close the battery compartment cover securely.
The device can also be powered via a Micro USB cable (not included) for convenience.
4.2. Connecting the Arm Cuff
- Locate the air hose connector on the side of the monitor.
- Firmly insert the air hose from the cuff into the connector port until it clicks into place.
4.3. Proper Cuff Placement
Accurate cuff placement is crucial for reliable readings. Follow these steps:
- Wrap the cuff around your upper left arm.
- Position the cuff so that its lower edge is approximately 1 inch (2-3 cm) above your elbow. The artery mark on the cuff should be placed over the main artery on the inside of your arm.
- Ensure the cuff is snug but not too tight. You should be able to fit two fingers comfortably between your arm and the cuff.
- If the left arm is difficult to use, you may use the right arm. Note that readings may differ between arms.

Image: A man correctly placing the blood pressure cuff on his upper arm, 1 inch above the elbow.

Image: A visual guide showing steps to wrap the cuff, position it above the elbow, check fit, and press the power button.
5. Operating Instructions
5.1. Taking a Measurement
- Sit comfortably with your back straight and feet flat on the floor. Rest your arm on a table so the cuff is at heart level.
- Take 3-5 deep breaths to relax before starting the measurement. Avoid moving or talking during the measurement.
- Press the Power button (
 ) to turn on the device. All available symbols will appear on the display.
 - The cuff will automatically inflate, and the display will show the increasing pressure.
- Once the measurement is complete, the cuff will deflate, and your Systolic (SYS), Diastolic (DIA), and Pulse (PUL) readings will be displayed.
- If you need to retake the measurement, wait at least 1-3 minutes to allow blood flow to normalize.
Video: Official product video demonstrating the blood pressure monitor, including setup and measurement process.
5.2. Dual User Support and Memory Function
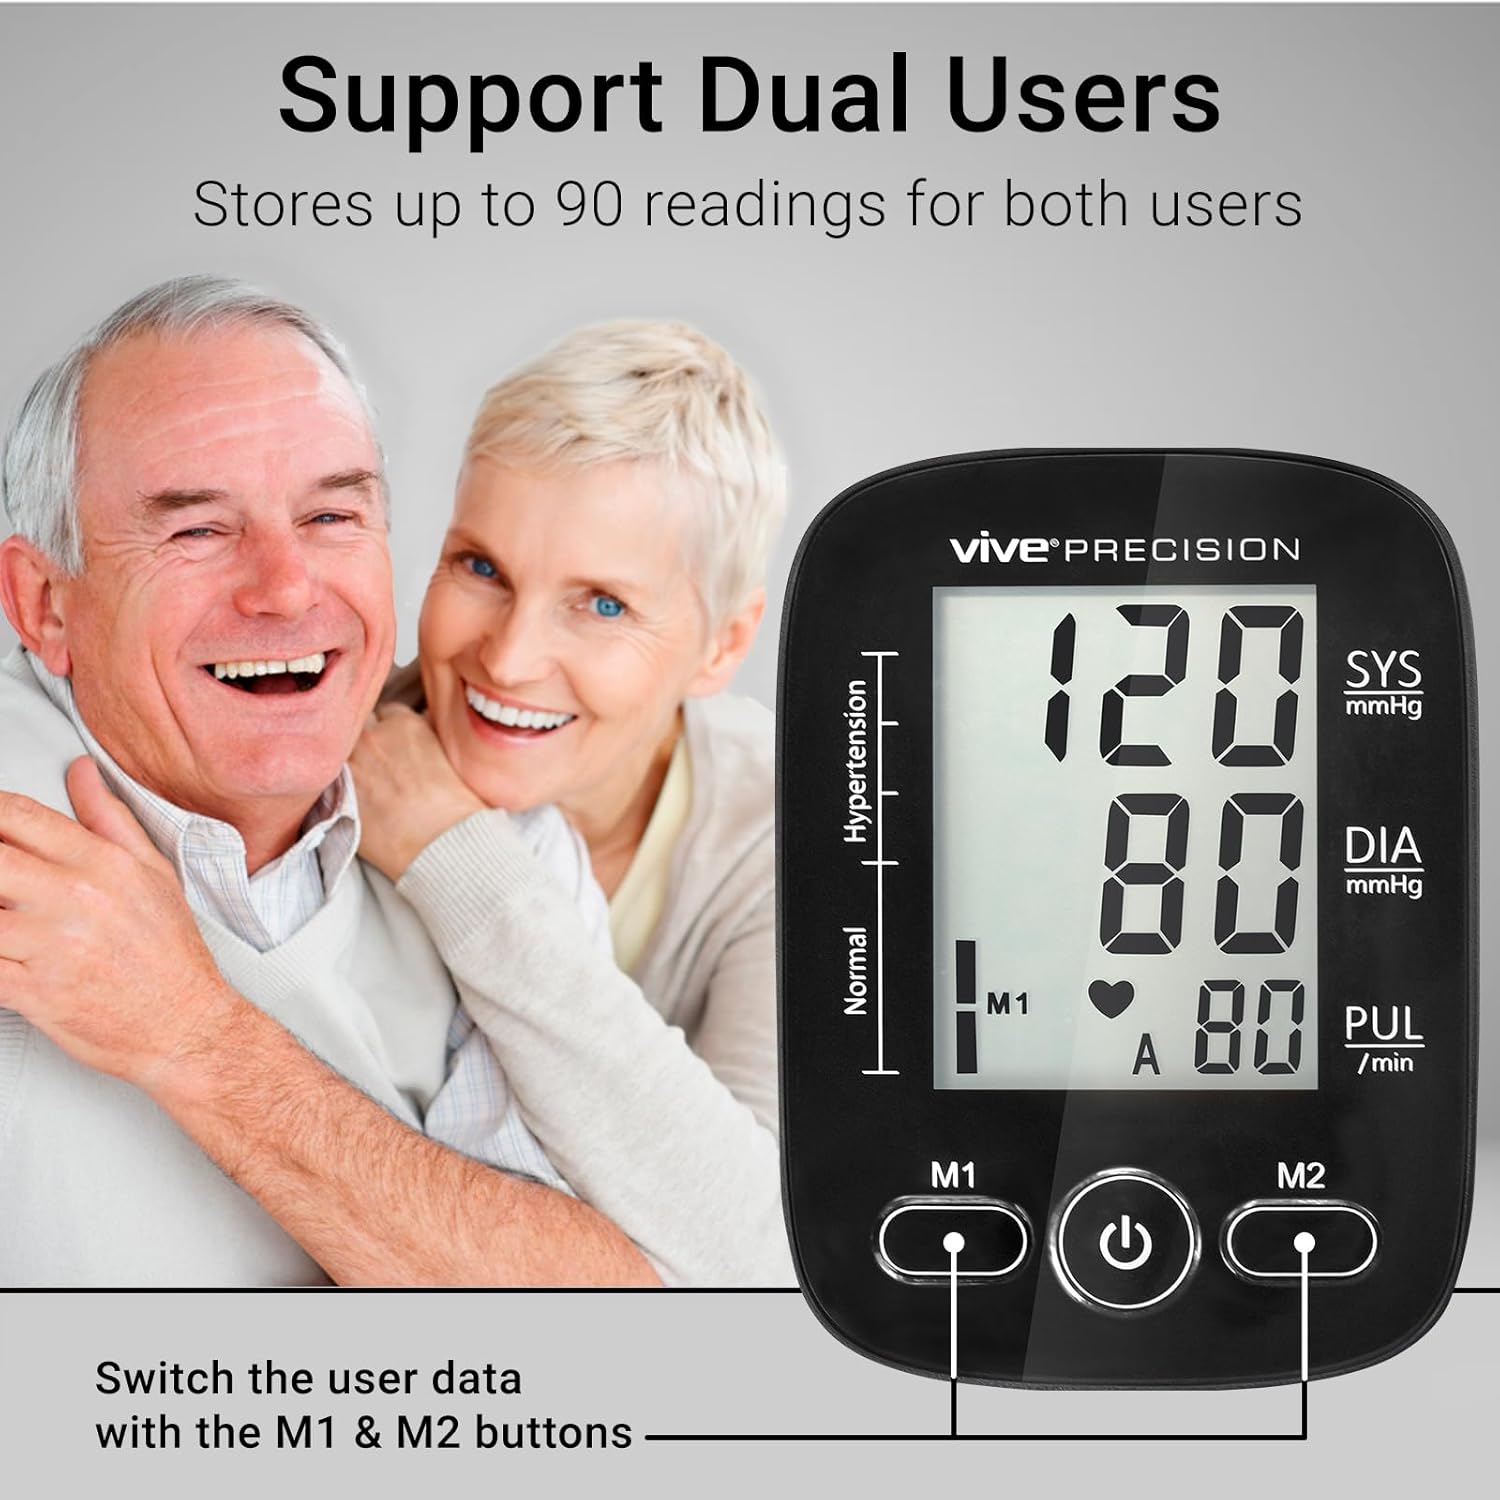
The monitor supports two users (M1 and M2) and can store up to 90 readings for each user, totaling 180 readings. It also calculates the average of the latest 3 measurements.
- After a measurement, press either the M1 or M2 button to store the result in the corresponding user's memory.
- To view previous readings, press M1 or M2 repeatedly to cycle through stored measurements. The latest reading is displayed first.
- To delete all readings for a user, hold down the respective M1 or M2 button for at least 5 seconds until 'CLR' appears on the screen.
Image: The monitor display highlighting the M1 and M2 buttons for dual-user memory.
6. Understanding Your Readings
Your blood pressure reading consists of two numbers:
- Systolic Pressure (SYS): The top number, which indicates the pressure in your arteries when your heart beats.
- Diastolic Pressure (DIA): The bottom number, which indicates the pressure in your arteries between beats.
- Pulse Rate (PUL): Your heart rate, measured in beats per minute.

Image: A detailed view of the monitor's LCD screen, labeling Systolic, Diastolic, and Pulse readings.
6.1. Blood Pressure Classification
The monitor automatically classifies your readings according to internationally recognized guidelines, displayed on the left side of the screen. This ranges from Normal blood pressure to Elevated, and Stages 1, 2, and Hypertensive Crisis.

Image: The blood pressure monitor displaying a reading with the classification bar indicating 'Normal' and 'Hypertension' ranges.
7. Irregular Heartbeat Detection
This device is equipped with an irregular heartbeat detector. If an irregular heartbeat is detected during a measurement, a heart symbol with an outline ( not a solid heart ) will flash on the LCD screen. This indicates that an arrhythmia or heart rate abnormality may be present.
If you frequently see this symbol, it is recommended to contact your physician for further evaluation.
8. Maintenance, Care, Storage, & Disposal
8.1. Care and Cleaning
- Clean the monitor's LCD screen and outer casing with a soft, dry cloth. For the cuff, use a slightly damp cloth.
- Do not use abrasive cleaners, solvents, gasoline, alcohol, or other harsh chemicals.
- This device is not waterproof. Do not immerse the device in water or rinse it under a sink/faucet.
8.2. Storage
- Store the device in a cool, dry place, away from direct sunlight, moisture, and extreme temperatures.
- Remove the batteries if the device will not be used for an extended period to prevent leakage.
- Keep the cuff away from sharp objects to prevent damage. Do not extend or twist the cuff.
8.3. Disposal
Dispose of the device and batteries according to local regulations for electronic waste. Do not dispose of with general household waste.
9. Troubleshooting
| Problem | Possible Cause | Solution |
|---|---|---|
| Device does not turn on. | Batteries are dead or incorrectly inserted. | Replace batteries or check polarity. Ensure Micro USB cable is properly connected if using AC power. |
| Inaccurate or inconsistent readings. | Improper cuff placement, movement/talking during measurement, or incorrect posture. | Ensure cuff is placed correctly (1 inch above elbow, artery mark aligned). Remain still and silent during measurement. Maintain correct posture (back straight, feet flat, arm at heart level). |
| Cuff does not inflate or deflates too quickly. | Air hose not properly connected or cuff is damaged. | Check that the air hose is securely connected to both the monitor and the cuff. Inspect cuff for any leaks or damage. |
| Irregular Heartbeat symbol appears frequently. | Possible arrhythmia or excessive body movement during measurement. | Ensure you are relaxed and still during measurement. If the symbol persists, consult your physician. |
10. Specifications
- Model Number: DMD1068
- Brand: Vive Precision
- Power Source: 4 AAA batteries (included) or Micro USB (5V, 500mA, cable/adapter not included)
- Cuff Size: M-L size, 22-42 cm (8.7 - 16.5 inches) arm circumference
- Display Type: Large LCD Display with backlight
- Memory: Up to 90 readings per user (2 users total)
- Measurement Method: Oscillometric
- Measurement Range: Blood Pressure: 0-299 mmHg; Pulse: 40-199 beats/minute
- Accuracy: Pressure: ±3 mmHg; Pulse: ±5% of reading
- Operating Conditions: Temperature: 5°C to 40°C (41°F to 104°F); Humidity: 15% to 90% RH
- Storage Conditions: Temperature: -20°C to 55°C (-4°F to 131°F); Humidity: 15% to 90% RH
- Device Dimensions: 6.57 x 4.41 x 3.82 inches
- Device Weight: 1.06 Pounds (approx.)
11. Warranty and Support
Vive Precision offers a 60-day guarantee on this product, ensuring your satisfaction. Additionally, the product is backed by a 1-year guarantee from Vive Health.
For customer service, support, or warranty claims, please visit the official Vive Health website or contact their customer support directly. Refer to the contact information provided in your product packaging or on the Vive Health website.

Image: Vive Health 1 Year Guarantee information.
For additional resources and guides, please visit vivehealth.com.
