1. Introduction
This manual provides detailed instructions for the proper assembly, installation, operation, and maintenance of your Metty Metal 3-Step Stair Handrail, Model Q350. Please read this manual thoroughly before installation and retain it for future reference. Adhering to these instructions will ensure safe and reliable use of your handrail.
Video: Overview of Metty Metal handrail products, demonstrating various applications and features.
2. Safety Information
Always prioritize safety during installation and use. Failure to follow these safety guidelines may result in injury or damage to the product.
- Ensure all fasteners are securely tightened before using the handrail.
- Regularly inspect the handrail for any signs of wear, damage, or loose connections.
- Do not exceed the maximum weight capacity of 600 pounds.
- Use appropriate personal protective equipment (PPE) during installation, including safety glasses and gloves.
- If installing into concrete, use a hammer drill with the correct masonry bit for optimal results.
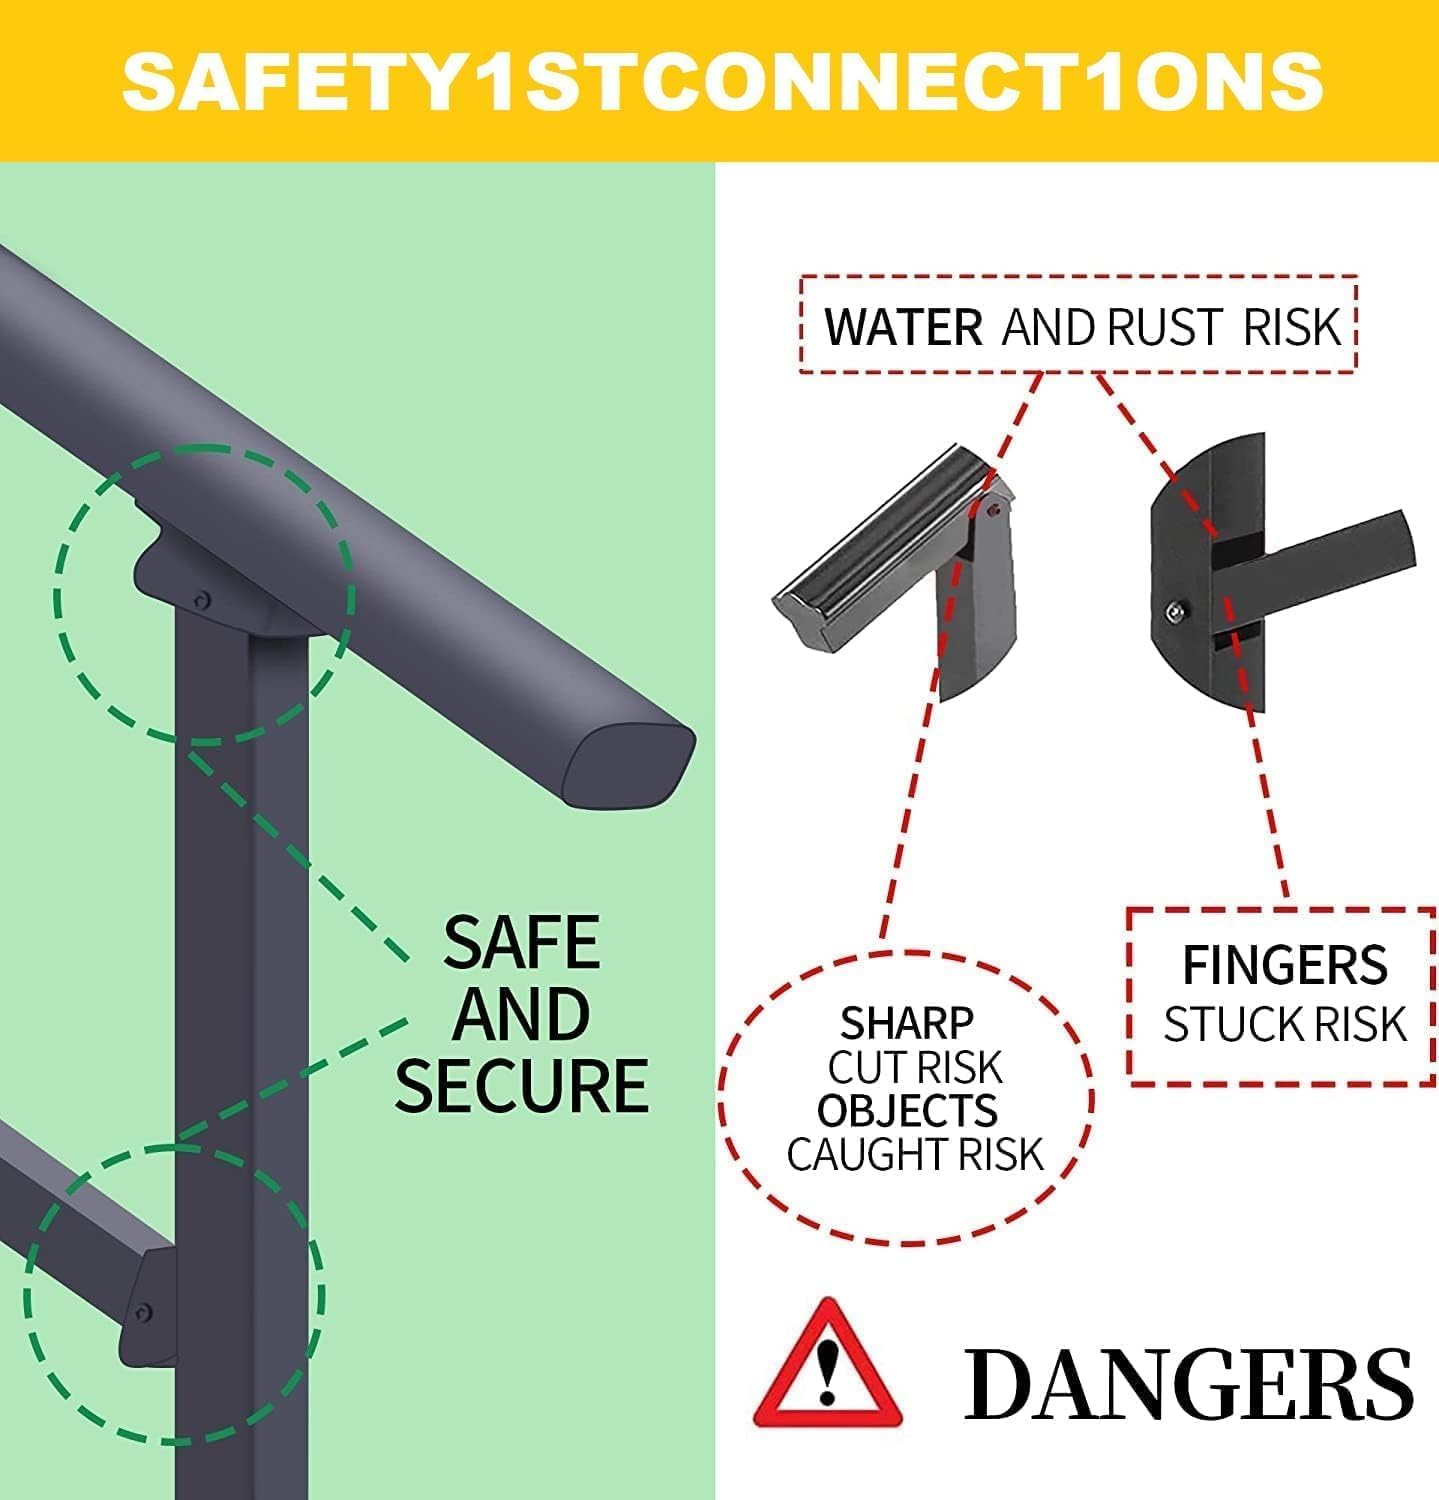
Image: Illustration highlighting the importance of safe and secure connections to prevent hazards like rust and pinching.
3. Package Contents
Verify that all components listed below are present and undamaged before beginning assembly.
- Handrail Sections (Main rail, support bars)
- Mounting Plates
- Connection Bolts and Screws
- Wrench
- Allen Key
- Drill Bits (for wood and masonry)
- Base Covers
- Installation Guide

Image: All components included in the Metty Metal 3-Step Stair Handrail kit.
4. Product Specifications
| Feature | Specification |
|---|---|
| Brand | Metty Metal |
| Model Number | Q350 |
| Material | Alloy Steel, Cast Iron |
| Color | Black-Straight |
| Item Weight | 12.17 pounds (5.53 Kilograms) |
| Product Dimensions | 36"L x 25"W |
| Weight Capacity | 600 Pounds |
| Steps Accommodated | Adjustable for 1 to 3 steps |
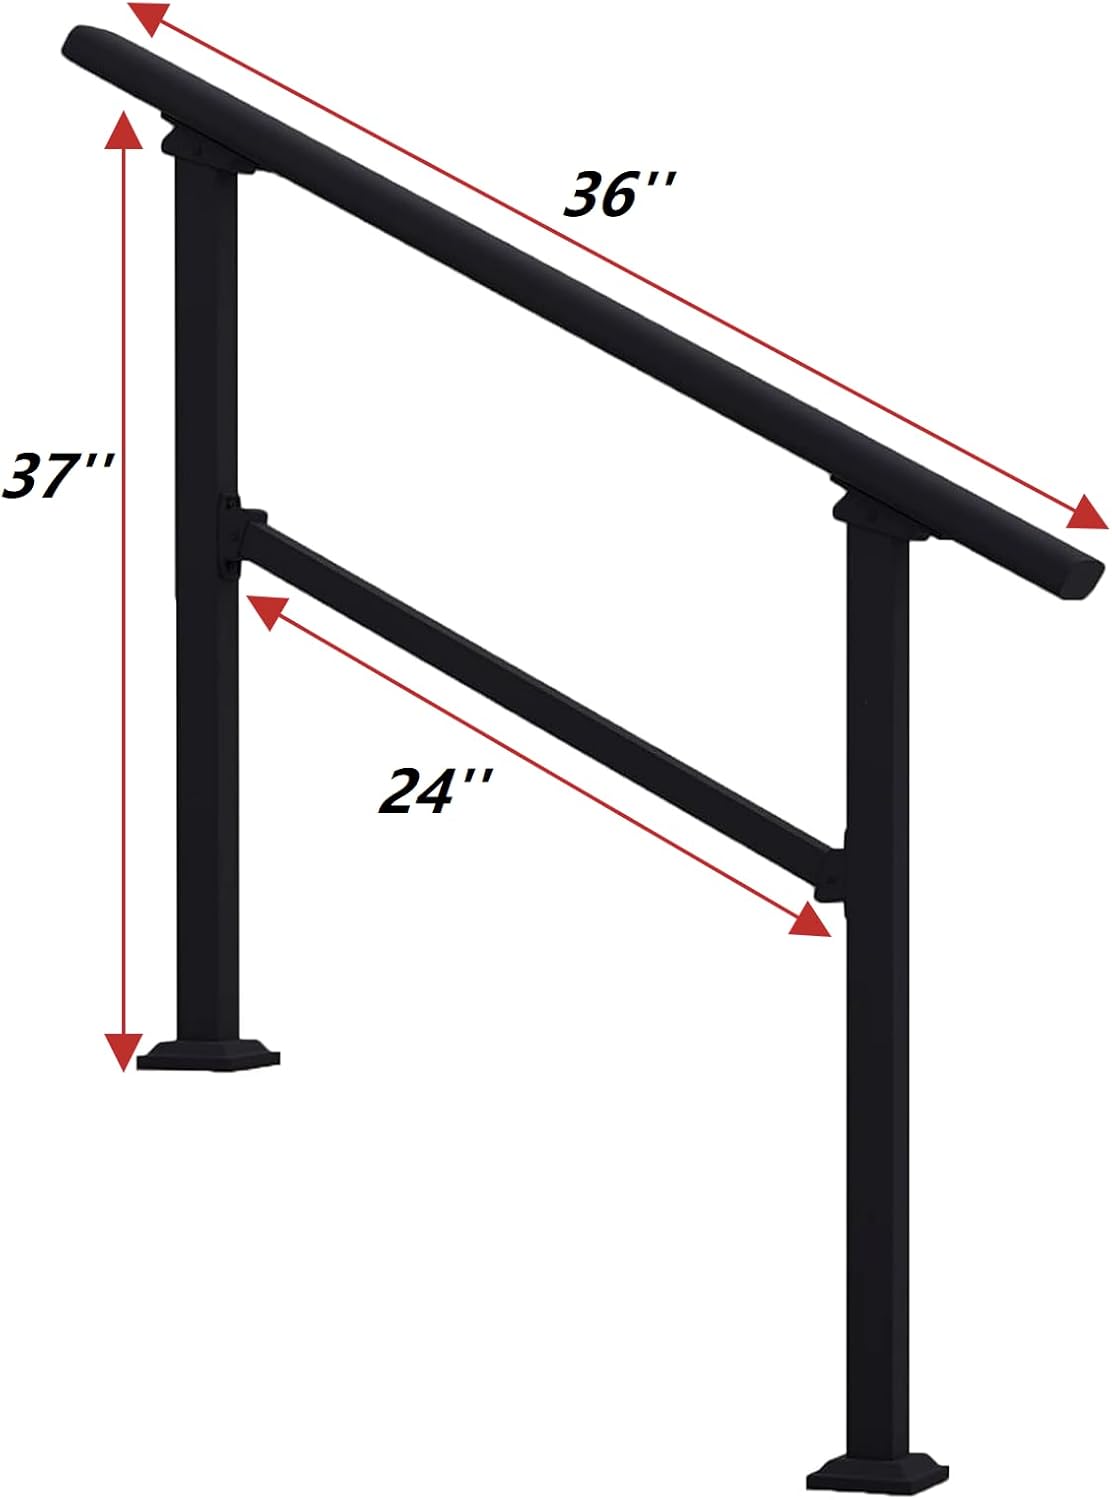
Image: Dimensional drawing of the handrail, indicating key measurements.
5. Setup and Installation
The Metty Metal handrail is designed for straightforward installation. Follow these steps carefully:
- Assemble Handrail Components: Lay out all handrail sections on a protective surface. Loosely connect the main handrail and support bars using the provided bolts. Do not fully tighten at this stage to allow for angle adjustment.
- Position and Mark: Place the assembled handrail in the desired location on your steps. Adjust the angle to fit your stairs (suitable for 1 to 3 steps). Once positioned correctly, mark the drilling points for the mounting plates on the step surface.
- Drill Holes: Using the appropriate drill bit (masonry bit for concrete/brick, wood bit for wood surfaces) and a suitable drill (a hammer drill is recommended for concrete), drill holes at the marked locations. Ensure the depth is sufficient for the anchors.
- Secure Handrail: Insert the anchors into the drilled holes. Place the handrail's mounting plates over the anchors and secure them tightly using the provided screws and wrench. Ensure the handrail is plumb and stable.
- Final Tightening and Covers: Once the handrail is securely mounted, fully tighten all connection bolts between the handrail sections. Finally, snap the decorative base covers over the mounting plates to conceal the fasteners and provide a finished look.

Image: Detailed view of the attachment brackets and screws for handrail assembly.

Image: Examples of various floor types suitable for handrail installation, including cement, brick, wood, and marble.
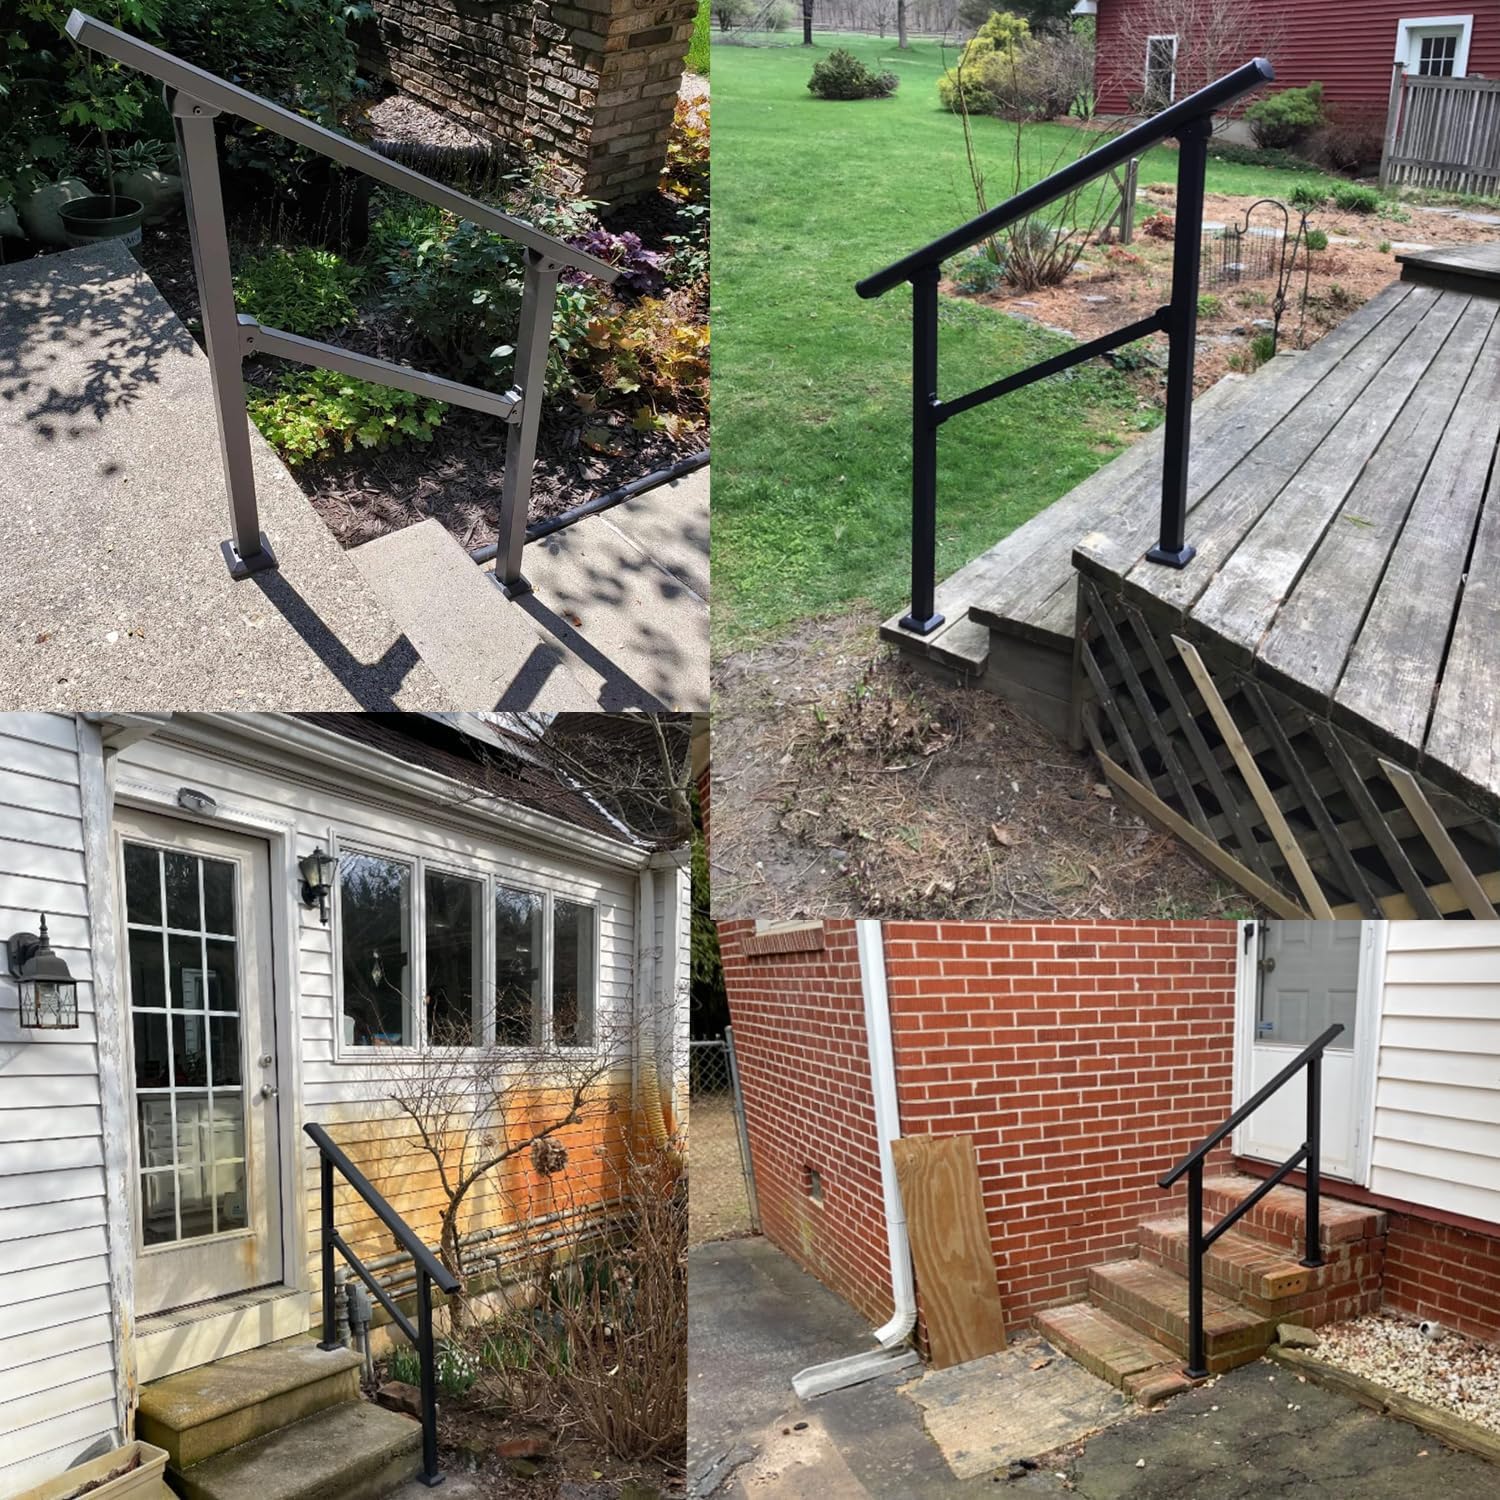
Image: Various real-world installation examples of the handrail on different outdoor step materials.
6. Operation
The handrail provides stable support for ascending and descending stairs. Its smooth, curved design ensures a comfortable and secure grip. It is suitable for individuals seeking additional balance, including children, the elderly, and those with mobility challenges.

Image: Demonstrates the handrail providing support for an elderly person and children on outdoor steps.

Image: Comparison highlighting the ergonomic oval armrests of the Metty Metal handrail for improved grip and safety.
7. Maintenance
To ensure the longevity and appearance of your handrail, regular maintenance is recommended:
- Cleaning: Wipe down the handrail periodically with a damp cloth and mild soap to remove dirt and grime. Avoid abrasive cleaners that could damage the finish.
- Inspection: Annually, inspect all bolts and connections to ensure they remain tight. Check for any signs of rust, corrosion, or structural damage.
- Rust Prevention: The handrail features a rust-resistant coating. If any scratches or chips occur, touch up the affected areas with appropriate outdoor-grade paint to prevent rust.
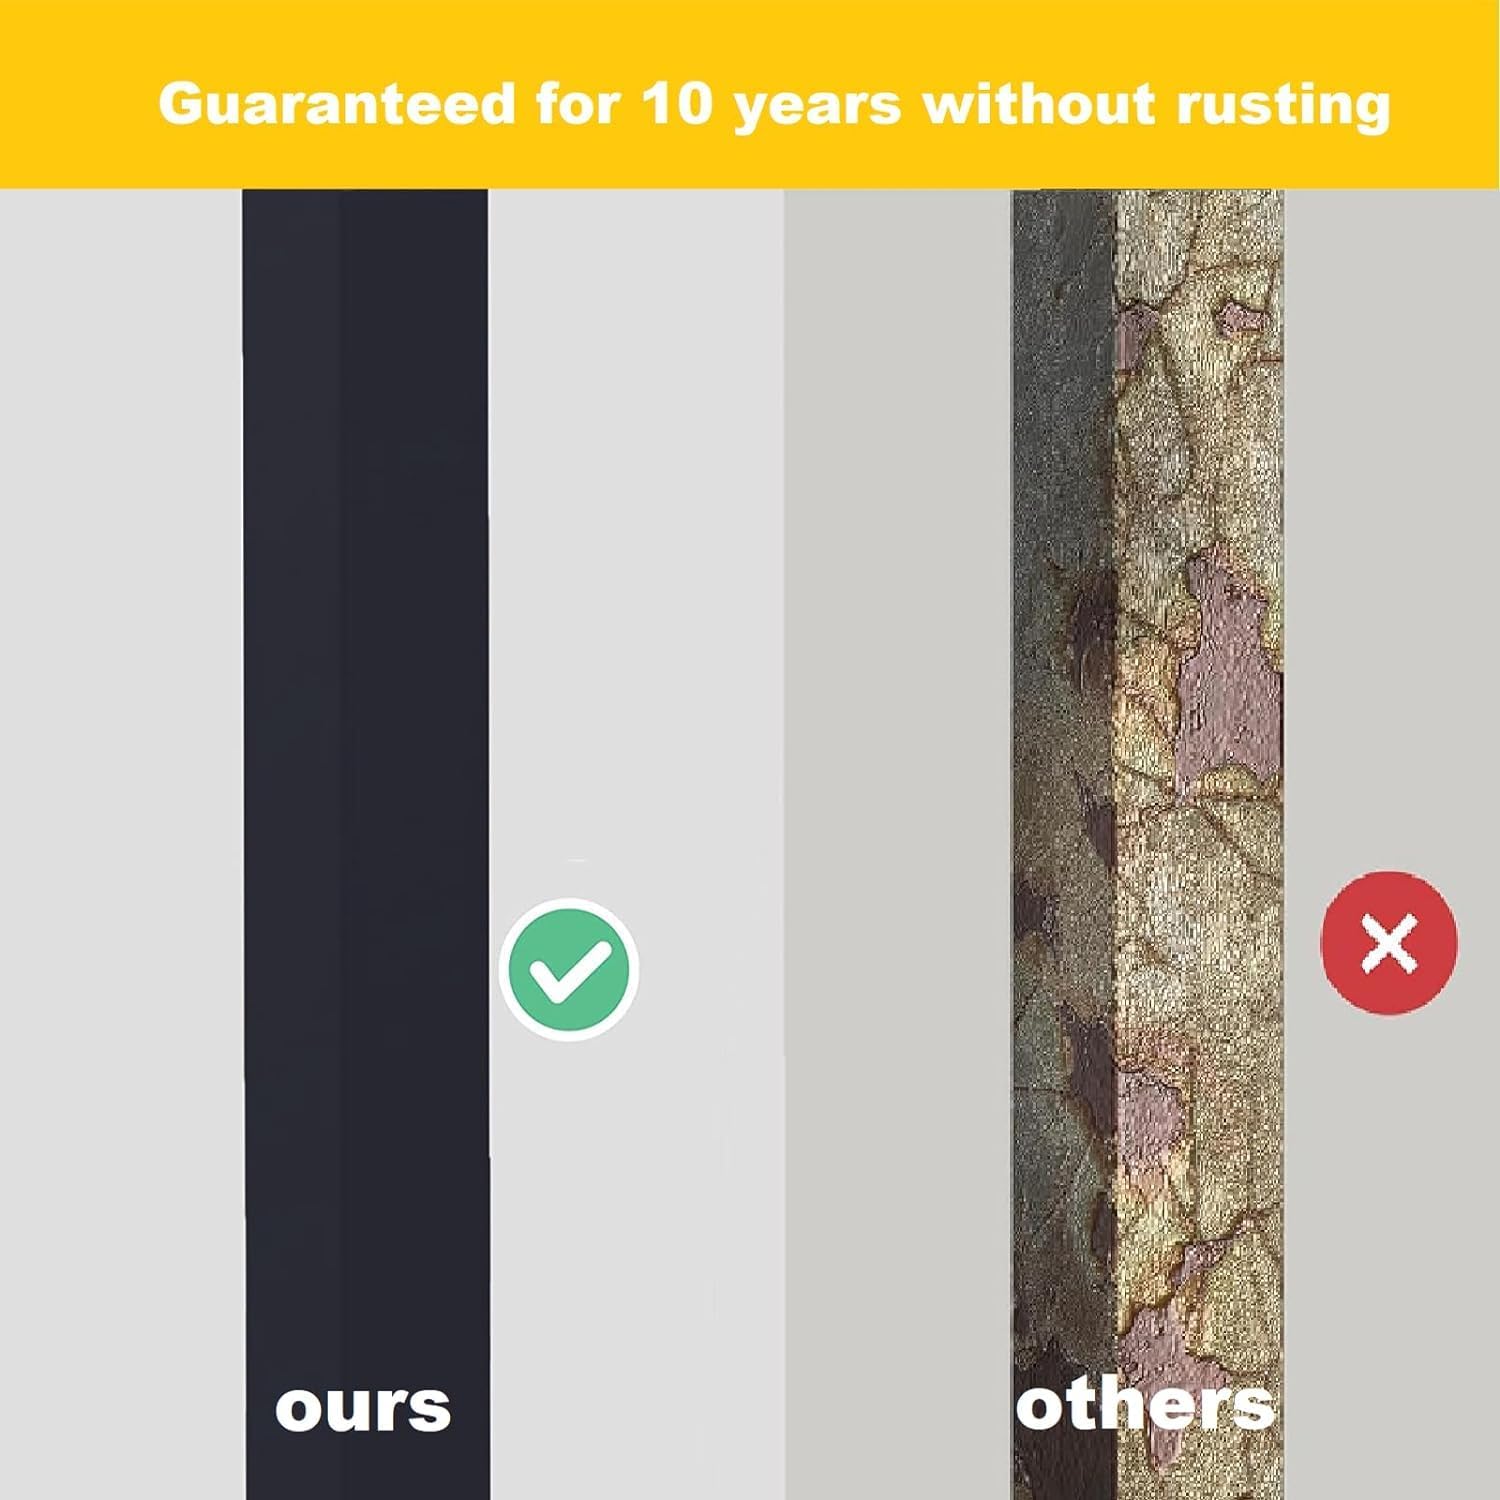
Image: Visual comparison demonstrating the rust-resistant properties of the Metty Metal handrail.
8. Troubleshooting
If you encounter any issues with your handrail, refer to the following common problems and solutions:
- Wobbling Handrail: Check all mounting bolts and connection screws. Tighten any loose fasteners. Ensure the mounting surface is stable and level.
- Difficulty Adjusting Angle: Loosen the connection bolts slightly to allow for easier adjustment. Once the desired angle is achieved, retighten all bolts securely.
- Surface Scratches/Chips: Clean the affected area and apply a rust-inhibiting primer followed by an outdoor-grade paint matching the handrail's color.
9. Warranty and Support
Metty Metal products are designed for durability and performance. For specific warranty details or technical support, please refer to the product packaging or visit the official Metty Metal store on Amazon. Ensure you retain your proof of purchase for any warranty claims.
For further assistance, please contact Metty Metal customer service through the Amazon platform or the contact information provided with your product.