Anytek NT930599K-V2
Anytek Front Wheel Bearing & Hub Repair Kit
Model: NT930599K-V2
Compatible with 2000-2005 Toyota Echo, 2004-2006 Scion xA, 2004-2006 Scion xB (4 Lugs)
1. Product Overview
This Anytek Front Wheel Bearing & Hub Repair Kit is designed to replace worn or damaged front wheel bearing and hub assemblies on specified Toyota and Scion models. It includes the necessary components for a complete repair, aiming to restore vehicle stability, reduce noise, and ensure proper wheel function.
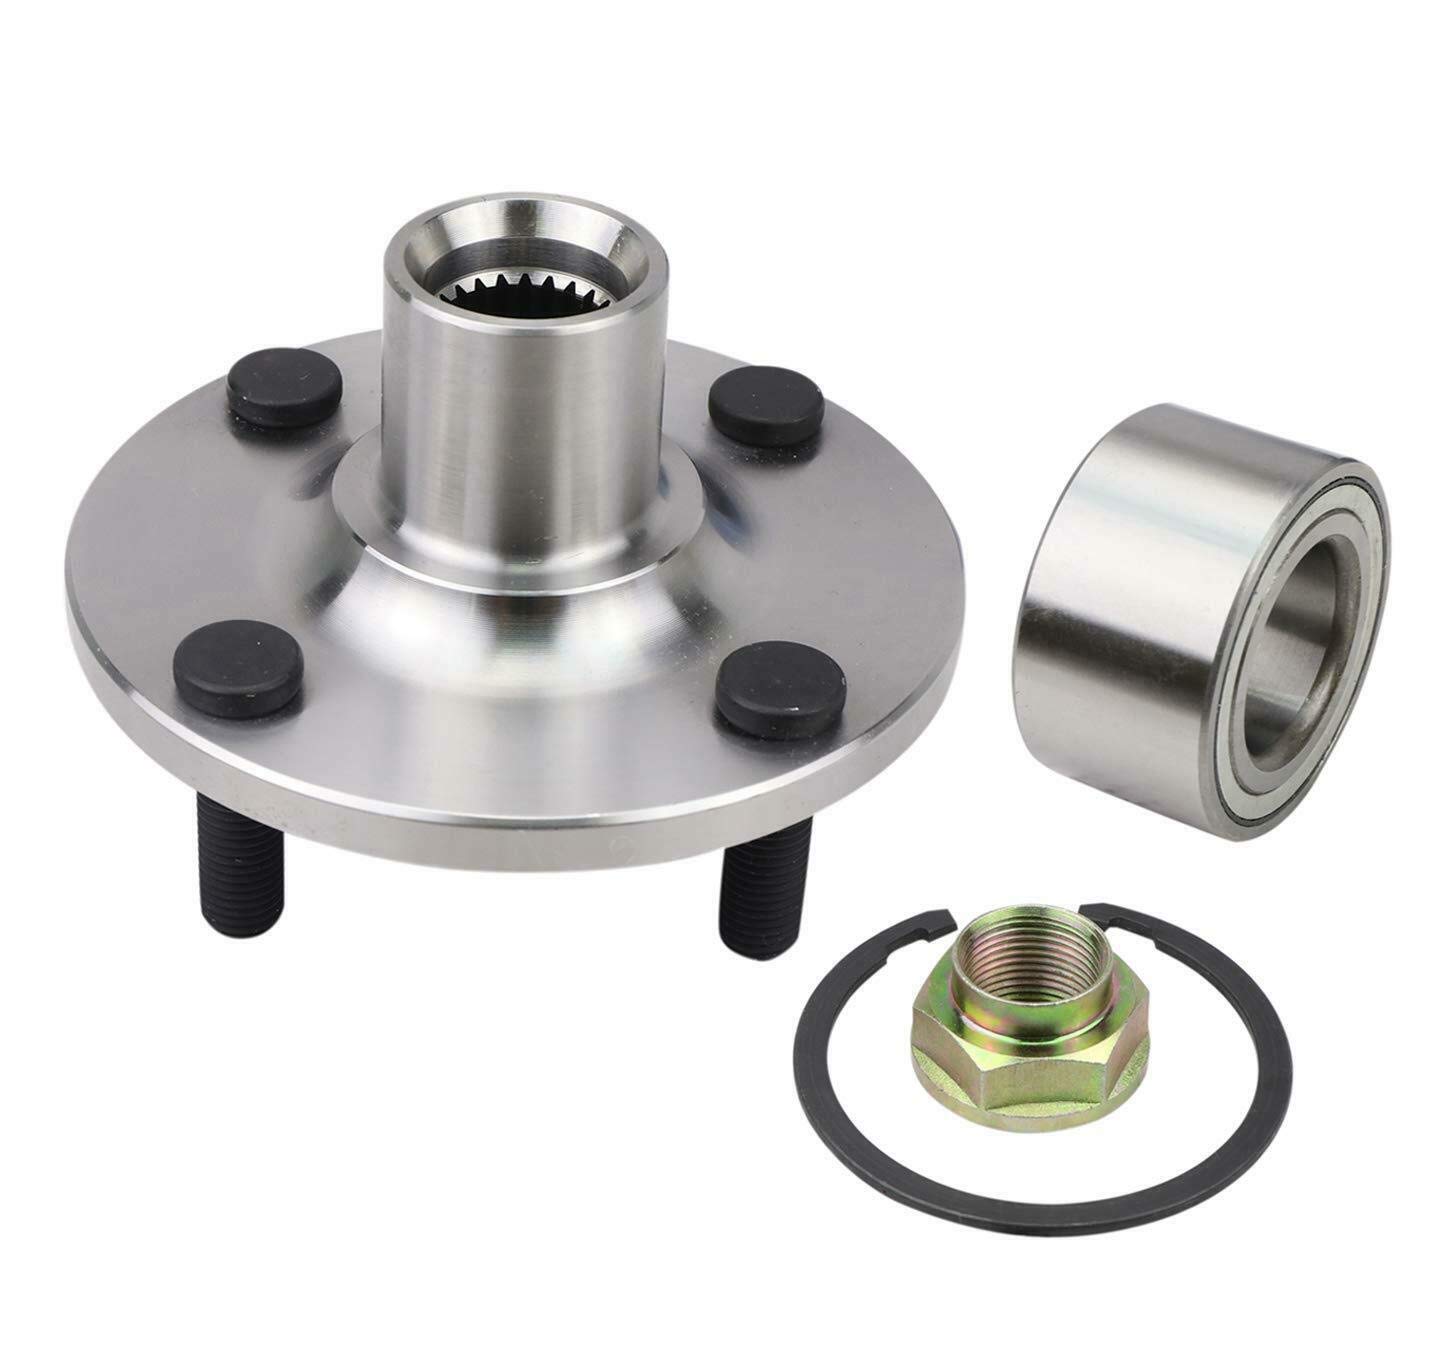
Image 1.1: Components of the Anytek Front Wheel Bearing & Hub Repair Kit, including the hub assembly, bearing, and retaining nut.
Key Features:
- Precision Engineered: Designed to meet or exceed OEM specifications for a precise fit.
- Smooth & Quiet Operation: Constructed to minimize friction and noise for a comfortable ride.
- Durable & Long-Lasting: Made with premium materials and advanced seals for resistance against wear, corrosion, and extreme temperatures.
- Enhanced Vehicle Stability & Safety: Contributes to improved handling and reduced vibrations.
2. Safety Information
Automotive repair can be hazardous. Always follow safety precautions to prevent injury or damage to the vehicle. If you are not confident in performing this repair, seek assistance from a qualified mechanic.
- Wear appropriate personal protective equipment (PPE), including safety glasses and gloves.
- Ensure the vehicle is securely supported on jack stands on a level surface before beginning work. Never rely solely on a jack.
- Disconnect the vehicle's battery before working on electrical components, if applicable.
- Use the correct tools for each step of the installation.
- Refer to your vehicle's service manual for specific torque specifications and additional procedures.
- Keep children and pets away from the work area.
3. Package Contents
Verify that all components are present and undamaged before beginning installation.
- 1 x Front Wheel Hub Assembly (4 Lugs)
- 1 x Front Wheel Bearing
- 1 x Axle Nut
- 1 x Retaining Ring (Snap Ring)

Image 3.1: The complete kit showing the hub assembly, bearing, axle nut, and retaining ring. Icons indicate OE fitment, easy installation, corrosion protection, and a 10-year warranty.
4. Installation Guide
This section provides a general guide for installing the front wheel bearing and hub assembly. Specific steps may vary slightly depending on your vehicle model. Always consult your vehicle's factory service manual for detailed instructions and torque specifications.
Tools and Materials Required:
- Jack and Jack Stands
- Wheel Chocks
- Lug Wrench
- Socket Set (various sizes, including axle nut socket)
- Breaker Bar
- Torque Wrench
- Hammer/Mallet
- Pry Bar
- Bearing Press Tool (or suitable alternative for bearing removal/installation)
- Rust Penetrant
- Brake Cleaner
- Anti-seize Compound
Installation Steps:
- Prepare the Vehicle:
- Park the vehicle on a level surface.
- Engage the parking brake.
- Chock the rear wheels.
- Loosen the lug nuts on the wheel to be serviced, but do not remove them.
- Raise the front of the vehicle using a jack and secure it with jack stands.
- Remove the lug nuts and the wheel.
- Access the Hub Assembly:
- Remove the brake caliper and rotor. Support the caliper to avoid stressing the brake hose.
- Remove the dust cap and cotter pin from the axle nut.
- Loosen and remove the axle nut. This may require a large socket and breaker bar.
- Disconnect any ABS sensor wiring from the hub assembly, if present.
- Remove the bolts securing the hub assembly to the steering knuckle.
- Remove Old Hub and Bearing:
- Carefully separate the old hub assembly from the steering knuckle. It may require persuasion with a mallet or a puller.
- If the bearing is separate from the hub, use a bearing press tool to remove the old bearing from the steering knuckle.
- Install New Bearing and Hub:
- Clean the steering knuckle bore thoroughly.
- If installing a separate bearing, use a bearing press tool to press the new bearing into the steering knuckle. Ensure it is seated squarely and fully.
- Install the retaining ring (snap ring) to secure the bearing.
- Apply a thin layer of anti-seize compound to the mating surfaces of the new hub assembly and the steering knuckle.
- Position the new hub assembly onto the steering knuckle.
- Install and hand-tighten the bolts securing the hub assembly to the steering knuckle.
- Install the new axle nut and hand-tighten it.
- Reassembly and Torque:
- Reconnect any ABS sensor wiring.
- Install the brake rotor and caliper.
- Tighten the hub assembly bolts to the vehicle manufacturer's specified torque.
- Tighten the axle nut to the vehicle manufacturer's specified torque. Install a new cotter pin if applicable.
- Install the dust cap.
- Reinstall the wheel and hand-tighten the lug nuts.
- Final Steps:
- Lower the vehicle to the ground.
- Torque the lug nuts to the vehicle manufacturer's specifications in a star pattern.
- Test drive the vehicle in a safe area to ensure proper function and listen for any unusual noises.

Image 4.1: The wheel bearing and hub assembly, illustrating its design for direct installation.
5. Operating Considerations
After installation, the new wheel bearing and hub assembly should provide smooth and quiet operation. Pay attention to any unusual noises or vibrations during the first few drives. A brief break-in period is not typically required for wheel bearings, but careful driving is always recommended after any significant suspension or brake work.
6. Maintenance
Wheel bearing and hub assemblies are generally maintenance-free components designed for long service life. However, regular vehicle inspections can help identify potential issues early.
- Regular Inspections: During tire rotations or brake service, inspect the wheel bearing for any signs of play, looseness, or unusual noise when rotating the wheel by hand.
- Avoid Impact Damage: Potholes and curb strikes can damage wheel bearings. Drive carefully to avoid such impacts.
- Proper Torque: Ensure lug nuts are always torqued to manufacturer specifications to prevent uneven stress on the hub.

Image 6.1: Internal view of a ball bearing, highlighting the precision components that require no user maintenance.
7. Troubleshooting
If you experience issues after installing the new wheel bearing and hub kit, consider the following common problems and solutions:
| Symptom | Possible Cause | Solution |
|---|---|---|
| Humming, grinding, or roaring noise from the wheel. | Damaged or improperly installed bearing. | Re-inspect installation for proper seating and torque. If noise persists, the bearing may be defective or damaged during installation. Replacement may be necessary. |
| Vibration felt through the steering wheel or floor. | Loose hub assembly, unbalanced wheel, or other suspension issues. | Check hub assembly bolts and axle nut for correct torque. Ensure wheels are balanced. Inspect other suspension components. |
| Wheel looseness or excessive play. | Improperly torqued axle nut or damaged bearing. | Immediately stop driving. Re-check axle nut torque. If play persists, the bearing may be damaged and requires replacement. |
| ABS light illuminated. | Damaged ABS sensor or wiring during installation, or incompatible sensor. | Inspect ABS sensor and wiring for damage. Ensure sensor is properly connected. Scan for ABS fault codes to diagnose. |
If troubleshooting steps do not resolve the issue, contact Anytek customer support or a qualified mechanic.
8. Specifications
| Attribute | Detail |
|---|---|
| Brand | Anytek |
| Model Number | NT930599K-V2 |
| Compatible Vehicles | 2000-2005 Toyota Echo, 2004-2006 Scion xA, 2004-2006 Scion xB |
| Lugs | 4 |
| Bearing Type | Ball Bearing |
| Compatible Lubricant | Grease (pre-lubricated, no additional lubrication required during installation) |
| Item Weight | 4.6 Pounds (approx.) |
| Product Dimensions (L x W x H) | 6.3 x 6.3 x 7.1 inches (approx.) |
9. Warranty Information
This Anytek Front Wheel Bearing & Hub Repair Kit is backed by a 10-year warranty. This warranty covers manufacturing defects and material failures under normal operating conditions.
Important: Any modifications to the item of any kind before contacting Anytek will void any and all warranty coverage for this item. Please contact Anytek before modifying the part so that we have the opportunity to correct the situation.
For warranty claims or inquiries, please retain your proof of purchase and contact Anytek customer support.
10. Customer Support
For technical assistance, questions regarding installation, or warranty claims, please contact Anytek customer support through the retailer where the product was purchased or visit the official Anytek website.
Online Resources:
Ask a question about this manual
Ask about setup, troubleshooting, compatibility, parts, safety, or missing instructions. Manuals+ will review the question and use this page’s manual context to help answer it.