1. Introduction
Thank you for choosing the Westpoint WCE-6640HDFS Gas Cooker. This appliance is designed for efficient and reliable cooking, featuring auto ignition, a convection gas oven, and a grill with fan assistance. Please read this manual carefully before installation, operation, or maintenance to ensure safe and optimal performance of your cooker.
This manual provides essential information on the safe use, installation, operation, and maintenance of your Westpoint gas cooker. Keep this manual for future reference.
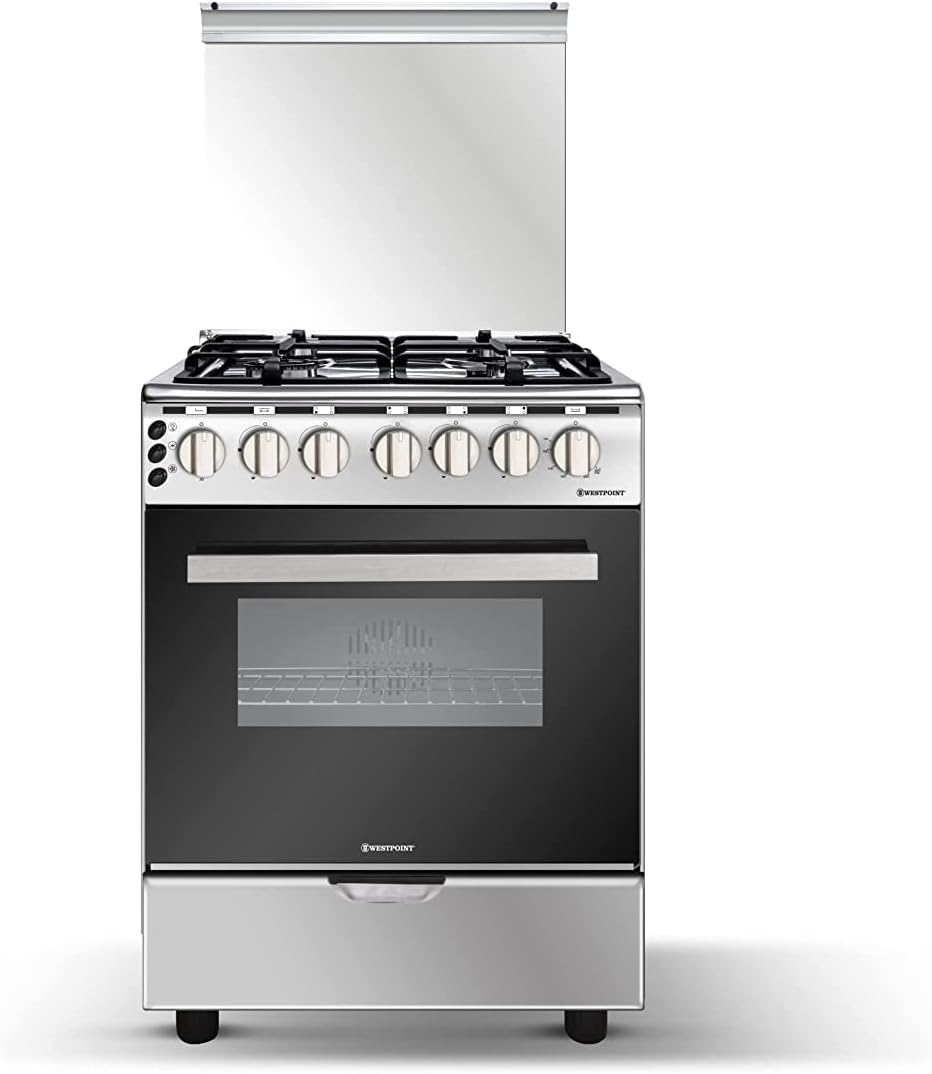
Figure 1: Front view of the Westpoint WCE-6640HDFS gas cooker. This image displays the appliance with its four gas burners on the hob, the control knobs located on the front panel, a large oven door equipped with a viewing window, and a storage/broiler drawer positioned at the bottom. The cooker features a sleek stainless steel finish.
2. Safety Information
Always prioritize safety when operating gas appliances. Failure to follow these instructions could result in fire, explosion, electric shock, or other injuries.
- Ensure proper ventilation in the kitchen area when using the gas cooker.
- Do not store flammable materials near the appliance.
- Keep children and pets away from the cooker during operation.
- If you smell gas, immediately turn off the gas supply, open windows, and do not operate any electrical switches or appliances. Contact a qualified technician.
- Do not use abrasive cleaners or sharp objects that could damage the surfaces.
- Always use oven mitts when handling hot items from the oven or grill.
- Ensure the appliance is properly grounded to prevent electric shock.
- This appliance is equipped with a Built-in Flame Failure Device for safety. If the flame extinguishes, the gas supply will automatically cut off.
3. Setup and Installation
Installation of this gas cooker must be performed by a qualified and certified technician in accordance with local regulations and standards.
3.1 Unpacking
- Carefully remove all packaging materials.
- Inspect the cooker for any signs of damage. Report any damage to your supplier immediately.
- Ensure all included components, such as the cast iron grid, are present.
3.2 Positioning and Leveling
- Place the cooker on a stable, level surface.
- Adjust the leveling feet at the bottom of the cooker to ensure it is perfectly stable and level.
- Maintain adequate clearance from adjacent walls and cabinets as per installation guidelines.
3.3 Gas Connection
The gas connection must be carried out by a qualified gas fitter. Ensure the gas type (Natural Gas or LPG) matches the appliance specifications.
3.4 Electrical Connection
Connect the cooker to a suitable grounded electrical outlet (50 Volts AC, 50 watts) for the auto ignition, oven light, and fan. Ensure the power supply matches the appliance's requirements.
4. Operating Instructions
4.1 Control Panel Overview
The cooker is controlled by knobs located on the front panel. Each knob is clearly marked for its corresponding burner or oven function.
4.2 Hob Burner Operation
- Place your cookware centrally on the cast iron pan support.
- Push and turn the desired burner knob counter-clockwise to the maximum flame position.
- The auto ignition will spark, igniting the gas. Hold the knob in for a few seconds to allow the flame failure device to engage.
- Once lit, adjust the flame size by turning the knob between the maximum and minimum settings.
- To turn off, turn the knob clockwise to the 'off' position.
4.3 Oven Operation
The oven offers multiple cooking modes: Grill, Top and Bottom Heat, and Convection.
- Select the desired oven function using the function selector knob.
- Set the desired temperature using the temperature control knob.
- Allow the oven to preheat to the set temperature before placing food inside.
- For grilling, ensure the grill pan is positioned correctly. The grill can be used with fan assistance for more even heat distribution.
- To use the timer, refer to the specific timer controls on your appliance.
- After cooking, turn both the function and temperature knobs to the 'off' position.
4.4 Storage/Broiler Drawer
The bottom drawer can be used for storage of oven accessories or as a broiler compartment, depending on your model's configuration. Refer to the markings on the drawer for its intended use.
5. Maintenance and Cleaning
Regular cleaning and maintenance will prolong the life of your Westpoint cooker and ensure its safe operation.
5.1 General Cleaning
- Always ensure the cooker is cool and disconnected from the power supply before cleaning.
- Use a soft cloth and mild detergent for cleaning all surfaces.
- Avoid abrasive cleaners, scouring pads, or harsh chemicals, especially on the polished stainless steel finish.
5.2 Hob Cleaning
- Remove the cast iron pan supports and burner caps/crowns. Wash them in warm soapy water, rinse, and dry thoroughly.
- Clean the hob surface with a damp cloth and mild detergent.
- Ensure all parts are completely dry before reassembling.
5.3 Oven Cleaning
- Remove oven racks and clean them separately.
- Wipe the interior of the oven with a damp cloth and a non-abrasive oven cleaner if necessary. Follow cleaner instructions carefully.
- Clean the oven door glass with a glass cleaner.
6. Troubleshooting
Before contacting service, please check the following common issues:
| Problem | Possible Cause | Solution |
|---|---|---|
| Burner does not ignite. | No gas supply; burner parts wet or clogged; power outage for auto ignition. | Check gas valve; ensure burner parts are dry and clean; check power supply. |
| Oven not heating. | Incorrect settings; gas supply issue; electrical issue. | Verify function and temperature settings; check gas supply; ensure power connection. |
| Strong gas smell. | Gas leak. | Immediately turn off gas supply, open windows, do not operate electrical switches. Contact a qualified gas technician. |
| Burning plastic smell from oven. | New appliance residue; internal component issue. | Run oven empty at high temperature for initial burn-off (ensure ventilation). If smell persists or is strong, discontinue use and contact service. |
For issues not listed or if solutions do not resolve the problem, contact a qualified service technician.
7. Specifications
| Feature | Detail |
|---|---|
| Brand | Westpoint |
| Model Name | WCE-6640HDFS |
| Product Dimensions (L x W x H) | 63 x 60 x 82 cm |
| Item Weight | 30 Kilograms |
| Installation Type | Freestanding / Countertop |
| Fuel Type | Gas |
| Heating Elements | 4 Burners |
| Burner Type | Sealed |
| Oven Cooking Modes | Grill, Top and Bottom Heat, Convection |
| Special Features | Auto Ignition, Built-in Flame Failure Device, Timer, Grill With Fan Assisted |
| Control Console | Knob |
| Material Type | Stainless Steel |
| Voltage | 50 Volts (AC) |
| Wattage | 50 watts |
| Included Components | Cast iron grid |
| Drawer Type | Storage, Broiler |
8. Warranty and Support
Your Westpoint WCE-6640HDFS Gas Cooker comes with a minimum 1-year manufacturer warranty. Please retain your proof of purchase for warranty claims.
For technical support, service, or warranty inquiries, please contact your retailer or the authorized Westpoint service center. Information regarding extended warranty options may also be available from your seller.
Always ensure that any repairs or servicing are carried out by qualified personnel using genuine spare parts.