1. Introduction
This manual provides detailed instructions for the installation, operation, and maintenance of your iTOPVIS V110U3 10X USB3.0 PTZ Camera. This camera is designed for high-quality video capture in various professional settings, including video conferencing, live streaming, broadcasting, and educational environments. It features 10X optical zoom, 1080p resolution, and multiple output interfaces including USB3.0, HDMI, and IP streaming.

Figure 1: iTOPVIS V110U3 PTZ Camera and Remote Control
This image displays the iTOPVIS V110U3 PTZ camera, a compact black unit with a lens and a pan/tilt base, alongside its dedicated remote control. The remote control features numerical buttons, camera selection, PTZ controls, and focus/zoom adjustments.
2. Package Contents
Please verify that all items listed below are included in your package. If any items are missing or damaged, contact your vendor immediately.

Figure 2: Package Listing
This image illustrates the complete package contents. It includes the PTZ camera, a remote control, power adapter, wall bracket, mounting screws, user manual, RS232 cable, and a USB cable. The camera's rear panel with its various output interfaces is also highlighted.
- iTOPVIS V110U3 PTZ Camera
- Remote Control
- Power Adapter
- Wall Bracket
- Mounting Screws
- User Manual (this document)
- RS232 Cable
- USB Cable
3. Product Overview
3.1 Key Features
- 10X Optical Zoom: Provides clear magnification for distant subjects.
- Full HD 1080p Resolution: Delivers crisp and detailed video output.
- Multiple Video Output Interfaces: Supports USB3.0, HDMI, and IP streaming for versatile connectivity.
- Pan/Tilt/Zoom (PTZ) Functionality:
- Pan: 0° to 340°
- Tilt: -30° to 90°
- Advanced Network Transmission: Compatible with ONVIF, RTSP, RTMPS, RTCP, RTP, TCP/IP protocols for easy integration with live streaming platforms.
- Efficient Video Encoding: Supports H.265 and H.264 formats for optimized video streams in various bandwidth conditions.
- Multiple Control Modes: Can be controlled via remote control, PTZ control keyboard, or software.

Figure 3: Pan and Tilt Capabilities
This image demonstrates the pan (horizontal rotation) and tilt (vertical movement) range of the USB PTZ camera, indicating its flexibility in capturing different angles.

Figure 4: Detailed Pan and Tilt Movement
A closer view illustrating the vertical (tilt) and horizontal (pan) movement of the camera head on its base.
3.2 Interfaces
The rear panel of the iTOPVIS V110U3 camera provides various ports for connectivity and control:

Figure 5: Rear Panel Interfaces
This image shows the rear panel of the camera with its various input and output ports, including CVBS, HDMI, RS485, RS232, USB 3.0, LAN, Audio Input, and DC12V power input.
- CVBS Output Interface
- HDMI Output Interface
- RS485 Input Interface
- RS232 Input Interface
- USB 3.0 Interface
- LAN Port (IP Streaming)
- Audio Input Interface (Line-in)
- DC12V Input Power Socket
4. Setup
4.1 Installation Modes
The iTOPVIS V110U3 camera supports multiple installation methods to suit various environments:
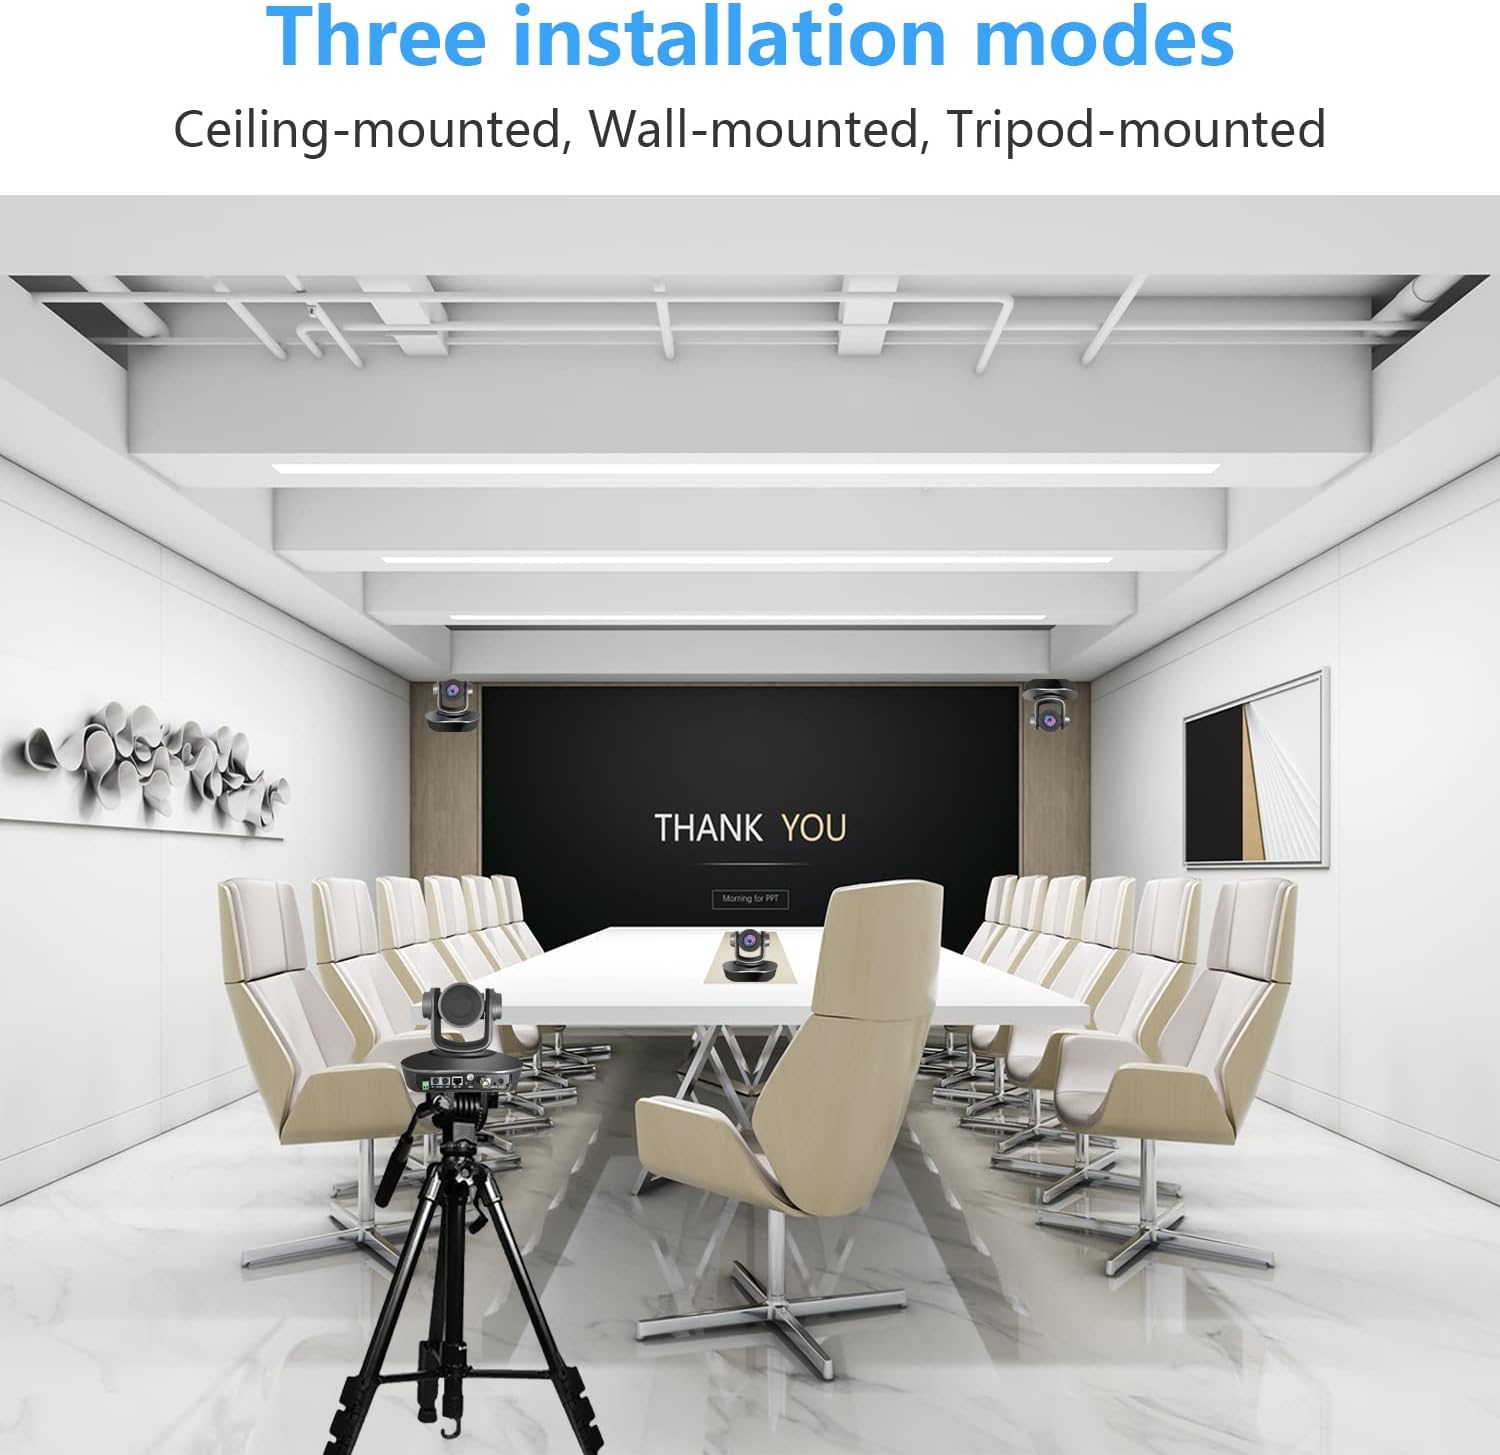
Figure 6: Installation Options
This image displays three common installation methods for the camera: ceiling-mounted, wall-mounted, and tripod-mounted, demonstrating its adaptability to different room setups.
- Ceiling-mounted: Use the provided wall bracket and mounting screws to attach the camera to the ceiling. Ensure the camera is securely fastened and oriented correctly.
- Wall-mounted: Attach the camera to a wall using the wall bracket and mounting screws. Position it at an optimal height for your application.
- Tripod-mounted: The camera can be mounted on a standard tripod for portable or temporary setups.
Always ensure the camera is securely mounted to prevent accidental falls and damage.
4.2 Initial Connection
- Power Connection: Connect the provided power adapter to the DC12V input socket on the camera and then to a power outlet.
- Video Output:
- For USB connection: Connect the USB 3.0 cable from the camera to your computer.
- For HDMI connection: Connect an HDMI cable from the camera to a display or capture device.
- For IP streaming: Connect an Ethernet cable from the LAN port to your network router or switch.
- Audio Input: If external audio is required, connect an audio source to the Audio Input (Line-in) interface.
- Control Connection (Optional):
- For RS232 control: Connect the RS232 cable from the camera to a control device.
- For RS485 control: Connect the RS485 cable from the camera to a control device.
5. Operation
5.1 Control Methods
The camera offers flexible control options:

Figure 7: PTZ Control Options
This image illustrates the three primary methods for controlling the PTZ camera: via a handheld remote control, a dedicated PTZ control keyboard, or through software on a computer.
- Remote Control: Use the included IR remote control to adjust pan, tilt, zoom, focus, and recall presets.
- PTZ Control Keyboard: Connect a compatible PTZ control keyboard (e.g., via RS232/RS485 or IP) for professional control. Supports VISCA, PELCO-D, and PELCO-P protocols.
- Software Control: Utilize compatible software on a computer connected via USB or IP to control camera functions.

Figure 8: Multi-Camera IP Control Setup
This diagram shows how multiple cameras can be connected to a router/hub and controlled by an IP controller or a PC, demonstrating a scalable control solution.
5.2 Software Compatibility
The iTOPVIS V110U3 camera is compatible with a wide range of video conferencing and streaming software:

Figure 9: Compatible Software
This image displays logos of various compatible software platforms, including GoToMeeting, Zoom, Join.me, OBS Studio, YouTube, Broadsoft, Cisco Webex, Lifesize, Facebook, Skype, Lync, and Google Meet, highlighting the camera's broad integration capabilities.
Supported operating systems include Windows, Chrome OS, Android V5.0+, Mac OS, and Linux.
5.3 Application Scenarios
The camera is suitable for diverse professional applications:

Figure 10: Diverse Application Scenarios
This image showcases various environments where the camera can be effectively used, such as video conferences, tele-medicine, educational settings, government projects, church services, and interrogation rooms.
- Video Conferencing
- Tele-medicine
- Education (Classroom, University)
- Live Streaming (Church, Broadcast)
- Government Projects
- Collaboration
6. Maintenance
- Cleaning: Use a soft, dry cloth to clean the camera body. For the lens, use a specialized lens cleaning cloth and solution. Avoid harsh chemicals or abrasive materials.
- Storage: When not in use for extended periods, store the camera in a dry, dust-free environment.
- Handling: Avoid dropping or subjecting the camera to strong vibrations, which can damage internal components.
- Power: Always disconnect the power adapter before cleaning or moving the camera.
7. Troubleshooting
If you encounter issues with your iTOPVIS V110U3 camera, refer to the following common problems and solutions:
| Problem | Possible Cause | Solution |
|---|---|---|
| No video output |
|
|
| Camera not responding to remote control |
|
|
| Poor image quality |
|
|
| IP streaming issues |
|
|
8. Specifications
| Feature | Detail |
|---|---|
| Brand | iTOPVIS |
| Model | V110U3 |
| Optical Zoom | 10x |
| Video Capture Resolution | 1080p |
| Photo Sensor Technology | CMOS (1/2.8" CMOS Sensor, 2.1 MP) |
| Maximum Aperture | 2.4 f |
| Connectivity Technology | USB 3.0, HDMI, IP (LAN), RS232, RS485 |
| Special Feature | Infrared |
| Pan Range | 0° to 340° |
| Tilt Range | -30° to 90° |
| Product Dimensions | 7.87 x 6.89 x 6.89 inches |
| Item Weight | 5.71 pounds |
| Supported Protocols | VISCA, PELCO-D, PELCO-P, ONVIF, RTSP, RTMPS, RTCP, RTP, TCP/IP |
| Video Encoding | H.265, H.264 |
9. Warranty and Support
iTOPVIS products are designed for reliability and performance. For specific warranty details, please refer to the warranty card included with your product or visit the official iTOPVIS website. For technical support, troubleshooting assistance, or service inquiries, please contact iTOPVIS customer support through the contact information provided on their official website or through your purchase platform.
For additional resources and product information, you may visit the iTOPVIS Brand Store on Amazon.